One of the first things any WordPress website owner needs to do is set up a sitemap. In the past, these were elaborate listings of every web page located within the site’s domain. This helps search engines like Google, know what content you have.
Without submitting a sitemap to search engines, you are at the mercy of that search engine crawling through your website. Not only is it possible they may miss something, but it can also take quite some time for a page to be indexed.
As a result, a WordPress sitemap could mean the difference in how successful your website is overall.
In this tutorial, I will show you how to set up a WordPress sitemap for search engines and a visual sitemap for visitors.
Why is a Sitemap Important for WordPress?
Google uses the sitemap file to know where your content resides. This helps the search engine giant find your posts and place them on the results page. Without a sitemap, it could take far longer for visitors to find your website.
No one will visit your pages if they don’t know the content exists. And this goes beyond Google. Users of Bing, Yahoo, and many other search engines are less likely to find your website as well.
Now, you don’t need a sitemap to have your site listed on Google. However, it vastly improves the chances of appearing in search results.
This is because Google and other search engines will use the file to find every URL related to your site.
Without a sitemap submitted to Google, the only way the search engine will find your content is if another site links to it. This could take months if not years for a single page to get indexed.
It’s like building a house in a rural location. Visitors may have a harder time locating it unless you give out your address.
Although WordPress comes with its own sitemap, there are plenty of other ways you can add one. And some come with quite a few extra tools that are probably worth the install.
I’ll go over WordPress’s sitemap a bit later. For now, let’s take a look at a couple of quick and easy ways to add this file to your website.
Creating A WordPress Sitemap with Yoast SEO
First, I’ll demonstrate how to use a sitemap with Yoast SEO. This is a free plugin that will improve the searchability of your site, including how you develop content.
Yoast is a great all-in-one system that I use on almost every WordPress site with which I work. It provides the XML sitemap as well as many other tools like a readability score system to help you write better content for visitors to read.
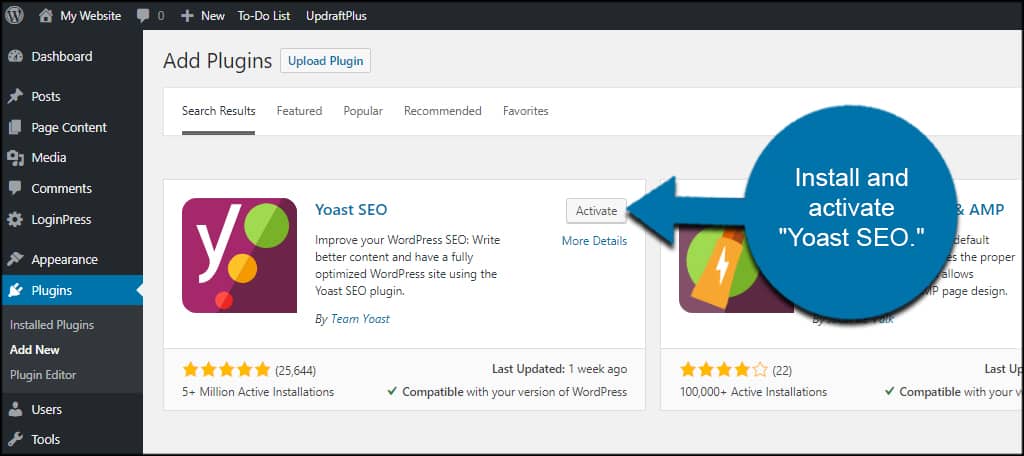
Step 1: Install and activate Yoast SEO
Head over to the Plugins page in your WordPress admin directory. Search for the Yoast SEO plugin by name using the search field and install and activate it from there.
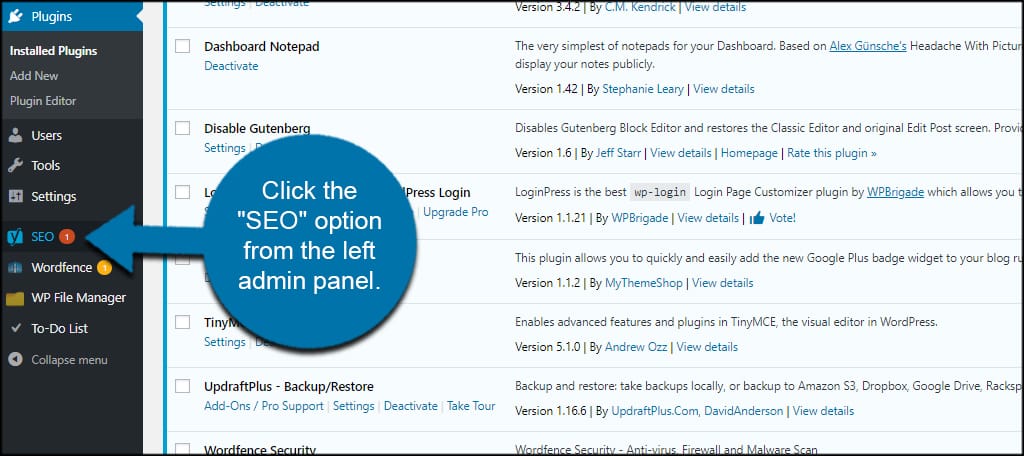
Step 2: Access Yoast SEO
Click the “SEO” option from the left admin panel in WordPress. It will have the Yoast icon of a “y” in front of a square.
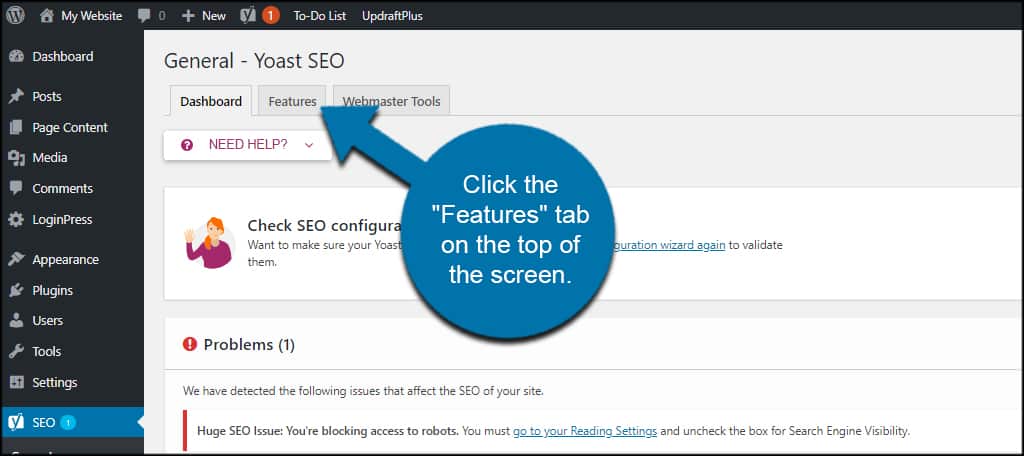
Step 3: Find the XML Sitemaps Section
Click the “Features” tab on the top of the screen.
Click to turn on “XML sitemaps.”
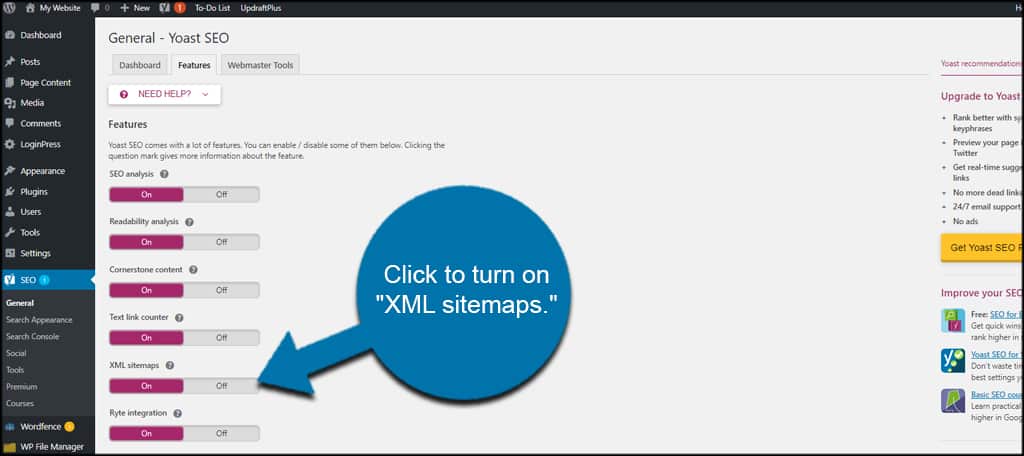
Once you’ve enabled sitemaps, click the “Save changes” button on the bottom.

Step 4: Accessing the Sitemap
Next, we’ll need the XML sitemap’s URL. We’ll need this to give to Google so the search engine knows where to find the content.
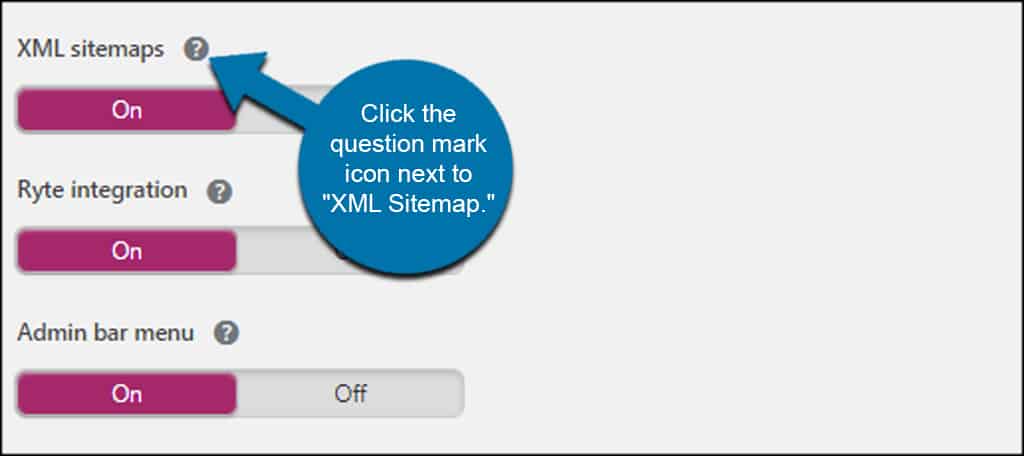
To access your sitemap, click the question mark icon next to “XML Sitemap.”
Open the XML sitemap by clicking the link.
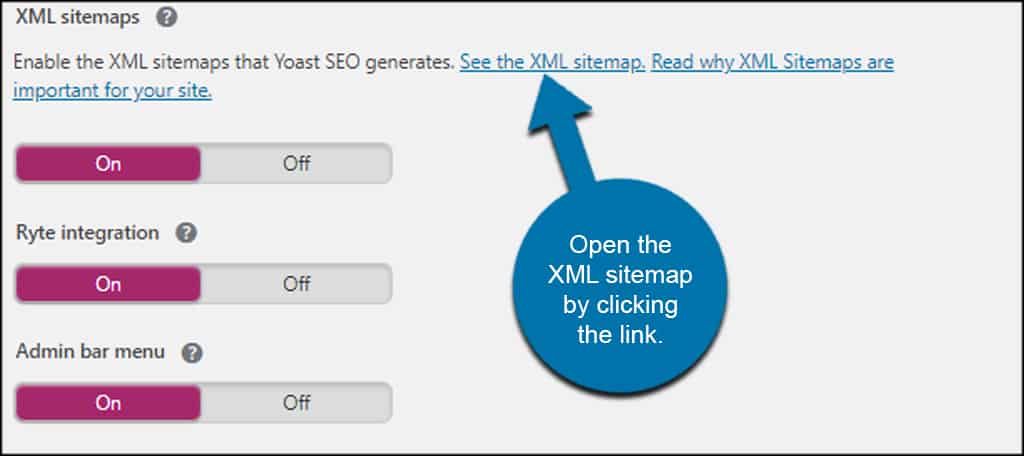
You want to take note of the address where the sitemap is stored. It’s probably a good idea to just leave this page open when you submit the sitemap to Google.
Creating A WordPress Sitemap With XML Sitemaps
XML Sitemaps is a dedicated sitemap plugin that over two million websites trust. It supports multiple search engine formats including Google, Bing, Yahoo, and more. It is the easiest plugin you can use because, upon installation, it creates a sitemap.
This is really the easiest way to create a sitemap in WordPress.
Like with any plugin, the first step is to always install it. Go to the Plugins section of WordPress, search for XML Sitemaps, and click on the “Install Now” button.
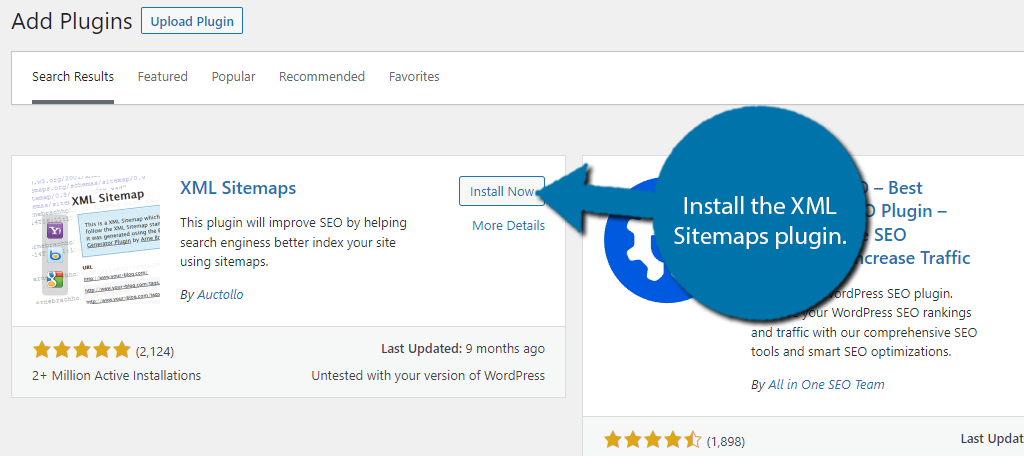
That’s actually it, the plugin will immediately generate a sitemap that is compatible with multiple search engines. The URL location of the sitemap this plugin generates is located on its settings page.
Now, you need to submit it to Google, or another search engine.
Submitting the Sitemap to Google
If you don’t have a Google account, you’ll need to make one. It’s free and lets you use things like adding Analytics to WordPress and a slew of other tools.
You’ll also need to add your domain to Search Console. You can do this from the welcome page for Google.
When you have your domain added and verified, it’s time to add the sitemap.
Go to the Search Console tool for Google.
If you only have one domain in Google, it should display as your default. If not, use the drop-down list and select your site.
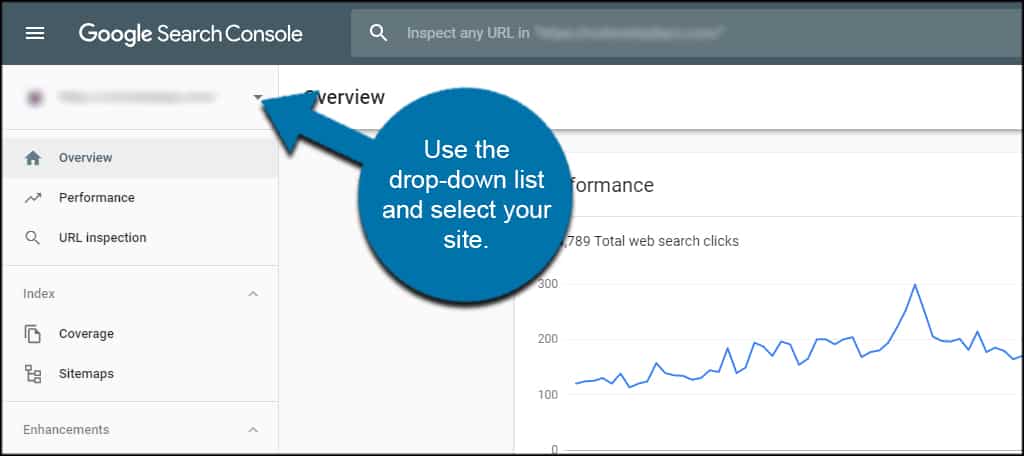
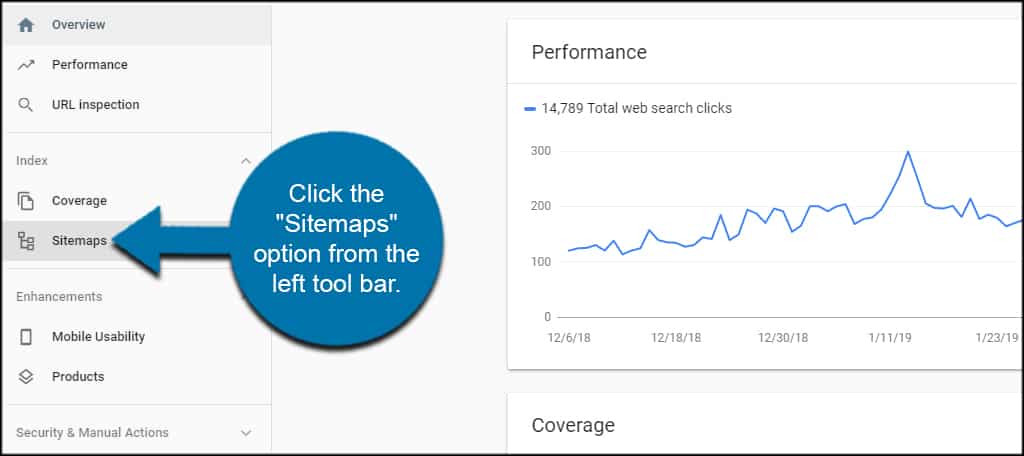
Click the “Sitemaps” option from the left toolbar.
Enter the URL of your sitemap. You can get this from the page you left open in the above step.
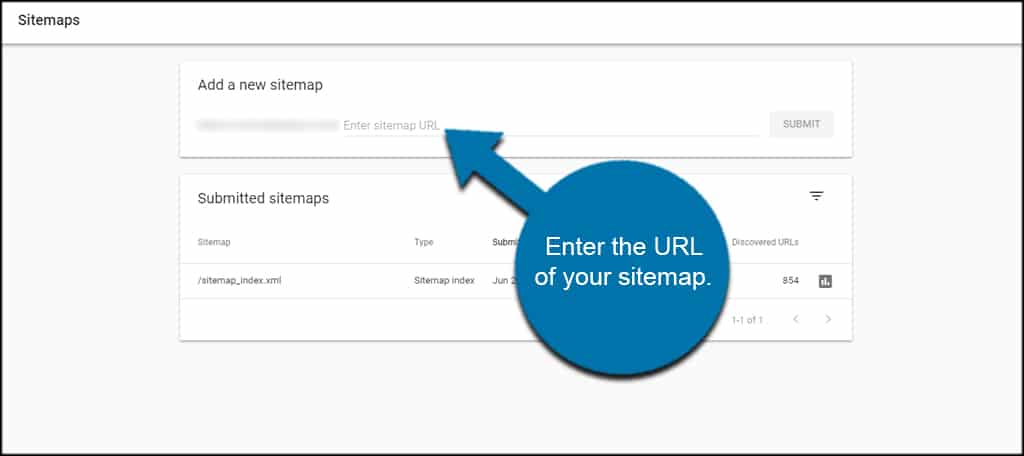
You’ll want all of the information after your domain name.
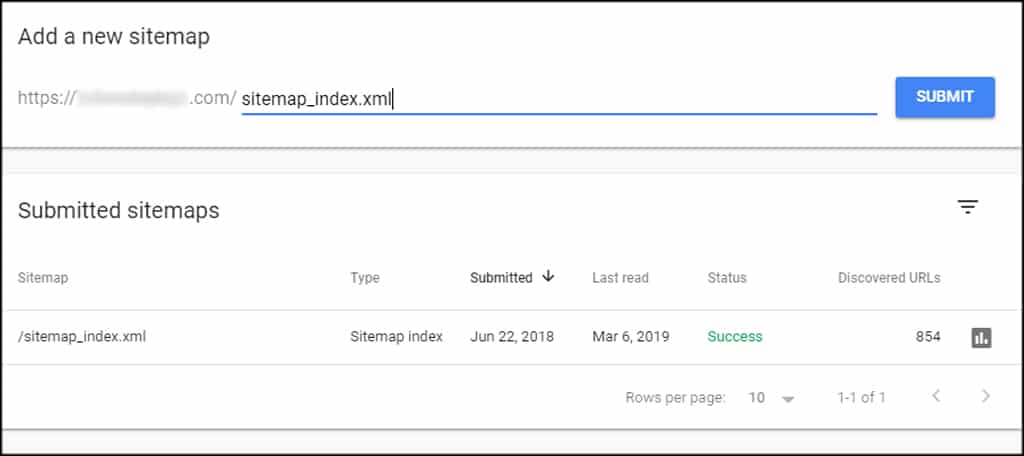
For example, Yoast will create the file as “sitemap_index.xml”. So your URL of the page might look something like: yourdomain.com/sitemap_index.xml.
In this instance, you would only enter the file name into the Google search console.
Click the “Submit” button on the right.
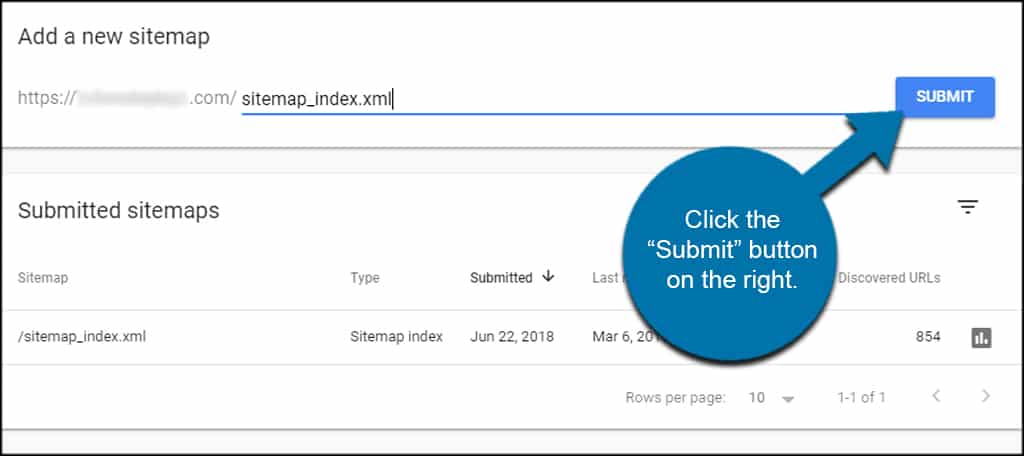
Once you click the submit button, Google will schedule and crawl your website.
How often will Google crawl your website?
While some tools will help “inspire” the Google bot to crawl a site more often, it really depends more on how frequently you create content.
If you’re more active on the website, Google will crawl it more often.
How long does it take to show up in search results?
Showing up in search results depends on how often your site is crawled. It could take anywhere from a few seconds to several weeks. If you get into a regular posting schedule for creating website content, you’ll show up in search results more often as time goes on.
What is WordPress 5.5 XML Sitemaps?
In August of 2020, WordPress released its own built-in XML sitemap feature. This is a new feature that will give you a default XML sitemap URL found at /wp-sitemap.xml.
This sitemap index can hold a maximum of 50,000 sitemaps, and a single sitemap can hold a (filterable) maximum of 2000 entries. It should be noted that WordPress is off to a good start, but there is still work to be done.
Important Note: If you are using this, then other sitemap plugins like Yoast SEO will automatically disable it when installed.
Where is the WordPress Sitemap Located?
The sitemap is usually stored in the root folder of your domain. By default, the WordPress sitemap is located at: https://www.yourdomain.com/wp-sitemap.xml.
In Yoast’s case, it would be https://www.yourdomain.com/sitemap_index.xml. However, the location may be different if you use a different plugin.
Different locations and filenames may vary depending on the configuration of your website and/or any plugins you choose to install.
How to Create A Visual Sitemap In WordPress With WP Visual Sitemap
A visual sitemap is different from an XML sitemap because it is not for search engines. Instead, it is either for visitors or the developers.
A visual sitemap will list all of the links on your website in a clear manner to help visitors quickly find the content they are looking for. If a website has one of these, it is on a dedicated page because it is a very long list of links.
Visual sitemaps are also used by developers to plan out a website. They are essentially like a flowchart of your website, and they can help you make sure content gets into the right categories.
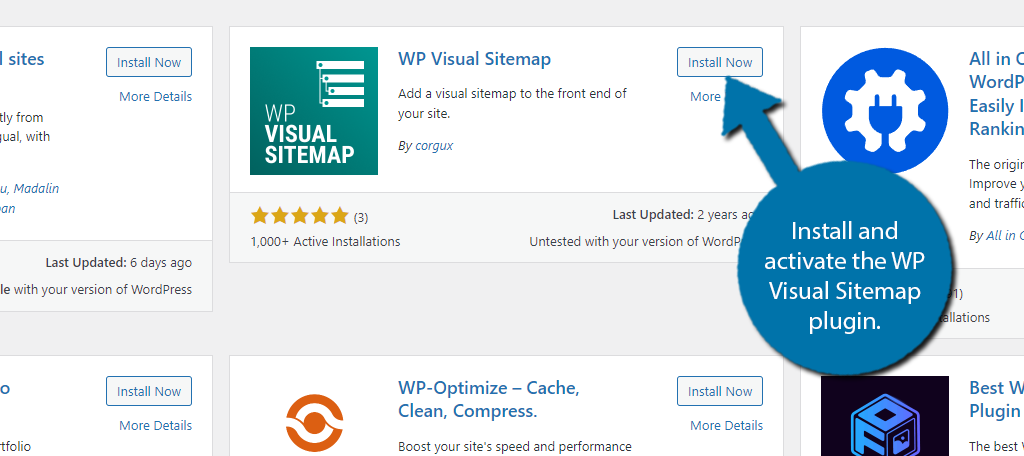
Step 1: Install WP Visual Sitemap
There are a few plugins that can help you make one of these and the WP Visual Sitemap is among the best of them.
Thus, start off by installing and activating the WP Visual Sitemap.
Step 2: Customize the Settings
While you can immediately add this to your live site with a shortcode, hold off on that and take a minute to customize the plugin settings. Since this is a Visual sitemap, there are options to customize the appearance.
To find them, click on Settings and select the WP Visual Sitemap option.
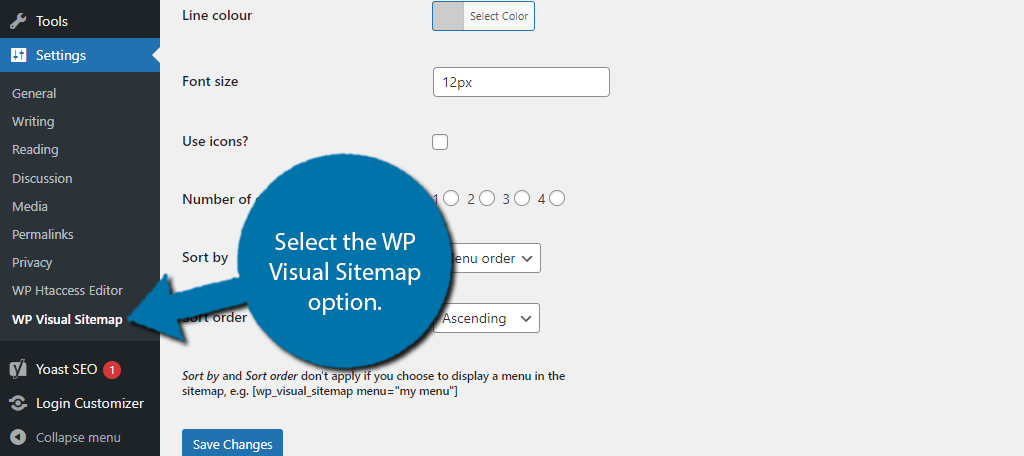
On the right-hand side of the screen, you will see a sample of what the visual sitemap will look like. You must save the changes you make for this preview to reflect the changes you make.
Thus, it is recommended to save after every change so you can see the effect.
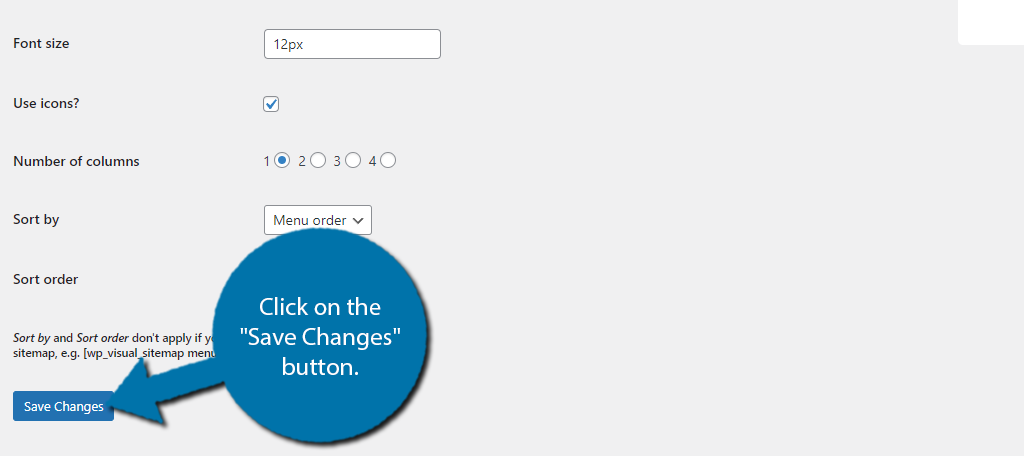
You can adjust the colors, font size, number of columns, and how the list is sorted. You can also enable icons. These will appear next to each item in the visual sitemap. You can select what icons to use on the actual page or post.
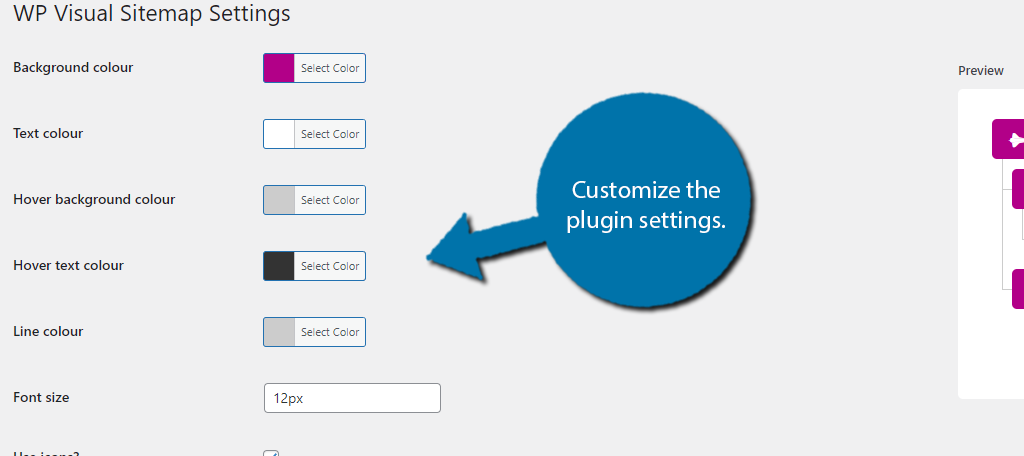
Once you are satisfied with the changes, click on the “Save Changes” button.
Step 3: Add the Visual Sitemap in WordPress
All that’s left is to actually add the sitemap to a post or page in WordPress. The good news is that this is extremely easy as the plugin relies on shortcodes.
Thus, you just need to copy and paste the following shortcode into a Shortcode block in the desired location:
[wp_visual_sitemap]
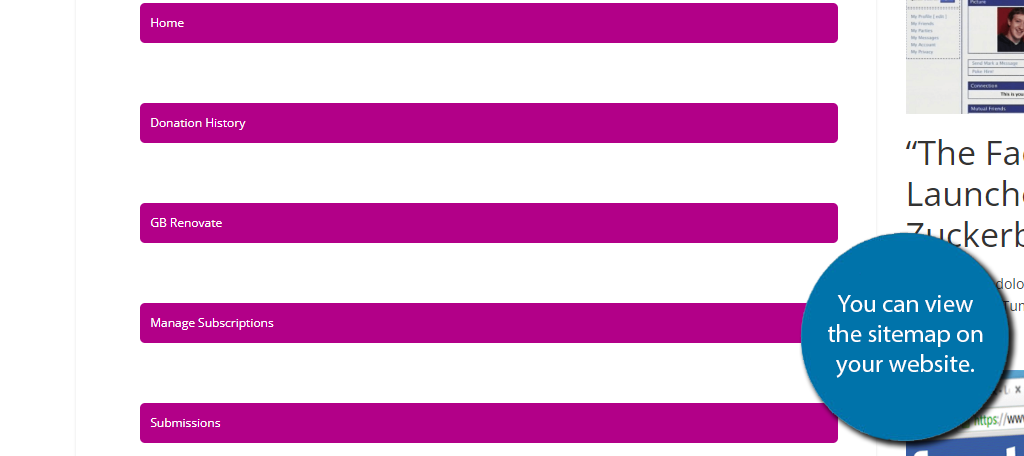
If you use the preview option in WordPress, you can view what the sitemap will look like. It should just be a list of your website’s content.
If you remember in the last section, I mentioned that you can add icons for each page. To do this go to the actual page you want to add the icon to. For instance, adding a home icon to your home page.
Go into the page settings, locate the WP Visual Sitemap settings and select an icon.
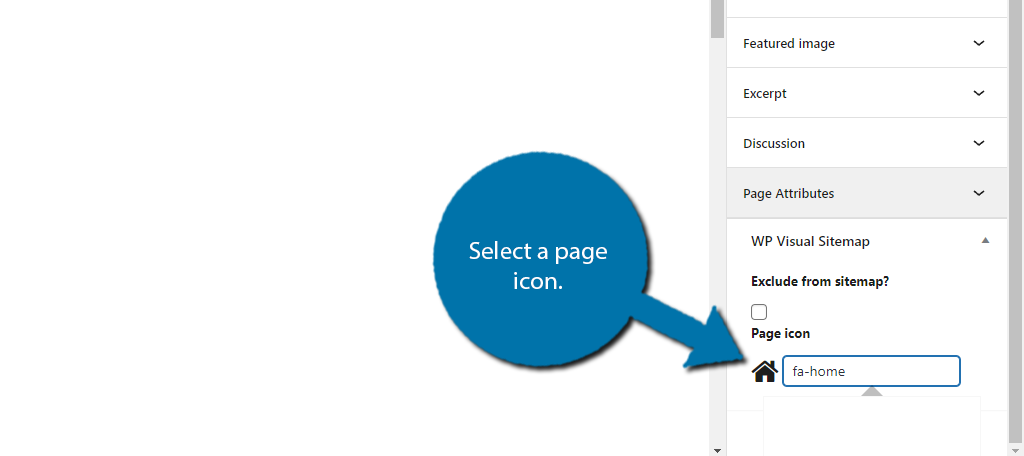
This has to be done for each page and cannot be done for posts. Thus, you may have to spend some time setting up this feature.
That covers, everything you’ll need to know to add a visual sitemap to your WordPress wit with the WP Visual Sitemap plugin.
How to Create An HTML Sitemap Page in WordPress
Step 1: Install WP Sitemap Page
Another type of sitemap you can add to WordPress is an HTML sitemap. This is similar to a visual sitemap in practice, but it lacks all of the visual appeal. Instead, it just consists of links.
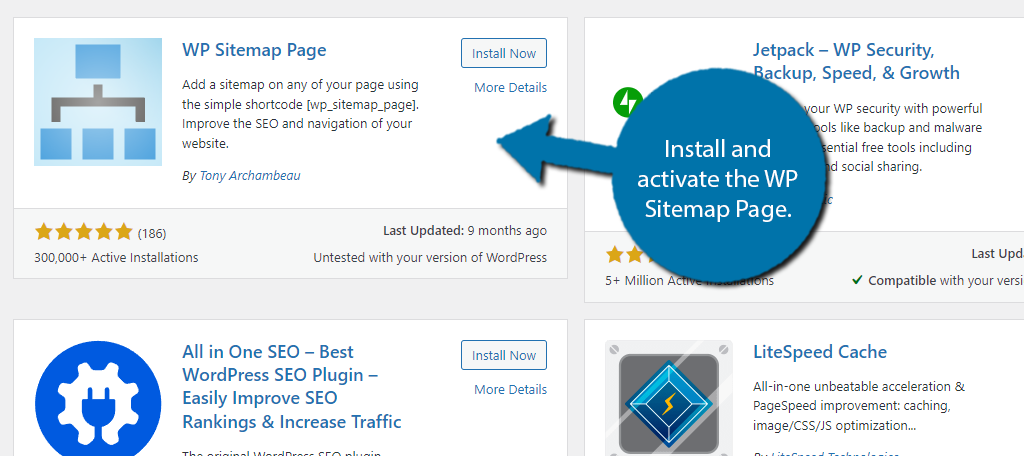
While you can add these in a variety of ways, the easiest way I have found is to use the WP Sitemap Page, which just consists of installing the plugin and placing a shortcode on the desired page or post.
Step 2: Understand the Plugin
Now, you are technically ready to use the plugin, but it’s really important to understand this plugin before beginning.
This plugin will generate a full sitemap of your plugin that contains every link on your website. For larger websites, this could include thousands of links. In those cases, this plugin should be avoided because it will exponentially increase the load times.
It’s just way too much for someone to load, especially on a mobile device. This plugin is ideal for small to medium-sized websites.
The plugin relies on a shortcode to display the sitemap page, and that shortcode can be modified. For instance, you can set it up to only display pages instead of everything.
This should contain fewer links as even large websites should only have a dozen or so pages.
In any case, let’s begin.
Step 3: Display An HTML Sitemap in WordPress
Since the goal is to create a sitemap page, create a new page for it. Then add a shortcode block. Once that is taken care of, all that you really need to do is copy and paste the following shortcode within its brackets:
wp_sitemap_page
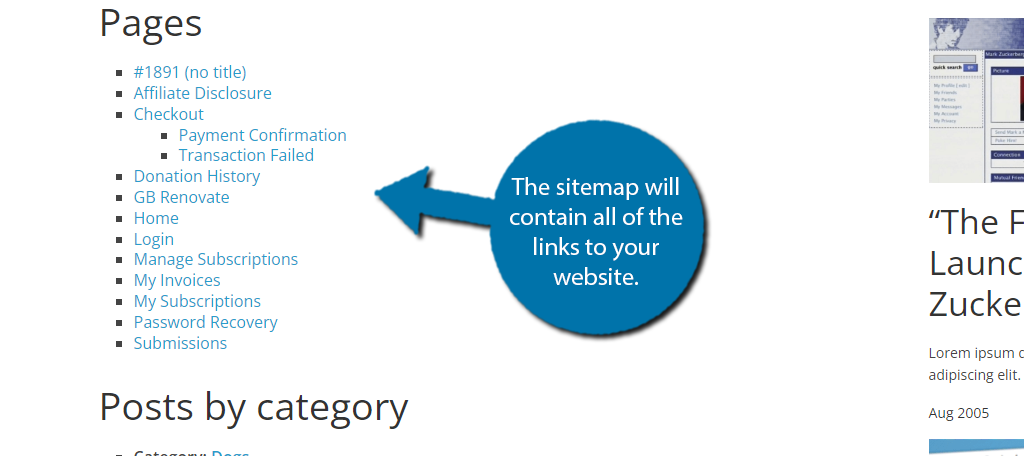
And that’s it. A sitemap will appear on the actual page. You can view it by using the preview or visiting the live page if it is published.
Now I mentioned you can modify this shortcode. If you are interested in only displaying a certain kind of content, like pages, the shortcode would look like this within its brackets:
wp_sitemap_page only="posts"
You can change the “page” attribute to another to only display that type of content if you wish. Overall, the appearance of the HTML sitemap is stylish, and can really help boost SEO and help visitors find things.
Other Sitemap Plugins to Try in WordPress
Yoast is simply my favorite SEO tool, but it’s not the only one you can use to create a sitemap. In fact, there are a lot of plugins available for WordPress for this purpose.
Here are just a few that you can install right now.
Jetpack

Jetpack is a great plugin that comes with a variety of tools for WordPress, including a sitemap generator. However, you’ll need a WordPress.com account to use it. This is a free system and comes with a variety of great modules.
Companion Sitemap Generator
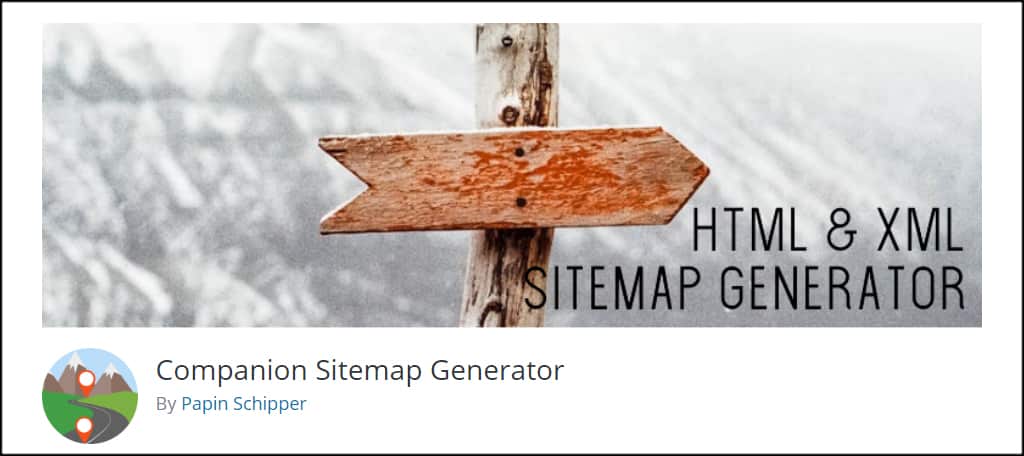
Companion Sitemap Generator is a good tool to have on a website. Not only will it create XML files, but you can also create HTML sitemaps to show to visitors. It also comes with a robots.txt file editor so you can control what bots access your content.
Boost SEO with a Sitemap in WordPress
The sitemap is probably one of the most important files for any website trying to attract an audience. It impacts how often Google will find your content and how people find you in search.
Make sure your sitemap is ready for Google. It should be the first step in any SEO strategy, and it will affect your online success.
What kind of SEO tools do you have installed on your WordPress site? Has there been a significant change in how many visitors are finding your material?


