Does your WordPress site allow user registration? If so, you may have wished for a way to format and build attractive user profiles. Wish no longer! The ProfileGrid – User Profiles, Groups and Communities plugin can do that and more.
Much more than a profile generator, ProfileGrid is a feature-packed user profile, member, and directory plugin. The ability to create and manage user groups means you can have different profile permissions for different user groups.
Does that sound like what you’ve been looking for? Let’s get right to it.
1. Installing the ProfileGrid Plugin
Log in to your WordPress admin panel.
In the left column navigation, mouse over the “Plugins” link and click the “Add New” link.
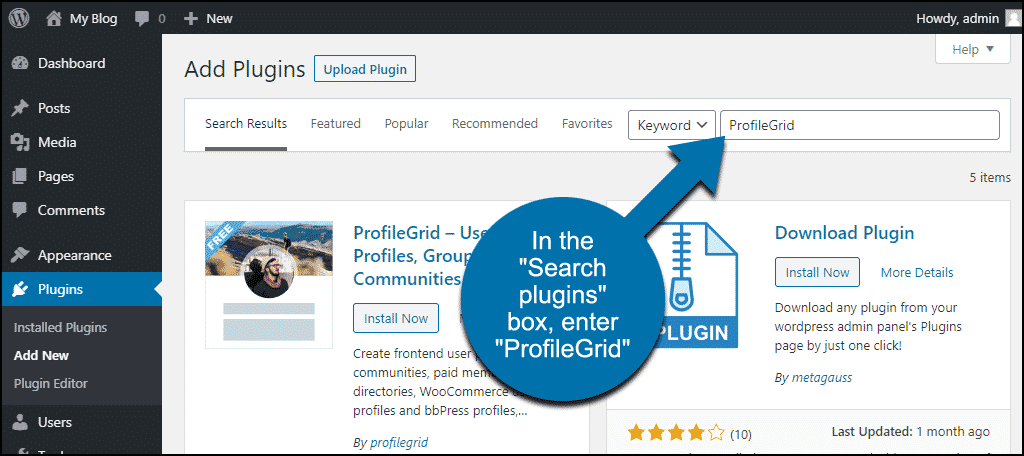
In the “Search plugins…” box, enter, “ProfileGrid.”
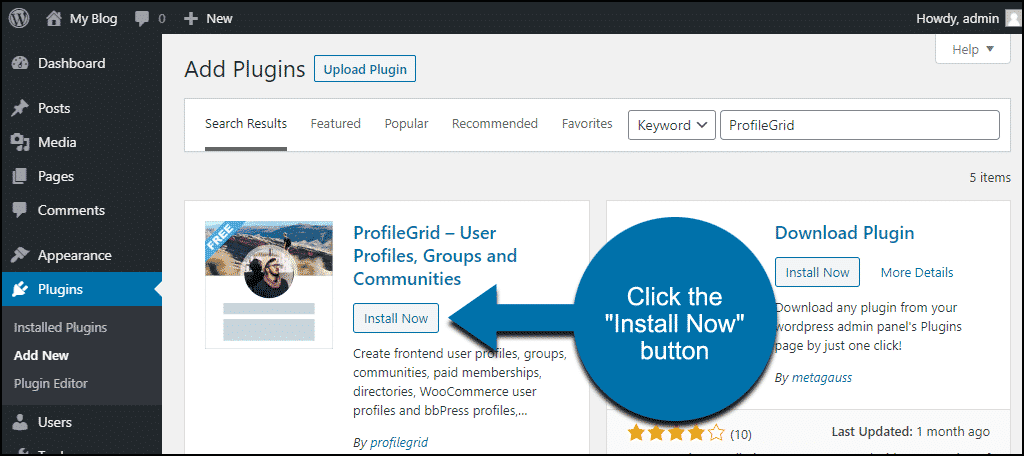
When you find the plugin, click the “Install Now” button.
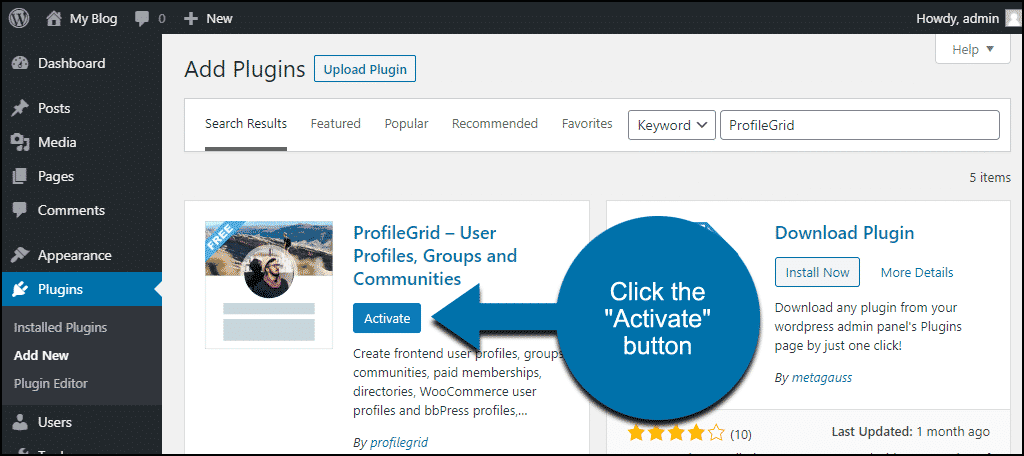
Now the plugin is installed, but it has to be activated before you can use it.
Click the “Activate” button.
That’s all there is to it. Now let’s put the plugin to work.
2. How to Use the ProfileGrid Group Manager Plugin
There are far more configuration and use options than I can adequately cover in this tutorial. (Just to give an example, there are more than 80 shortcodes listed on this page.) ProfileGrid is a full-featured plugin, and there’s a lot to discover.
So as a starting point, let’s go over the basic steps to implement the user profiles.
Pages Created by ProfileGrid
When you activate ProfileGrid, it creates six pages.
- /all-groups displays a list of all of the ProfileGrid Groups. User can sign up to become a member of a group from here.
- /default-user-group is a display page for the default group. You can edit the ID in the shortcode on the page to make it display any other group as the default.
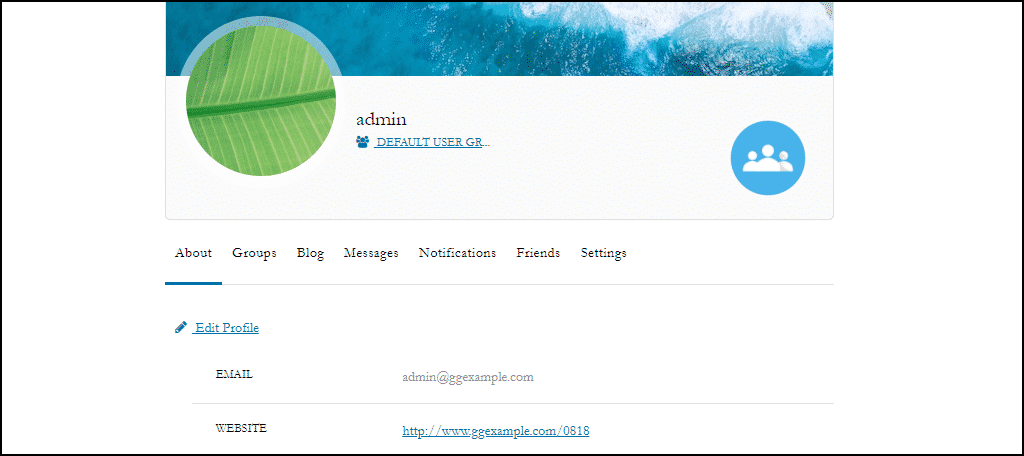
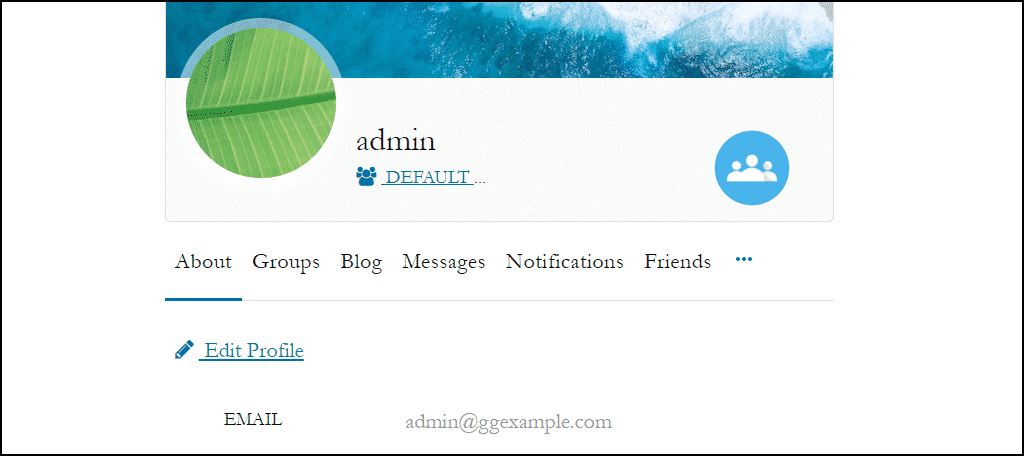
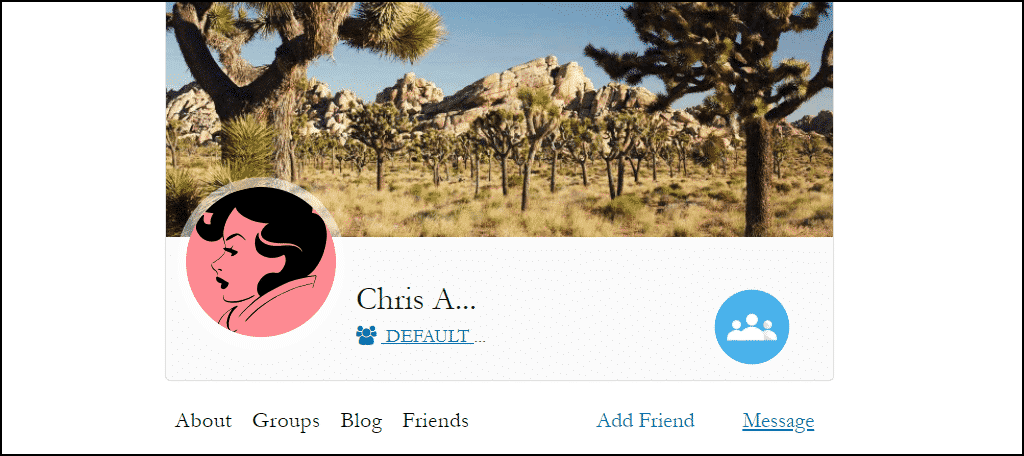
- /my-profile displays all the profile information for the logged-in user.
- /registration is where a user can register to become a member of a group. Like the /default-user-group page, a shortcode can be used to change the default group registration for the page.
- /login is the front-end website log in for users.
- /forgot-password users can set a new password here.
As you can see, many of those pages are for groups. We’ll get to those in a minute.
For now, take a look at /my-profile to see the user profile created by ProfileGrid.
The tiny text in the default styling leaves a bit to be desired. But adding a couple of lines to the Additional CSS for your theme is a quick fix.
.pmagic {
	font-family: inherit;
	font-size: inherit;
}
You can style that class further, of course. But adding the CSS above will make the typography for all the ProfileGrid-generated pages match your theme.
Displaying the User Profiles
What if you want to display user profile information outside of the plugin-generated pages? That’s where the shortcodes come in.
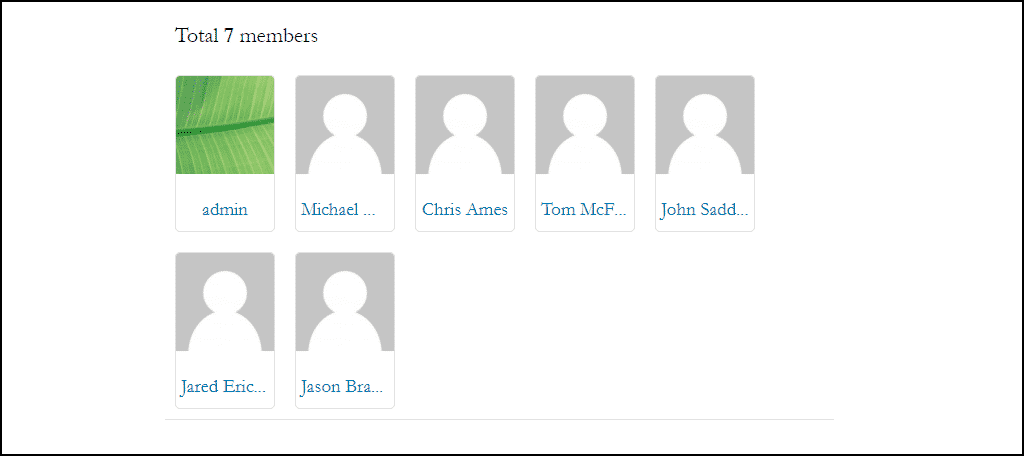
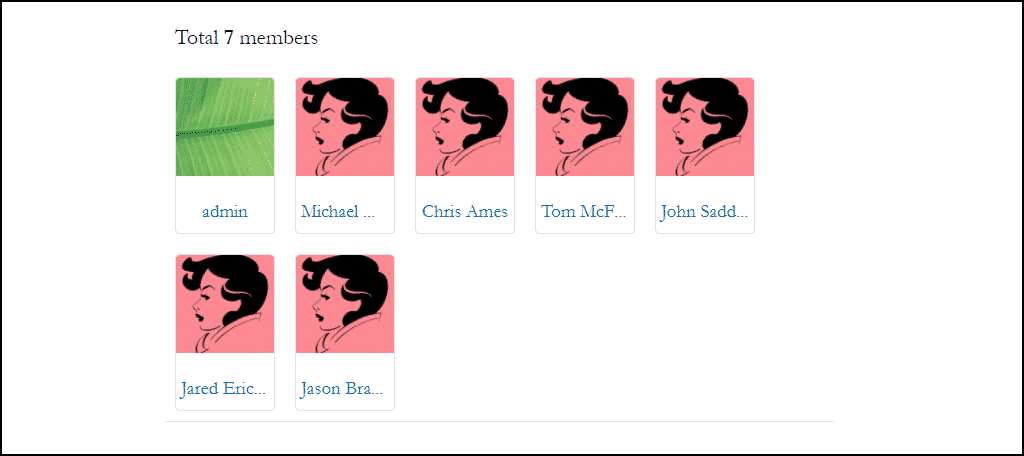
As an example, we’ll display a grid of all of the site users on a new “Users” page of our demo site.
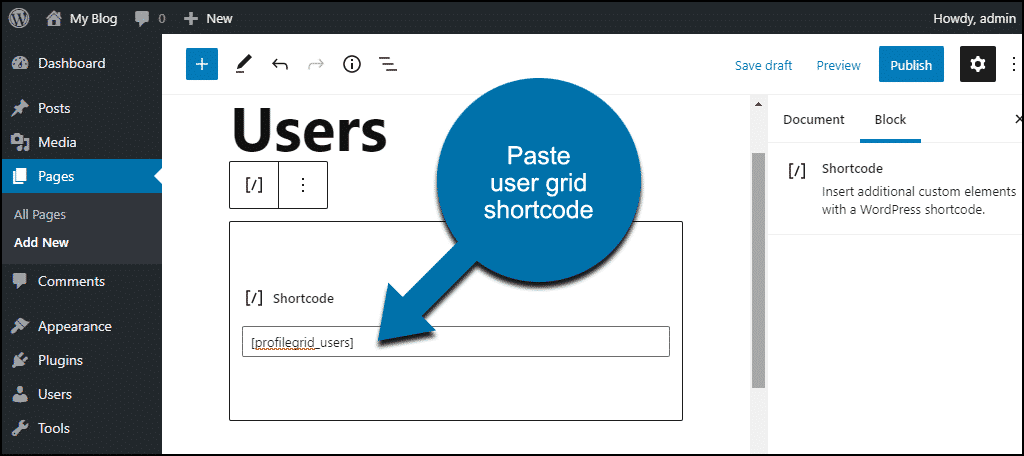
First, I’ll create a Users page and add a shortcode block.
Then I’ll paste the user grid shortcode, [profilegrid_users], into the block. If you use the “classic” WordPress editor, you’ll just paste the shortcode where you want the user grid to appear.
You can see where some further styling could come in handy, but that’s the basic grid.
Changing the Default User Profile Images
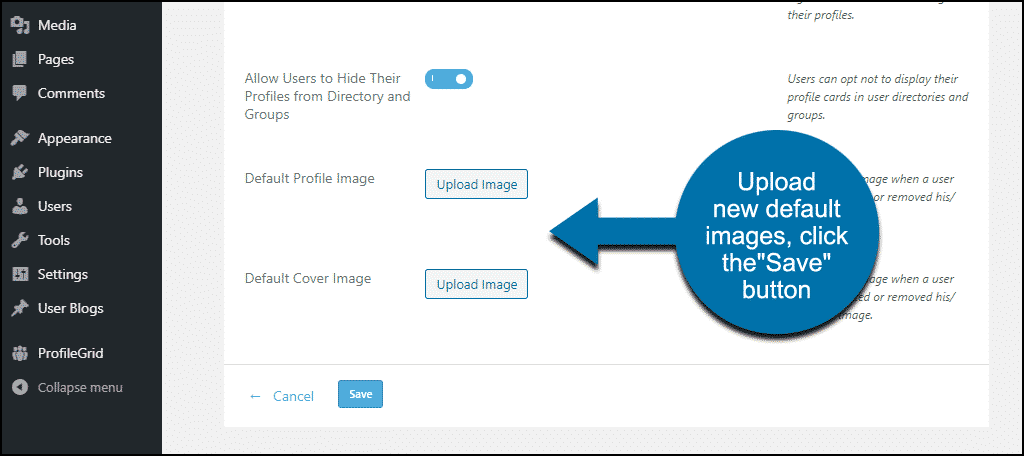
If a user hasn’t uploaded a profile picture or a cover image, defaults are used. If you want to set different default images, you can do that globally.
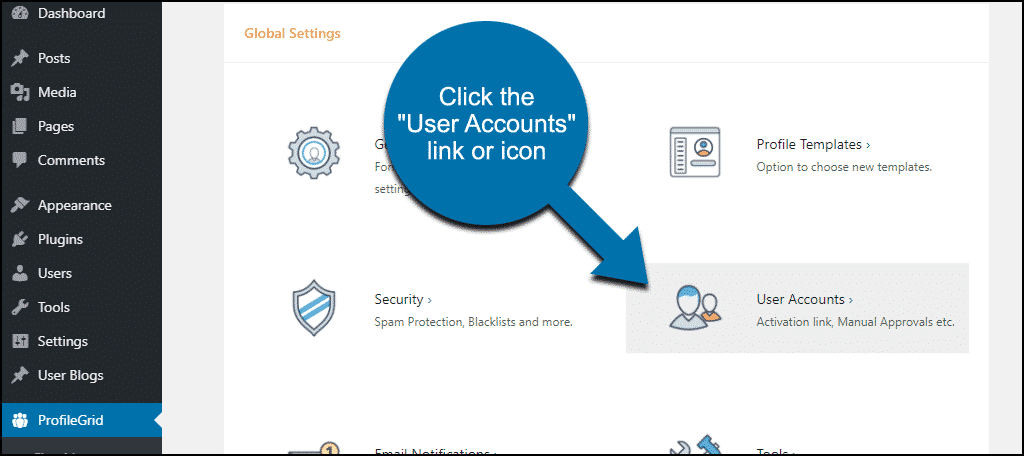
In the left column navigation, mouse over the “ProfileGrid” link and click the “Global Settings” link.
Click the “User Accounts” link or icon.
Scroll down and upload images to the “Default Profile Image,” and “Default Cover Image” sections.
Click the “Save” button, and the default images have changed.
3. Setting User Groups
Groups are a big part of the ProfileGrid plugin, and it excels at group creation and management.
We’ll create a sample group so you can see how to do the basics. But there are a lot of group functions that you can take advantage of.
- You can create multiple user profile types.
- Each group can have different profile fields.
- You can assign different users as group managers or moderators.
- Each group can have a different registration process.
- Visitors or members can join or request membership for each different group.
- You can set limits for the number of members in each group.
- Groups can be mapped to WordPress “roles.”
- The user profiles on the directory page(s) can be filtered based on group membership.
- Groups can be either public or private (the group manager or site administrator approves membership in private groups).
- Users can belong to multiple groups.
Creating a New User Group
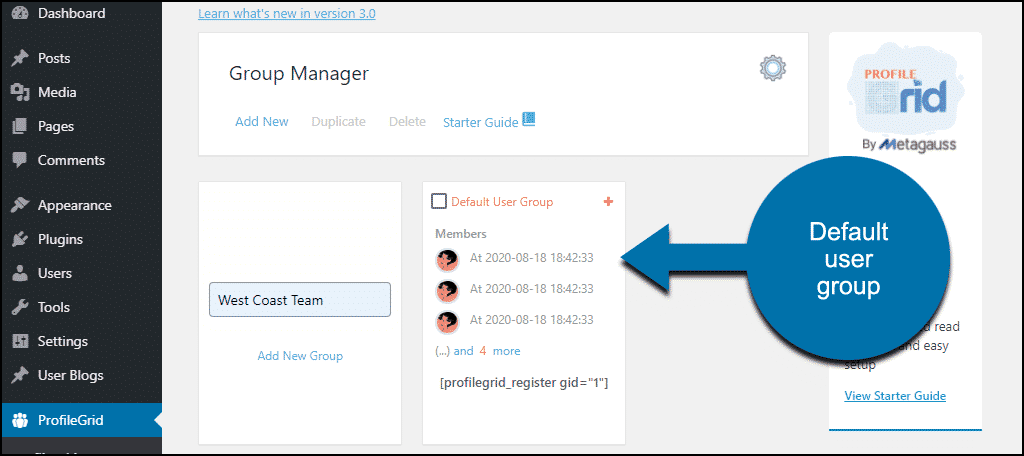
To create a group, in the left column navigation, click the “ProfileGrid” link.
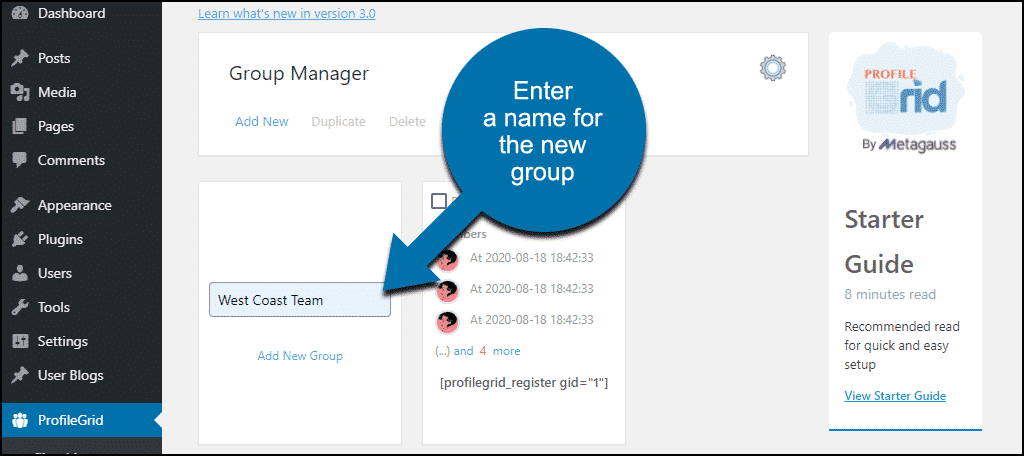
That will land you on the Group Manager page. There’s already one group present, the “Default User Group.” That was created when the plugin was installed, and it’s what we’ve been looking at so far.
Enter a name for the new group and click the “Add New Group” link.
Creating a Registration Page for the New User Group
The new group is active, and you can assign users to it on the back end. But if you want to allow new or existing users to join, you’ll need a form they can complete.
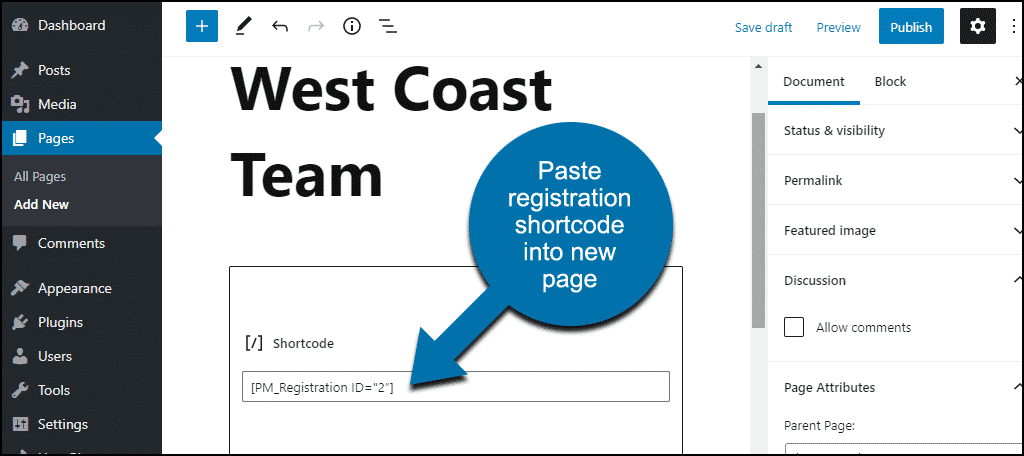
To create a registration page for the new group, paste the shortcode [PM_Registration ID=”2″] into a new registration page, and publish it.
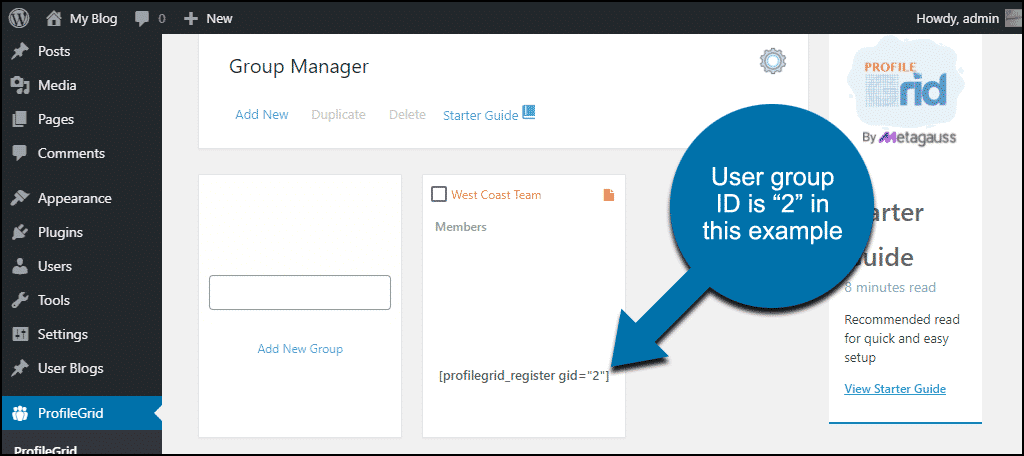
The ID value in the PM_Registration shortcode is the group ID. You can find that in the group box on the Group Manager page.
Adding Fields to a Group Registration Page
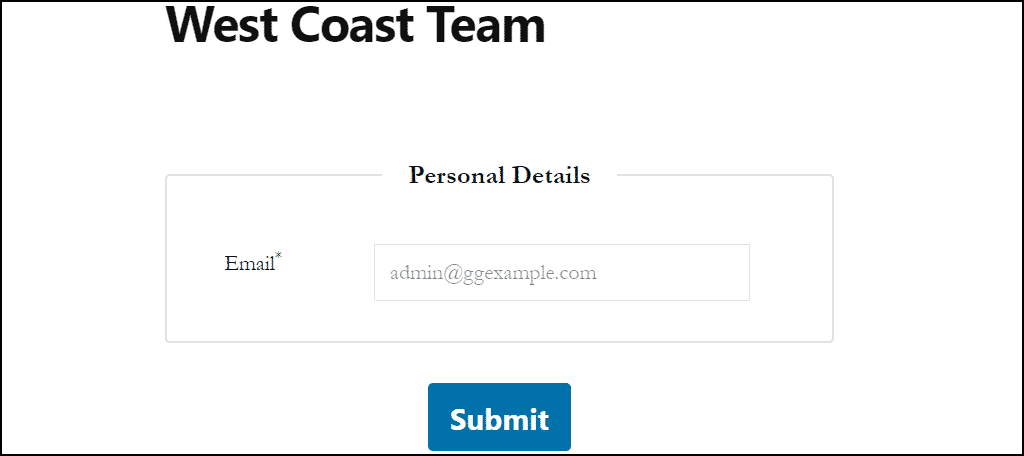
Now you have a registration page, but all it asks for is an email address.
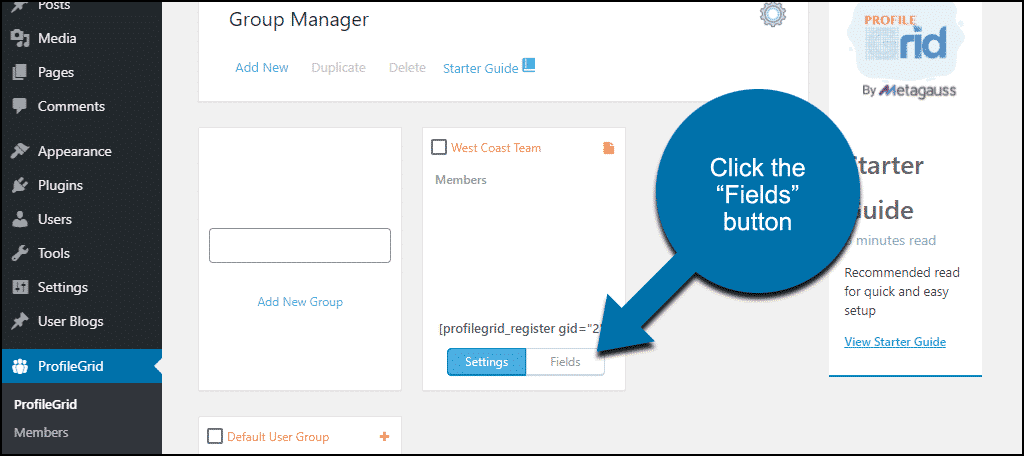
To add more fields to the registration form, go back to the Group Manager page. Hover over the bottom part of the box for your new group and click the “Fields” button.
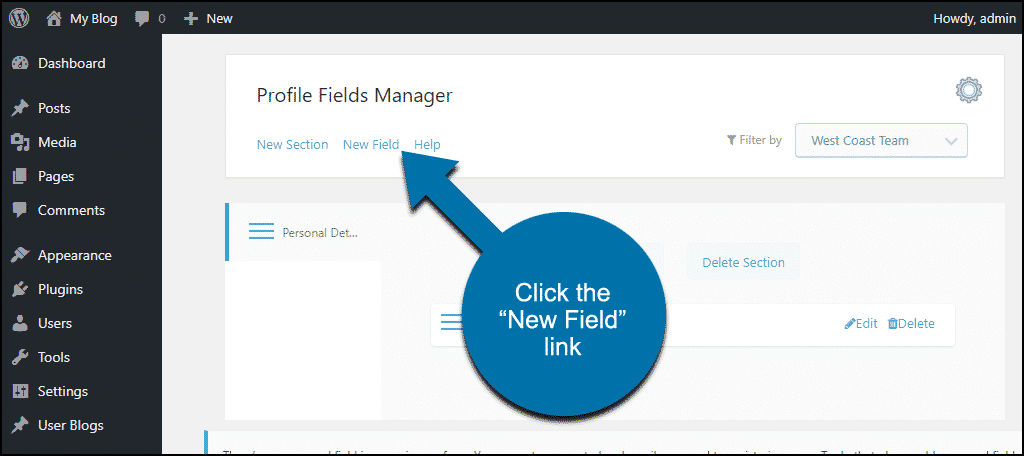
Click the “New Field” link.
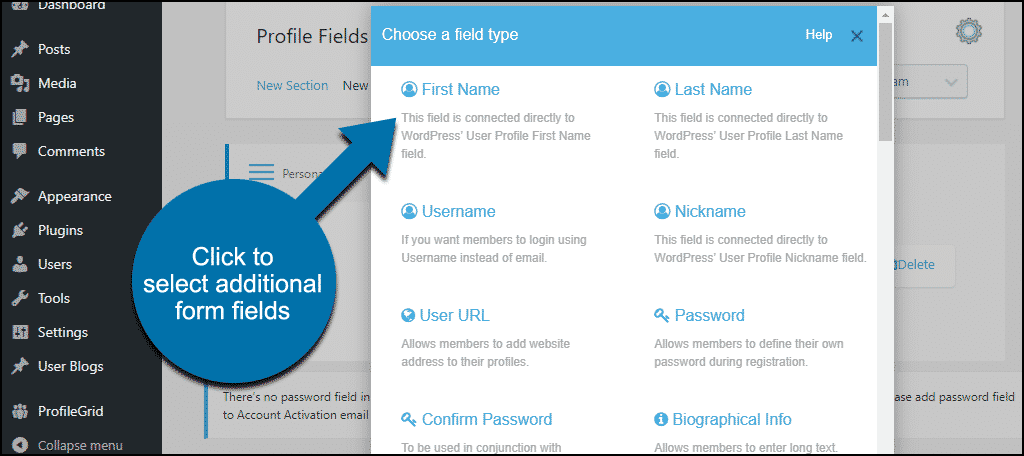
Now you can select the other form fields you want to include in the registration form.
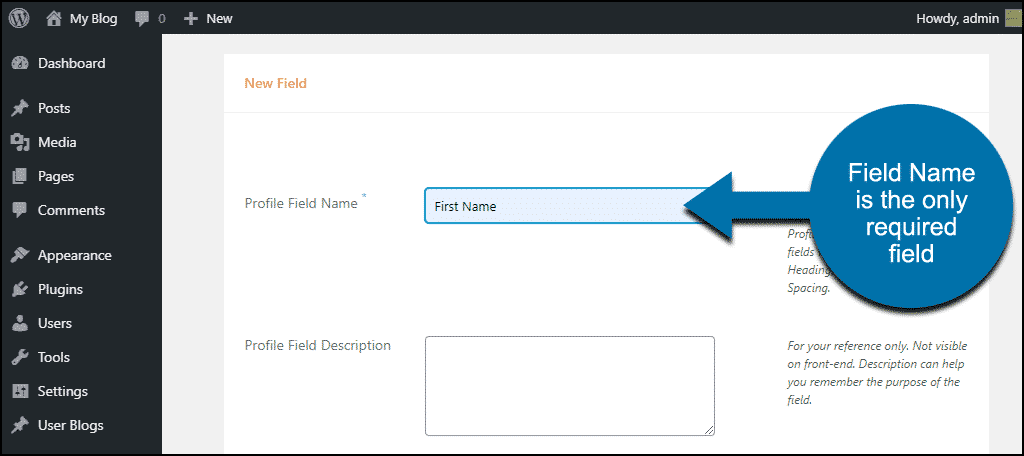
There are several options for each field that you add, but only the “Profile Field Name” is required.
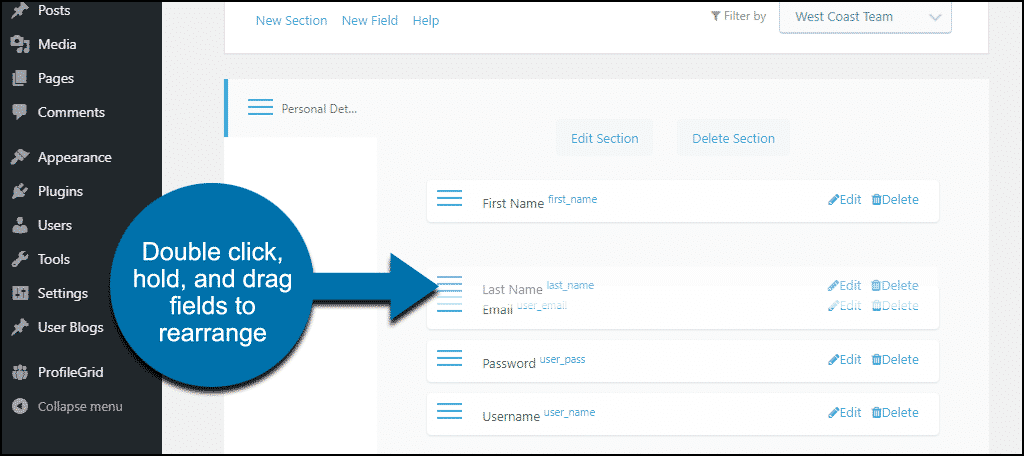
Here, I’ve added a few fields to the form, but I want to change the order in which they appear. It’s easy to rearrange the fields. Just double click and hold on the lines to drag the fields to a new location.
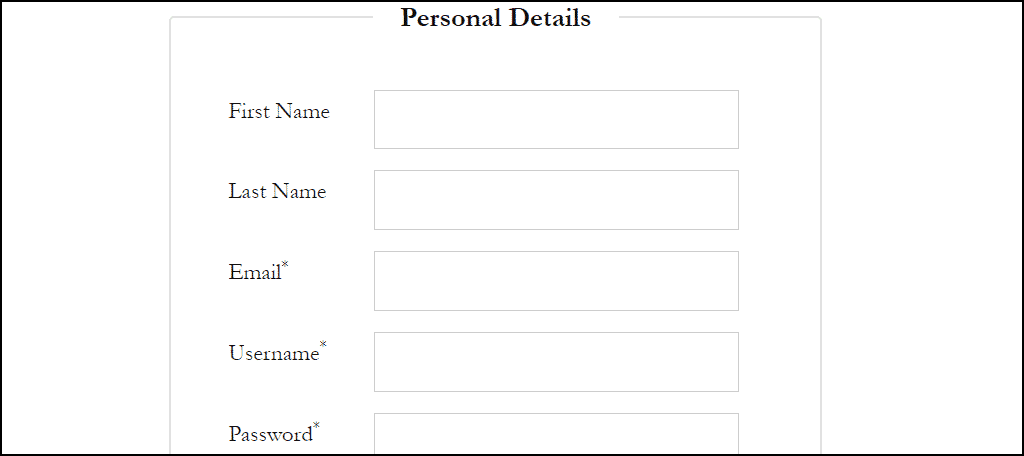
Now the fields appear on the form in the proper order.
What Happens if You Uninstall the ProfileGrid Plugin
If you uninstall the plugin, pages and posts that used it will be affected.
- Pages created by the plugin will be deleted.
- Plugin-related pages that you created yourself will have to be edited or deleted manually.
- The plugin shortcodes will stop working, so the shortcodes themselves will be displayed as text anywhere they were used.
The plugin creates database tables that are not removed when the plugin is uninstalled. If you want to delete them, look for tables with the “promag_” prefix.
The above issues are what we found in our testing. There may be other issues our testing did not uncover.
WordPress User Profiles As They Should Be
ProfileGrid does user profiles, sure. And that’s something that’s always been missing from the core WordPress installation, so it’s a good thing. That on its own is reason enough to use the plugin.
But it would be difficult to find a better group manager plugin than ProfileGrid. If you have group management needs, it’s definitely worth a closer look.
As I mentioned, I was only able to scratch the surface in this tutorial. It would take a dozen tutorials just like this to do it justice and really delve into the plugin’s capabilities.
Would you use ProfileGrid for its user profile abilities alone? Are you currently using a plugin user management system?
Let me know in the comments. I’d love to hear from you.


