Are you looking for more creative tag designs in WordPress? If so, be sure to check out the Cool Tag Cloud plugin, because it adds a host of tag options to choose from. And having more customization options means more possibilities for your website.
Some of the options provided by this plugin include the ability to choose the color, the font, the font size, a tooltip, animation effects, alignments, and much more. It is by far the most comprehensive tag tool in WordPress.
Today, I will demonstrate how to use the Cool Tage Cloud plugin.
Why Style Tags in WordPress?
Tags are one of the most common taxonomies used by WordPress developers. Customizing allows them to better match your website’s design or even better match what they represent.
For instance, let’s say you cover environmental topics. In this case, you could make all of your tags related to the environment use the color green. This visual change makes it easier for visitors to identify the content.
This same idea can be applied to a variety of topics.
You can also utilize them to match the time of season or holiday. For example, you could make your tags festive for Halloween by using an orange color with a spooky font.
Little changes and details like this can really make a difference to your visitors.
How to Use Cool Tag Cloud in WordPress
Step 1: Install Cool Tag Cloud
The Cool Tag Cloud plugin is the one-stop-shop of tag customization in WordPress. Most users will add their tags using the tag cloud widget, but it is also possible to add them via shortcode. The widget is more popular because it is typical to add them in the sidebar or footer area.
However, shortcodes give you more options, so it is worth being aware of their existence. For this plugin to work, you must already have created and assign tags to posts. If a tag has not been assigned to a post, it will not appear.
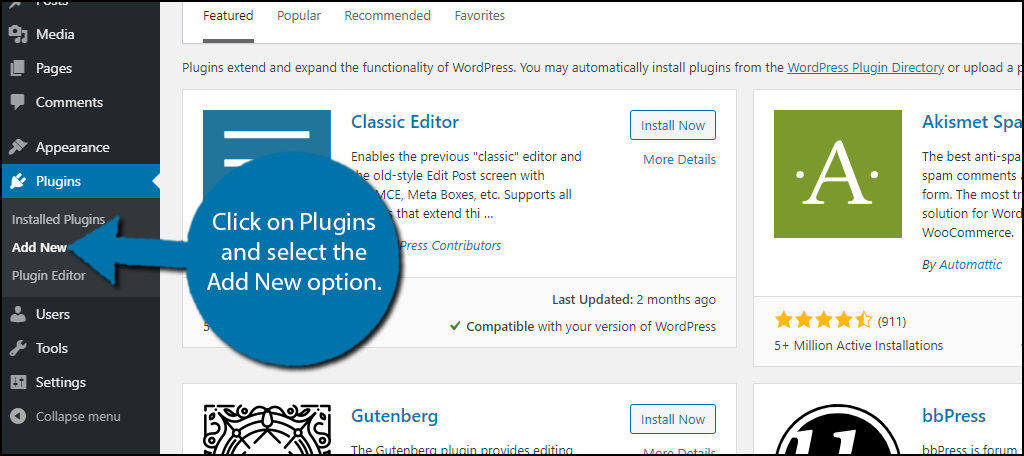
Let’s start by clicking on Plugins and selecting the Add New option on the left-hand admin panel.
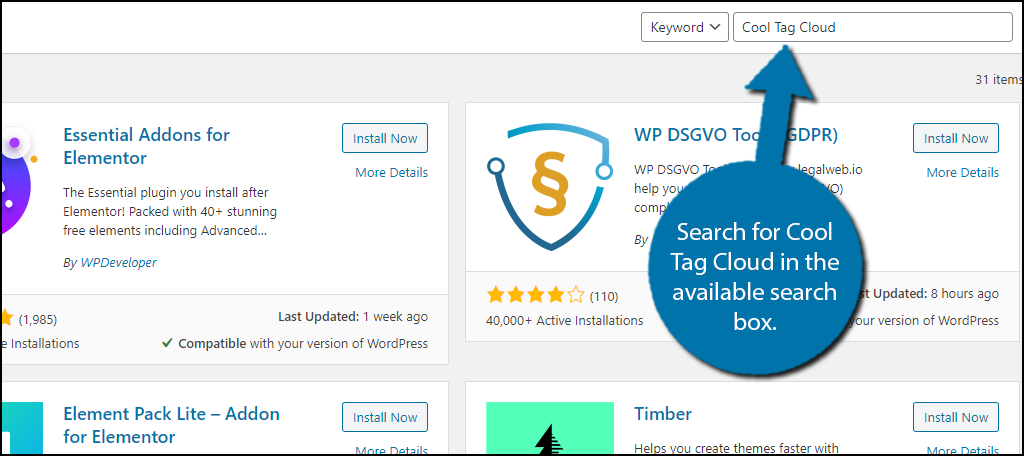
Search for Cool Tag Cloud in the available search box. This will pull up additional plugins that you may find helpful.
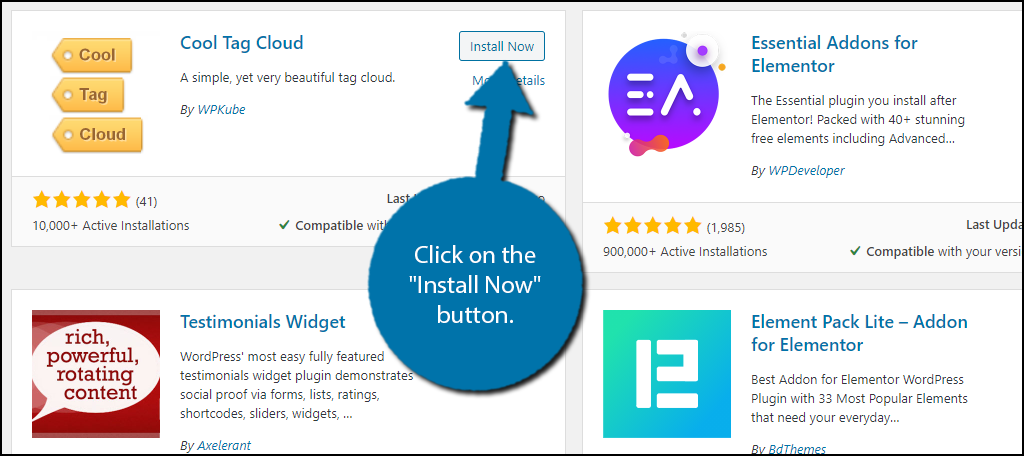
Scroll down until you find the Cool Tag Cloud plugin and click on the “Install Now” button and activate the plugin for use.
Step 2: Find the WordPress Cool Tag Cloud Widget
There is no settings page for this plugin, instead, everything is handled by either using the widget or writing a shortcode. In this section, I will go over how to use the widget. It mainly consists of dropdown boxes, so it should be very easy for any skill level.
On the left-hand admin panel click on Appearance and select the Widgets option.
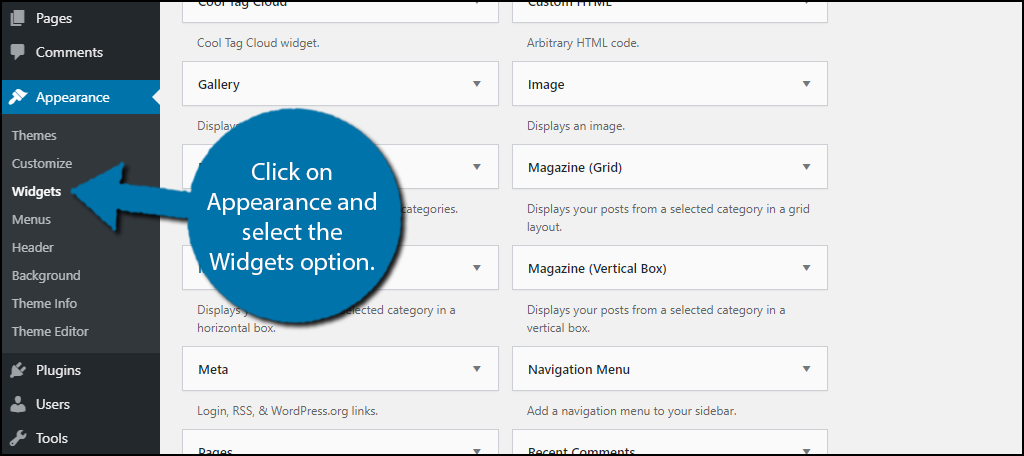
Locate the Cool Tag Cloud widget and add it to the desired widget area.
Note: There is another widget called Tag Cloud that is a default widget in WordPress. This uses the basic design in WordPress and your theme. It is not related to the plugin at all.
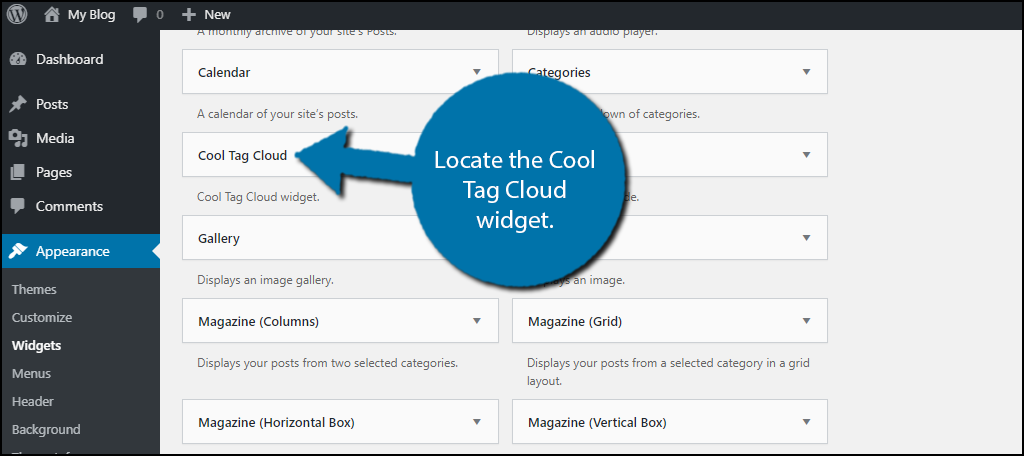
With the widget in the desired widget area (sidebar, footer, etc.) it is now time to customize the appearance of it.
Step 3: Widget Settings
Before I cover the settings, I need to point something out that is essential.
This plugin does NOT create tags for your website. You must already have created AND assigned tags to your posts and pages.
If you do not have any tags assigned to posts or pages, the plugin will not display any of them. Thus, take a few moments to create and add tags if you do not already have them in place.
The settings for this widget are pretty straight forward and by default, the tags will look pretty good. Create a title and go through the various settings. You will find options for the font type, font color, tag color, alignment, the number of tags to display, display the post count, and much more.
Most of these are drop-down boxes, but some of them ask you to enter a number. Carefully go through the settings of the widget.
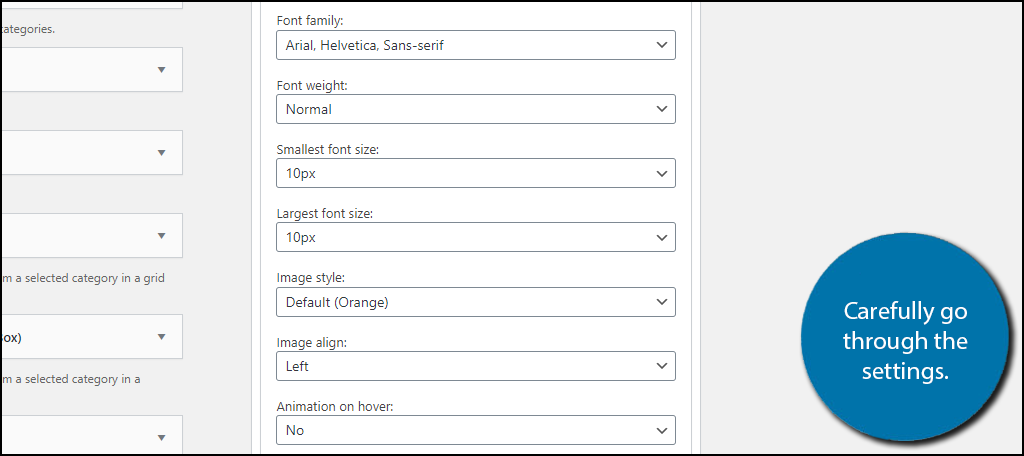
When you are done, click on the “Save” button at the bottom.

Keep in mind that the plugin will not show you a live preview. Thus, as always, I recommend opening a second tab so you can see what the changes look like on a live page. You can quickly edit them in the widget section at any point. Having two monitors in these situations is ideal.
You can view the tags on your website.
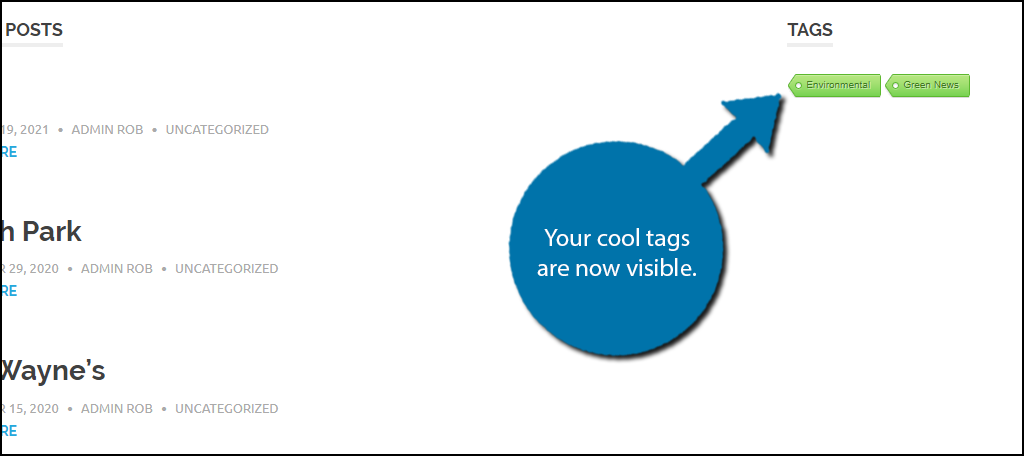
For most websites, using the widget will be the best choice, however, if you want to place tags in a different area, the shortcode is the only option.
Step 4: The Shortcode
As with most plugins, there is also a shortcode alternative. You can customize specific parts of the tags by adding information to the shortcode. All of these options can be found on the shortcode page.
The base shortcode is:
[ht_message mstyle=”info” title=”” show_icon=”” id=”” class=”” style=”” ][cool_tag_cloud][/ht_message]
The shortcode can be customized just as much as the widget. This is accomplished by adding specific parameters to the shortcode. And trust me, it sounds much harder that it is.
For instance, you can change the color of the tag with the following parameter: [ht_message mstyle=”info” title=”” show_icon=”” id=”” class=”” style=”” ]style=”green”[/ht_message]
So the actual shortcode would now look like this:
[ht_message mstyle=”info” title=”” show_icon=”” id=”” class=”” style=”” ][cool_tag_cloud style=”green”][/ht_message]
Notice that there is a single space between the base shortcode and the parameter in question. All parameters MUST be separated by a space.
And it will look like this on a page:
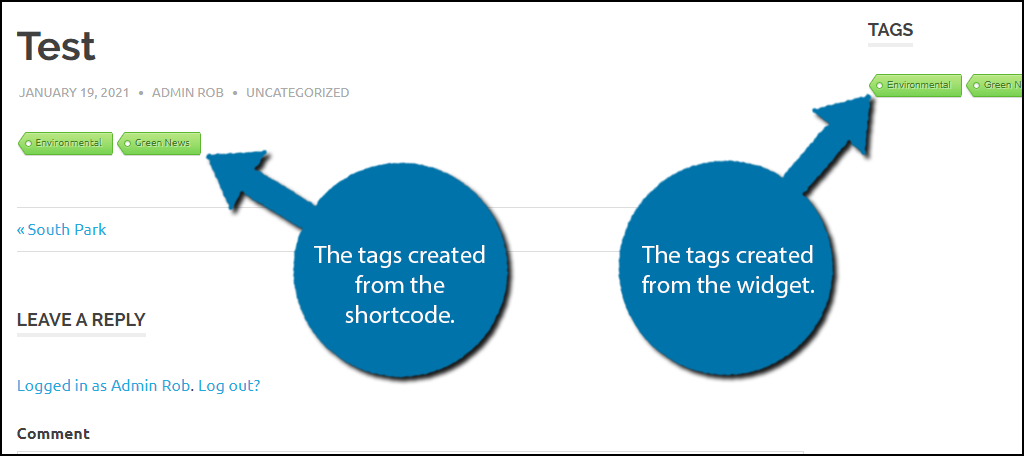
Note: You can find all of the shortcode parameters on the plugins page, with all of the possible options. It can generate any appearance that the widget can. Just remember to separate each parameter with a single space.
Congratulations on learning how to customize your tags with the Cool Tag Cloud plugin.
Tags Are Useful For SEO
It’s no secret that taxonomies like categories and tags are very useful in SEO. However, keep in mind that there are a lot of different types of tags that can help your website grow.
Post tags are extremely useful in helping visitors, and even search bots, find specific pieces of content on your website. For visitors, this can help them navigate your pages. In the case of search bots, you could rank higher.
Thus, there is no reason why your website should not be utilizing tags.
Small Customizations Can Make A Big Difference
No matter how small of a change you make on your website, it can have a big impact when it comes to improving your site’s appearance.
Displaying highly stylized tags are just one simple way to not only improve the appearance of your website, but also the navigation. After all, click on a tag will display all of the posts that utilize that tag. It’s simple but highly effective.
Just make sure the colors you use stand out on your website while not clashing with the design.
How easy did you find the Cool Tag Cloud plugin to use? Did you prefer using the Cool Tag Cloud Widget or using the shortcode?
