While WordPress allows you to change the URLs for your posts, pages, and categories, there is actually no built-in way to change the author URL slug. Luckily, with the Edit Author Slug plugin, we can get around this limitation.
Optimizing your URLs for users not only helps them find pages more easily but can also benefit your SEO efforts. By customizing the author slug, users will have an easier time finding that author’s page, which can contain contact information or links to their posts.
This process is quite easy with the Edit Author Slug plugin and today I am going to demonstrate how to use it.
What Are URL Slugs and URL Bases?
Understanding the difference between the URL slug and URL base is critical to understanding how permalinks work in general.
The URL base is the root of your website’s address. Or in simpler terms, it is the part of the URL that is always present regardless of what area of the website you visit. For example, no matter where you visit on this website, you will see https://www.greengeeks.com/tutorials.
That is the URL base of this website and everything is built upon it. While the slug is everything after that.
The slug is the title of a publicly viewable page. In this case, since we are in the tutorial section, https://www.greengeeks.com/tutorials/, everything that comes after the “tutorials/” is the URL slug. Essentially, what comes after the “/” is the slug.
The slugs are essential in creating easy-to-understand URLs for users to engage with. Not to mention the impact they have on a website’s SEO efforts. Luckily, WordPress allows you to modify these efficiently in most cases.
For instance, you can change the post slug when editing the post itself. Or you can edit the categories slug, by simply editing the category itself in WordPress. The problem is that WordPress does not give you the same options when it comes to authors.
Let’s take a look at how we can get around this limitation.
How to Change the Author URL Slug in WordPress
Edit Author Slug is a plugin that will give you full access and control to all user permalinks. This means you will be able to change both the author base and author slug with some simple tweaks to your website’s settings page.
The plugin is straightforward to use, as you will see in the steps below. Furthermore, it is very lightweight and will not slow your site down when you decide to start using it.
However, just using this plugin by itself will not be enough for your site. You see, while it can change everything you want, you’re going to also need to set up some redirects, which this plugin does not do.
When it comes to creating redirections in WordPress, there is no better option than the Redirection plugin.
All we will do is redirect the old author URL to the new one we created with the Edit Author Slug plugin. This ensures that users accessing the old link do not see a 404 page, which could tank your SEO.
Let’s start by installing the plugins we will need in this tutorial.
Step 1: Install the Plugins You Will Need
In this case, we need two plugins: Edit Author Slug and the Redirection plugin. I’ll demonstrate how to install the Edit Author slug, and you can repeat these steps for the Redirection plugin.
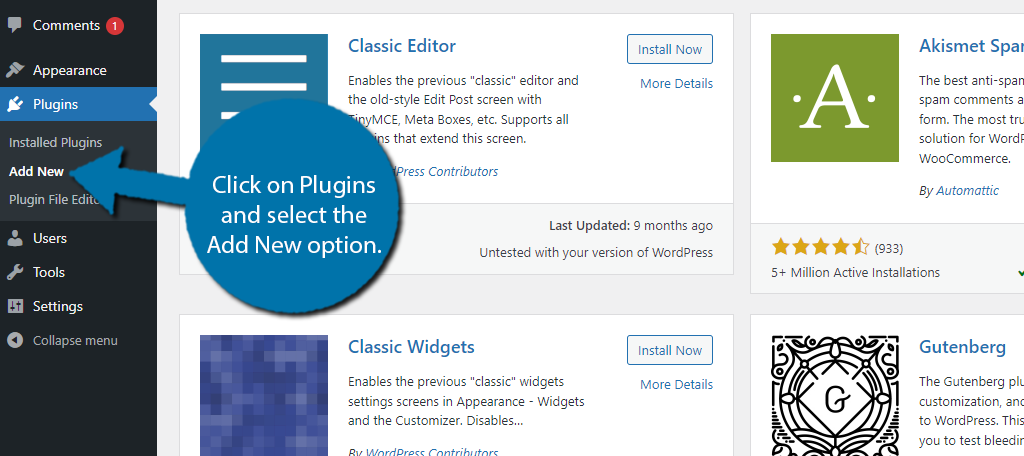
Click on Plugins and select the Add New option on the left-hand admin panel.
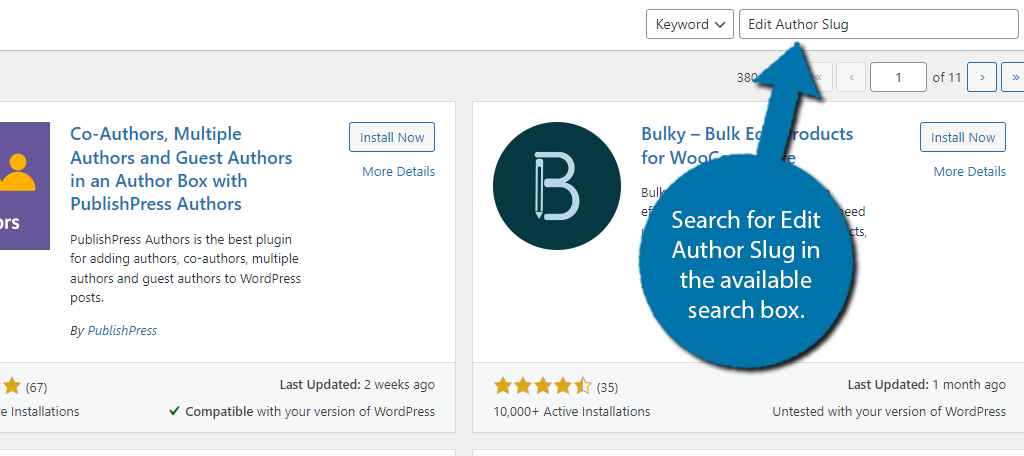
Search for Edit Author Slug in the available search box. This will pull up additional plugins that you may find helpful.
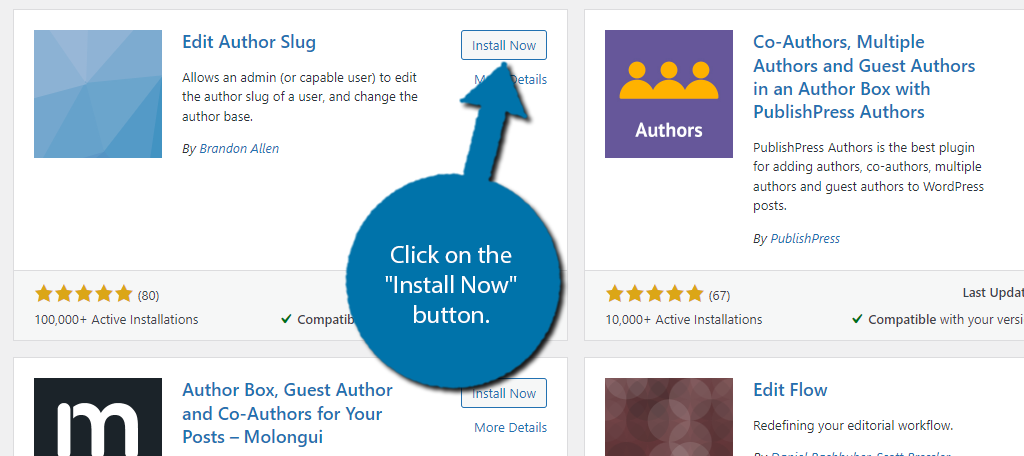
Find the Edit Author Slug plugin and click on the “Install Now” button and activate the plugin for use.
Go ahead and repeat this step for the Redirection step, or feel free to do so after you have finished changing the author slug in WordPress.
Step 2: Edit the Author Slug
With the plugin installed, you can either change the Author base or slug first. In this case, I’m choosing to do the slug first, but the order does not matter. To edit the author slug, we need to access that user in WordPress.
To get there, click on Users and select All Users.
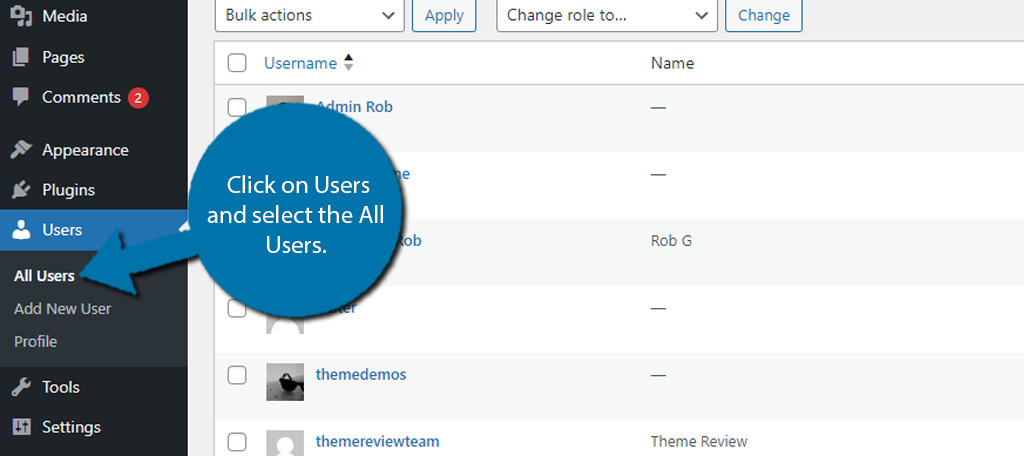
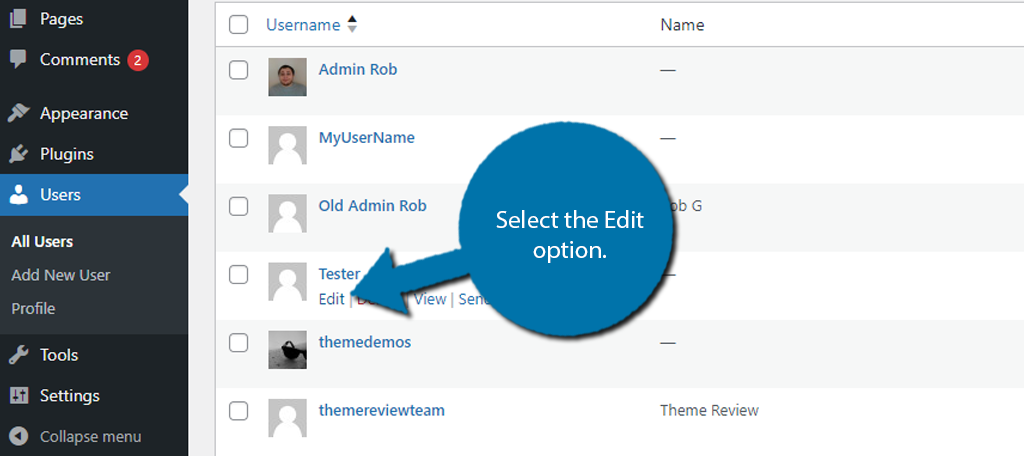
You should now see a list of all of your users. Locate the user you wish to edit the author slug for and click on the Edit option under their name.
Here you will find all of the options you can use to edit the User. In this case, scroll to the bottom to locate the Edit Author Slug section. Here, you will have a variety of options based on the user profile information.
You can use one of these or use the custom option at the bottom to create your own author slug.
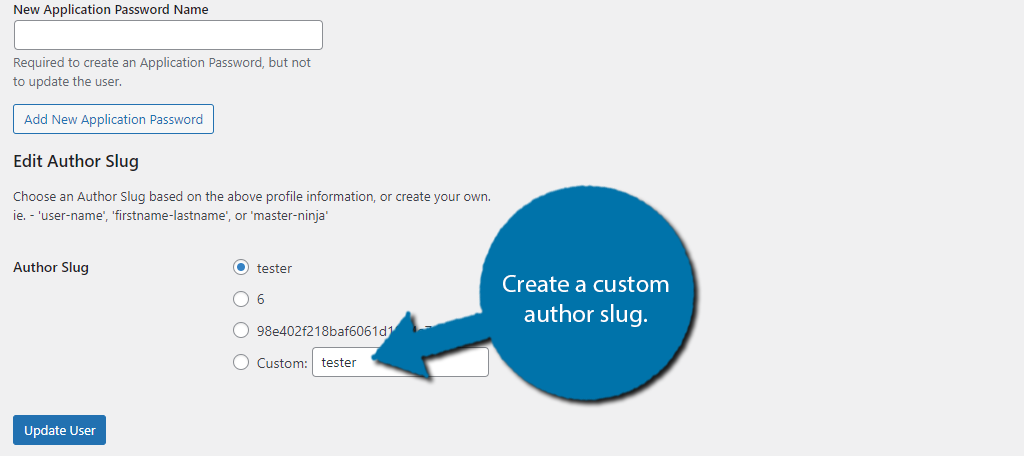
Once you have made the changes, go ahead and click on the “Update User” button to save them. This will update the author slug in WordPress. Now, let’s change the author base, or if this was the only thing you wanted to change, skip to step 4.
Step 3: Change the Author Base
In all honesty, the default author base doesn’t need to be changed. It is short and easy to understand, but if you feel the need to change it, this plugin allows you to do that. This is found in the settings section of WordPress.
Click on Settings and select the Edit Author Slug option.
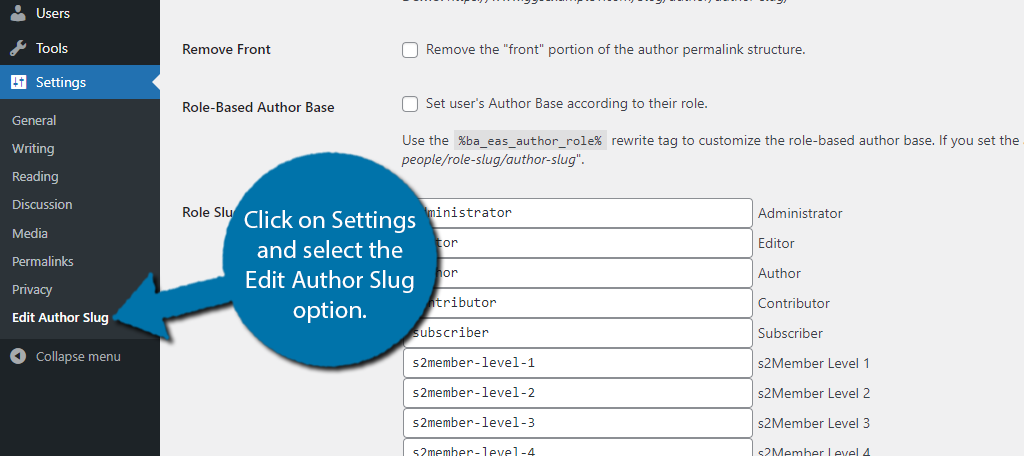
There are a lot of things on this page, but it really boils down to two options. You can customize the author base that is used for everyone, or you can create author bases for individual user roles like the administrator, editor, author, and so on.
In this case, we are just going to change the author base on a global level. This option is right at the top,
By default, it is set to “author” and all you need to do is edit the value in this box. The goal of any URL is to be short and intuitive to users, and the author base is part of that. As such, keep this in mind as you update the name.
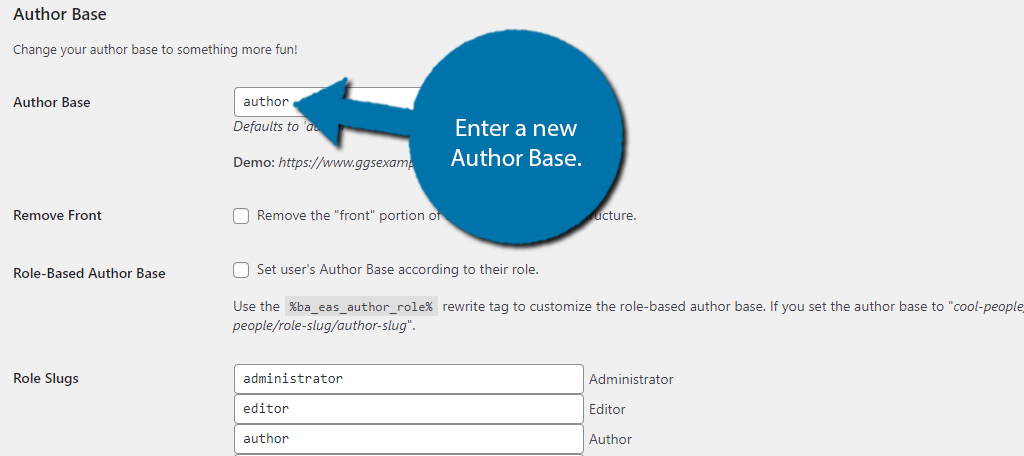
And that’s it. Scroll down to the bottom and click on the “Save Changes” button to finish, at least with this plugin. After these changes have been made, the old URL will now lead to a 404 page, and if that was indexed, it will hurt your SEO.
As such, you need to take a moment and set up a simple redirection. Install the Redirection plugin if you have not done so yet.
Step 4: Setup a Redirection
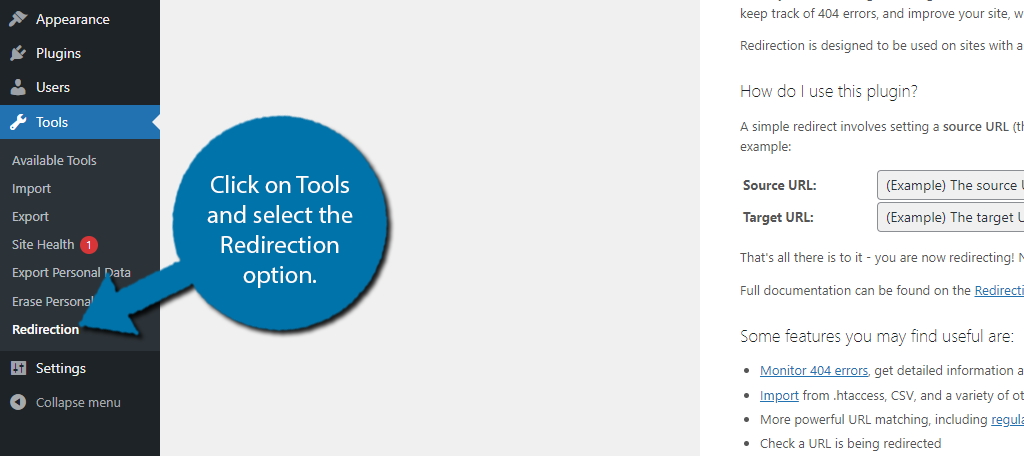
Redirection is the easiest redirection plugin to use in WordPress. To find its options, click on Tools and select the Redirection option.
If this is your first time using the plugin, click on the “Start Setup” button. The plugin will walk you through some simple settings that you can configure. These include an option that will automatically detect when you change a permalink and set up a redirection for you.
You can choose to enable this or do it automatically. In this case, we have already changed the permalink structure, thus, it needs to be done manually. There is also an option for the plugin to keep a log of redirections and 404 errors. It is recommended to enable it.
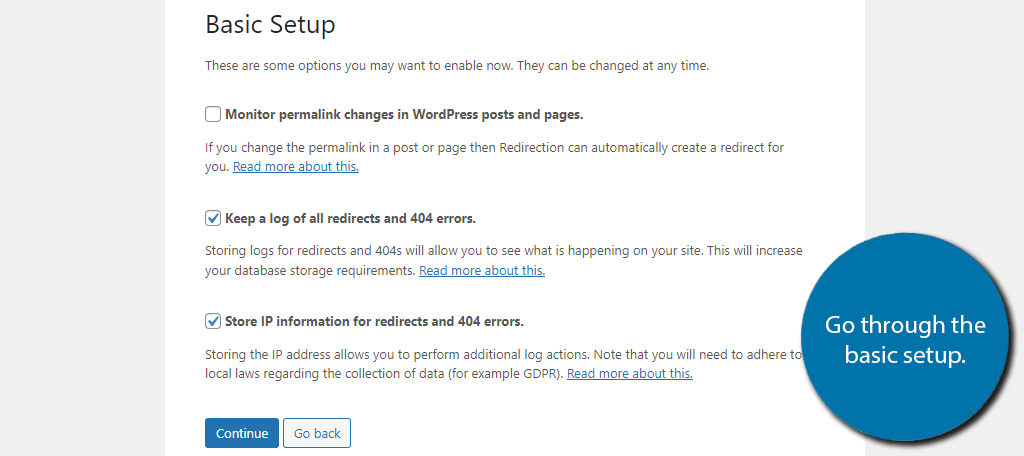
There is also an import section that you can use. Just continue and the plugin will finish the initial setup process. Once it is complete, you can create a redirection. This just consists of adding the old URL into the Source URL text box, and the new URL into the Target URL.
Once the info is entered, click on the “Add Redirect” button.
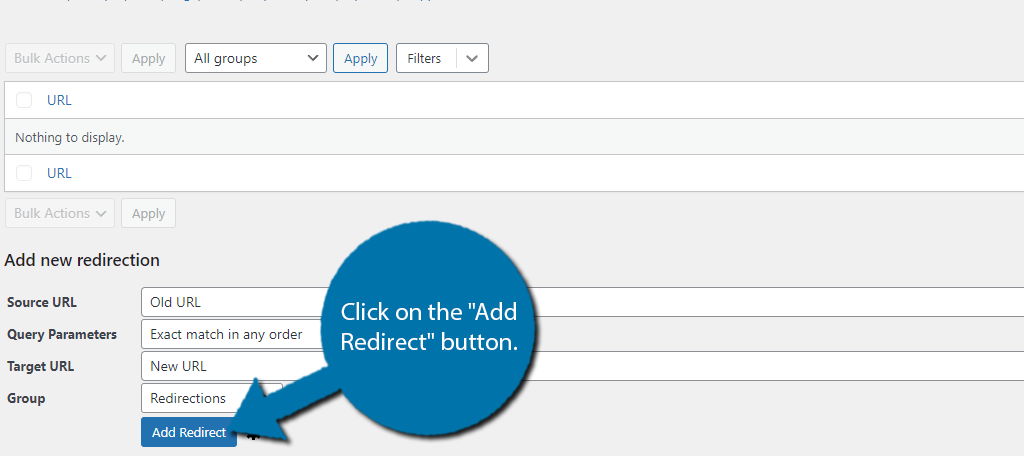
And that’s it. You have successfully set up a redirect for your old author URL. This is something you should do any time you alter the permalink structure of your site, otherwise, it will tank your rankings.
FAQ
If you have just built your site and are doing the initial setup, then the author pages will not be indexed by search engines like Google. In this case, you probably don’t need a redirection, but it is a good habit to form.
Absolutely! I picked Redirection because it is the easiest to use, but if you already have a different redirection plugin installed, that will get the same results. Or if you are looking for more options, check out our top picks for redirection plugins.
If the page has been indexed, it will now lead to a 404 error. Once the search engines become aware of this, it will hurt your website’s ranking, thus it will decrease how much traffic your website receives organically.
Yes. You can code this into your website, but it is on the advanced side. As such, beginners may struggle with it, and since you would be editing your site’s permalink structure, a mistake could have a serious impact on SEO.
No. This is the main reason why WordPress does not have this option built in like it does for pages, categories, tags, and so on. The author permalink structure is quite good by default, but some sites may want to change it regardless.
The plugin offered users the ability to have an author base for each user role. In my opinion, this is not worth doing, as generally speaking, a website will only have content created by the author’s user role.
Some websites have taken the time to develop a custom author page, as such, having an individual page for each author may not be necessary, which defeats the purpose of changing the base and slug in WordPress.
Customize Your Author URL Slug Today
As you can see, with the right plugin, customizing your author URL slug in WordPress is pretty easy. Doing so gives you greater control over your website’s permalink structure, and when done right, can improve SEO.
That said, in this case, there’s not much reason to change the default option. It comes down to personal taste and, you might just think a different structure looks better than the default.
In any event, I hope you found this tutorial helpful in learning how to change the author slug in WordPress.
Did you use a different plugin to change the author slug in WordPress? Why did you change the author slug?


I’ve recently had a friend ask me how to do this. He didn’t like his author pages being indexed as they were displaying usernames etc, so I built a plugin to allow you to completely customise the authors URL. It also redirects the author pages and is overrideable by admin.
https://wordpress.org/plugins/wp-custom-author-url/