In this tutorial, we’re going to talk about the right way to do image credits and attribution in WordPress. It’s going to be a little different from our typical tutorials since it’s not exactly a technical how-to.
It’s more about giving credit where credit is due.
Images enhance our articles. They make them more shareable and get our point across more effectively. As we create pieces that are more shareable, proper image attribution is critical.
Why It’s Important to Add Image Credits or Attribution
The early web was a collaborative, friendly place where people freely shared their creative work. But like any community that experiences tremendous growth in a short amount of time, the web eventually became a bit less friendly and a bit more corporate.
Kind of like a Walmart store appearing in a small town.
Once commercialization and commodification began to take over, creative people looked around and said, “Hey, that for-profit website is using my art. I should be getting paid for that use. If I can’t get paid, I should at the very least receive proper credit.”
The idea that everything that is found on the web is fair game and can be used by anyone is an old one. The only problem is it’s not true. It’s never been true, but it persists, perhaps due to the freewheeling and forgiving nature of the early web.
How Do I Know Which Images Are Copyrighted?
When an artist, photographer, or writer creates a piece of work, that work is automatically covered by copyright. That gives the creator certain legal rights they can exercise if you use their work without permission.
If you do a good job as a writer, your articles will be shared. Of course, that also means that any images you use in an article may also be shared. That increases the chance that the photographer or artist will see their work associated with yours.
So it’s important to understand that you run a legal risk when you don’t credit the creator of an image. But aside from the legal risk, attribution or credit is just the right thing to do.
And you can never go wrong doing the right thing!
The discussion of copyright here pertains mainly to the U.S. copyright laws and requirements. Not every country has copyright laws, and those that do have different rules. Many countries have signed treaties or agreed to conventions that respect foreign copyrights. So a good rule of thumb is to assume that all creative work is covered by copyright.
How to Add Image Credits in WordPress
As far as the technical nuts and bolts of adding image credits in WordPress are concerned, it’s a simple and straightforward process. Just add credit or attribution in a caption below the image.
Captions can be added at the time an image is being added to the post or page. They can also be added after the fact by editing the image in an existing post.
I Want to Give Credit, but Where Do I Find Image Credit or License Information?
If you’re lucky, the image author will provide some indication that their photos can be used under a license such as Creative Commons. If so, it’s a simple matter to add the proper credit to the image.
Let’s take a moment to talk about Creative Commons
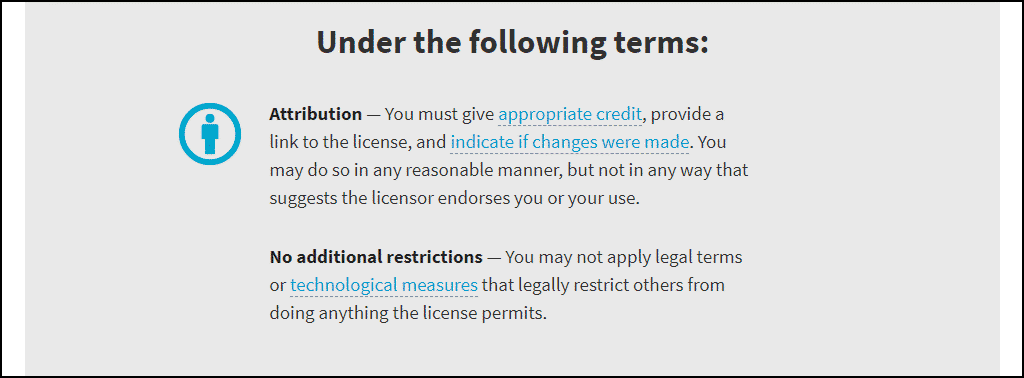
Creative Commons was developed as a way for artists to grant licenses to use their work. The licenses allow you to use the artist’s work at no cost but usually with stipulations. There are many variations on Creative Commons licenses, so don’t assume that they are all the same, or that you’re free to do anything you’d like to a Creative Commons work. All Creative Commons licenses allow you to use the work (as-is) in your presentation, and they all require that you attribute (credit) the creator of the work.
You can search for images right on the Creative Commons site. When you do that, you know that you can use whatever you find.
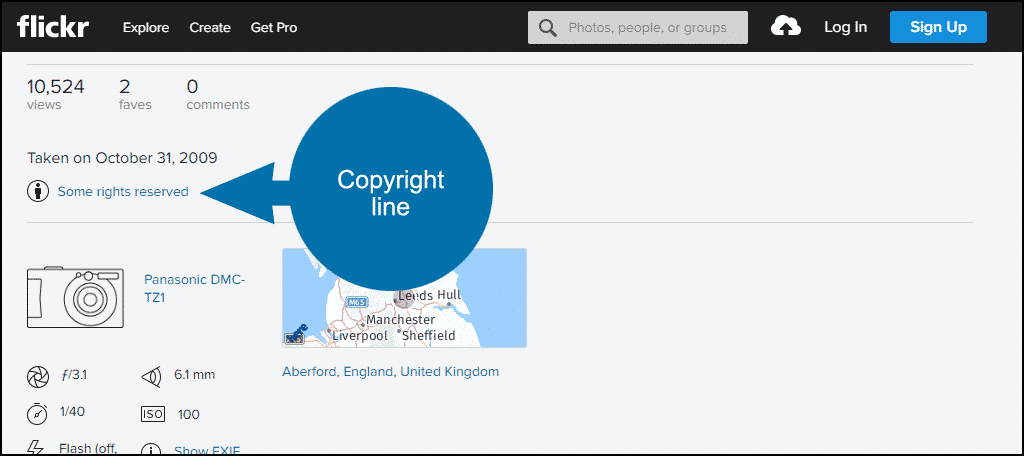
Images on sites like Flickr will have a copyright information line and a link to the Creative Commons definition of their license.
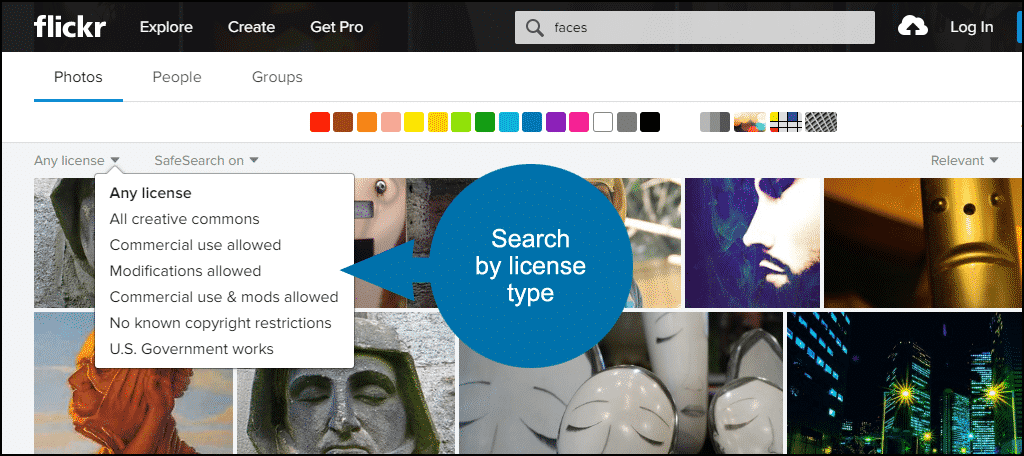
Flickr also lets you search for images based on the uses allowed.
Okay, so Creative Commons works are usually easy to spot. But most images that you come across online will not have any licensing information. If you can’t find licensing information, you have to assume that you cannot use an image.
You can do some detective work and try to contact the creator of an image, but that can take time that most of us don’t have. So what’s the alternative? Finding images that you know you can use. More on that in a minute.
Formatting Image Credit or Attribution in WordPress
You’ve found the perfect image, checked out its Creative Commons license, and you want to use the image in a post and provide proper credit. Now what?
First, determine what is required by the license. For the purposes of our tutorial here let’s use a Creative Commons image license you are likely to come across, “Attribution 2.0 Generic (CC BY 2.0).” This is one of the most basic licenses, and pretty much the only requirement is attribution.
If you’re choosing images from the Creative Commons website, they include some cut and paste HTML that you can use for the image credit in WordPress. But let’s add the credit manually. This is what it should look like:

So when we are adding the credit as a caption, we need the following URLs:
- The link to IMG_4073-B Jackrabbit, which is on Flickr.
- A link to the image author, who goes by mnchilemom (this is also on Flickr in this example, but it could be a personal website).
- The link to the Creative Commons license code. In this case, CC BY 2.0.
The caption/credit information has to be HTML formatted manually to display properly in WordPress:
[ht_message mstyle=”info” title=”” show_icon=”” id=”” class=”” style=”” ]<a href=”https://www.flickr.com/photos/50228879@N00/5937562263″>IMG_4073-B Jackrabbit</a>” by <a href=”https://www.flickr.com/photos/50228879@N00″>mnchilemom</a> is licensed under <a href=”https://creativecommons.org/licenses/by/2.0/”>CC BY 2.0</a>[/ht_message]
The wonderful world of royalty-free stock photo websites
Before we talk about image sites, allow me to point out that there is a WordPress plugin called ImageInject that will search for royalty-free images while you’re writing an article.
That’s pretty cool and great if you’re pressed for time. But for the best results, you’ll have to cast a wider net and search a number of royalty-free image websites. “Royalty-free” doesn’t mean necessarily mean, “at no cost.” It means that you pay a fee to use the image, and then there are no further royalties related to how it’s used.
Some royalty-free image websites have low-resolution downloads (that are perfectly good for most blog or article uses) available at a low cost. As size and resolution increase, costs increase. But there are a lot of blog-sized images available for as little as a dollar, and some sites even give away a limited number of free images.
Some sites will also provide completely free images for commercial use without requiring attribution. This means you have nearly full run of the site for any image that is available without worrying about license fees or paying upfront costs.
Why Pay for Royalty-Free or Stock Images When There Are Free Creative Commons Images out There?
There are a couple of compelling reasons to pay for an image. First, it makes you a patron of the arts. 😉
You are contributing to an artist making a living from their work, and that’s a beautiful thing.
But perhaps most importantly, you usually don’t have to link away from your article in the photo credits for a stock image. In fact, you may not have to provide credit at all for some royalty-free images.
Most Creative Commons image licenses will require you to link to the original source of the image. That’s all well and good, but often we don’t want to provide links in an article that take the visitor away from our website.
If it’s worth paying a dollar or two to keep your visitors focused on your content, images that don’t require an outgoing link are the way to go.
The problem with all stock images
You can put a lot of time and effort into finding the best images for your articles. Then one day you may see the same image on another site. And another, and another.
That’s the problem with stock imagery. If you think an image is perfect, someone else out there probably agrees and has used the same. Often, many people have used it before you.
Another problem is relevance. I’m sure you’ve seen images in articles and wondered what the image had to do with the text.
Images should always be relevant to the article they accompany. Relevant images increase a visitor’s memory of your site and content. But we tend to ignore images that are not relevant to the text around them.
The best solution to the problem is to use your own photographs or graphics. That’s not always possible, of course, as we’re not all great photographers. But don’t underestimate the value and power of your own snapshots.
We here at GreenGeeks, attend a lot of WordPress WordCamps, and we blog about the experience. As you can see, we’re not using fancy, professional images in the posts, but the snapshots are great for giving a glimpse into what happened.
No stock images could have been better.
So keep all of your options in mind when searching for the perfect images. And when you find them, be sure to nail the credits and attribution.
The photographers of the world will thank you!
Have you ever used images in an article or presentation without first getting the permission of the creator? Okay, that’s kind of a rhetorical question. We’re all guilty of it at some point. But after reading about credits and attribution, are you more likely to start crediting the images you use?


