Are you struggling to add widgets in WordPress using the drag and drop approach? While dragging and dropping widgets in WordPress is easy for many individuals, it can be extremely challenging for others. Accessibility mode in WordPress is designed to help individuals who struggle with these actions.
Since WordPress is the largest website building platform in the world, it is important for the platform to be accessible to everyone. Unfortunately, WordPress does not do a good job of informing web developers that the mode exists.
Today, I will demonstrate how to use accessibility mode to add widgets in WordPress.
What Does Accessibility Mode Do?
By default, adding widgets in WordPress requires you to click on the widget, drag the widget to the appropriate area, and release the click. This can be extremely difficult or impossible for some individuals.
Accessibility mode eliminates this method and adds a new way to add widgets in WordPress.
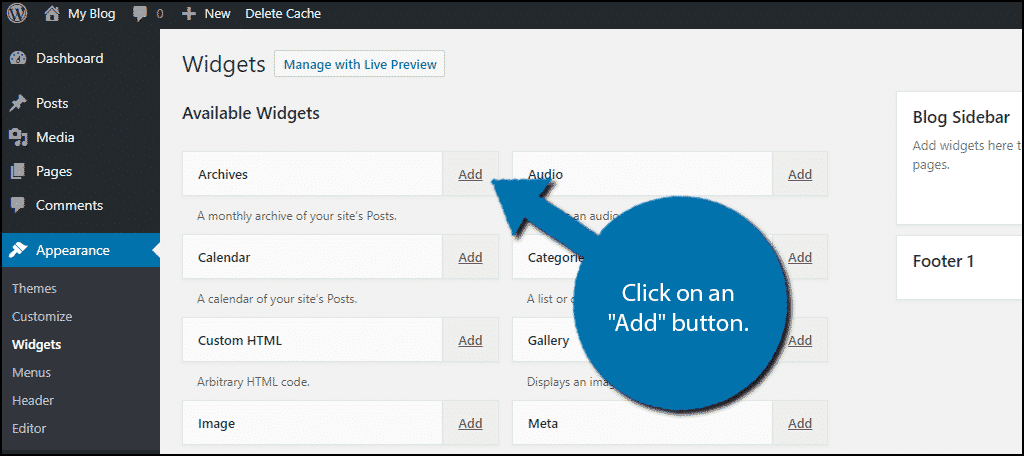
While this mode is active, each widget will have an “Add” button next to them. When you press this button, you can select which widget area, sidebar, footer, etc., that the widget will be added to. This means it only takes a few clicks to add widgets instead.
Thus making the process more accessible to those who had difficulties with the default system.
How to Use Accessibility Mode to Add Widgets in WordPress
Step 1: Enable Accessibility Mode in WordPress
This mode is built directly into WordPress and will not require any additional plugins to use. It can be disabled at any time in the same manner with which it’s activated. When adding widgets, you can actually edit the widget when selecting where it will be placed.
This can save time if you are used to the system.
Before you can use the Accessibility mode, you need to enable it. On the left-hand admin panel, click on Appearance and select the Widgets option.
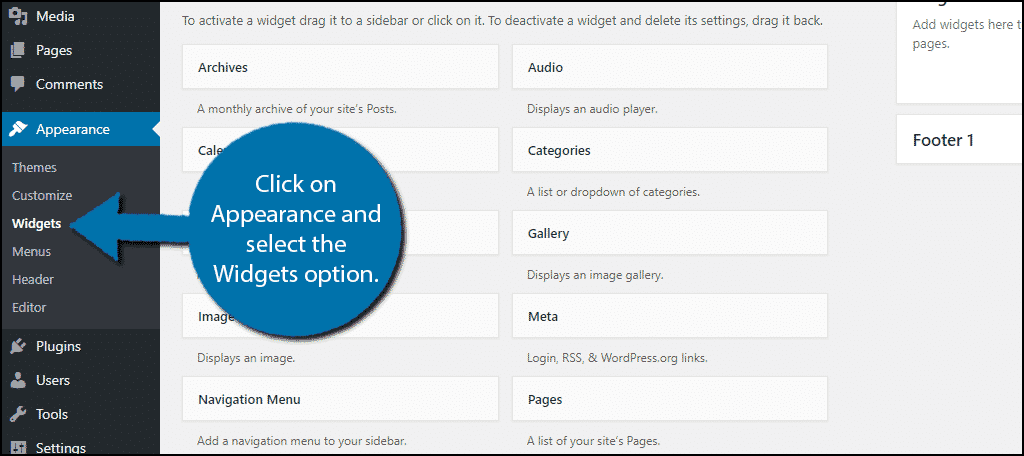
This is the widgets page, where you can add widgets to your website. It has multiple areas that you can add widgets too. These include areas like your sidebar and footer area. At the top of the page, click on the Screen Options option.
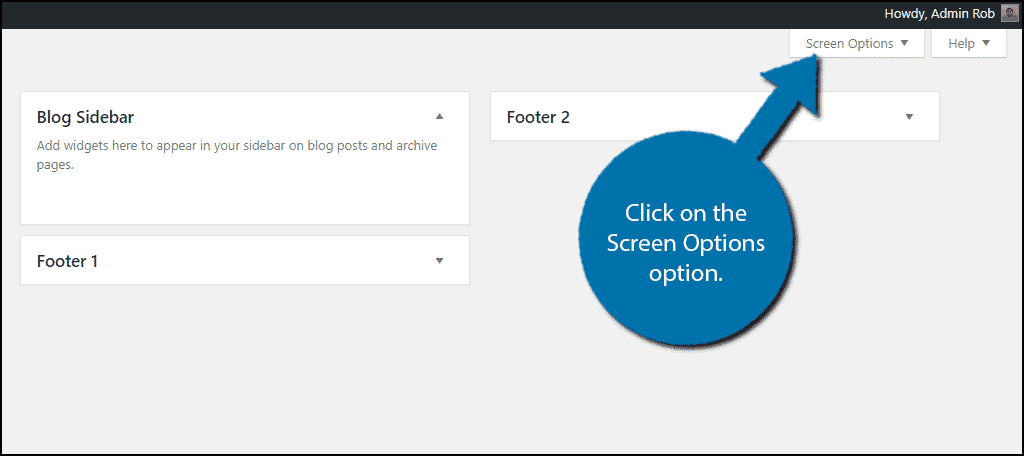
Click on the Enable accessibility mode option. You can repeat these steps to disable it.
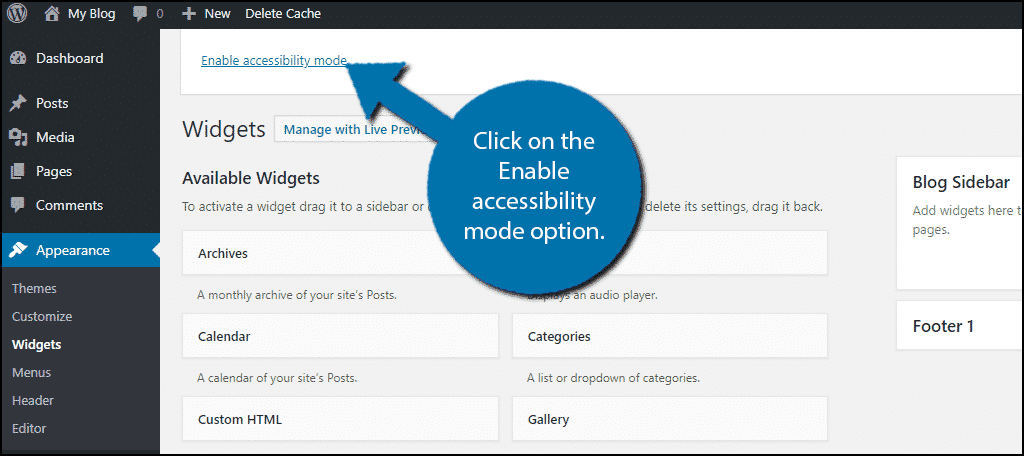
If at any point you want to disable accessibility mode, simply repeat these steps, but click on the disable accessibility mode option. This will restore the default system.
Step 2: Use Accessibility Mode to Add Widgets in WordPress
You will now notice that an “Add” button is next to every widget. Click on an “Add” button to begin adding that widget to the appropriate area.
On this page, you will have access to the widget settings. You can set these up as you normally would. Underneath the widget settings, you will see your available widget areas. Select the widget area and the position of the widget.
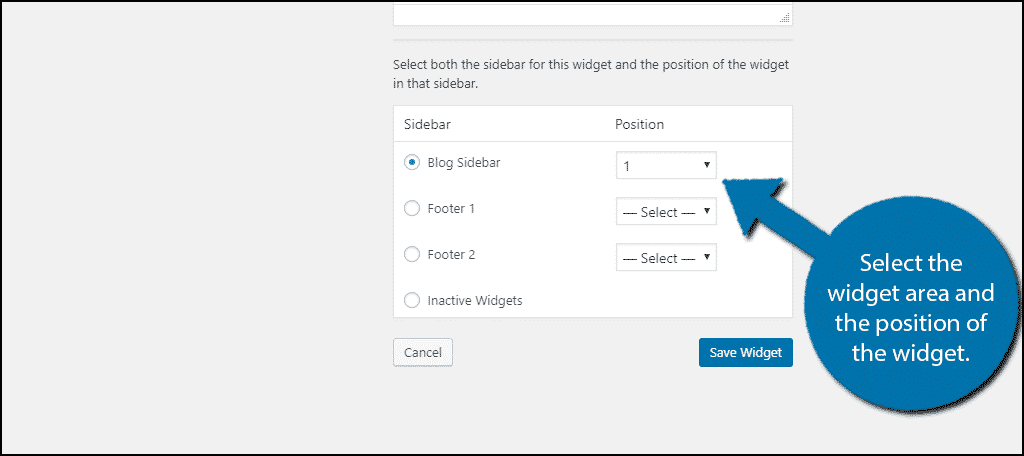
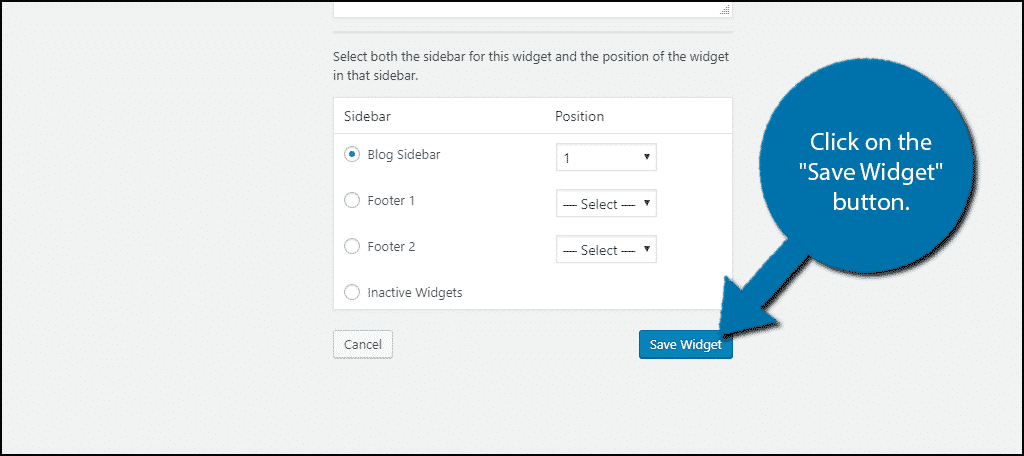
Click on the “Save Widget” button when you are done changing the settings and selecting the position of the widget.
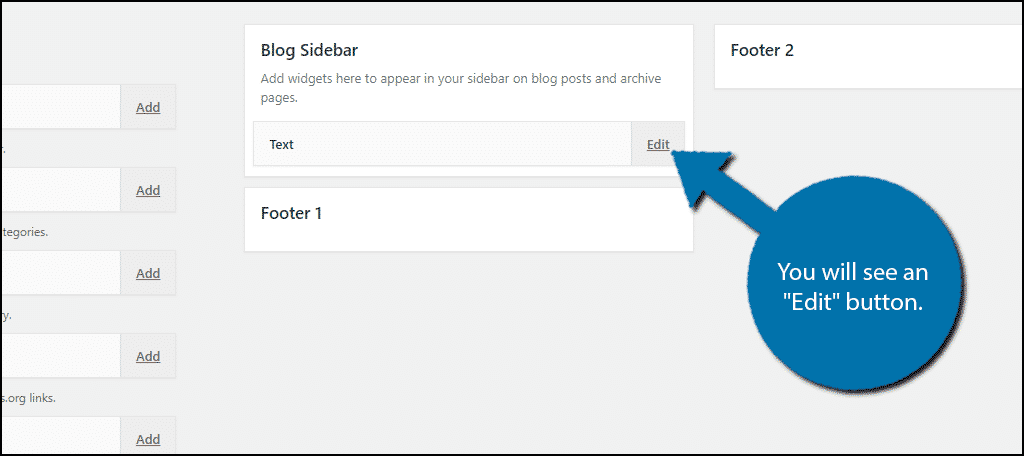
You should now see the widget in the widget area you selected. You will see an “Edit” button that you can use to change the widget settings, change the widget position, or delete the widget.
Congratulations, you have successfully enabled accessibility mode and used it to add widgets in WordPress. You can repeat these steps to add as many widgets as you want.
Additional Plugins
While WordPress provides some accessibility options, it doesn’t mean there aren’t plugins that go a step further. Here are some additional plugins to help make your website more accessible.
WP Accessibility Helper (WAH)
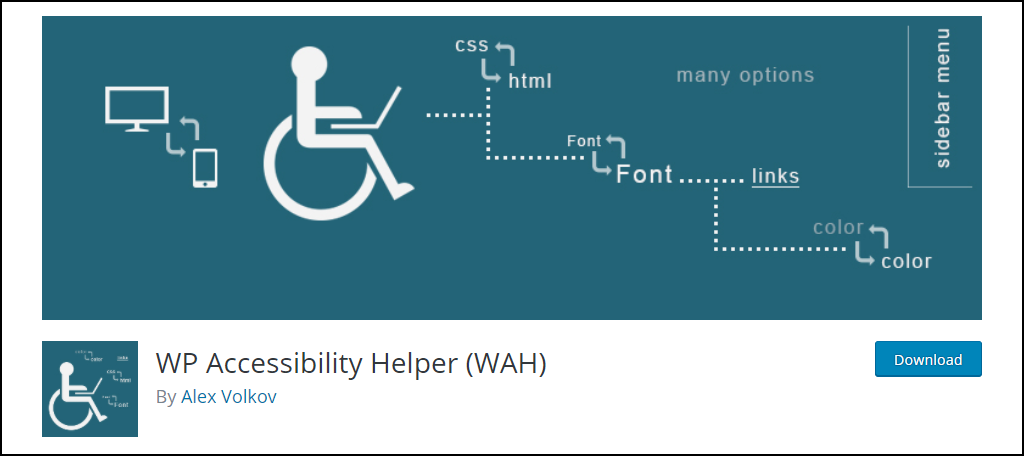
The WP Accessibility Helper (WAH) plugin adds a variety of options to help make your website more accessible to visitors. Some of these options include allowing visitors to resize font for visibility, contrast mode, lighting options, and much more.
It’s a perfect blend of accessibility options that every website needs.
WP Accessibility
The WP Accessibility plugin helps web developers identify areas of their website that can be made more accessible. This includes tracking down images that do not contain an alt attribute, adding skip links, enable long descriptions for images, and much more
The entire plugin is through a series of checkboxes, so it doesn’t get much easier to use.
Colorblind Options Are A Must
Without a doubt, color blindness is the most common disability a website owner should be ready for. One in twelve men (8%) suffer from it, and if you made your website colorful, you could cause problems for those who do.
For example, if you use a colored font on a colored background, the text may become unreadable depending on the color shades you’ve picked.
Unfortunately, this is one of WordPress’s biggest shortcomings because it does not provide built-in color modes. Instead, this is something web developers should be aware of and pick colors that are easy to read. Which is why the majority of websites use black font color.
However, this can also impact the effectiveness of text on images. So make sure you have alt text visitors can see.
Make WordPress More Accessible
It is always important to consider visitors and staff who have disabilities. For example, one of the most common issues for visitors is vision. It is quite common for someone to forget their reading glasses. You can actually allow visitors to control the font size of your website to help them out.
Another popular way to make your website more accessible is to add more languages. A multilingual website has a better chance of success than one that only supports a single language. A good way to decide what languages to use is to look at the most popular geo locations to your site in Google Analytics. You also can identify common languages in your specific target area.
For example, many places in the United States offer both English and Spanish options. Not doing this could cost you a sale.
Always try to make a website that everyone can enjoy.
Has accessibility mode made adding widgets easier? What other steps have you taken to make your website more accessible for staff and visitors?
