Do you want to transfer your website from Squarespace to WordPress? WordPress is the most popular website building platform in the world and is responsible for over 25% of all websites. It’s no surprise that so many people are switching to WordPress for all of the flexible options it contains. By comparison, Squarespace is a very easy, but limited platform to build a website on.
WordPress is open source and thanks to all of the plugin and theme developers, the options are endless when it comes to WordPress. It is a platform that can do anything without you being a coding expert. That’s right you do not need to write a single line of code to make a successful website on WordPress. Today, I will demonstrate how to transfer from Squarespace to WordPress.
Understanding WordPress
A common mistake when starting out in WordPress is not understanding the difference between WordPress.org and WordPress.com. WordPress.org is the version I am referring too. There are many differences that separate these, but the biggest three are plugins, custom themes, and web hosts. WordPress.org will have all three of these while WordPress.com will not.
How to Transfer from Squarespace to WordPress
Today, I will demonstrate how to transfer from Squarespace to WordPress. It is not overly complicated but can require a bit of work if your Squarespace website is on the larger side. The process is simple to understand, export your Squarespace content and import it on your new WordPress website. Once that is done, all you need to do is set up your new WordPress website.
Preparation
There are two major things to take care of before starting the transfer. Find a web hosting provider and install WordPress on the new website.To get the most out of WordPress, you will need to find a web host. You will need to do this to transfer to your new website. Depending on the web host, this could take around a day or more to set up.
Once you have the website you then need to install WordPress. You may find that your web host might ask you if you would like them to do this for you and feel free to. You may also find that a web host is willing to transfer everything for you for an extra cost. Once you have a web-hosted website with WordPress installed, you are ready to transfer.
Exporting Your Squarespace Content
Squarespace has an exporting feature, but it does not cover everything. It is also an interesting fact that there is a specific WordPress export option. The following are items that will not export:
- Only one blog page, the rest will not
- Custom CSS and Style Changes
- Folders and Index Pages
- Video, Audio and Product Blocks
- Album, Event, and Product pages
This shouldn’t pose too much of an issue since you will most likely redesign your website in WordPress, but it is important to be aware of these limitations. Everything else should transfer very smoothly or be salvageable at the very least.
On the left-hand side of your Squarespace website, click on Settings. Click on the Advanced option. Finally, click on the Import/Export option.

You will have two options, to Import or Export, click on the Export option.

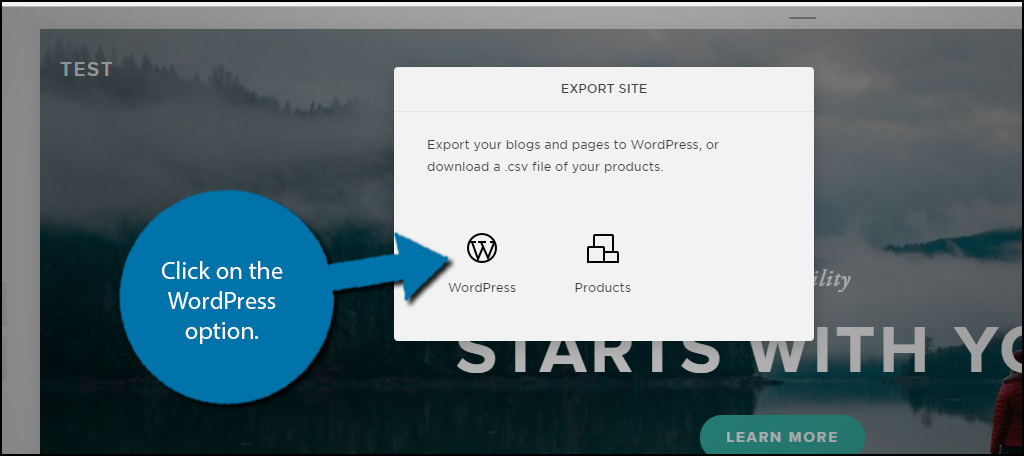
A pop-up window will appear, select the WordPress option. The exporting process will begin. It can take several minutes, depending on the size of the website.
Once the process is over, click on the Download option. This is all of your Squarespace content, make sure it is saved in the appropriate location. You will be using this file in the next step.

Importing Into WordPress
Now that you have all of your exported Squarespace content, it is time to import it into WordPress. WordPress has a very extensive list importing tools for almost every platform.
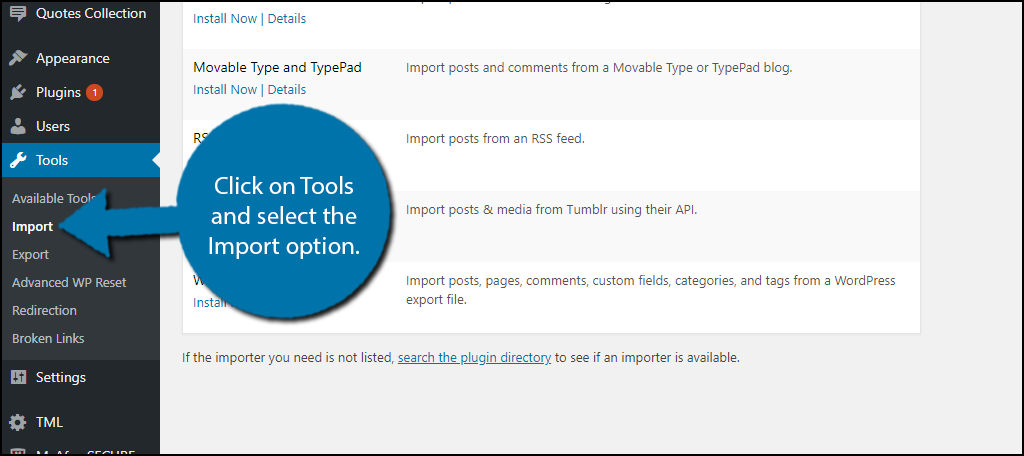
On the left-hand admin panel, click on Tools and select the Import option. Unfortunately, Squarespace is not one of the listed options, but it is there.
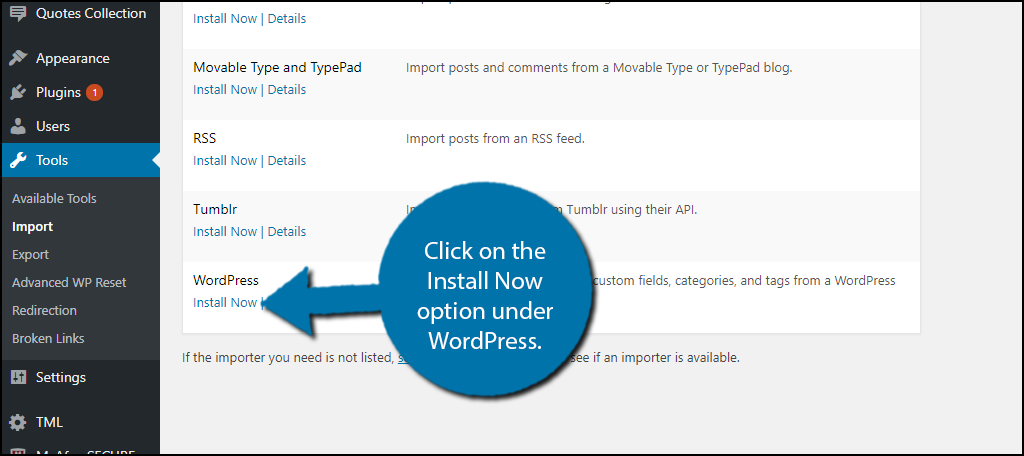
Click on the Install Now option under WordPress. Squarespace exports all of the content in a .xml file format, which is the WordPress format.
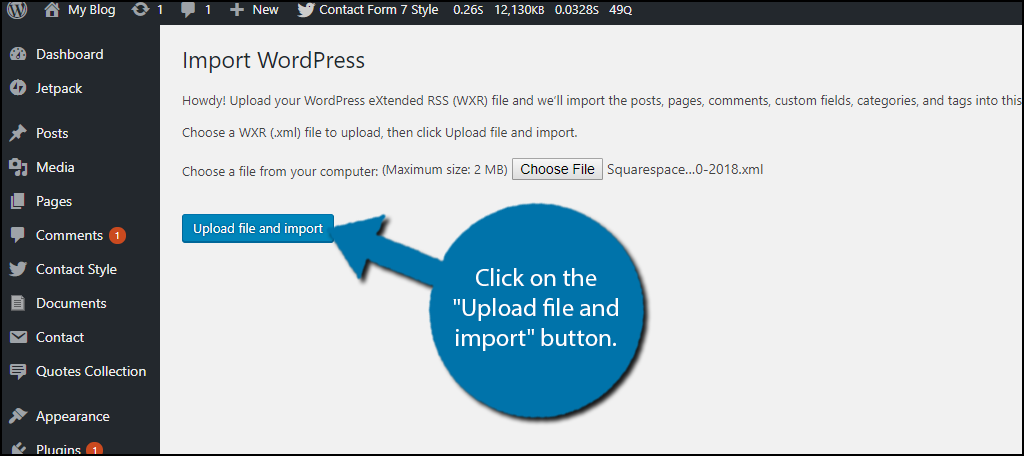
Once it is installed, click on the Run Importer option. Click on the Choose File button and select your exported Squarespace content from the previous step. Click on the “Upload file and import” button.
WordPress will ask you to create a new author for all of this content to be listed under. If you have taken the time to already create authors on your website this message will not appear. Once the process is done, you will see an import successful screen.
Importing Images
One thing that is not imported are your website’s images, but they can be. They are exported, but the WordPress importer cannot handle them. Don’t worry, all you need to do is install the Import External Images plugin. Do not be alarmed that it has not been updated, it still works perfectly.
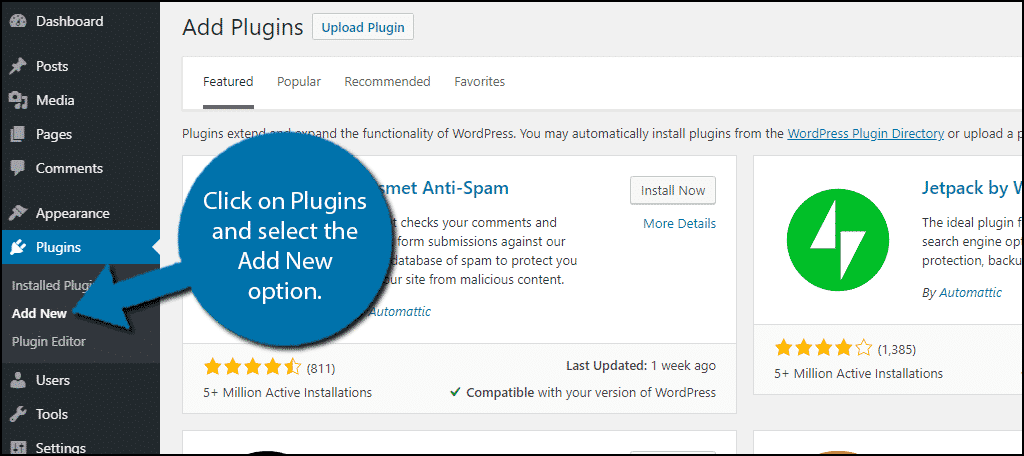
Let’s start with clicking on Plugins and selecting the Add New option on the left-hand admin panel.
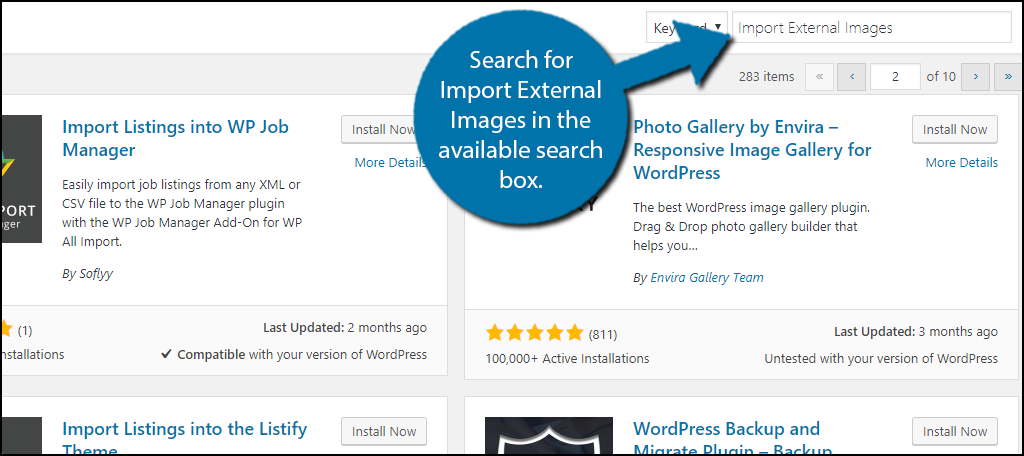
Search for Import External Images in the available search box. This will pull up additional plugins that you may find helpful.
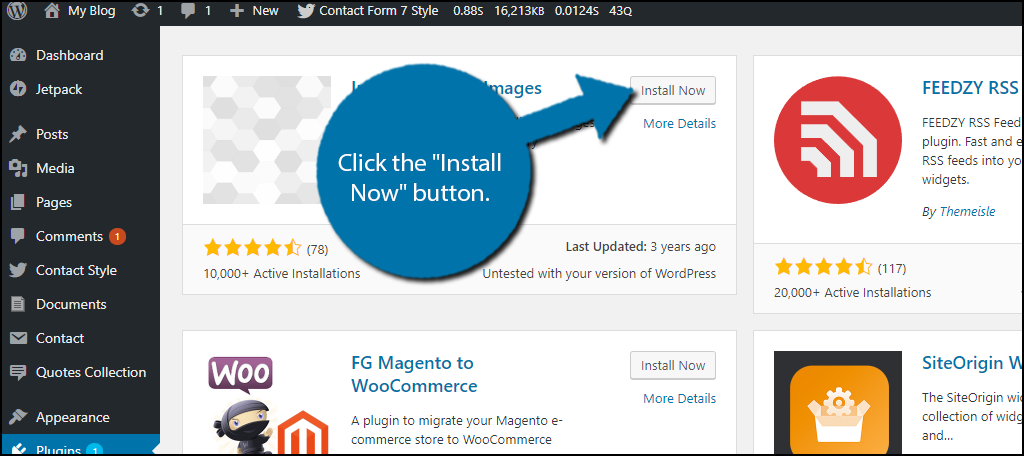
Scroll down until you find the Import External Images plugin and click the “Install Now” button and activate the plugin for use.
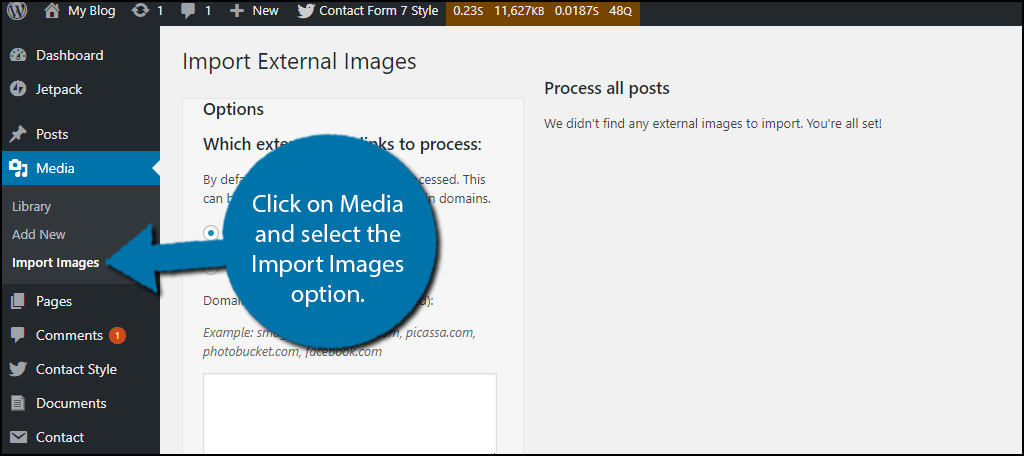
On the left-hand admin panel click on Media and select the Import Images option. This will pull up the main settings page.
If you have images to import, click on the “Import Images Now” button. This should make all of your images work within WordPress.
Updating WordPress Permalinks
The last step is to make sure that all of your loyal visitors will still visit your website. This is accomplished by changing your permalinks to the same style as Squarespace. WordPress is fully customizable and there are a lot of options when it comes to permalinks.
On the left-hand admin panel, click on settings and select the Permalinks option.
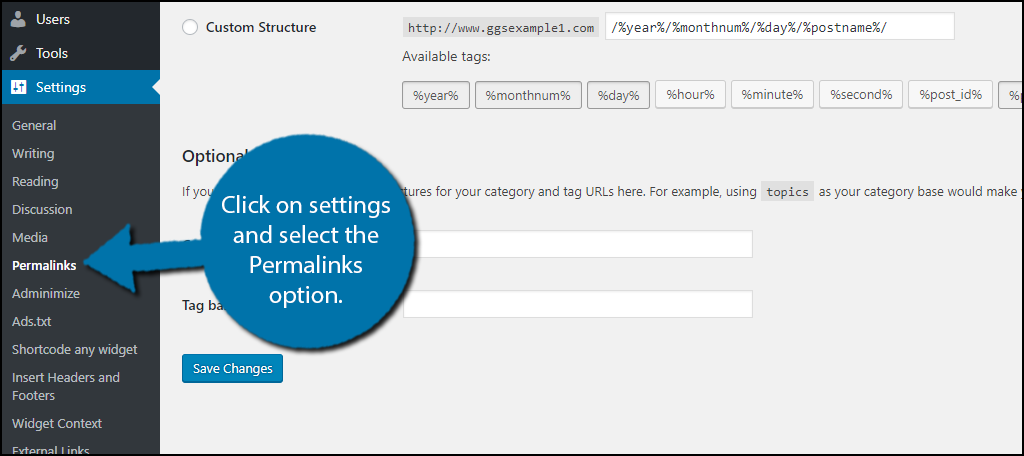
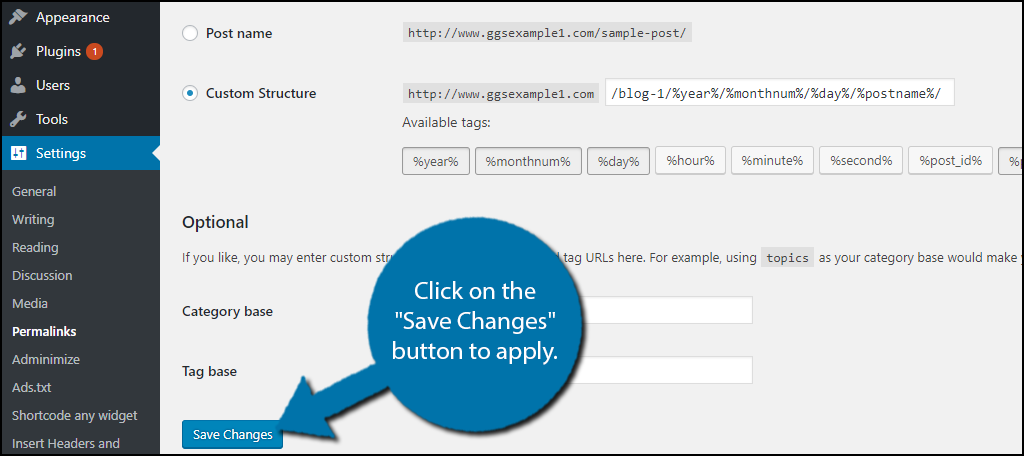
The closest match is the Day and Name option, but WordPress allows you to create your own custom permalink. Select the Custom Structure option and paste the following line:[ht_message mstyle=”info” title=”” show_icon=”” id=”” class=”” style=”” ]/blog-1/%year%/%monthnum%/%day%/%postname%/[/ht_message]
This should make your WordPress website’s URL match your Squarespace URL if you have the same domain name. Click on the “Save Changes” button to apply.
There is still a good chance that many of your pages will give you a 404-page error. This is one of the many common WordPress errors you will encounter and it is quite easy to fix.
Customize Your New WordPress Website
All of your content should now be on your website. All that’s left to do is to customize your new website. The first few steps should be installing a theme, installing plugins, and making sure all of your content is set up. There are lots of customization options to choose from and it can be a bit overwhelming at first.
Create a clear gameplan to get your website up and running as quickly as possible. A few suggestions for your first plugins are a security plugin and a backup plugin. These are both very important tools for web developers and should be a major concern.
How much content have you transferred between websites? Have you run into any unexpected error? Do you like WordPress better than Squarespace?

Does Square Space export the actual files or a copy of the files? And you didn’t specify if the exported files are just one or are several? How would someone know without doing this before where the image file is or how to locate it. Great article love the step by step and the simplicity of it Good job.
The files you are exporting will still be in your Squarespace account. You are simply exporting copies of the files. If you want those files deleted, you probably need to cancel your account there and manually delete them.