When it comes to customization, WordPress is truly an unmatched platform. No matter how big or small, WordPress allows you to change it, and this even includes the title placeholder for your posts and pages.
While there is not exactly a great reason why anyone would want to change this from the default value, the option exists. And for many users, if they have the option, they want to use it.
In this case, you can easily change the placeholder text for your titles by adding some simple code into your theme’s functions.php file. This is easy to accomplish and should only take a few moments.
Today, I will demonstrate how to do this and change the title placeholder text in WordPress.
What Is the Title Placeholder in WordPress?
When you start a new post or page in WordPress, each one begins with a blank title slot at the top of Gutenberg that says “Add Title”.
This informs the user that the title should be placed in this area. However, if for some reason you want this text to say something different, it is completely possible to change it by editing your theme.
And just to be perfectly clear, there is no advantage to doing this. It serves no purpose other than customizing the content creation experience and the only people who can see it are those who can create a new post or page.
How to Change the Title Placeholder Text in WordPress
The method we are going to use today is quite simple. The placeholder text is dependent on your WordPress theme; thus, we can edit that theme with a small line of code that will alter the text.
Since this is theme-specific, it is worth noting that every time you update your theme, the code will have to be redone. To avoid this annoyance, it is highly recommended that you create a child theme that you can edit.
Since we are going to be adding code to a file, it is always recommended to create a backup before proceeding. This will ensure that if something does go wrong you can revert your site to before the changes were made and try again.
Step 1: Access Your functions.php File
There are a lot of ways to edit your theme in WordPress. These include using an FTP client like FileZilla, the theme editor from within WordPress, or the cPanel’s File Manager to name a few. Any of these methods will work.
However, for this tutorial, I’m just going to use File Manager as it is one of the simpler ways to edit a theme in WordPress.
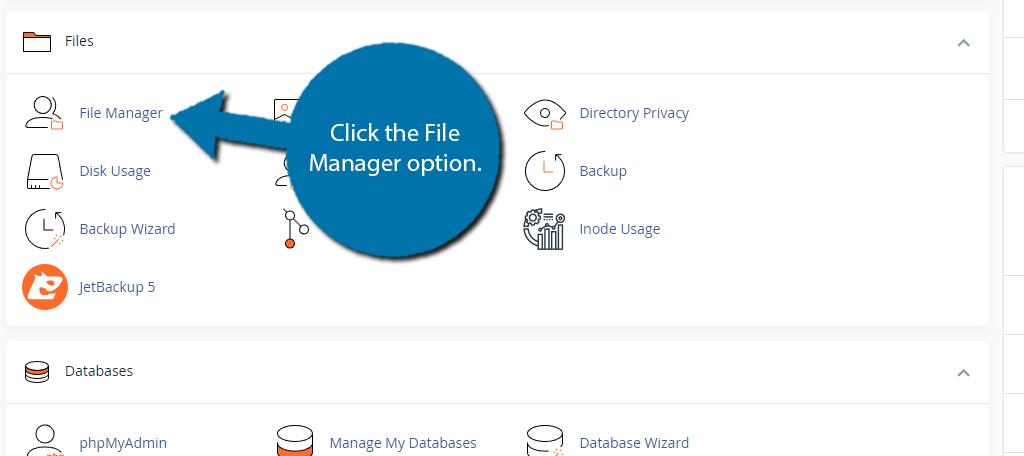
Start by logging into your web hosting account and accessing the cPanel. Once inside, locate the Files section and click the File Manager option to access your root directory on the web server.
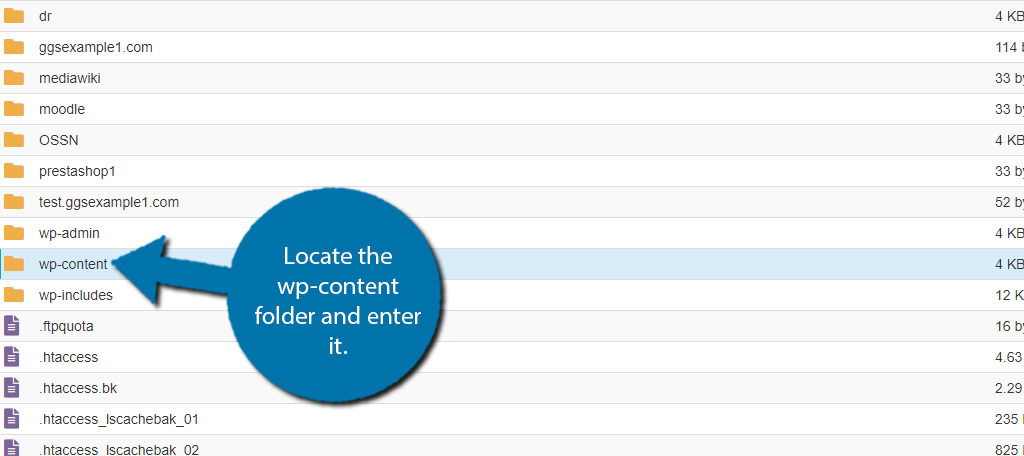
This area contains every file on your web server. You want to access the public_html directory as it should contain your WordPress install. From here, locate the wp-content folder and enter it.
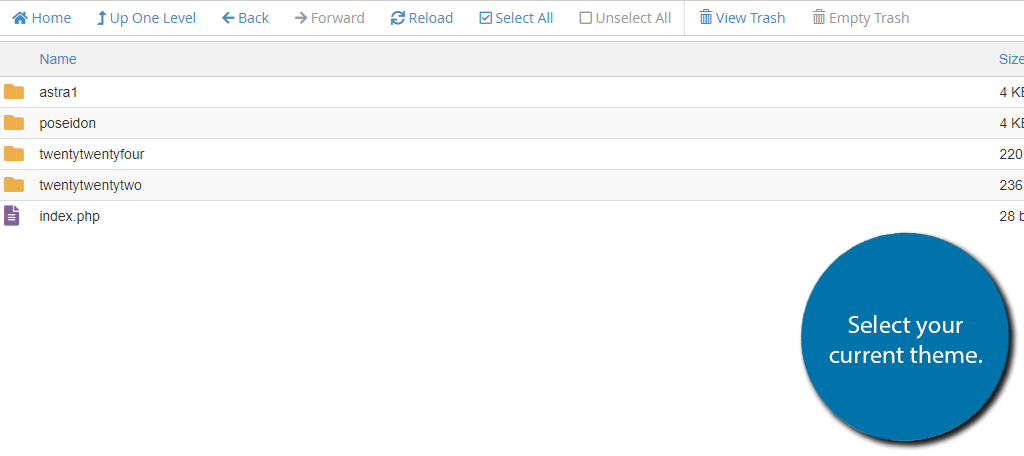
Once inside, click on the themes folder. Inside of here, you will see every currently installed theme on your WordPress site. You need to select the theme you are currently using. If you are using a child theme, this is where you would select it.
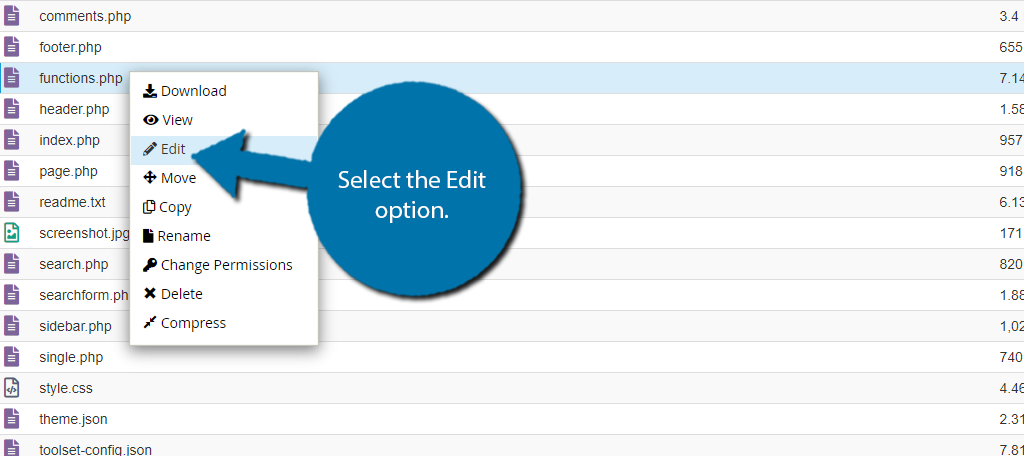
And finally, locate the functions.php file, right-click it, and select the Edit option.
A small pop-up will appear explaining the dangers of editing files for a site. It recommends creating a backup to ensure you can reverse any mistakes that are made. Click on the “Edit” button to enter the file.
Step 2: Edit the Functions.php File
Once inside the file we just need to add some simple lines of code. We need to add two lines; one to change the title placeholder text for posts and another for pages. Themes store both of these differently, so we need the two lines.
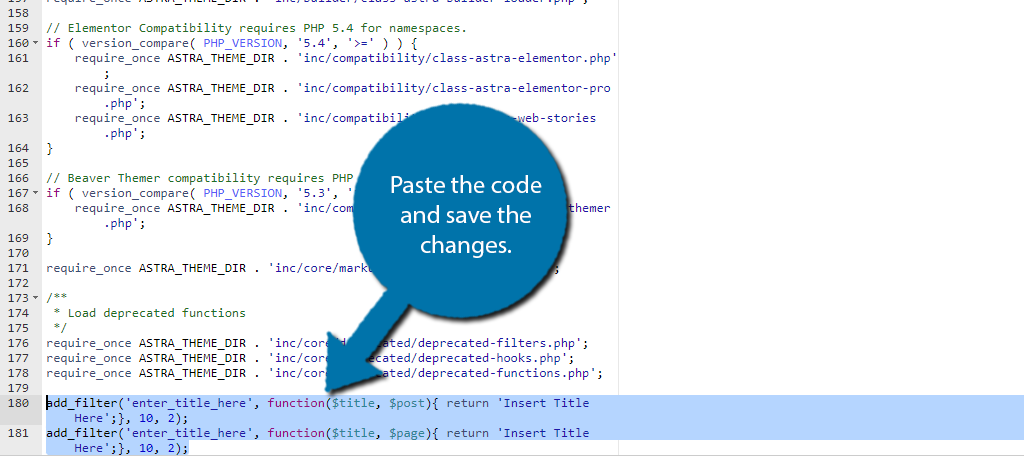
Luckily for you, this just involves copying and pasting them at the bottom of the file. Scroll down to the bottom and paste the following line there:
add_filter('enter_title_here', function($title, $post){ return 'Your New Placeholder';}, 10, 2);
add_filter('enter_title_here', function($title, $page){ return 'Your New Placeholder';}, 10, 2);
You may notice that these lines are extremely similar, and you would be correct. The only difference is the “$post” and “$page” piece that dictates what title placeholder is changed. The only thing you need to do is change the “Your New Placeholder” to the desired text.
So, in my case, I will change these to say, “Insert Title Here”. Once you have added the code and edited the text that is displayed, be sure to save the changes.
Step 3: Check Out the Results in WordPress
With the code added, all you really need to do is reload your website to see the changes. Create a new post or page and take a look at what the blank title text says.
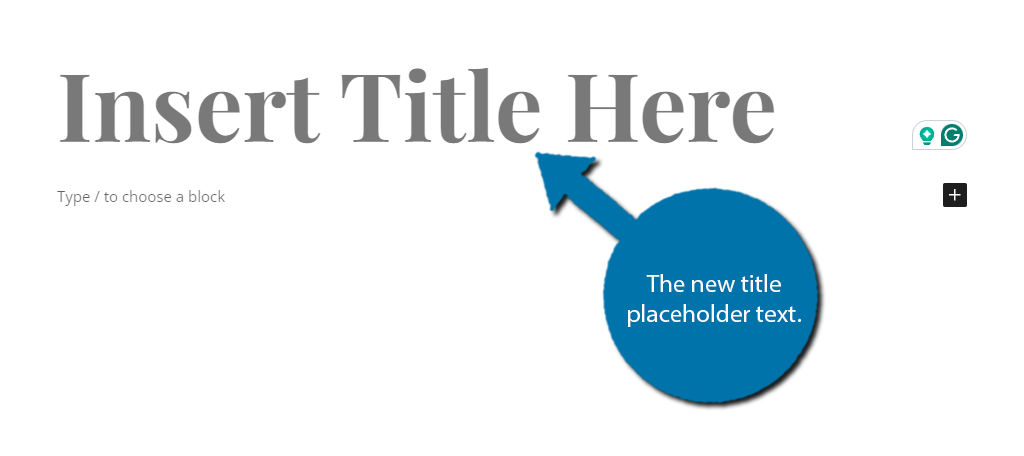
And that’s really all there is to. Again, there’s not much reason to do this. This placeholder text in WordPress is only viewable until you add a title. Then it is gone until you create a new post or page. But as I said, the option does exist.
Customize WordPress How You See Fit
As you can see, no matter how small of a change you want to make, WordPress is a platform that can make it happen. In many cases, you can use a plugin to make changes on your site, but for more obscure things like this, coding is the only option.
The good news is that due to WordPress’s popularity, there is no shortage of guides and code snippets for the platform. As such, you will never struggle to find a way to do something in WordPress because nothing is off-limits.
I hope you found this tutorial helpful in learning how to change the title placeholder text in WordPress.
Why did you want to change the title placeholder text in WordPress? What did you change it to?


I’m learning to use WP and this has been a very interesting article. Just one thing: I think there may be a mistake in the pic that shows how the placeholder will look when adding a new page (as it looks like a new post is being added instead).
Thanks