If you have an online store, then naturally you are looking for different ways to retain customers and keep them coming back to buy more products. While there are a lot of great WooCommerce plugins that can help drive sales, having a wishlist option on your site is a great way to keep customers coming back. One in particular called TI WooCommerce Wishlist makes adding wishlist functionality easy.
Adding a wishlist plugin to your WooCommerce store gives people the ability to add products to their own personal wishlist so that they can come back at a later date and purchase them. They will also have the ability to share the wishlist with their friends and family on social media.
What is a Wishlist?
A wishlist is an eCommerce feature that allows your customers to create a personalized collection of items they want to buy. They can then access this list from their user account and purchase items at a later date. They can also use the wishlist to show others what they want.
A wishlist is perfect for sharing if you need to give people gift ideas, or to use for weddings or baby showers. When customers add and build a wishlist on your site, they are letting you know that they are interested in the product, but plan on buying it at a later date.
A wishlist can be very important for an eCommerce store for various reasons. Not only does it provide your customer base with a better shopping experience, but it can also be used to provide you a lot of information about shopping habits and what customers do and don’t like.
Finally, mobile shoppers will be very excited about the new wishlist functionality on your website, as it can save a lot of browsing time that they have to do from a small screen.
Today, I am going to show you how to easily add a wishlist plugin to your site. Let’s take a look at the plugin we are going to use today and see all that it has to offer.
TI WooCommerce Wishlist

TI WooCommerce Wishlist is a very simple and easy-to-use plugin that is also very powerful. It allows you to give users the ability to build and create wishlists that they can reference later and even share with their friends and family.
The plugin also acts as a fantastic way to convert site visitors to loyal customers in the long run. Why? Adding products to a list that they can come back to reference keeps them coming back to your site and even shopping your items again.
The plugin has quite a bit of functionality. That being said, it is still lightweight and will not slow your site down. It comes packed with a ton of features. Some of the main ones include:
- Ability to select a wishlist page and name
- Remove product from wishlist automatically after it has been added to cart
- Position the “add to wishlist” button where you want it
- Add the ”add to wishlist” button on product pages
- Pre-defined icons for the “add to wishlist” button
- Upload custom button icons
- Redirect the wishlist page after items are added
- Wishlist table columns are customizable
- Share wishlist to all major social media channels
- Fully customizable
- Add custom CSS
- Translation ready
- WPML Support
- Cache friendly
As you can see, TI WooCommerce Wishlist doesn’t leave many stones unturned. This is a great solution if you need to add a wishlist function on your site quickly and easily.
Let’s get the plugin installed and set up together.
Note: The rest of this tutorial assumes that you already have WooCommerce installed and set up on your WordPress website.
Add Wishlist Functionality to Your WooCommerce Store
Step 1: Install and Activate the Plugin
In order to start using the TI WooCommerce Wishlist plugin, you first have to install and activate it on your site. You can do this by jumping over to the Plugins page in the WordPress admin dashboard.
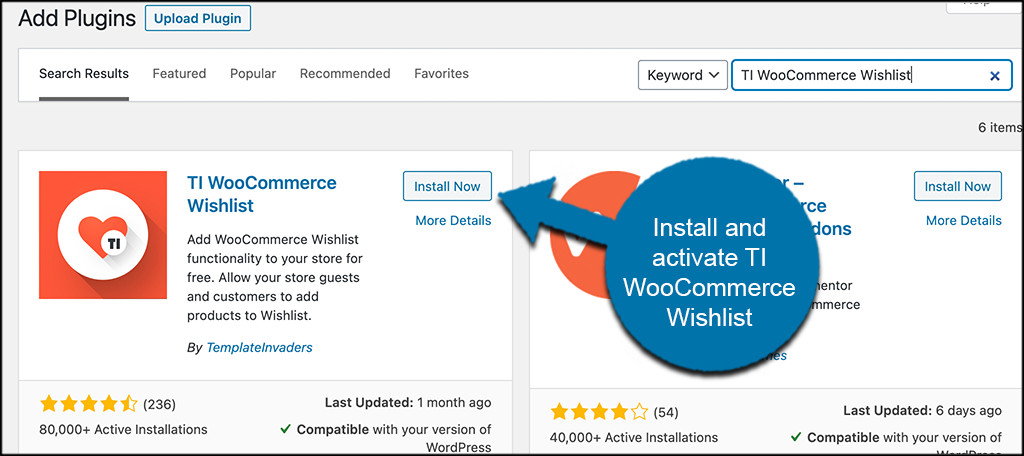
Simply use the available search field to search the plugin by name. Once you see it pop up, install and activate it right from there.
Step 2: Start the Set-Up Process
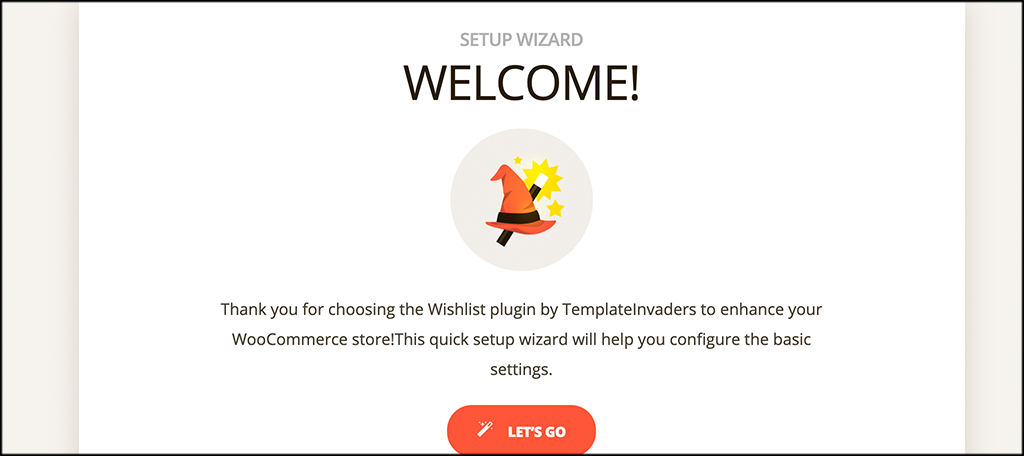
When the TI WooCommerce Wishlist plugin is activated, you will automatically be taken to the setup wizard. You can see that the first page has a welcome message. Go ahead and click on the “Let’s Go” button to get started.
Step 3: Choose a Wishlist Page
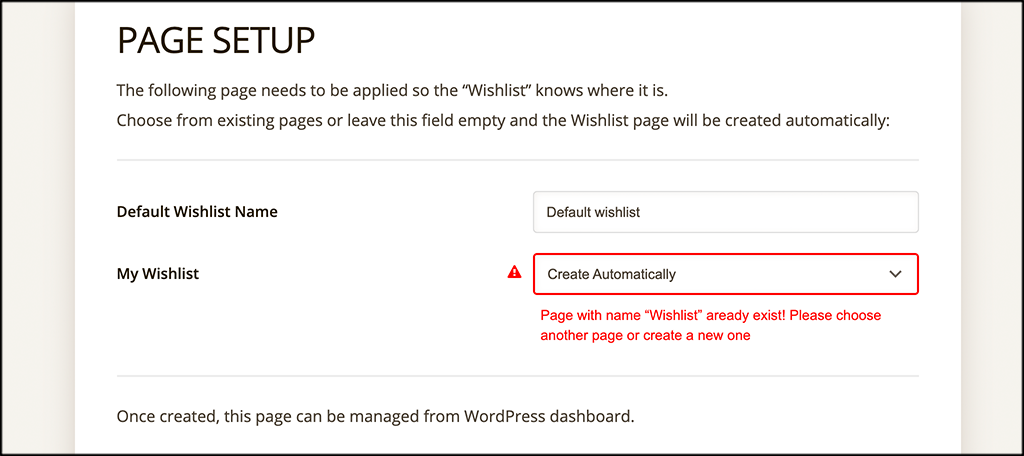
From the Page Setup area, you can choose a name for your wishlist page, as well as choose an existing page or create a new one.
Step 4: Configure Button Options
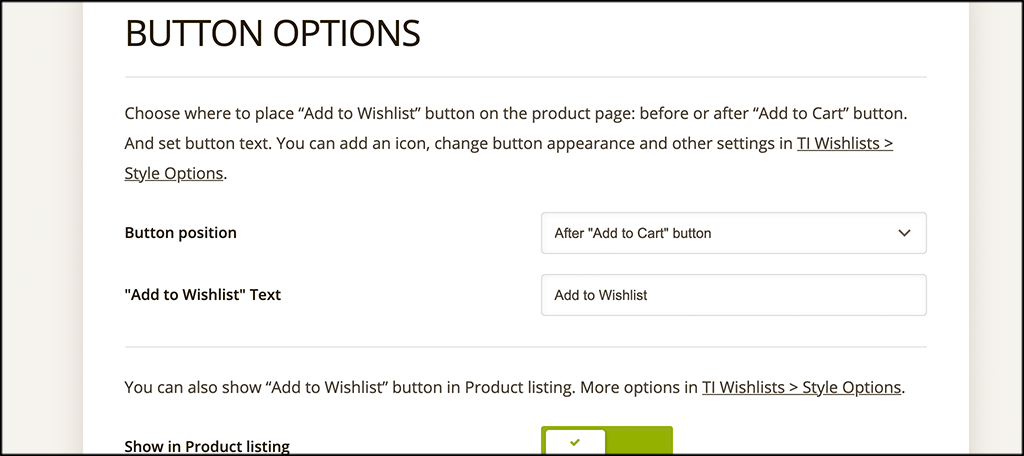
The next part of the setup wizard brings you to the button configuration area. Configure your button position and other button related items.
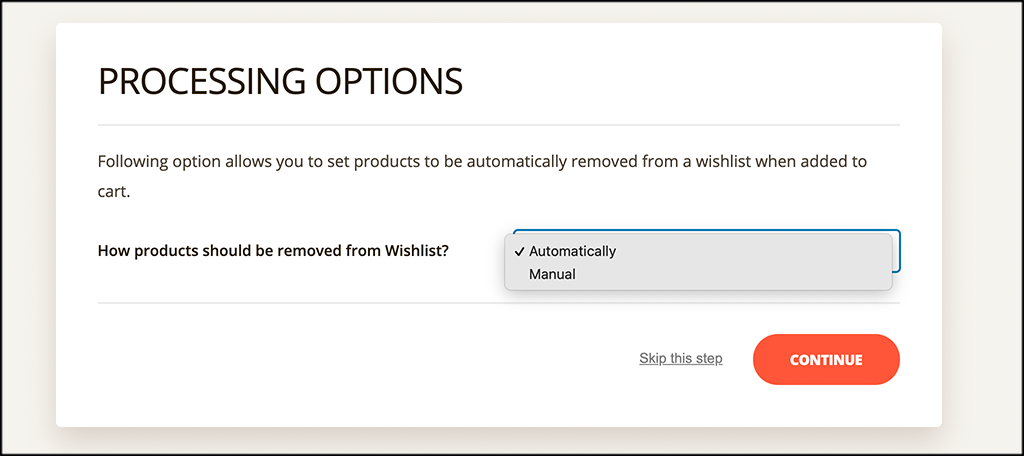
Step 5: Select Processing Options
From here, you can select whether or not you want products to be removed from a wishlist manually or automatically once they have been added to a cart.
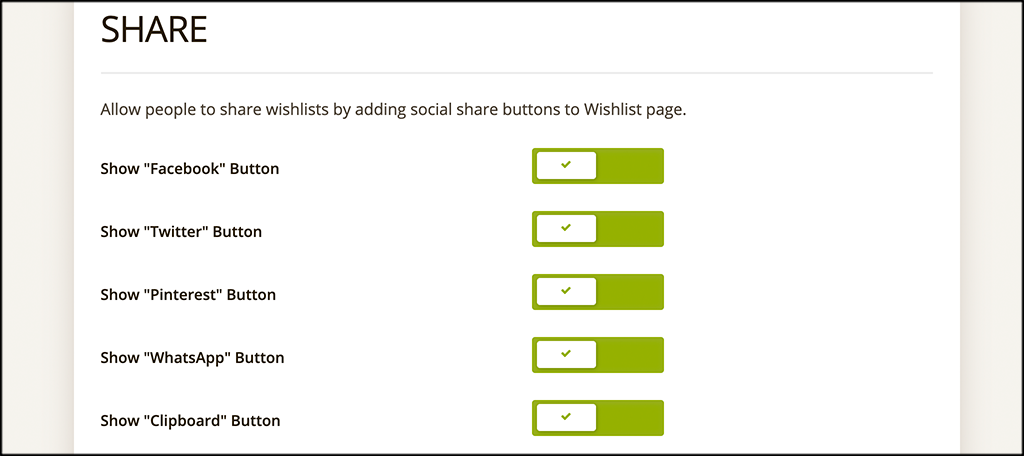
Step 6: Select Social Media Sharing Buttons to Show
The TI WooCommerce Wishlist plugin gives you the ability to allows wishlist sharing across a number of popular social media platforms. Pick the ones you want to show here.
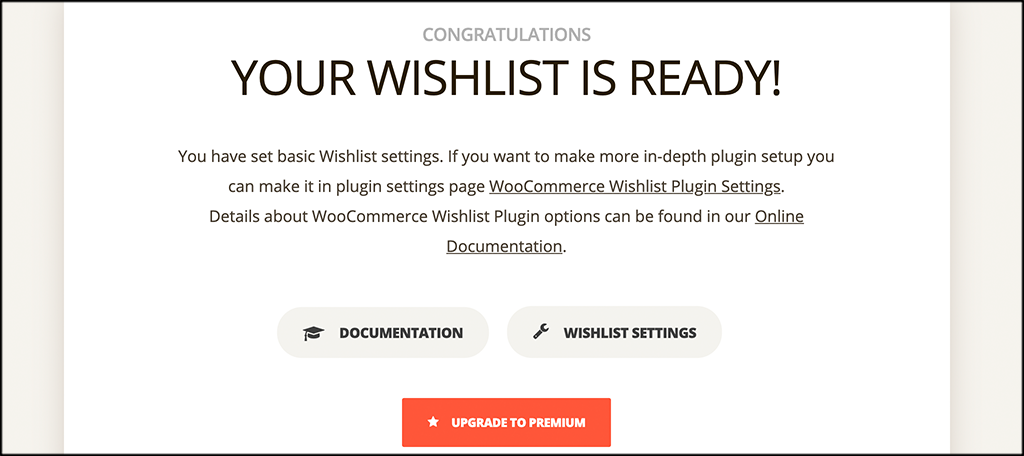
Step 7: Finish the Setup Wizard
At this point, you are all done with the setup wizard. From here, you can go to wishlist settings, or head back to the dashboard. Let’s go back to the dashboard.
Step 8: Configure All General Settings
The wishlist plugin is fully functional and ready to roll at this point. However, there are a lot of other general settings you can view and configure how you want. Click on the “General Settings” tab located under the main TI Wishlist tab on the left menu area
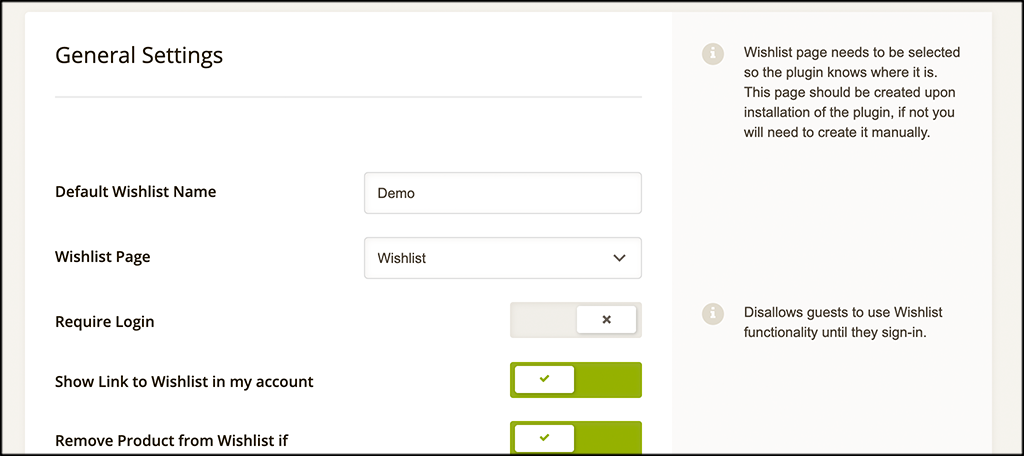
Take your time and set all the other general settings how you see fit for your site.
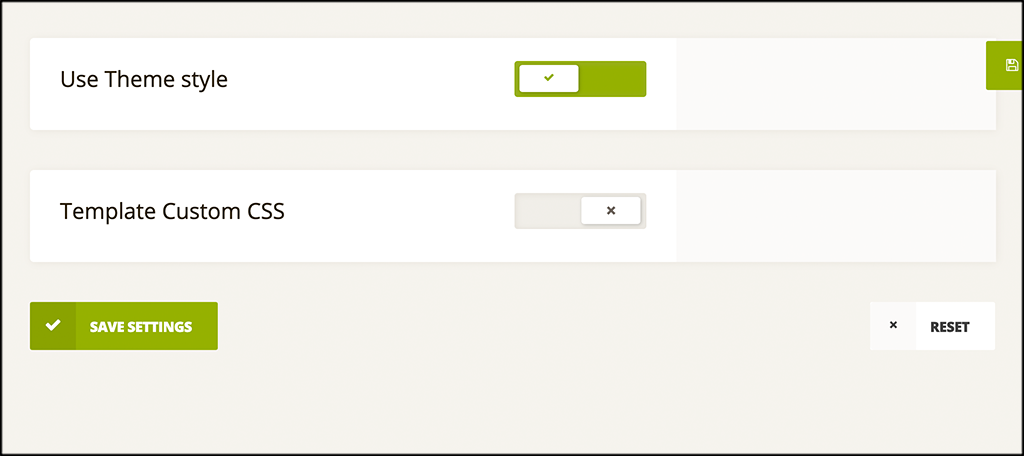
Step 9: Configure Style Options
Last but not least, select the sole options you want to use. Are you going to use the theme style, or style your own using custom CSS?
Step 10: View the “Add to Wishlist” Button
Go ahead and go to any product and checkout the “Add to Wishlist” button that is now there. Remember, yours may look different or be in a different place based on the configurations you chose.
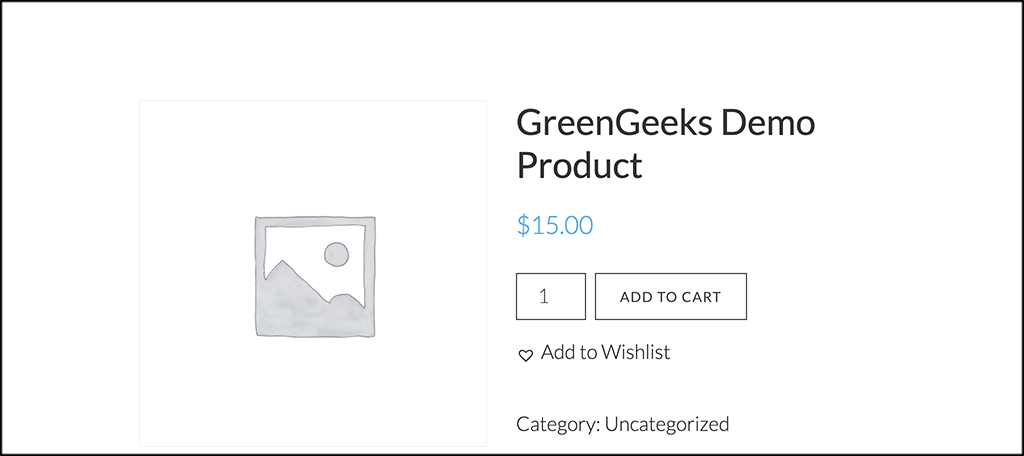
In my case, it’s the link under the ability to add items to the cart.
That’s it! You have successfully installed, and set up the TI WooCommerce Wishlist plugin. Your customers can now add items to their very own personal wishlist and share them across social media.
Feel free to go back and make any adjustments you may need to.
Final Thoughts
Adding a wishlist button for your customers is a fantastic way to give them a better shopping experience. It is also a great way to retain customers and keep them coming back to your site time and time again.
I hope this tutorial was able to show you how easy it is to add wishlist functionality to your WooCommerce website. If you know the process, what to use, and where to start, then creating a wishlist button for your customers to use is not difficult at all. This is just one of many ways you can build an audience and gain sales.
Have you ever used this or any other wishlist plugin? What other techniques do you use to personalize the shopping experience for your customers?
