Do you run a WordPress website and want to offer a directory for local businesses? If so, then you want to have a solid store locator so people can easily find those locations. Let’s talk about a good store locator plugin and how to set it up in WordPress.
What is a Store Locator Plugin?
A store locator plugin will allow you to embed Google Maps on your website, and within those maps add store locations for any type of store directory that you want to build.
Adding a store locator in WordPress will also help you with search optimization. Adding certain custom entry fields and other data will make your store locations bounce up in local SEO searches.
For this tutorial, I found a really great store locator plugin to use. Let’s take a look at the plugin and how to set it up so you can start adding store locations.
WP Store Locator

The WP Store Locator plugin is arguably one of the best WordPress store locator plugins available out there. It is a very powerful and lightweight location management system.
The plugin is easy to use and allows you to customize the look and feel of your map. It also lets you provide easy to read and understand custom labels for entry fields.
Your website users can find and filter results by radius, and then easily get driving directions right to the store they choose. The WP Store Locator plugin is packed full of features. Some of them include:
- Ability to manage an unlimited amount of stores.
- Provide store details like phone, address, email, description, and hours.
- Supports custom map styles
- Tons of marker icons to choose from.
- Shortcodes available.
- Compatible with multilingual plugins.
- Uses Geolocation API.
- GDPR Compliance
The store locator plugin has everything you need to rank higher in local SEO and build an online location management system. Let’s take a look at how to install and activate the plugin.
Install and Activate WP Store Locator
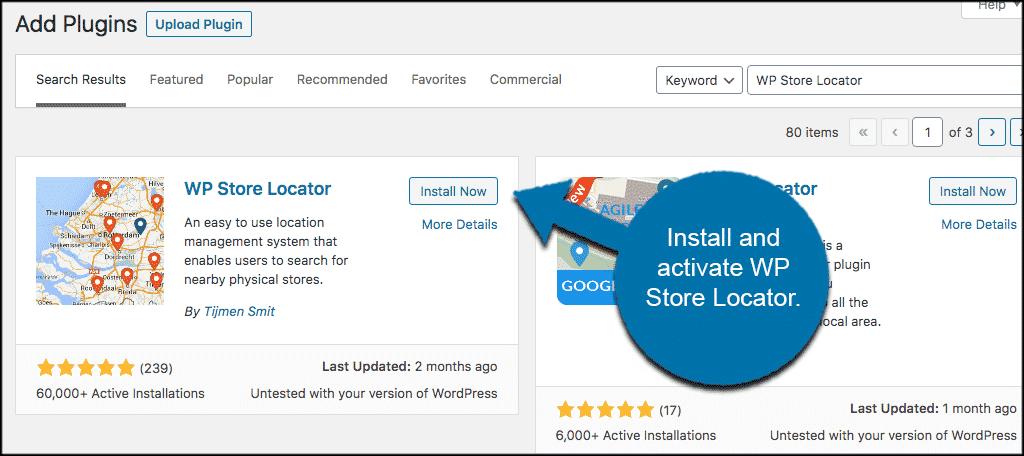
In order to start building your store database and make strides in local SEO, you need to install and activate the WP Store Locator plugin. You can do this from the plugins page that is located in your WordPress admin dashboard.
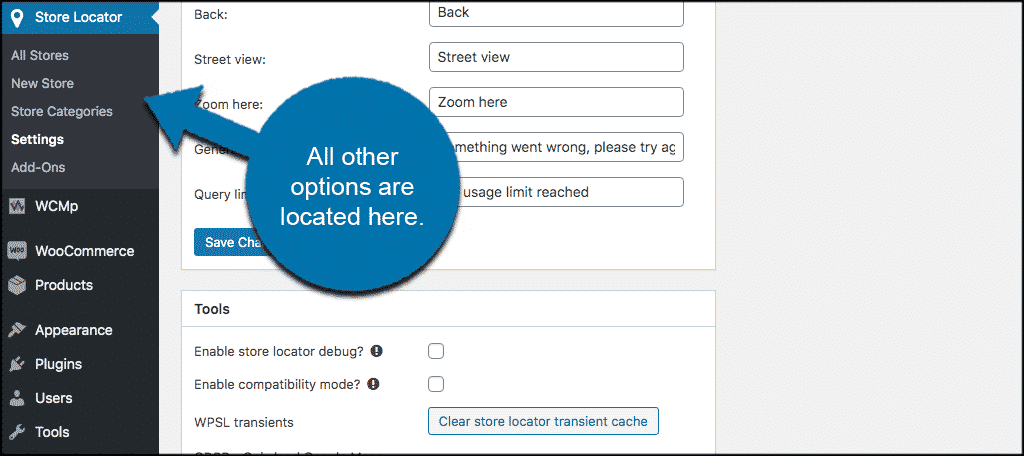
Once the plugin is installed and activated, click on Store Locator > Settings. You will see this in the left menu area of the WordPress admin dashboard.
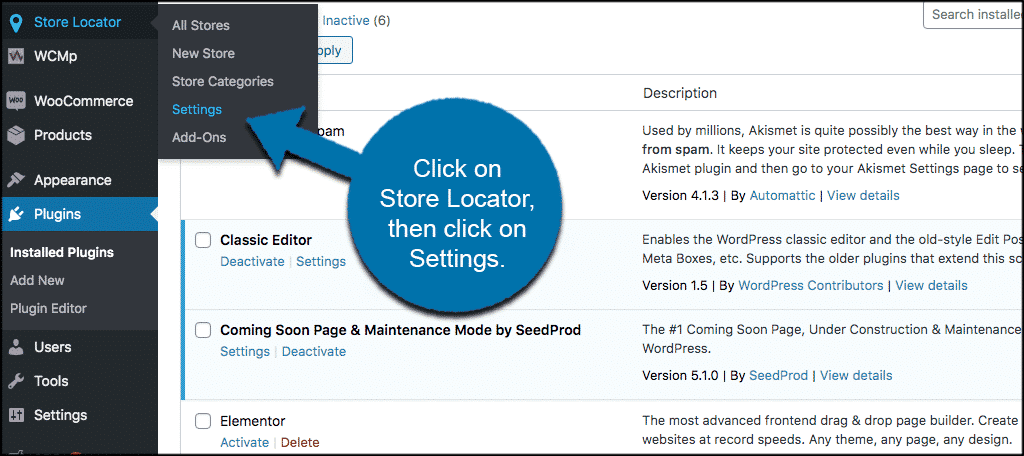
This will take you to the main configuration and settings page for the plugin. Once this has been filled out properly, you will be ready to create stores and manage them.
Let’s take a look at how to set up the store locator in WordPress.
Setup Store Locator in WordPress
The first thing you need to do is to create API keys for Google Maps. This is something that Google now makes you do to use their map system. It does add an extra step, but it isn’t difficult to do.
Once you have created the relevant API keys and have added your financial information into Google, you can move on with the store locator setup. The setting’s page is one long form filled with different areas to configure.
Let’s go over each area.
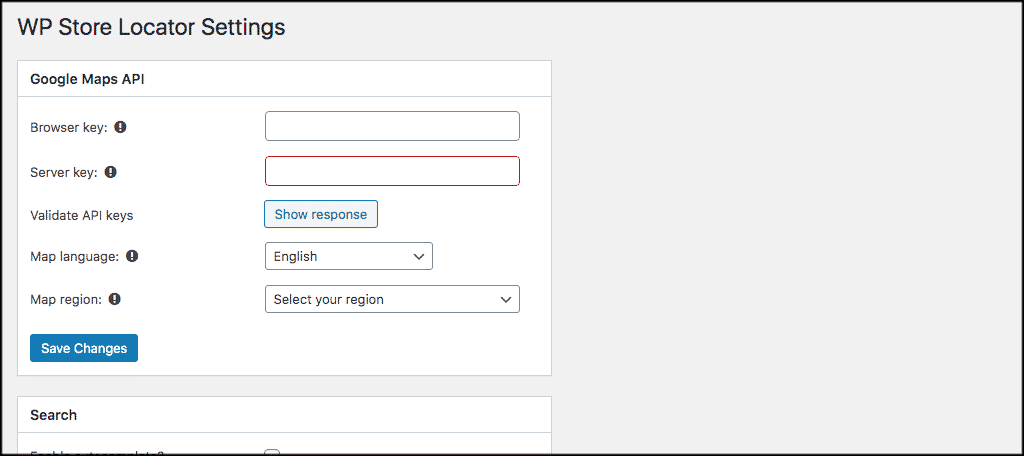
Google Maps API
After you get your API key information, this is where you will enter all of that data.
Search
These are the search settings. Enter these according to how you want your website users to be able to search.

Map
This is where you will enter map styles, functionality, the number of map locations to display, zoom effects and more. Control many of the map layout settings here.
Note: You can also view a map preview based on your setup.

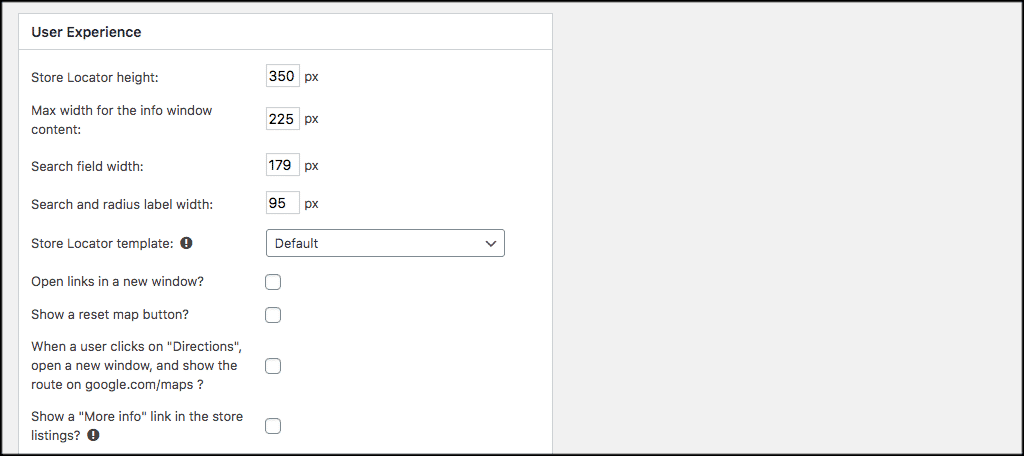
User Experience
Every setting here is how your users will experience the entire store locator in WordPress on the front end of the website. Play with these settings and then see how best you want to use them.
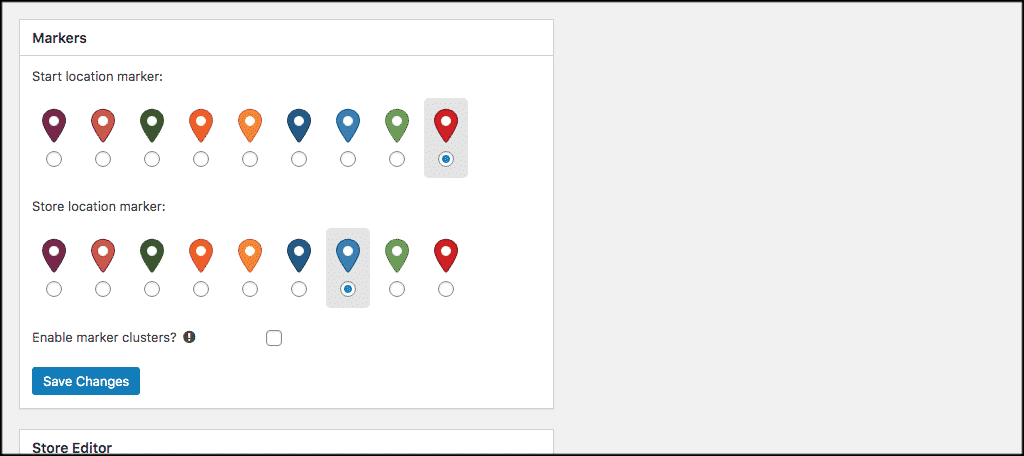
Markers
Select your store locator markers in this section.
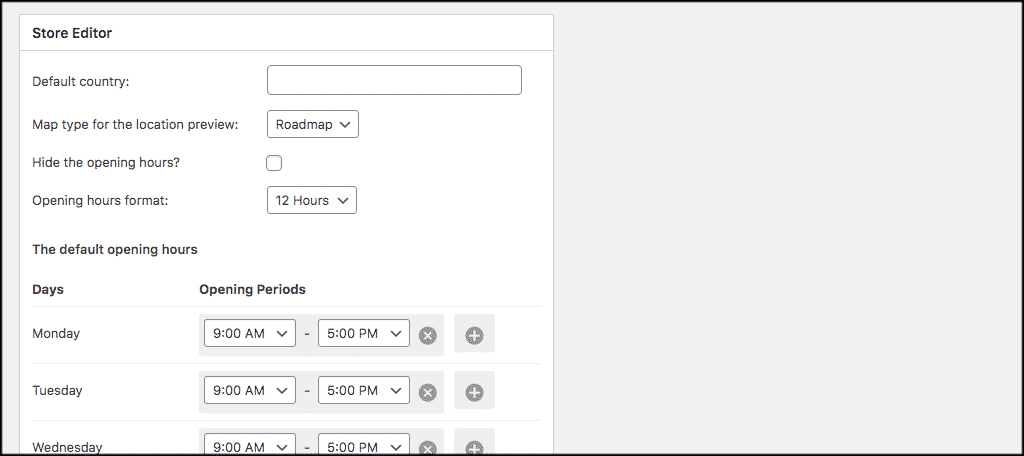
Store Editor
Store location fields, days, time, and more can be set here.
Note: The default country and opening hours are only used when a new store is created. So changing the default values will have no effect on existing store locations.
Permalink
Enable store permalinks to match your website here.
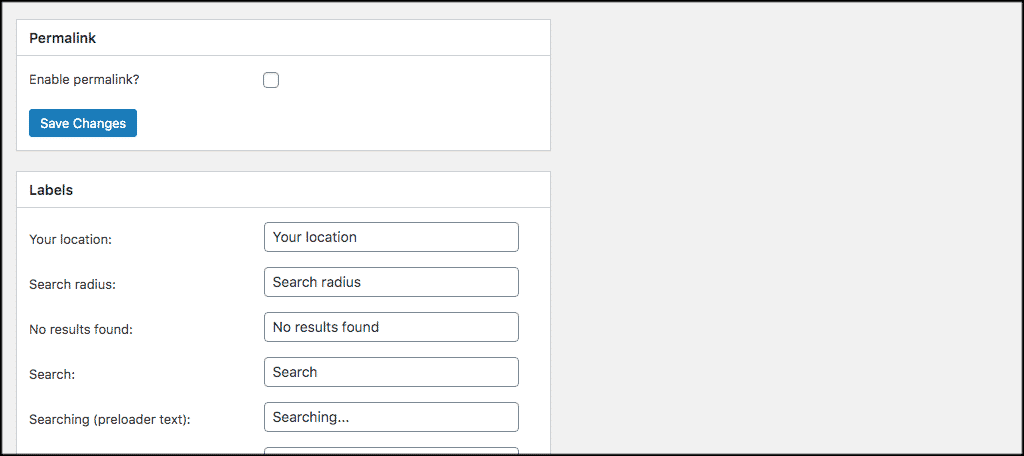
Labels
Use the text you want on each label. You can configure these however you would like.

Tools
These are some other useful tool settings for the store locator map plugin.

When you are finished with all the plugin configuration, click on the “Save” button to apply changes.
Other Options
Once the configuration is complete you will see that you can now build store categories as well as start adding new stores. All of these options are located under the “Store Locator” tab.
That’s it! Start adding all the stores you want and build your local SEO up for the website.
Final Thoughts
Adding a store locator in WordPress is not difficult at all. Simply follow the steps above and you will have a fully customized store location management system in place in no time.
Have you ever tried building a store location management system without a plugin? Have you found that this particular store locator plugin helps your website in local SEO searches?
