Social media has changed not only the way the internet works but also how the world works. And while some may think there is no room for new platforms, TikTok is a prime example that this is not the case. BuddyPress can help you start one today.
While it won’t be easy to build a social media network, if you have a particular niche in mind, you can still find a lot of success. Just make sure you go in with the right expectations. It can take a long time before your site gains a following.
And while WordPress is best known as a blogging platform, with a plugin like BuddyPress, it can also be a social media giant.
This tutorial is going to demonstrate how you can build a social network in WordPress with the BuddyPress plugin.
What is BuddyPress?
BuddyPress is a plugin for WordPress that focuses on building a community or social network for users. With it installed, users can register and create their own profile page where they can add friends, send messages to each other, and much more.
If you can do it on a social media network, a similar option probably exists on BuddyPress.
One of the most important aspects of BuddyPress is the long list of integration options at your disposal. This gives you full creative control over your website and doesn’t limit you to a specific set of tools.
With that said, while BuddyPress does the basics great, if you want to add more unique or original types of content to your site, you may find it to be a bit difficult. It will require you to code these features, thus it can leave beginners behind.
How to Install BuddyPress
Installing BuddyPress works like any other plugin in WordPress, thus it only takes about a minute to do. BuddyPress will work with any WordPress theme, but we have listed quite a few that you might want to use below.
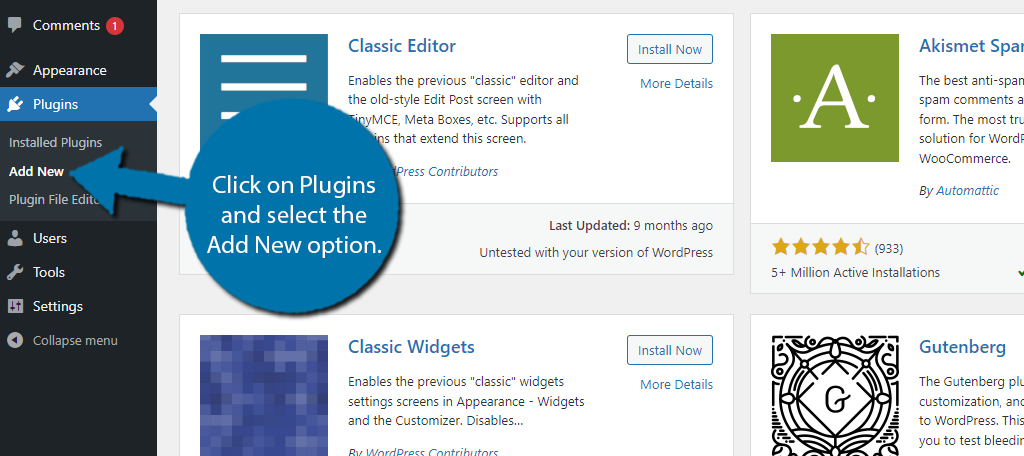
Let’s start by clicking on Plugins and selecting the Add New option on the left-hand admin panel.
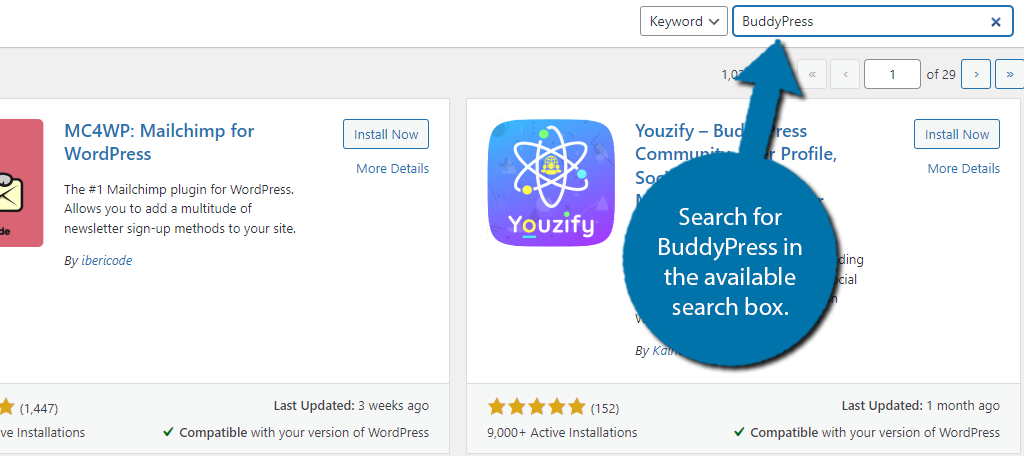
Search for BuddyPress in the available search box. This will pull up additional plugins that you may find helpful.
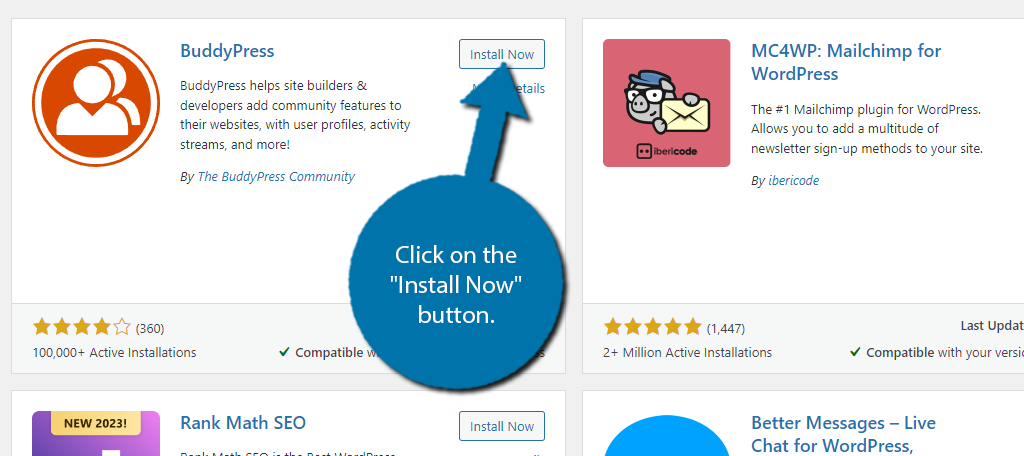
Find the BuddyPress plugin and click on the “Install Now” button and activate the plugin for use.
How to Configure Your Social Network Settings
BuddyPress has a lot of features to go through, which can make the initial setup difficult for beginners. However, nothing is actually hard to do, it is more along the lines that there are so many options, it can feel overwhelming.
Thus, I am going to demonstrate how to configure BuddyPress to create the social network of your dreams.
Enable/Disable BuddyPress Components
Components in BuddyPress are similar to modules for Jetpack. They add specific features to the plugin that you can utilize. In the case of BuddyPress, these are the core features of most social media platforms.
In total, there are eight options you can enable or disable including:
- Extended Profiles
- Account Settings
- Friend Connections
- Private Messaging
- Activity Streams
- Notifications
- User Groups
- Site Tracking
By default, some of these features are on and some are off. You can view these by going to the settings section for BuddyPress. To access this, click on Settings and select the BuddyPress option.
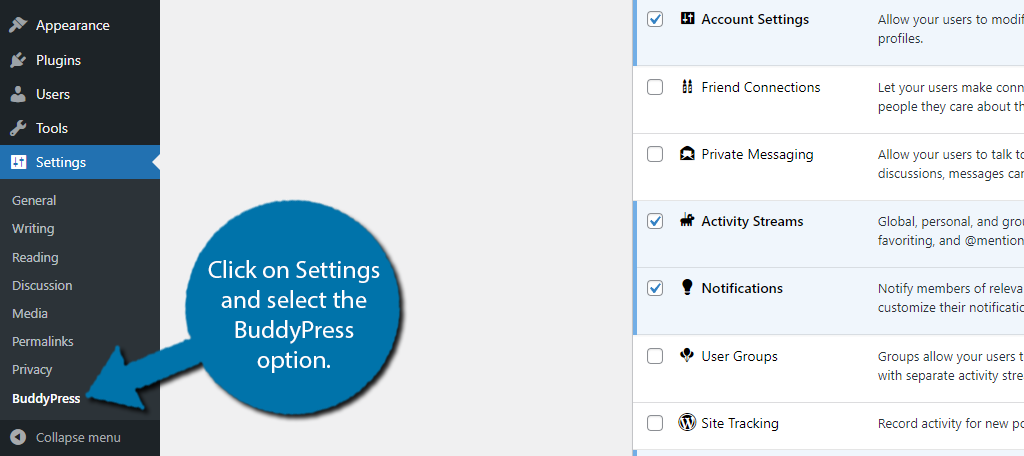
Each of the options is displayed on this page with a short description of what it does. Simply use the checkbox next to it to enable or disable the feature you wish to include. You can also check the box at the top to select all of the options.
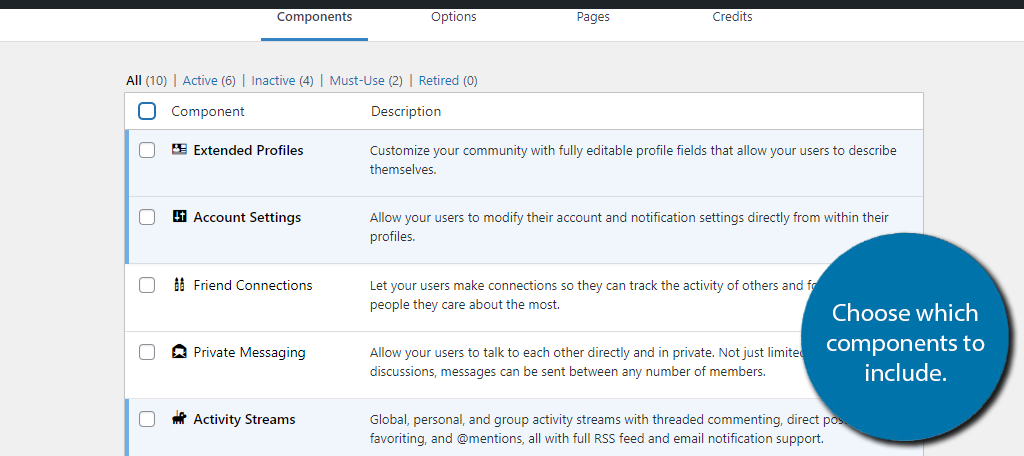
Be sure to click on the “Save Settings” button to save the changes you make.
Configure the Options & Pages
You should now take a few minutes to configure the BuddyPress. To begin this, click on the Options tab.
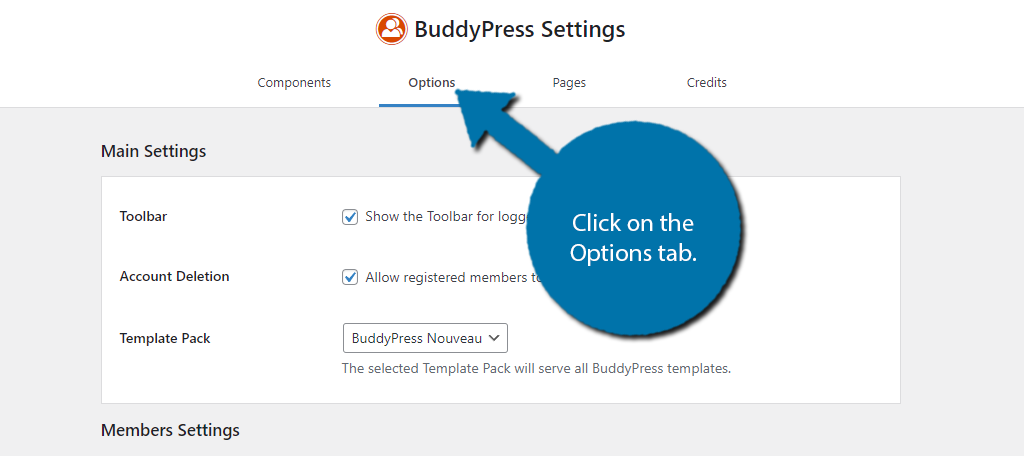
The options are pretty straightforward to go through and just consist of checkboxes regarding the options for your site. Simply go through these options and enable or disable the features you want to use for your users.
Note: The options available are determined by what components you enable.
Once you are done with that, save the changes and click on the Pages tab.
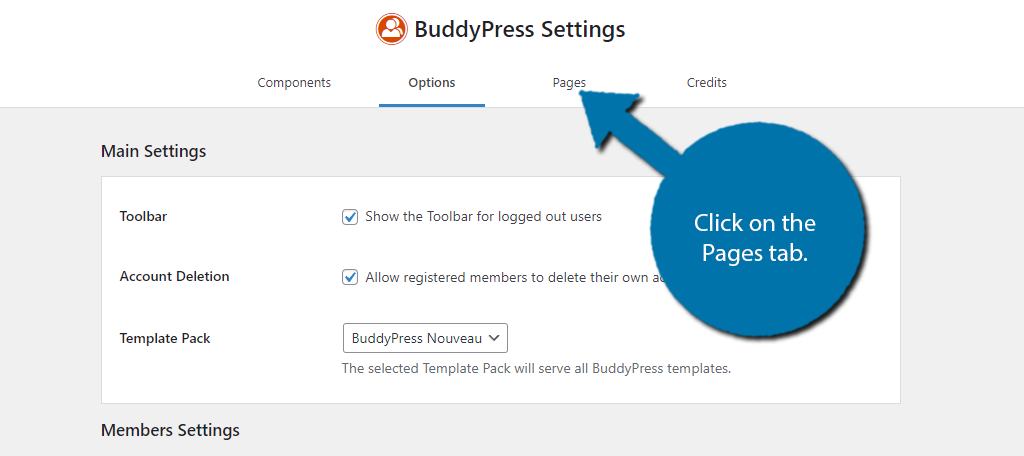
Here, you can assign BuddyPress directories to pages. By default, BuddyPress should create these pages for you, but you can create your own and assign them as you see fit. Simply use the drop-down menu to select the page.
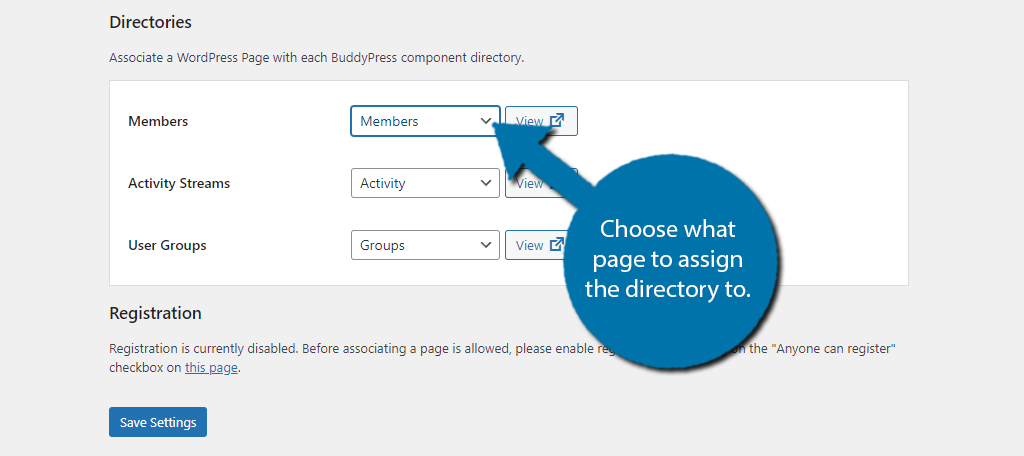
Again, make sure to save any changes you make.
Create Groups
Perhaps one of the best parts of social networks is being able to communicate with other like-minded individuals, and one of the best ways to help users connect is to build groups around a certain topic.
If you enabled the Groups component, you could easily create some groups for users to join.
To do this, click on the Groups option.
Note: There is a Group Types option that is basically like creating categories for your groups. Feel free to create some if you find it useful. In most cases, the group itself is more than enough.

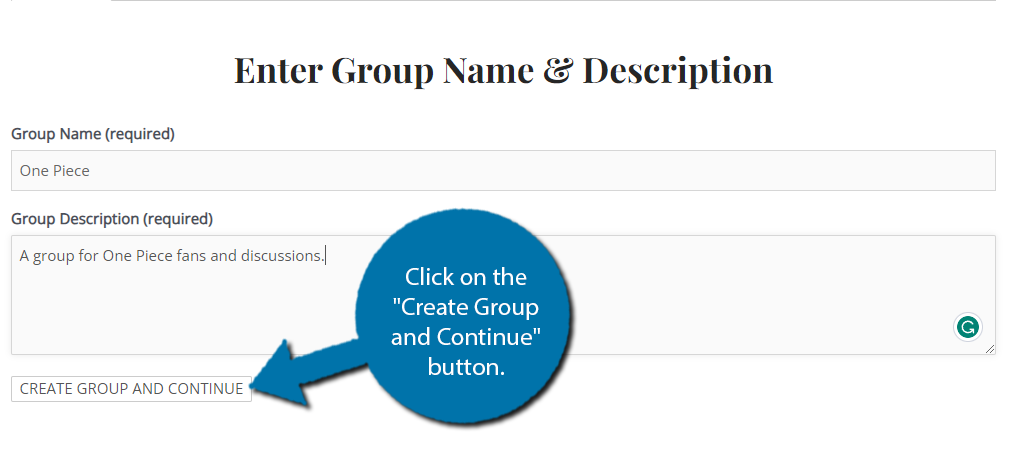
Go ahead and click on the “Add New” button at the top. You will then be asked to enter the Group Name and description of that group. For example, I’ll make one titled for the One Piece and add a short description of the group.
Click on the “Create Group and Continue” button when you are done.
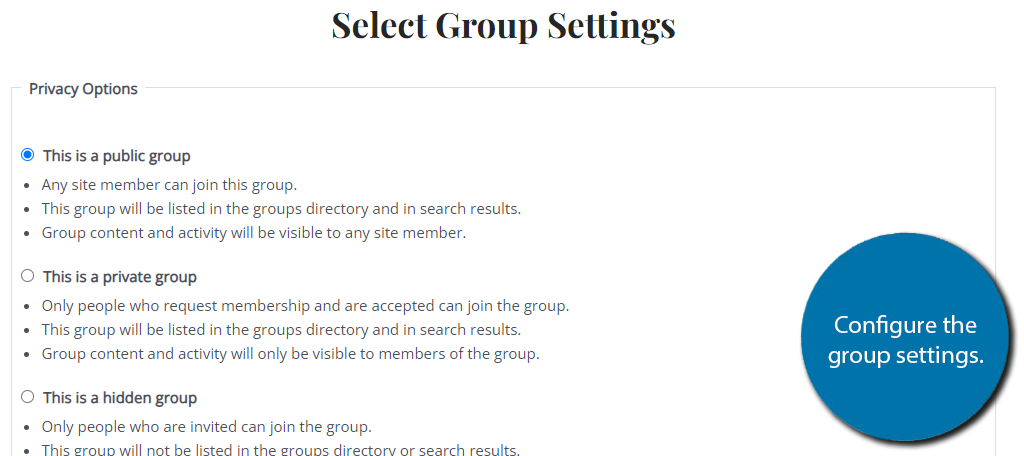
Next, you’ll need to configure some simple settings. This includes selecting whether the group is public, private, or hidden, and which group members can send invites to other members. Click on the “Next Step” when you are done.
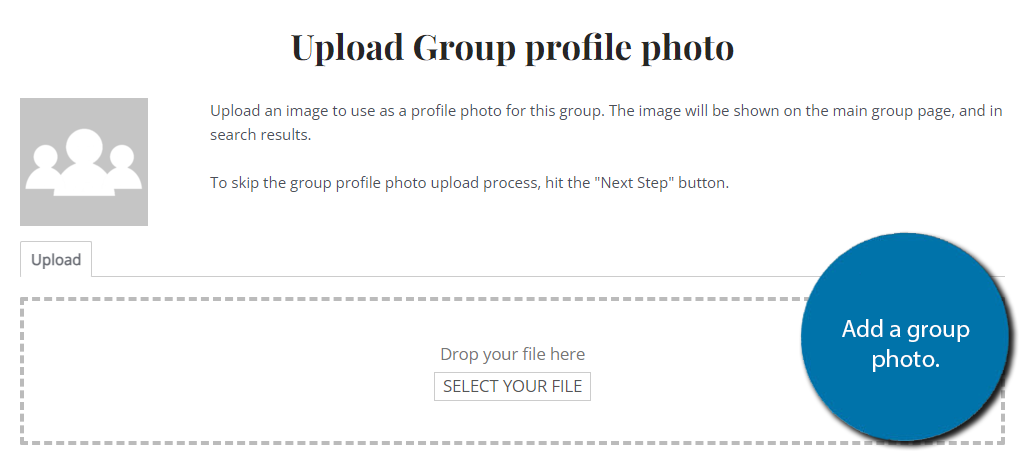
On the next screen, you can upload a profile image representing the group. Simply choose one from the media library or upload your own. Go to the next step when you are done.
Next, you can add a group cover image. This is the image displayed when users view the content from that group. Again, just select one from the media library or upload a new one. Continue to the final step.

The last step is the most important as this is where you can send out some initial invites. Obviously, if you just started the site, you may not actually have any users, but if you do, feel free to send an invite to them.
However, as a word of caution, some users may find it annoying when you send out group invites to them if they are not interested in it, to begin with. Thus, it may be in your best interest to not actually invite users and allow them to join on their own accord.
You should create hundreds of groups for popular topics to bring in as many users as possible. This will take time, but it is definitely worth it.
Configuring WordPress for BuddyPress
With BuddyPress setup, you might want to take a moment to configure WordPress itself. That said, there’s not much to do as BuddyPress should flawlessly integrate with the system. But there is one thing you should consider.
For example, what should your homepage be? If you are creating a pure social network, you should consider making the activity page your home page so users can see what’s new on the site.
To do this, click on Settings and select the Reading option.
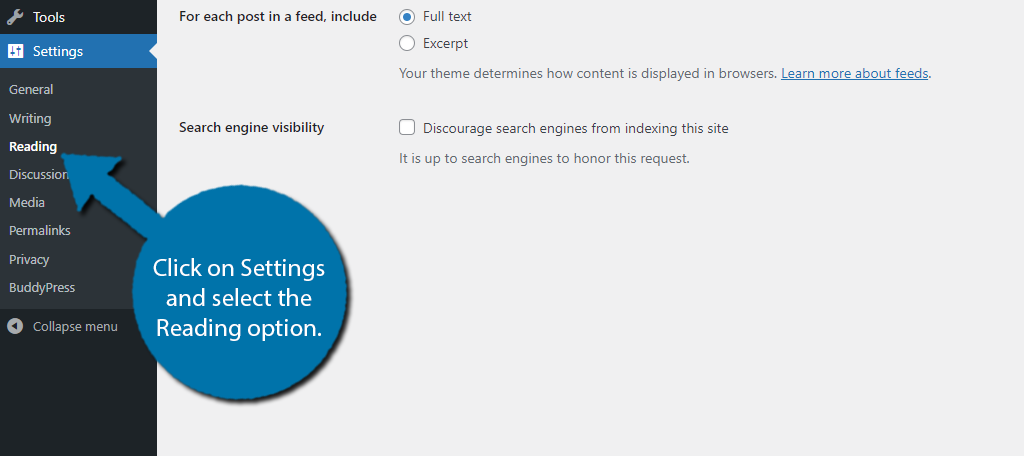
At the beginning of this section, you can choose what page to show as your home. In this case, select the Static Page option and choose the Activity page. This will make your activity stream the first thing users see.
Note: If you used a different page for the Activity stream, select that from the list.
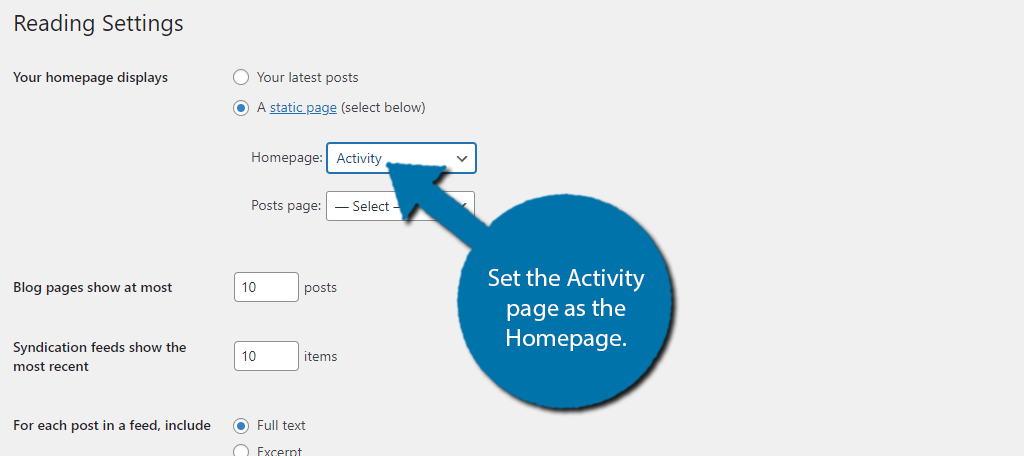
Of course, if blog content is still the main focus of your website, you may not want to do this and leave your homepage as is. This is different for every site, so the choice is yours.
5 Best Themes to Use with BuddyPress
While BuddyPress is compatible with all WordPress themes, not all themes are created equal. Instead, some themes may suit your website better than others. Thus, here are five themes that you may want to install.
For a more comprehensive list, check out our picks for the best BuddyPress themes in WordPress.
1. BuddyBoss
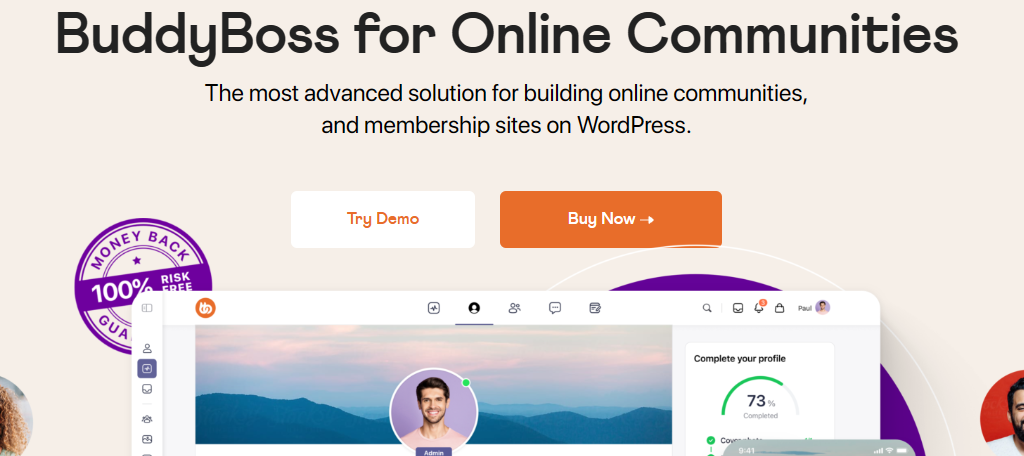
The BuddyBoss theme was built for social networks of all shapes and sizes. It comes with a variety of templates that can help you create a social network for any niche. It works exceptionally well with BuddyPress because it comes from the same developers.
If you are looking to build a community of any kind, this is the theme you should pick.
It includes a variety of built-in features that complement what BuddyPress does. For instance, if you are looking to build a membership site with a subscription fee, this theme has those tools available. Or, you could sell lifetime access for one fee.
This theme also fully integrates with GamiPress which allows you to gamify your network. This means users can unlock awards, earn achievements, level up ranks, and more. When it comes to community sites, BuddyBoss has it all.
Benefits of Using BuddyBoss
- Allows for Zoom integration for voice chat support
- Includes tons of templates that you can use as the base of your website
- Supports file sharing to allow users to trade files with one another
- Multilingual and RTL support
- Gain access to 24/7 support
BuddyBoss Pricing
- A one-site license begins at $288 per year. Other plans include usage for more sites.
2. BuddyX
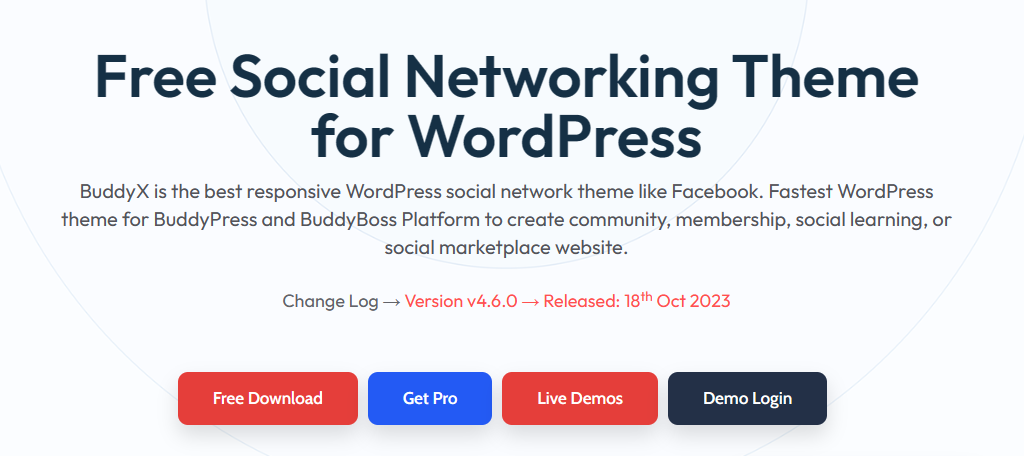
BuddyX is a social network theme that has something for everyone. It has an excellent design that can fit into any kind of niche and supports any type of site structure. This includes free access subscriptions or one-time fees.
The theme was built specifically to integrate with BuddyPress and has features that complement it.
When it comes to structure, the theme has a Facebook-esq design to it that will fit what most social networks are looking for. There are plenty of customization options to configure, so you can get a very unique look out of it.
It also has a lot of integrations with LMS plugins. This makes it one of the best platforms to build a community around education. What makes this theme truly impressive is the price tag. It is completely free to use.
Benefits of Using BuddyX
- Integrates with WooCommerce to create a social market
- Allows you to launch online courses with no coding
- RTL and translation ready
- Includes a great selection of templates with Elementor integration
- Includes four post tyles to choose from
BuddyX Pricing
- BuddyX is a free theme.
3. BeSocial
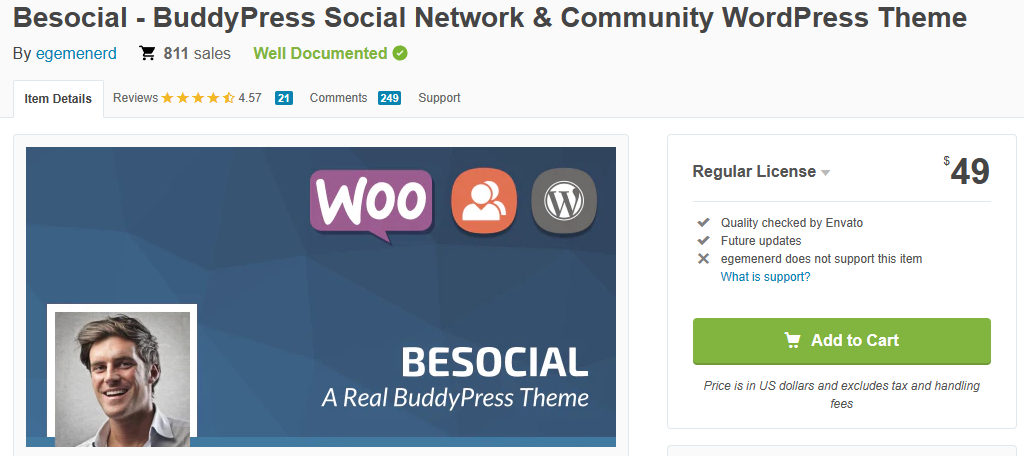
BeSocial is another excellent social media-focused theme that integrates with BuddyPress and bbPress. It sports a great design that can be customized to match your niche with several design features created just for BuddyPress.
For example, instead of having to make your own navigation menu, this one already has it available.
Of course, this is just a taste of the theme’s design power. It utilizes a drag-and-drop page builder that gives you complete freedom on where site elements go. As such, you really don’t have any limits when it comes to design.
Perhaps one of the biggest highlights of this theme would be the member and group card system. Essentially, it allows you to take the information added in BuddyPress and create a profile card for that user.
Benefits of Using BeSocial
- Responsive design ensures it looks good on any screen size
- Includes a like and dislike system
- Includes a built-in FAQ system or compatibility with bbPress
- Allows you to implement a Facebook-like comment system
- Import demo content in a single click
BeSocial Pricing
- Purchase BeSocial for $49
4. Blackfyre
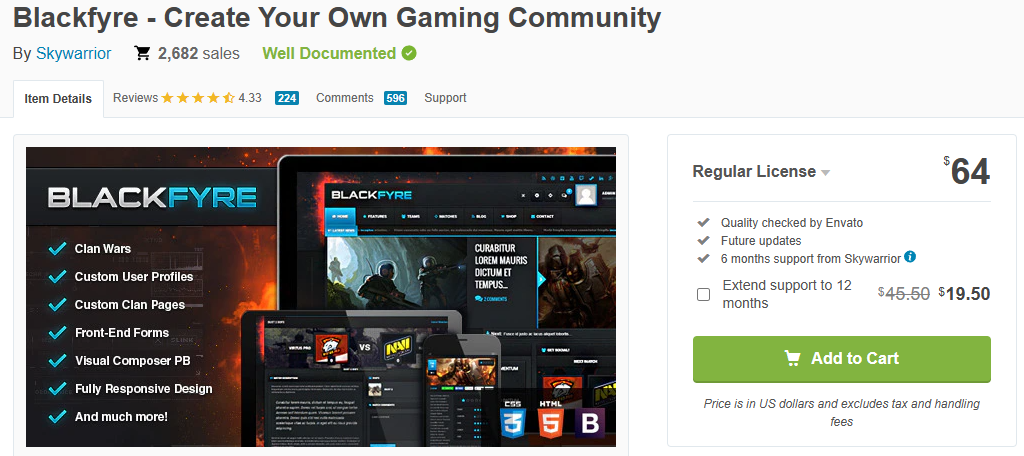
You can build a community website around any topic, and if your niche happens to be video games, then look no further than the Blackfyre theme. It specializes in creating a community around gaming with a variety of great features.
While you may think Discord has made dedicated LFG sites unnecessary, that’s just not true.
Being able to find like-minded individuals with similar goals has gotten more challenging as the gaming industry has gone through explosive growth. This theme boasts an excellent design that makes it perfect as a gamer hub.
It has a variety of features like custom leaderboards where users can post their best scores, the fastest kill times, and so on. Instead of creating groups, you can create clan or guild pages. If your aim is gaming, this is the theme for you.
Benefits of Using Blackfyre
- Create clan wars to help create a community rivalry
- Use just a single click to import demo content
- This theme is translation-ready with RTL support
- Also integrates with bbPress for forum support
- Includes parallax effects
Blackfyre Pricing
- Purchase Blackfyre for $64
5. SocialChef
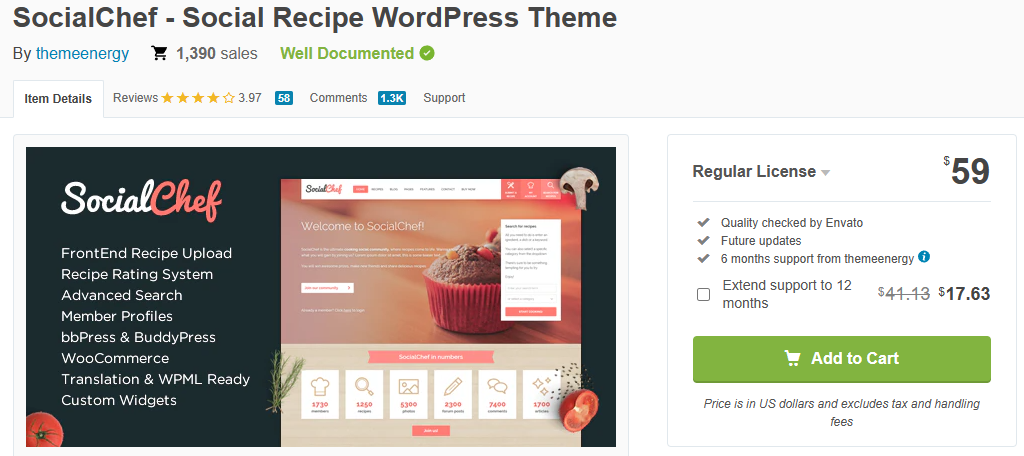
SocialChef is an interesting BuddyPress theme you may want to consider if the focus of your community is cooking and sharing recipes. Simply put, this theme has a food-based design and features to help users share recipes with one another.
Recipe communities have gained some popularity over the years as people try and cook healthier dishes.
Of course, there are many sites online that focus on recipe sharing, but a social network based on the idea is actually ingenious, as oftentimes, it is crazy food trends and weird combos that tend to go viral on other platforms.
It’s worth mentioning that this theme is also fully compatible with WooCommerce, which opens the door for you to sell cooking supplies to your user base. If you plan on focusing on this niche, there is no better theme you could choose.
Benefits of Using SocialChef
- Easily display nutrition facts and ingredient lists
- Allow users to rate each other’s recipes
- Users can easily submit their latest recipes
- Create categories for different food types from baking to BBQ
- Users can search for recipes instead of users and follow their favorite chefs
SocialChef Pricing
- Purchase SocialChef for $59
Creating Menus and Widgets
Perhaps the most important aspect of any good social network would be the UI design. A good UI allows users to easily find what they are looking for, which allows them to spend their time doing what they like instead of getting lost in settings.
In WordPress, this is all done through the Menu and Widget systems. Menus are navigational tools that help users move between areas on your website. They are often located at the top and broken up into sub-menus for easier navigation.
Widgets are basically WordPress blocks but for your header, footer, and sidebar area. They allow users to quickly access content and are usually visible on every page or post unless you take the time to disable them.
When it comes to BuddyPress, you need to help users navigate to the most important sections like their profile, groups, activity streams, and you know, registering or logging into the site.
Menus
To create a menu in WordPress, click on Appearance and select the Menus option.
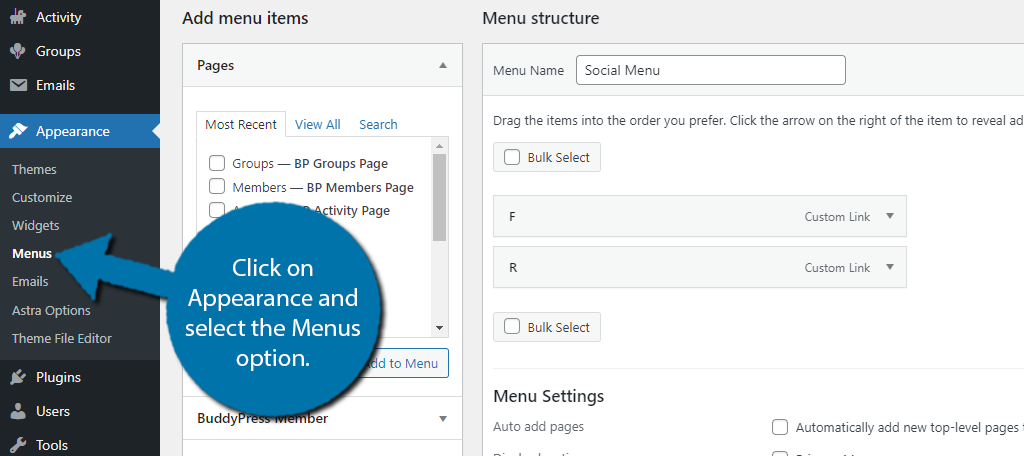
There is a new option exclusive to the BuddyPress plugin called BuddyPress Member. Click on it to expand the options.
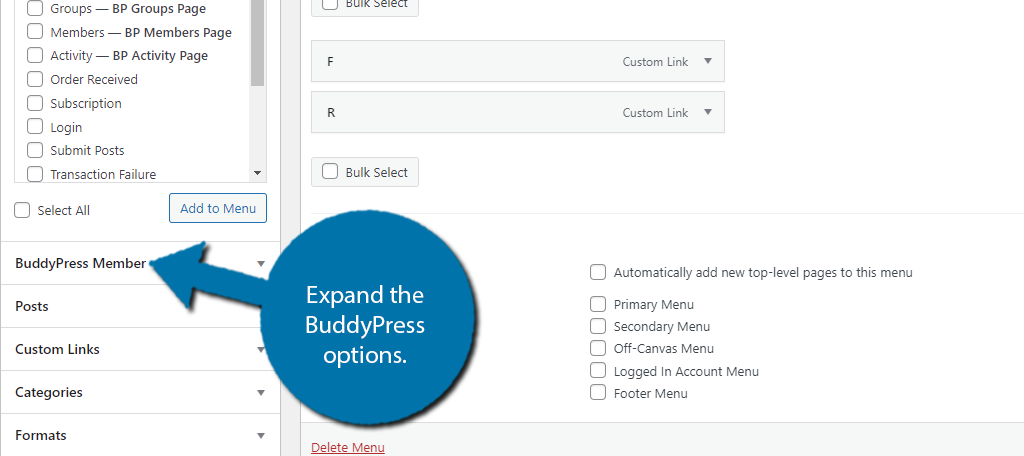
This will give you access to all of the menu items necessary for BuddyPress and include:
- Activity
- Profile
- Notifications
- Messages
- Friends
- Groups
- Settings
- Log Out
Note: There are different menu items for logged-in and logged-out users.
You can select the items you want to add to the menu or use the Select All option to add them all to the menu.
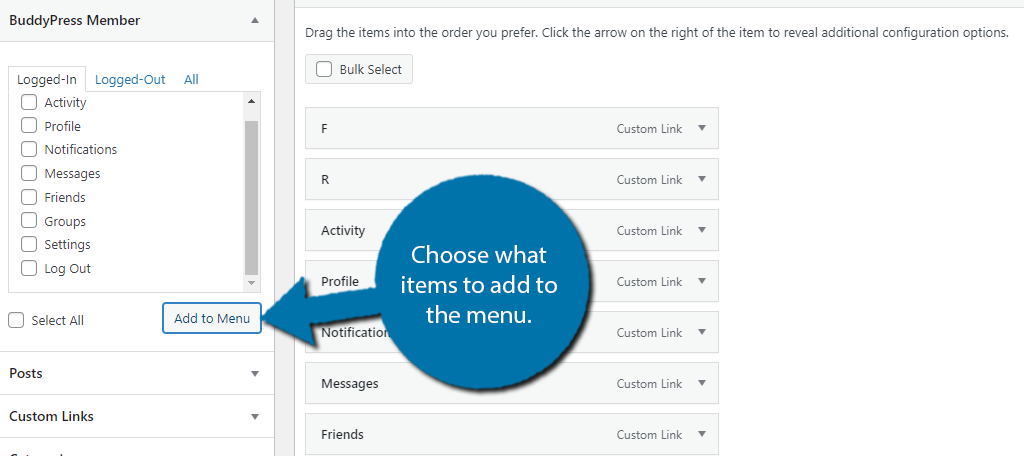
You can rearrange the menu items by dragging them to the desired location. Just be sure to save the changes.
Widgets
Adding BuddyPress widgets to your widget areas is quite easy as the plugin comes with several blocks to choose from. That said, many of the blocks are intended for post or page content.
Thus, you probably don’t want to add much in the form of widgets. One exception would be the Login Form. This allows users to log in and out of the site from the widget area.
To choose what widgets to add, click on Appearance and select the Widgets option.
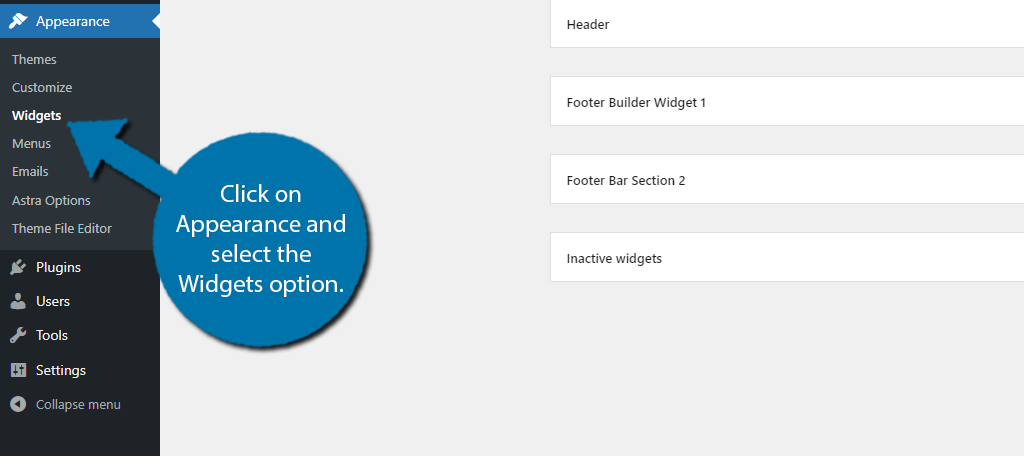
The widget areas you have available to you are determined by the theme you install. As such, if you are unhappy with the widget areas you have, you may want to swap themes. You can also use certain plugins to add widget sections in WordPress.
In either case, choose the widget area you want like the sidebar.
Then, add the Login Form block.
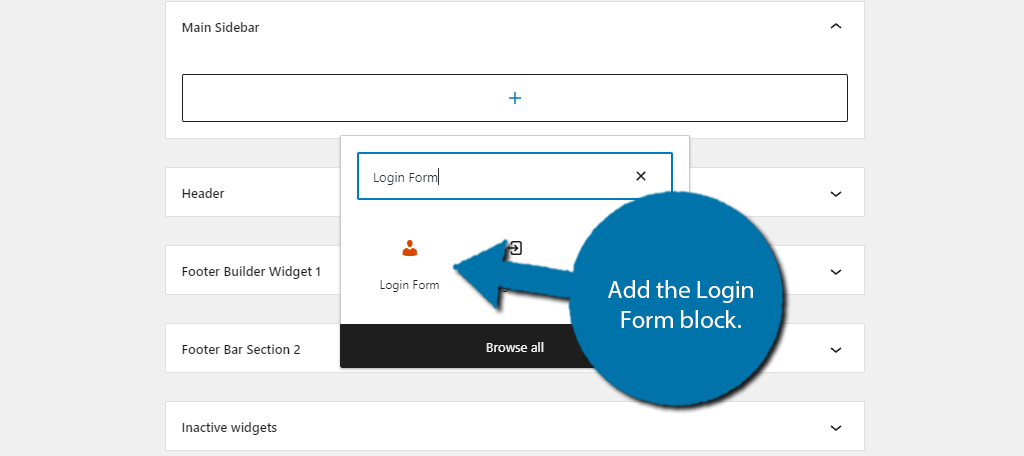
And that’s really it. There’s nothing to configure with this one. Instead, you just have a login option in the widget area you added this to.
Best Plugins to Use with BuddyPress
While BuddyPress will help you cover the basics, and a great theme can help take it to the next level, you are probably going to want a few more tools for your social network. Luckily, WordPress has a great selection of plugins you can choose from.
There are some obvious choices like a security plugin, or an anti-spam plugin to prevent bot accounts, but we’ll cover more BuddyPress-focused plugins to help you make your site feel more unique and attract a bigger audience.
Here are some WordPress plugins you may want to consider using alongside BuddyPress on your site:
1. bbPress

You might have noticed when we went through the themes section that most of them also mentioned support for bbPress. Well, that’s because forums are a great addition to most social networks.
In fact, when you think about it, Reddit is just a big forum with a variety of topic boards that users can choose from.
In terms of setup, there’s not much to say. Simply install the plugin, create the topics (categories) that users can post in, and go through the settings to get everything just right. As such, simplicity is one of its best features.
When it comes to customization, users may find this plugin lacking, but you really do have complete freedom. However, it does require being knowledgeable in CSS. You can add your own custom code to change the forum colors as you see fit.
Benefits of Using bbPress
- Easily scale the forums to match your needs
- Compatible with most WordPress plugins
- Many themes are built with bbPress in mind
- View when the last post in a forum thread was
- Users can display their profile avatars and add signatures
bbPress Pricing
- bbPress is a free plugin
2. GamiPress
Many websites are embracing the gamification of their website in one way or another. This entails linking key features of your website to some kind of point system where users can earn rewards like badges or achievements for using the site.
For example, when posting in a forum, users may receive badges for how many times they post or how many likes they get.
When it comes to gamification in WordPress, there is no better option than the GamiPress plugin. Naturally, it fully integrates with BuddyPress, bbPress, and other popular community plugins.
This plugin supports adding user ranks, creating achievements & badges for users to earn, with social sharing options for users to show off what they accomplished. In terms of setup, it’s quite easy, but each plugin integrates differently.
Benefits of Using GamiPress
- Utilizes drag-and-drop controls
- Create time-limited achievements (perfect for the holidays)
- Includes Gutenberg blocks for easy integration
- Open Badges compatible
- Create your own rank types (levels, grades, etc.)
GamiPress Pricing
- GamiPress is a free plugin
3. Events Manager

One of the most popular uses for any social network is for businesses, friends, or family, to promote events, parties, or family gatherings. Luckily, the Events Manager plugin can integrate with BuddyPress so users can submit upcoming events.
This makes it easy for their followers to be aware of upcoming events and improve attendance.
When it comes to BuddyPress integration, this plugin supports users to submit events, create group events, set personal events, and more. It also has a variety of features not exclusive to BuddyPress that can add more options to your site.
For instance, it is compatible with Zoom, thus you can integrate chats or even full-blown webinars. Luckily, setting this plugin up is quite easy and it just comes down to setting who can submit events and how they will appear.
Benefits of Using Events Manager
- Integrates with Google Maps to help guests attend events
- Add Google Calendar buttons so users can add it to their calendar
- Create events that display the start time in the user’s time zone
- Includes booking options to allow users to accept or reject invitations
- Create categories for different event types
Events Manager Pricing
- The base plugin is free, and the Pro version begins at $89 dollars for 1 site
4. BuddyPress Multilingual
When you think of social media platforms like Facebook, they have a user base that spans around the world, and that means its users are communicating in different languages. As such, your site is going to need the same ability.
That’s where the BuddyPress Multilingual plugin comes into play.
As the name suggests, it allows your site to support multiple languages by integrating with WPML (the WordPress Multilingual plugin). This allows you to set the languages for groups, profiles, registration pages, and anything else you can think of.
Users can select what language they view pages in. And it can even translate email notifications that users will receive. Overall, if your goal is to reach as many users as possible, you are going to need a translation plugin to ensure everyone accesses the site.
Benefits of Using BuddyPress Multilingual
- Keep the entire BuddyPress workflow in your language
- Works on the main site and any child sites
- Remembers what language users have selected when going from one page to another
- Translates the activity stream
- Guest users can select their primary language
BuddyPress Multilingual Pricing
- BuddyPress Multilingual is a free plugin but does require WPML to work
5. Youzify
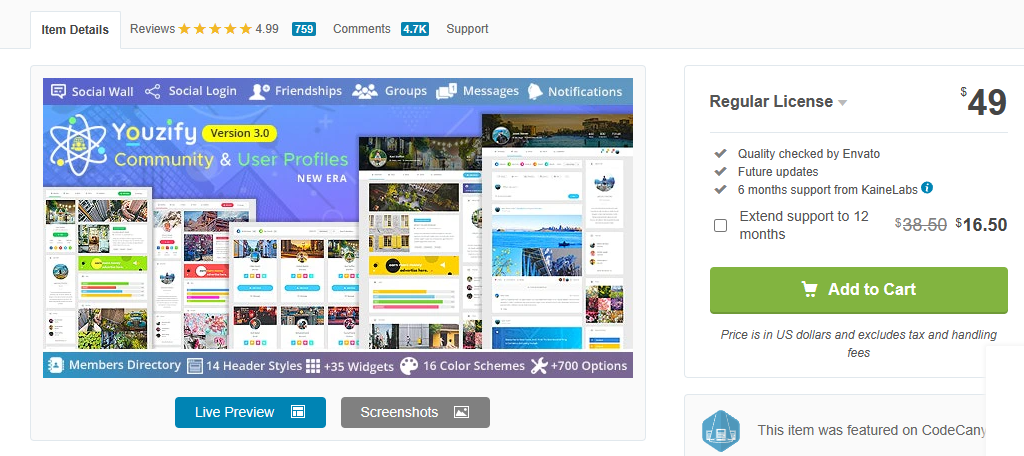
While BuddyPress has a decent user profile customizer, there is a lot of room for improvement, and the Youzify plugin can help take your social network design to the next level.
That said, the Youzify plugin offers a lot more than just design options for your BuddyPress site.
Let’s start with design. Users will gain access to hundreds of profile templates and widgets that can be used to customize your site. This can help you stand out from the growing number of BuddyPress sites in circulation.
It also offers a variety of unique features that can be a great addition to your site. For instance, you can allow users to request and accept donations from other users. They can even set up a subscription to do it regularly.
Benefits of Using Youzify
- Allow users to log in with other social media accounts
- Give users the power to make their profiles private
- Includes 14 header styles you can choose from
- Advertise user profiles as an additional source of income (like advertising businesses)
- Add an unlimited number of profile fields for users
Youzify Pricing
- Youzify is a premium plugin starting at $49
How to Promote Your BuddyPress Social Website
It should come as no surprise that trying to build a new social network is no easy task and the hardest part is trying to get the word out. Let’s face it, people have gotten used to using their favorite platforms, thus, it’s challenging to get them on yours.
Thus, you need to spend some time marketing your new social network.
Here are 10 simple methods you may want to consider:
- Leverage Existing Social Networks: You may think you want to get people off of existing platforms, but that won’t work. Instead, use them to your advantage to make you look like the superior choice for your niche.
- Invite Family & Friends: While this may sound cliche, you need to get a starting community. Having your mom or aunt share your recipe network with their friends can lead to growth. Every network starts small but can grow fast if it is done right.
- Hire An Influencer: While this is going to cost you money, getting users with a huge following to try your community is probably the best option for creating a social network. Especially if they are big in your niche.
- Purchase Ad Space: This is a classic staple of any advertising plan. Getting as many eyes on your site as possible is the goal, thus making sure users see ads for it is a great option.
- Advertise On Other Niche Platforms: If you are targeting a specific audience, start by attempting to advertise your platform on the current sites they frequent. Some websites won’t allow this, so try your best.
- Do A Big Giveaway: If there’s one thing that will get people excited for a new website it is the chance to win a prize. It doesn’t have to be anything crazy. You could even do t-shirt giveaways that also act as advertising if they are seen in public.
- Advertise In Relevant Reddit Communities: When it comes to niches, there is no better place to advertise than Reddit. You can target the community you are aiming for directly by posting about it. Just make sure it doesn’t have the opposite effect.
- Come Up with A Strong SEO Plan: You can’t really mention marketing strategies without talking about SEO. You need to do this right to appear at the top of search results. Creating a blog to accompany your social network can really help you in this regard.
- Link Trade with Relevant Sites: Your goal is to become a central part of your community, thus partnering up with other popular sites in your niche is a great option to consider.
- Create Video Guides on YouTube: YouTube is a great tool for not only sharing information, but advertising. Creating tutorial videos that help users learn about your platform is a great strategy to kill two birds with one stone.
There are plenty of more strategies you can use to promote your website, but it really depends on the niche you are trying to aim for. Just make sure you go in with realistic expectations. It can take several months, or even over a year to grow a sizable audience.
Keep Your Network Growing and Engaging
The most important part of creating a social network is trying to stay unique. You don’t want to be just another Facebook, Instagram, or X (Twitter) clone. You may have some success at the start, but ultimately clones don’t build a strong following.
Instead, you need to think outside the box to be effective in this field, and sometimes using feedback from visitors in a WordPress forum can really help. Of course, having a creative system doesn’t necessarily mean you are worlds apart from the competition.
For example, almost any major social media website has a way to make an account, create a custom profile to express themselves, add friends or follow others, join groups, etc.
The key is to do it in a way that people feel is unique and creative while performing the same general roles visitors expect.
How easy did you find the BuddyPress plugin to use? Is your social network aiming for a specific niche?


It very good