Having an online store, or the ability to sell products on your website using WooCommerce, is a huge advantage. Of course, you want to make your products as attractive as possible. This helps to drive sales. One way to catch the eye of your customer is to create a slider in WooCommerce.
Website Sliders
When you go to a website and you see scrolling images, those are called sliders. There are actually a lot of great WordPress sliders out there that you can try.
Each slider has its own unique functionality, and most of them add a little something different to your site. Of course, this depends on how you build them and which plugin you use. But, all of them can give you some amazing slider layouts to work with.
That being said, we want to take the concept of a WordPress slider and apply it to WooCommerce. Providing your website users with something that catches their eye like a WooCommerce carousel of products is a great way to build interest and keep people on your site. This is just one of many WooCommerce variations you can perform.
However, many of the WordPress slider plugins available do not give you the ability to create a slider for WooCommerce specifically. This is where Woo Slider Pro comes in. This amazing little plugin gives users the ability to create a WooCommerce product slider and add it wherever they would like in a post or page.
Let’s take a look at the plugin together and see what it can do for you.
Woo Slider Pro
Woo Slider Pro gives users the ability to create dynamic sliders for their WooCommerce products. Not only that, but the plugin is actually a drag-and-drop tool. This allows you to create a full slider in WooCommerce using the simple drag and drop technique to build.
No coding ability is required.
Once the plugin is installed on your website, you have multiple styles and options available to you when you want to build a slider for WooCommerce. With preset styles, one, two, or three-column layout grids, and the ability to add tons of different options, this WooCommerce product image carousel builder leaves no stone unturned.
Furthermore, if you know CSS, then you can add your own personal styling. If you don’t, then you can wait for plugin updates for available add-ons and functionality. However, right now, the plugin gives you everything you need to build dynamic, SEO friendly sliders for WooCommerce.
You simply build a slider using the drag-and-drop interface, then publish it and you are provided with a shortcode. Place the shortcode in any post, page, or widget area on your website and the slider will automatically show.
Let’s go over plugin installation together and then see what it takes to set up a slider and get going.
Install and Activate Plugin
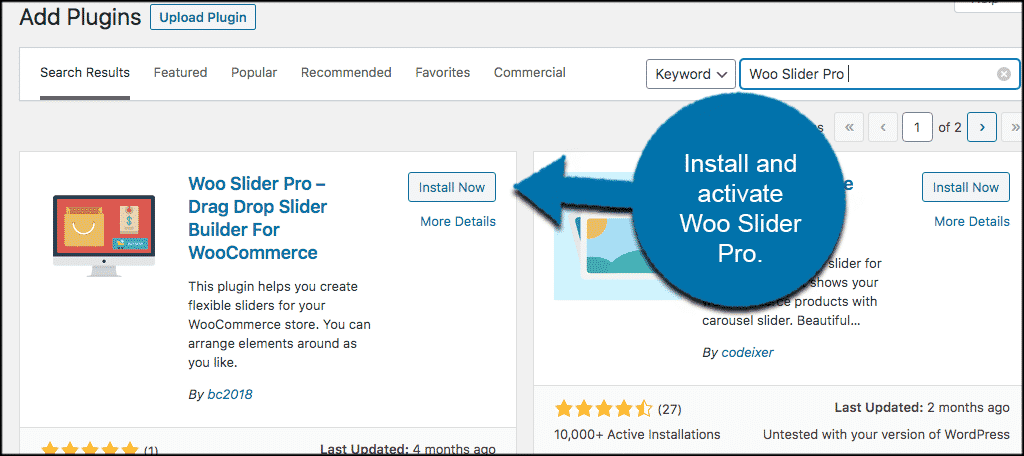
In order to create a slider for WooCommerce, you first need to install and activate the Woo Slider Pro plugin. You can do this by going to the plugins page inside your WordPress admin dashboard. Simply search the plugin name.
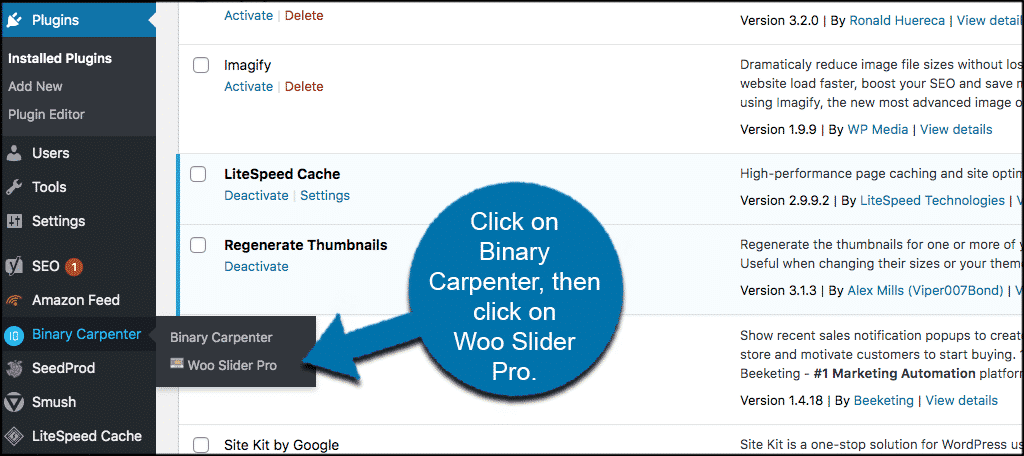
Once the plugin has been installed and activated on your WordPress website, click on Binary Carpenter > Woo Slider Pro. You will see this on the left side menu of your admin dashboard.
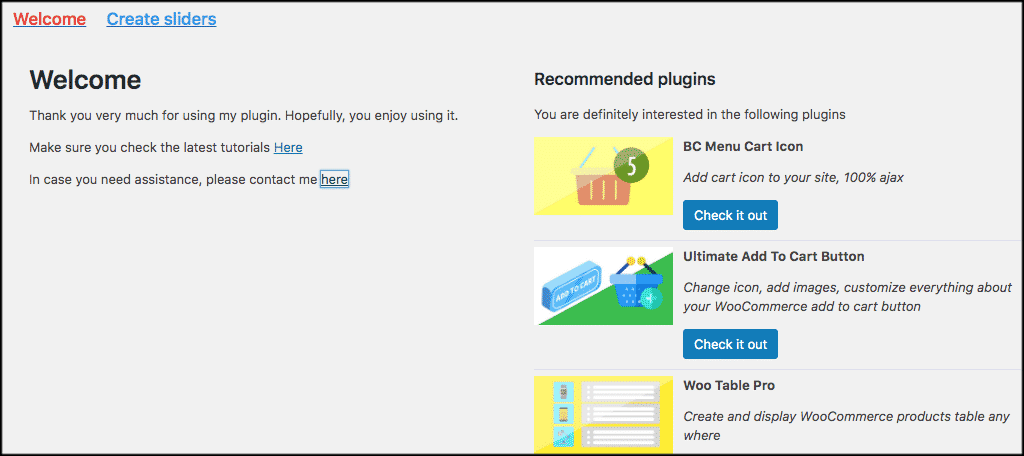
This will take you to the main setup page for the plugin. Here, you can build all the sliders you want using the input variable provided. Let’s go over building a slider together and get you going.
Add a Slider for WooCommerce
At this point, you should have navigated to the main settings page for the plugin. You will see two tabs. They include:
- Welcome
- Create Sliders
The welcome tab simply has a welcome message and a couple of links to some tutorials if needed and a contact link to the plugin developer. If you need to make use of either of these for troubleshooting purposes, feel free.
You will also see a list of recommended plugins on the right side. It is up to you whether you check these out or not.
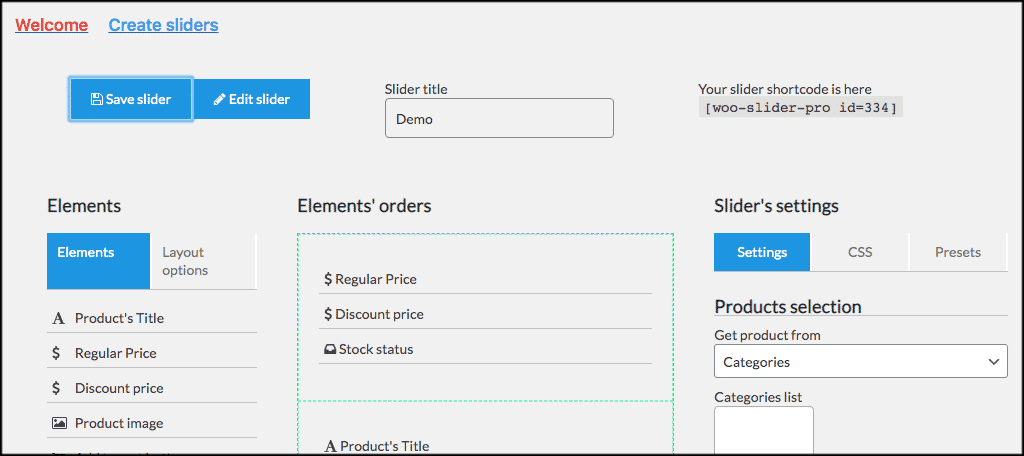
Go ahead and click on the second tab titled “Create Sliders.” This is a single page configuration layout. You will be able to create a slider for WooCommerce here. Let’s do one together.
Note: This tutorial assumes you already have WooCommerce set up and running and have plenty of products to work with.
Create a Title For Slider
Go ahead and create a name for your WooCommerce slider. Use the title box and give it a recognizable name. This will come in handy when you are making multiple sliders for WooCommerce as it will allow you to more easily separate them.
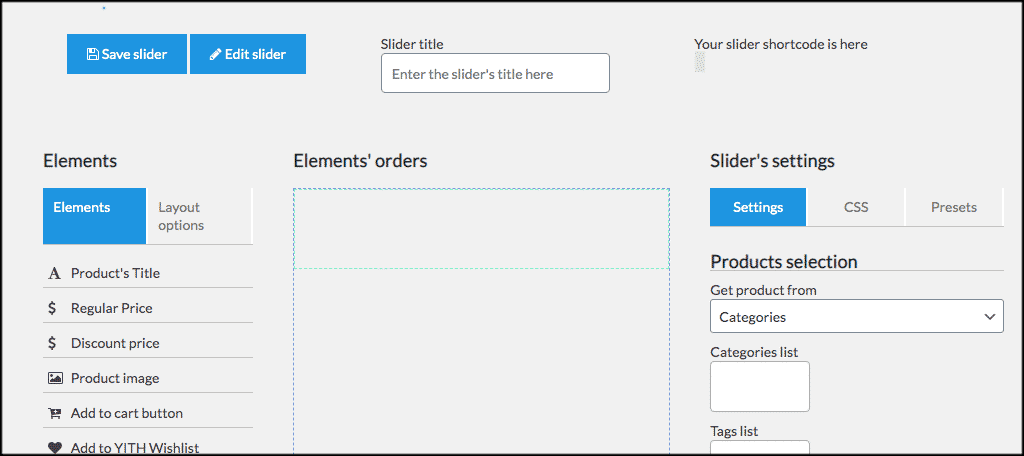
Elements and Layout Options
If you scroll down just a little, you are going to see the boxes for layouts and elements. This is all drag and drop. You click on the layout’s tab or the element’s tab and drop everything into the “Element’s Orders” box. This will represent the layout that site users see when they are viewing your WooCommerce slider.
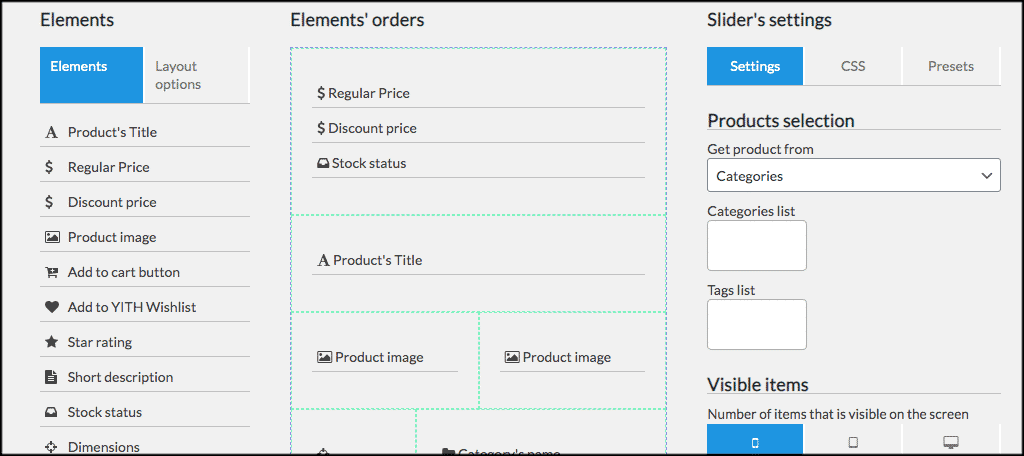
Basically, you can see that we created a few different layout column options using the Layout Options tab, and then started dragging elements where we wanted them placed within the order box.
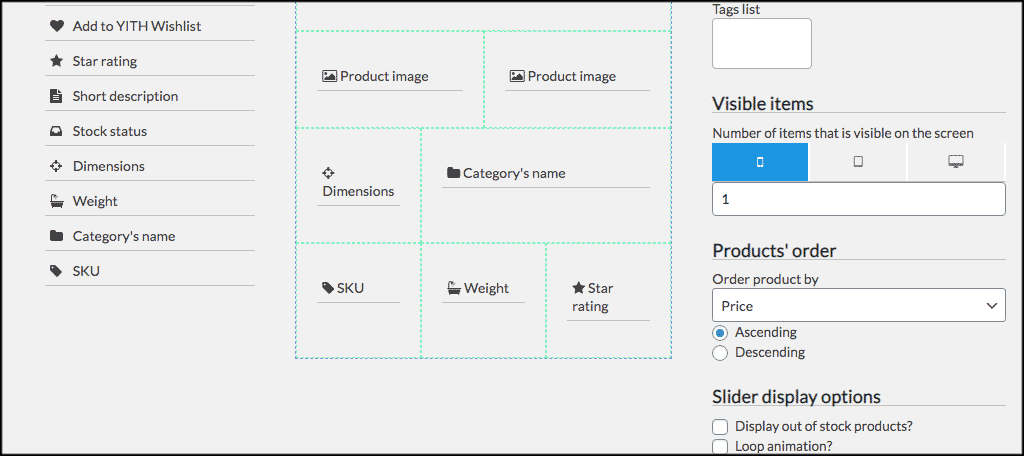
Slider Settings
At this point, you should have a layout in place. On the top right of the configuration page, you will see an area called “Slider Settings.” In this area, you can set all of the following by clicking through the tabs:
- Settings
- CSS (if you know how)
- Presets
- Categories
- Category List
- Tag List
What options show for you within the boxes and dropdown menus will depend on how you have products already set up in WooCommerce. Go ahead and make relevant selections now.
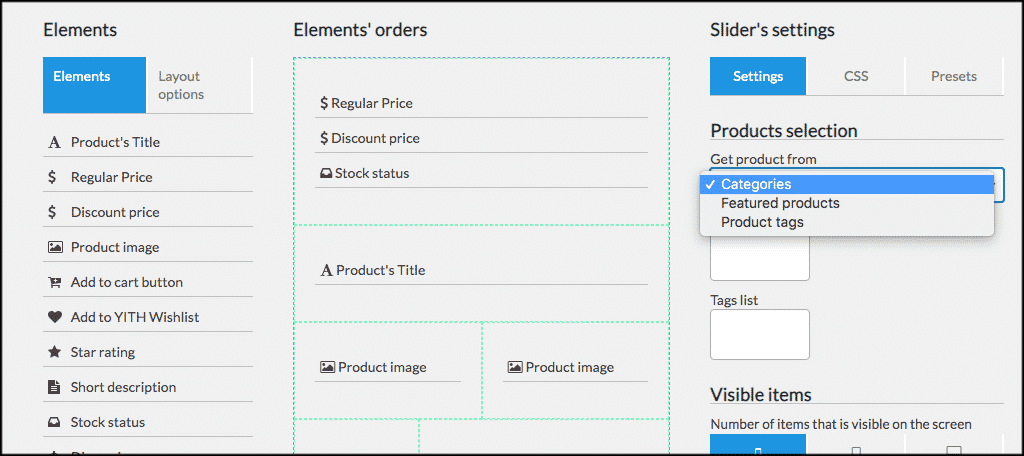
Visible Items, Products Order, and Slider Display Options
Below that, you will see three final areas to create configurations for. Visible items allow you to set the number of items that can be visible on different size screens. Yes, the plugin is fully responsive and mobile-friendly.
Now go ahead and select products in the order you want them to show. You can choose from ascending or descending.
Last but not least, select the slider display option and animation that you prefer. This is really personal taste, so check out the different ones if you want.

Save Slider and Get Shortcode
That’s it! You have successfully built a slider for WooCommerce. Go back to the top of the configuration page and click on the blue “Save Slider” button. When you do, a shortcode will be automatically generated.
You simply copy the relevant shortcode and paste it in any post, page, or widget area of your website you want. When you do, that location is where the WooCommerce slider will show for your website users.
Repeat the process above for as many sliders as you want.
Final Thoughts
Having the ability to create a slider for WooCommerce gives you another great way to display your products. This also acts as a unique way for potential customers to view your products from different parts of your website.
Sometimes, sliders can slow a website down and can hurt SEO. However, when configured and implemented properly, they actually work really well together with the WordPress website optimizations you have already done.
Will this be your first time creating a slider for WooCommerce? Do you like the easy to use drag-and-drop template provided by this particular plugin?
