Although WordPress has a basic method to let users search your site, it doesn’t always provide the best results. If you can fine-tune the tool, it could improve engagement and on-page time of the site. And showing specific post types in search is a good way to accomplish this.
After all, you want visitors to find exactly what they’re looking for if you want to keep them interested.
Today, I’ll show you how to add specific post types for search results in WordPress.
Why Showing Specific Post Types in Search Matters
By default, the search function of WordPress is not as intuitive as many may like. It doesn’t always provide the best results according to visitor criteria. Not to mention that you don’t have options for customizing the results.
When you expand what the search function can do, you deliver a more engaging layout for visitors.
For instance, it’s easy to build a WordPress custom search page where visitors can find more precise results. This has the potential to keep them browsing your content longer instead of looking elsewhere for answers.
Of course, you still need to create amazing content for those search functions to work properly.
Using Ivory Search
In this tutorial, I am going to demonstrate a bit of what Ivory Search can do in WordPress. It’s a solid plugin that comes with an easy-to-use interface. This plugin lets you customize results according to specific post types in search.
You can add it in the sidebar, on a post, page or even add a search in the menu bar.
You can limit authors, custom post types, metadata and even adjust for WooCommerce should you open an online store.
In a nutshell, it lets you build a WordPress custom search form while giving a lot of options for specific information.
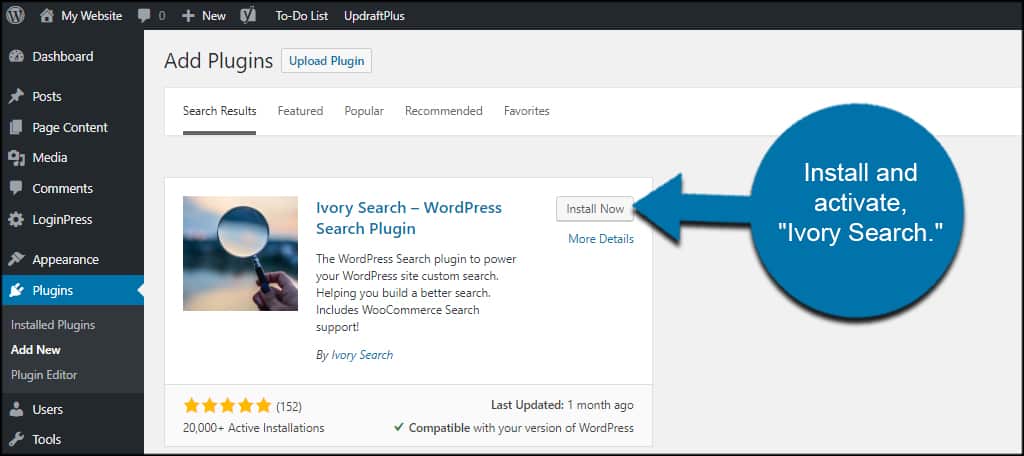
Install and activate, “Ivory Search.”
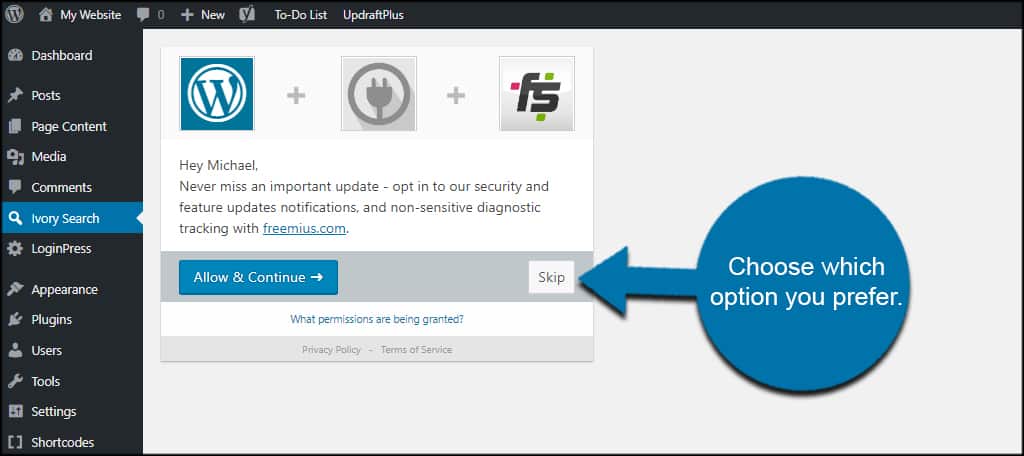
Upon activation, you’ll see a security and updates feature display. This is an optional setting, and you don’t have to allow the function.
Essentially, it’s the developer asking permission to send you update information regarding features and security.
Choose which option you prefer. For this tutorial, I’m simply clicking the “Skip” button. But this is completely up to you.
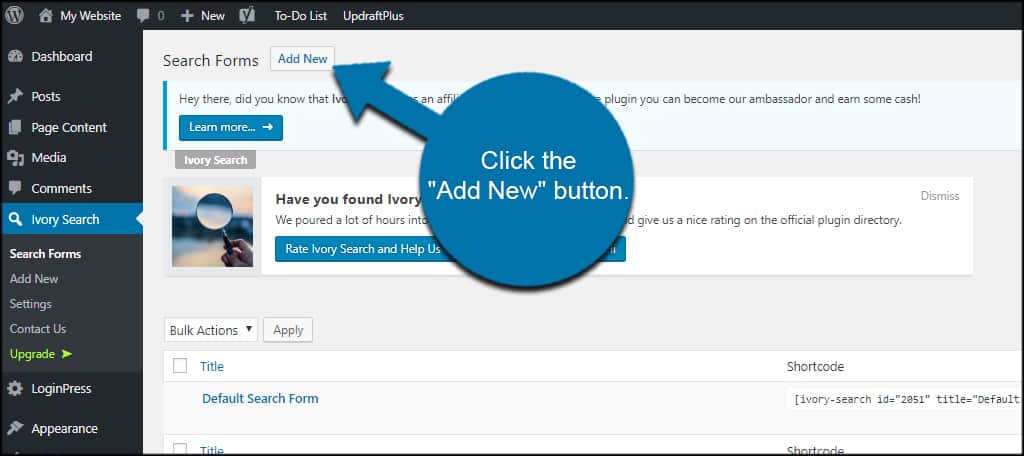
The next screen will show “Search Forms.” You can find this later by going to “Ivory Search” from the left panel in WordPress.
In this screen, you will see all of your available search forms. As you can create multiple search results for your site, here is where you would make adjustments.
Ivory search gives you a variety of ways to improve the searchability of your website. You can use widgets, create a specific search page or use a simple field in the navigation menu.
Adding New Search Results
Let’s build a new search form.
Click the “Add New” button on the top of the screen.
Give the search form a new name. This is for your reference only. Visitors will not see this display on the front end.
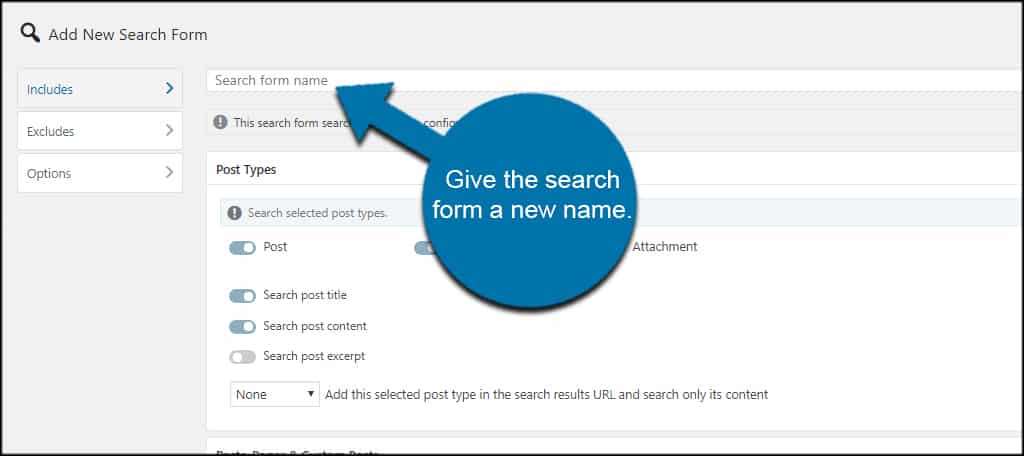
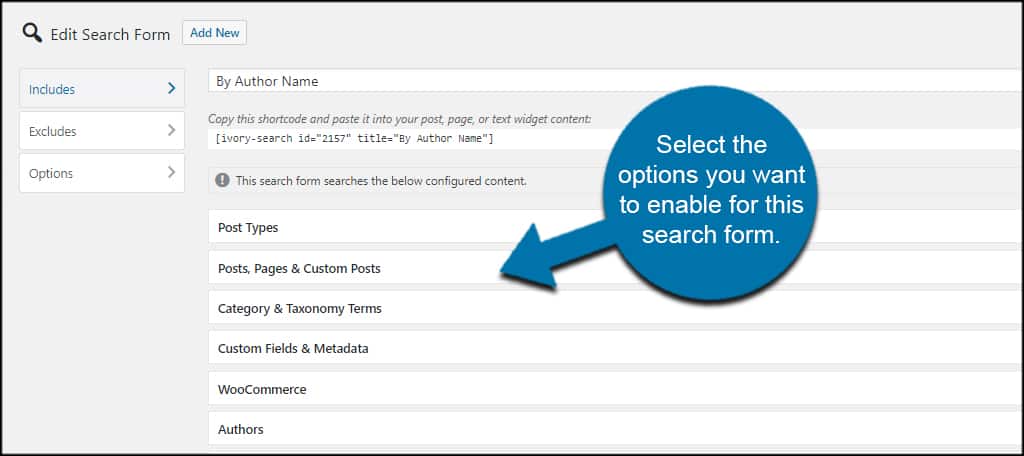
Select the options you want to enable for this search form. Here is where you can adjust specific post types in search results.
For example, you can enable “Attachment” under Post Types if you want visitors to search through images and files.
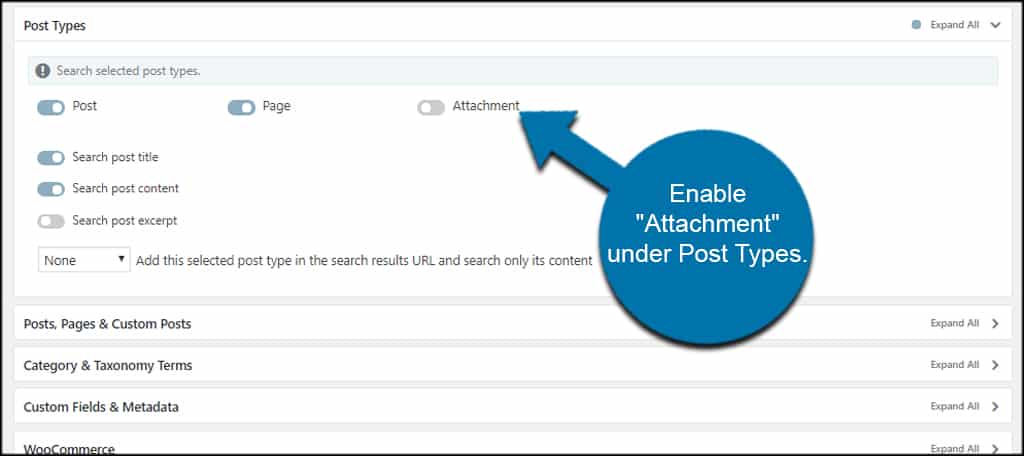
Something like this might benefit an online portfolio or a way to search image galleries.
Another method to fine-tune the WordPress search results page is to use the Category & Taxonomy Terms. In this section, you can select specific categories, tags and post formats. You can also include titles and descriptions.
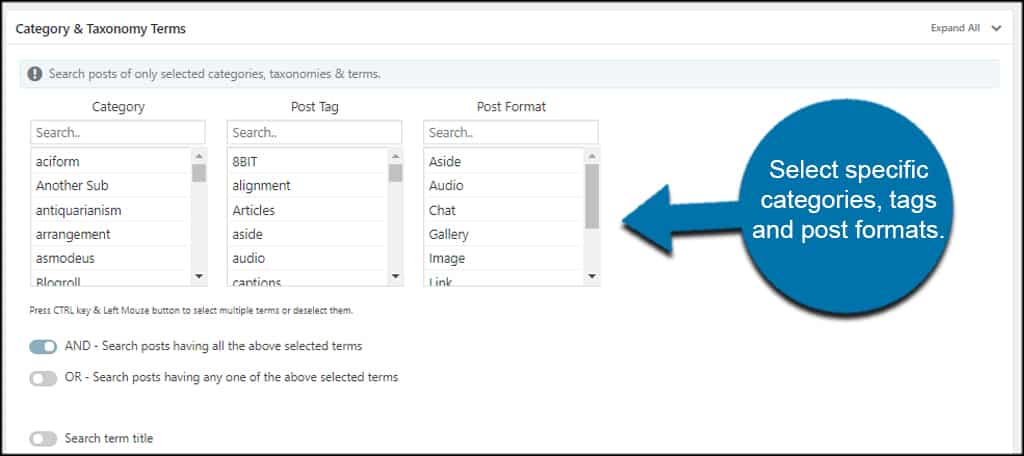
This gives you a great way to let WordPress search within a category of your choice. Which means you can offer a custom search form in posts which only browse related content.
Unfortunately, a lot of Ivory Search’s more engaging options are locked behind the pro version. For example, you can limit search results according to author unless you upgrade.
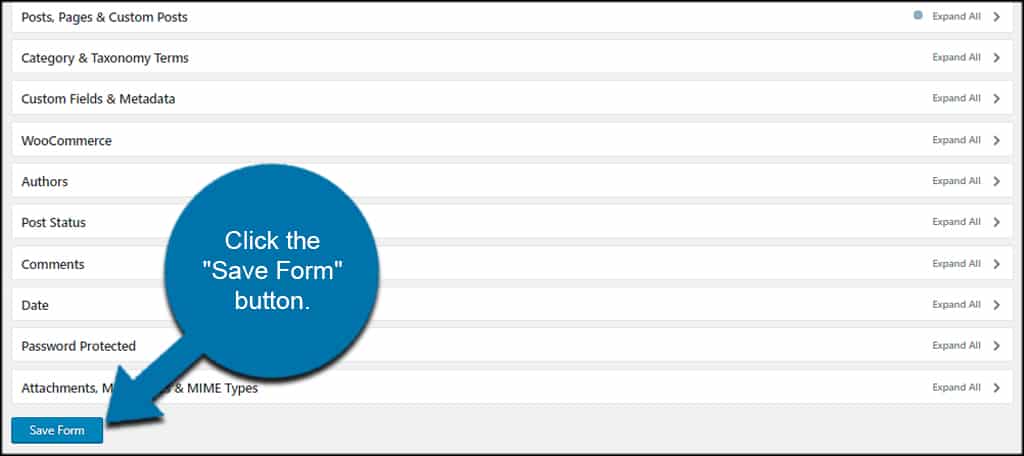
Once you’re done making your adjustments, click the “Save Form” button.
Excluding Search Results
What if you want to exclude specific post types in search?
Click the “Excludes” tab on the left of the search form.
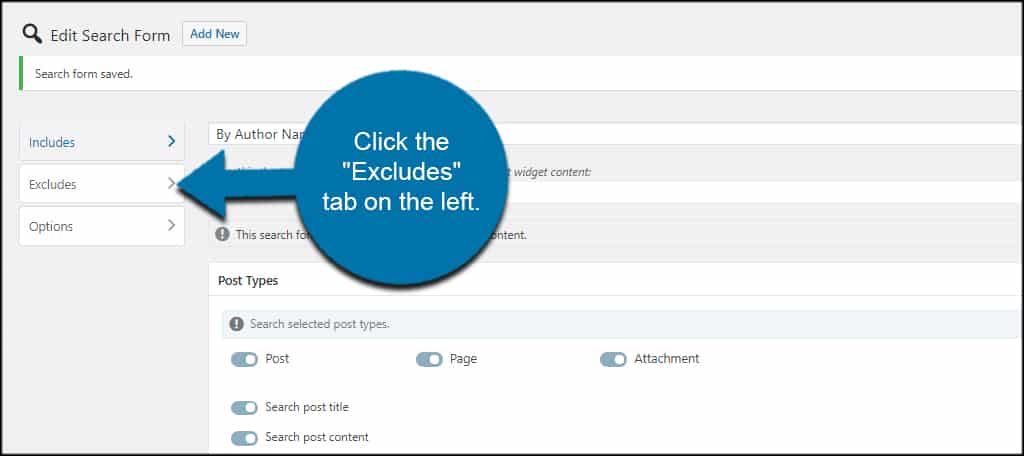
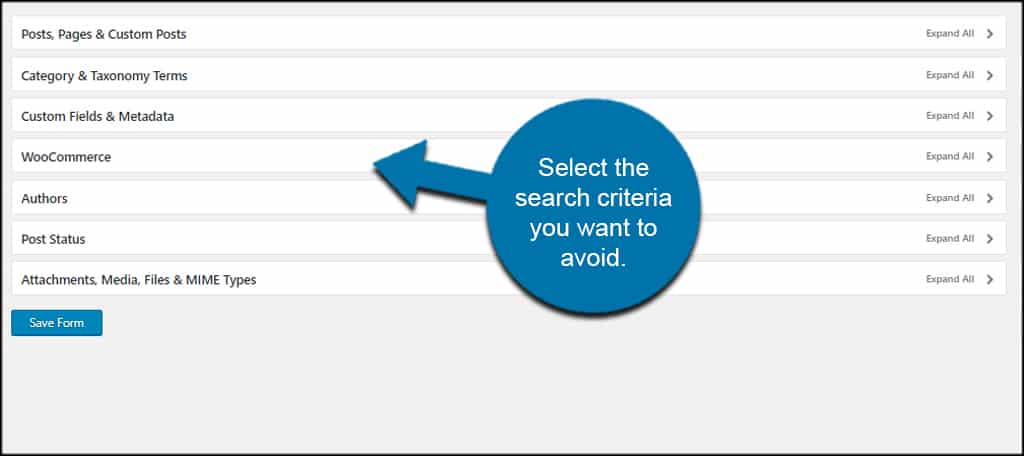
This section works the same way as when you’re building your new search form. However, it will remove these options from the results page. Select the search criteria you want to avoid in the new search field.
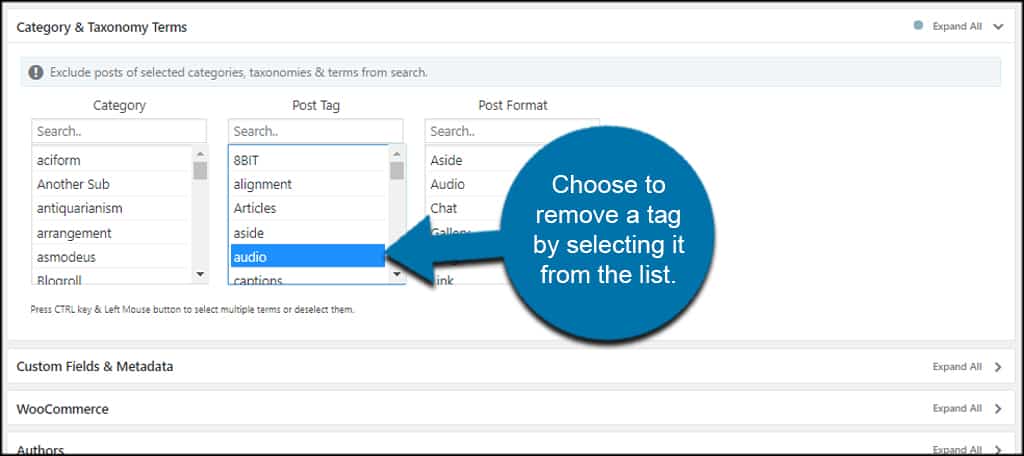
For example, we could choose to remove a tag by selecting it from the list.
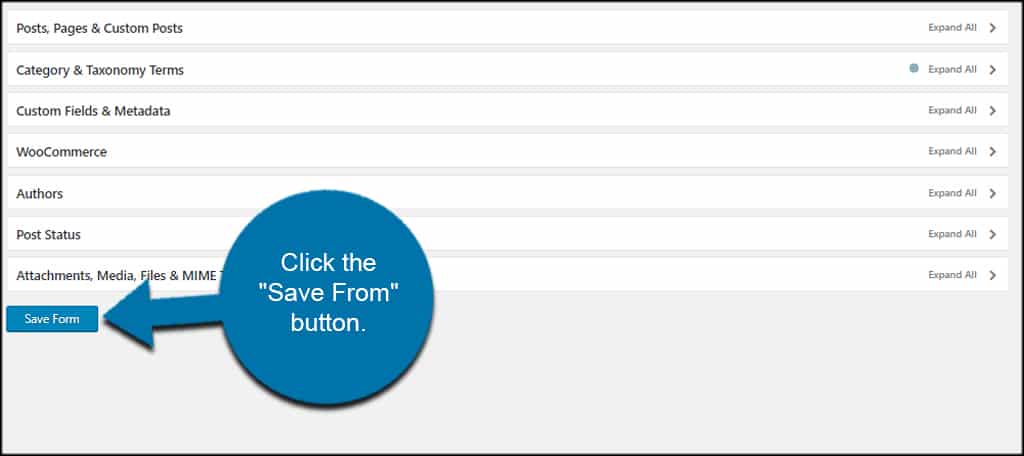
Once you’ve selected your options, click the “Save From” button.
Using Custom Search on a Post or Page
Now that we have a specific post types search ready, it’s time to add it to a page or post.
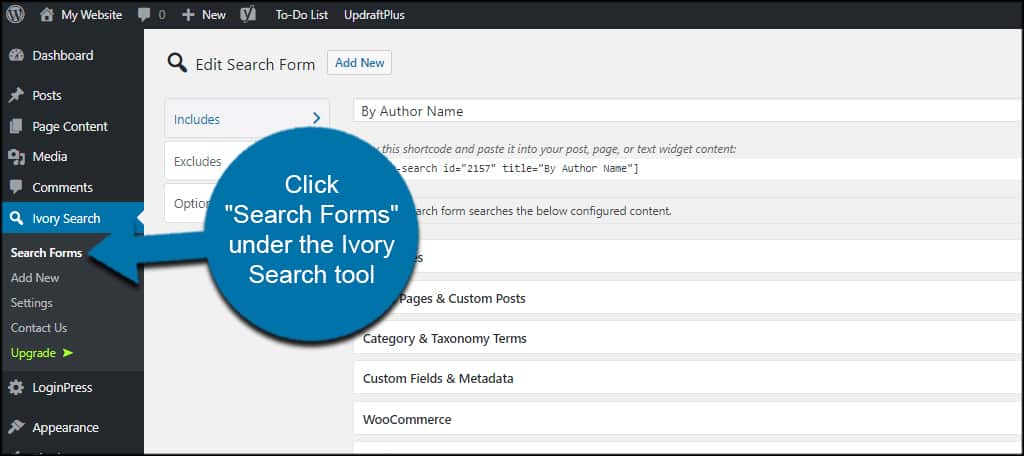
Click “Search Forms” under the Ivory Search tool on the left.
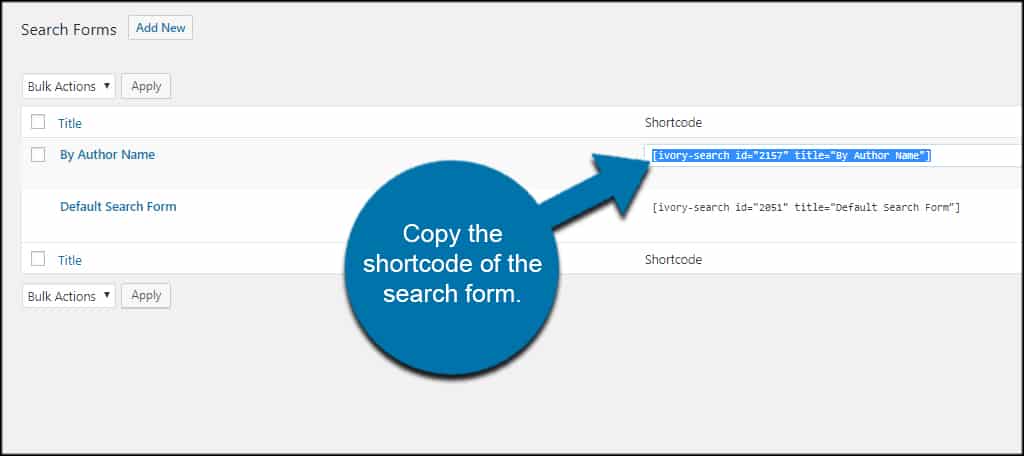
Copy the shortcode of the search form you want to use.
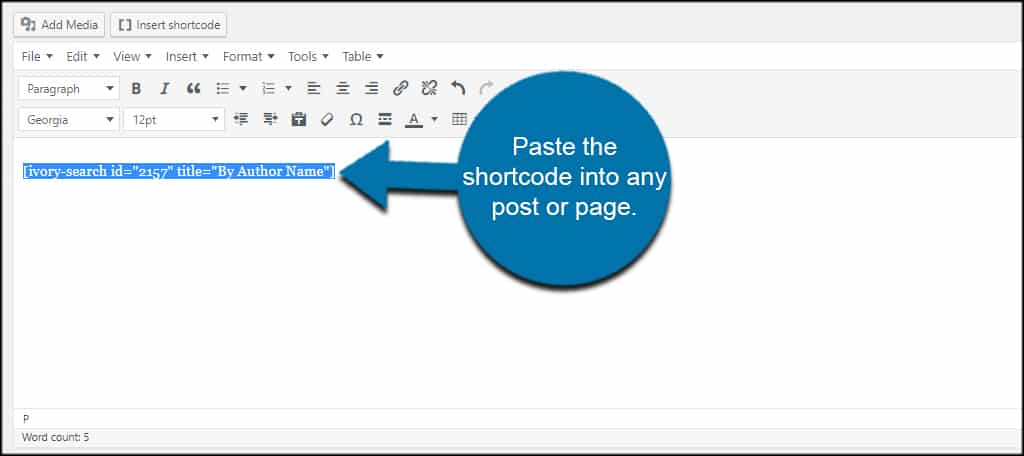
Paste the shortcode into any post or page you want to use the search field.
If you’re using the Gutenberg Editor, you can use a shortcode block for this as well.
Once the post or page is published or updated, you’ll see the search field available.
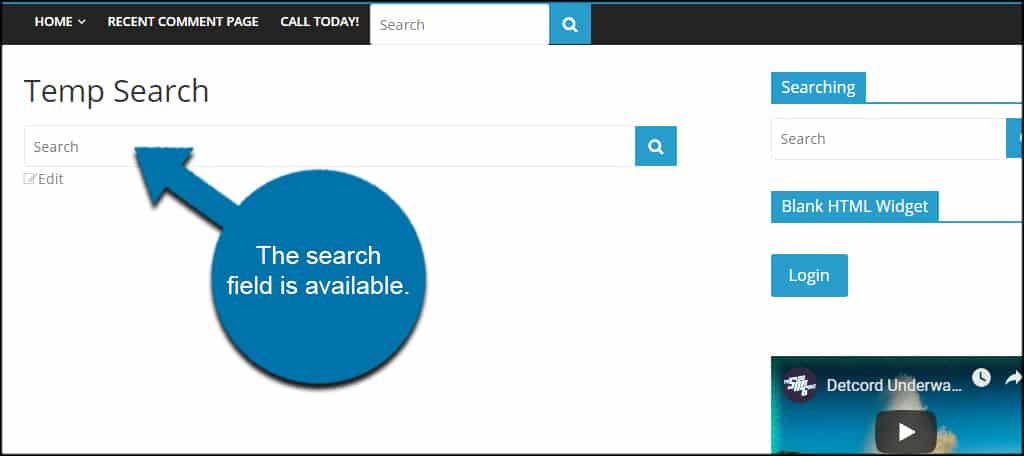
This lets you place the search field anywhere within your content.
Using a Custom WordPress Search Widget
What if you want a WordPress custom search form in a widget? Ivory Search can do that as well. This lets you put the search function in any sidebar of your theme.
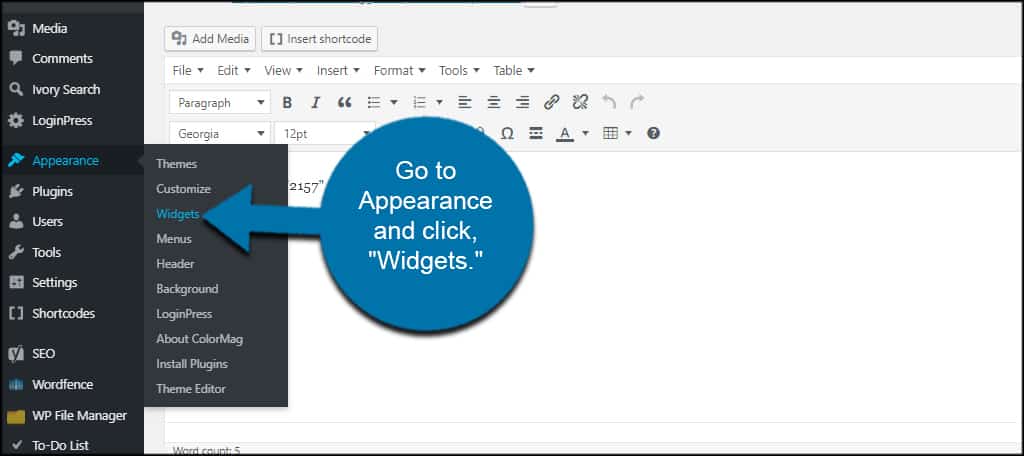
Go to Appearance and click, “Widgets.”
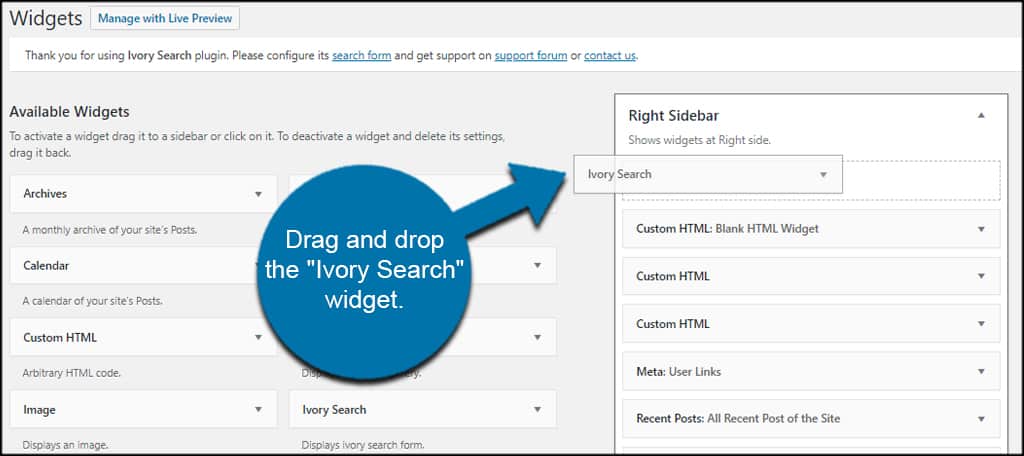
Drag and drop the “Ivory Search” widget into your sidebar.
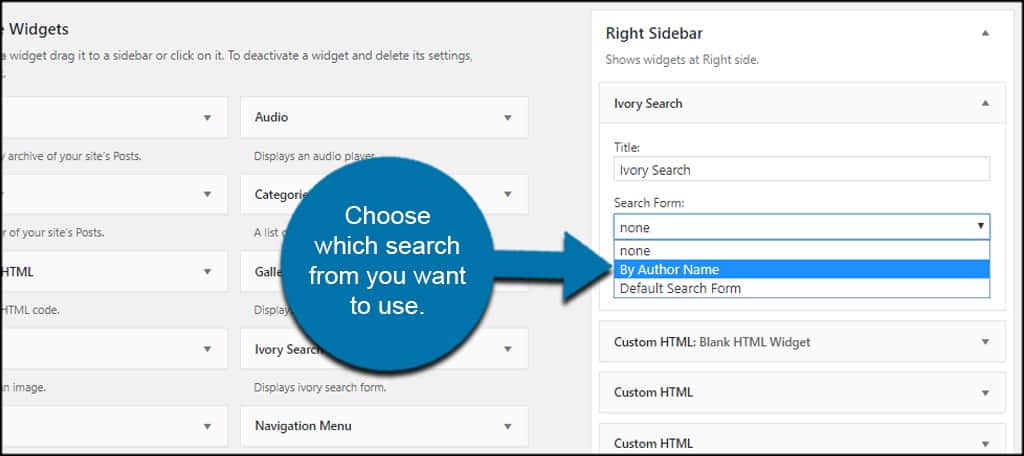
Choose which search from you want to use.
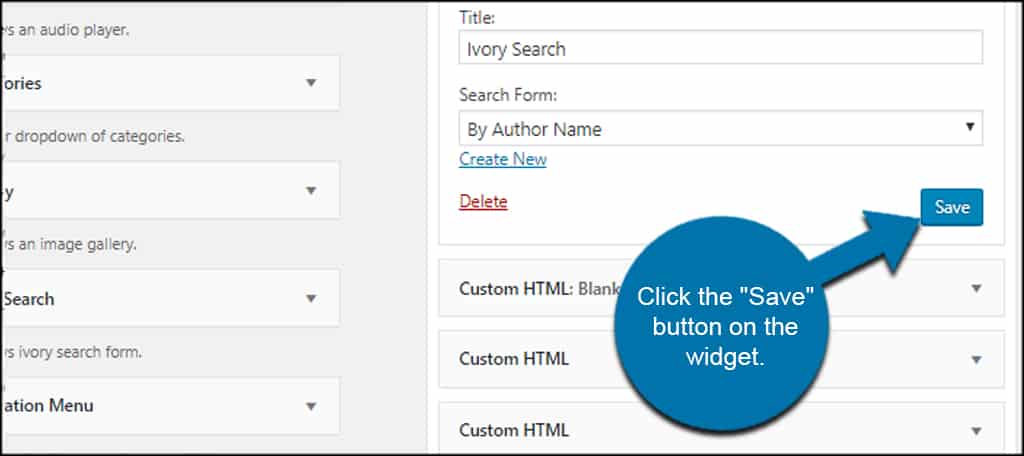
Click the “Save” button on the widget.
You will then have a search field in the sidebar in reference to the custom search query settings of the form you built.
Improve On-Page Time with Specific Post Types Search Results
Adding a WordPress custom search form improves your control over the results. It also gives you a chance to offer visitors a way to search specific post types. Offer your guests an easier way to browse your content. It may boost overall engagement of the site.
What search tools do you like to use in WordPress? Do you find visitors looking for certain information through your posts or pages?
