Are you looking to create a high-quality WordPress slideshow? Unfortunately, WordPress lacks this feature by default. But like most things in WordPress, there is a plugin available. Plugins allow you to customize every part of your website in a new and unique way.
Without a doubt, plugins are the best part of the platform.
The MetaSlider plugin will help you build great slideshows easily and quickly. It is optimized for ease of use, SEO and is the most popular slideshow plugin on WordPress with over 900,000 active installs.
Today, I will demonstrate how to create a WordPress slideshow using the Metaslider plugin.
Why Add A Slideshow in WordPress
While your written content may be the foundation of the website, an image is worth a thousand words. However, adding a lot of images to your website can have some negative consequences like slower load times and forcing visitors to scroll down a lot.
A slideshow fixes these issues.
A slideshow allows you to display a lot of images without inflating your page length. This makes it convenient for visitors to look at. It’s also convenient for developers. Instead of having to find a spot in your blog to add the image, all of them are placed in one location.
This can save you a lot of time as a developer.
Slideshows are also very convenient for showing off product images. For example on a product page, you can create a slideshow that involves different images of the item you are selling. It is a great way to display information and looks very professional.
Installing MetaSlider
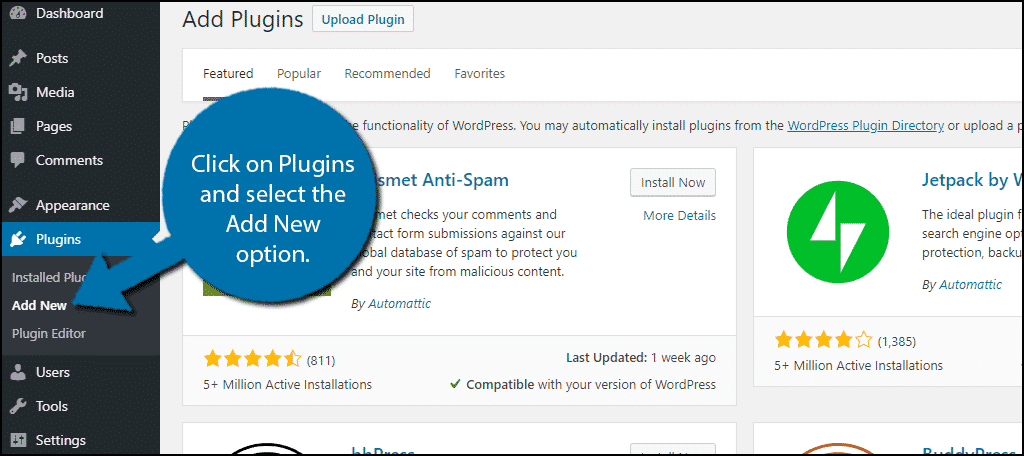
Let’s begin by clicking on Plugins and selecting the Add New option on the left-hand admin panel.
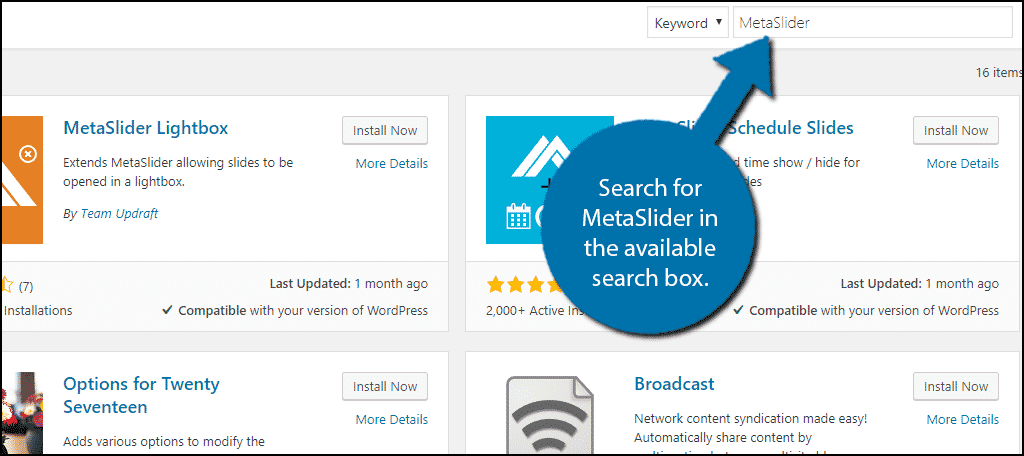
Search for MetaSlider in the available search box. This will pull up additional plugins that you may find helpful.
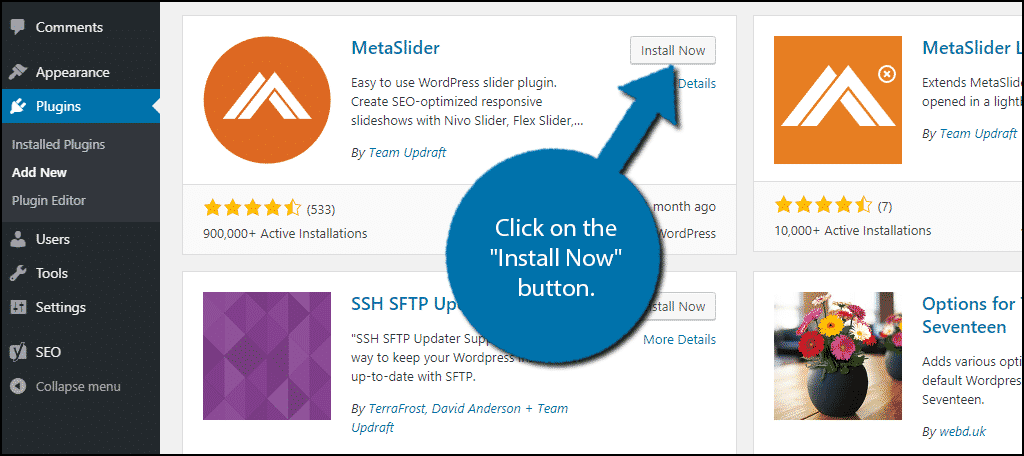
Scroll down until you find the MetaSlider plugin, click on the “Install Now” button and activate the plugin for use.
Using MetaSlider
MetaSlider is very easy to use when creating slideshows and the best part is it’s free to use. This plugin fully supports Guttenberg and allows you to add and view the slideshow at the same time. This makes it easier to find the perfect location inside the post or page.
You can insert multiple slideshows in a single piece of content and the interface makes it easy for everyone to do. The first step involves actually creating a slideshow.
If you have chosen to disable the Gutenberg editor, you can add it to the visual editor using a shortcode. You can also use shortcodes in Gutenberg, but I do not recommend doing so since the block option is much easier.
Creating A Slideshow
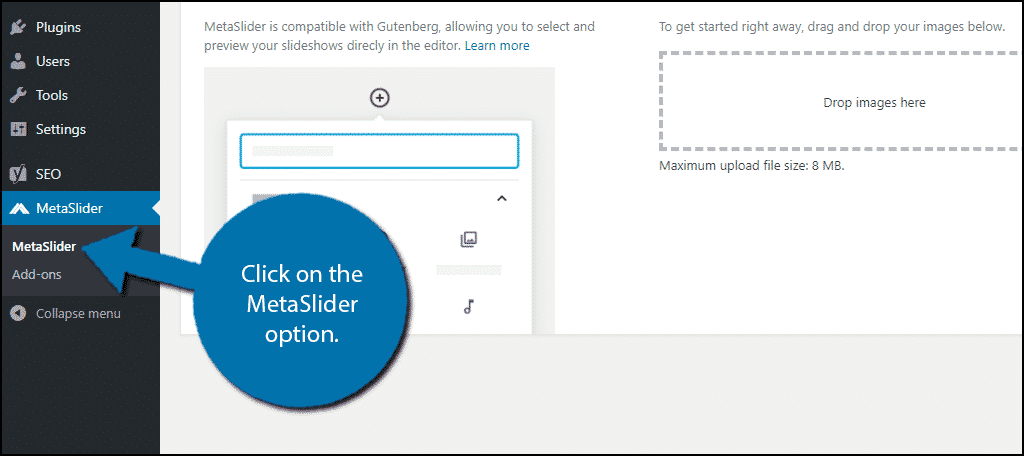
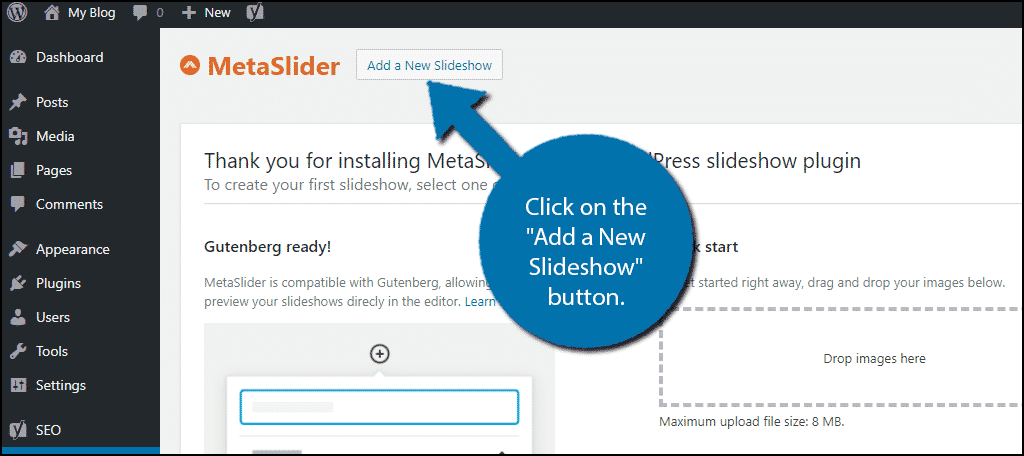
On the left-hand admin panel, click on the MetaSlider option. This is where you will go to create or edit any slideshow.
Click on the “Add a New Slideshow” button at the top.
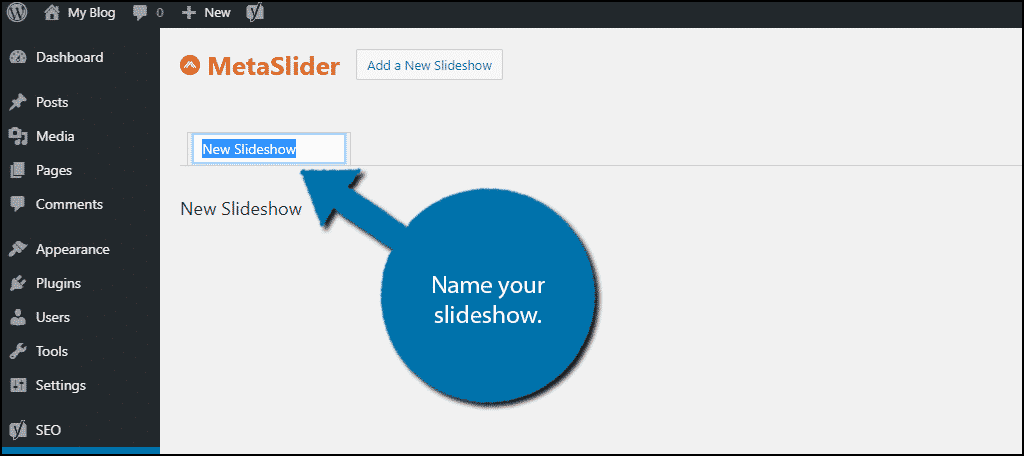
The first thing you need to do is name your slideshow. You will select all of your slideshows in a block by choosing the name. So if you make 3 slideshows and leave the default name, you will see New Slideshow, New Slideshow and New Slideshow. It can get really confusing and will be a waste of time.
Click on the New Slideshow tab to rename it.
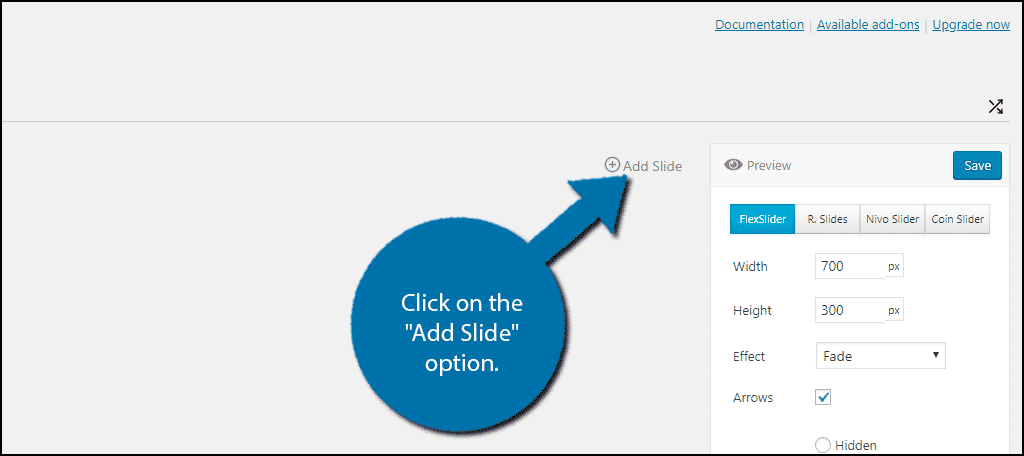
Click on the “Add Slide” option. This will open up the media library where you can add the image you want. Repeat this step to add as many slides as necessary.
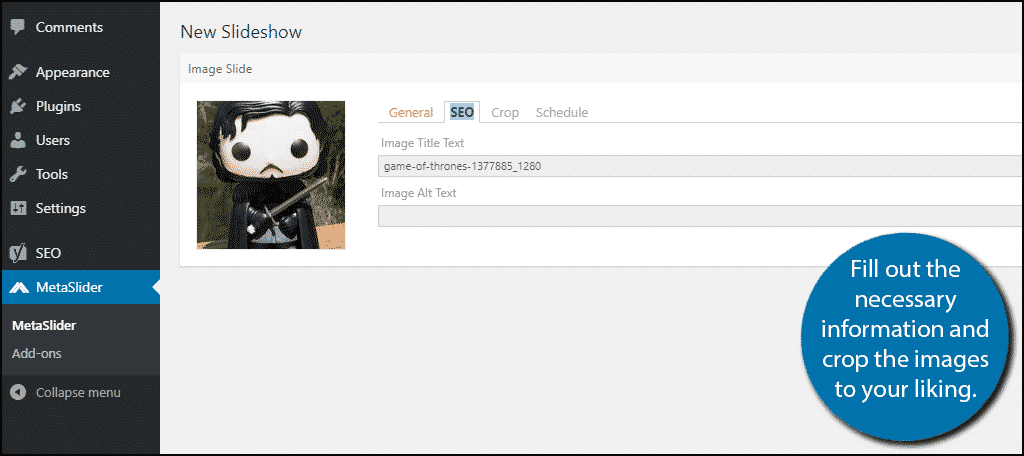
You can now add information to each image. This includes the caption, title and alt text. This is found on the General and SEO tabs.
The Crop tab will allow you to perform a simple crop with 9 options. This is a very basic crop tool, so I strongly recommend making sure the image is properly cropped and sized before adding.
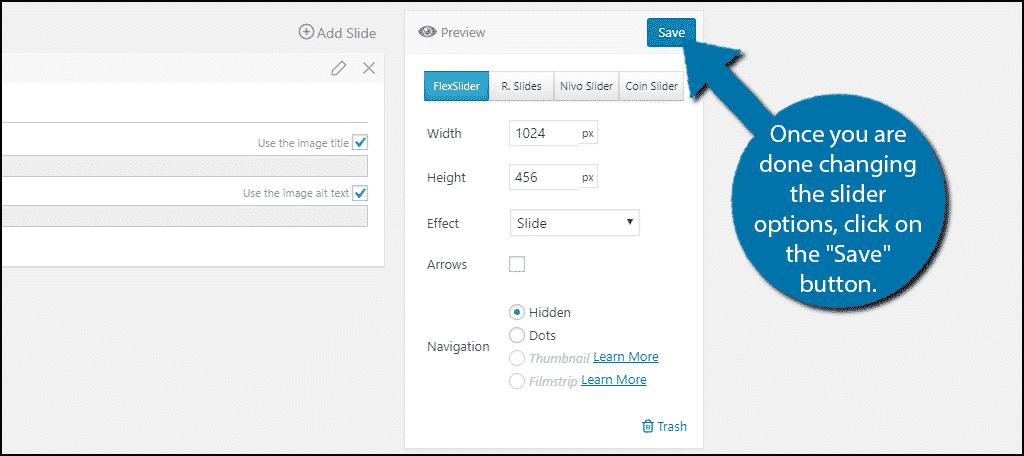
Once all of the images have been added, it’s time to select the slider type as well as the size and effect. There are 4 sliders and 18 effects to choose from. Which slider and effect you choose is completely up to you. Pick the one that looks the best.
However, for image size, you should try to make it the same dimensions of your images. This will avoid any unnecessary cut off and will look more professional if everything is equally sized.
Once you are done changing the slider options, click on the “Save” button.
Adding A Slideshow
Now that you have created a slideshow, it is time to add it. Go to any existing post or page, or create a new one.
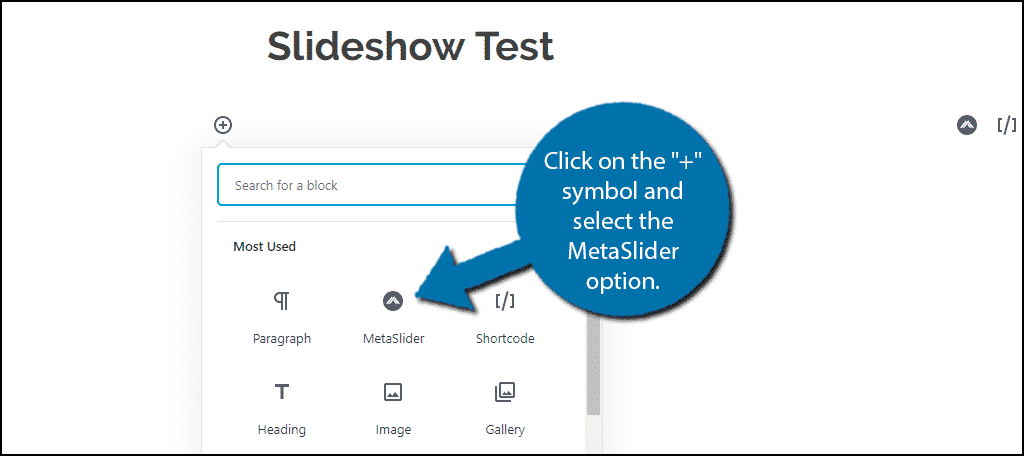
Make a new block or click on an existing block. Click on the “+” symbol and select the MetaSlider option.
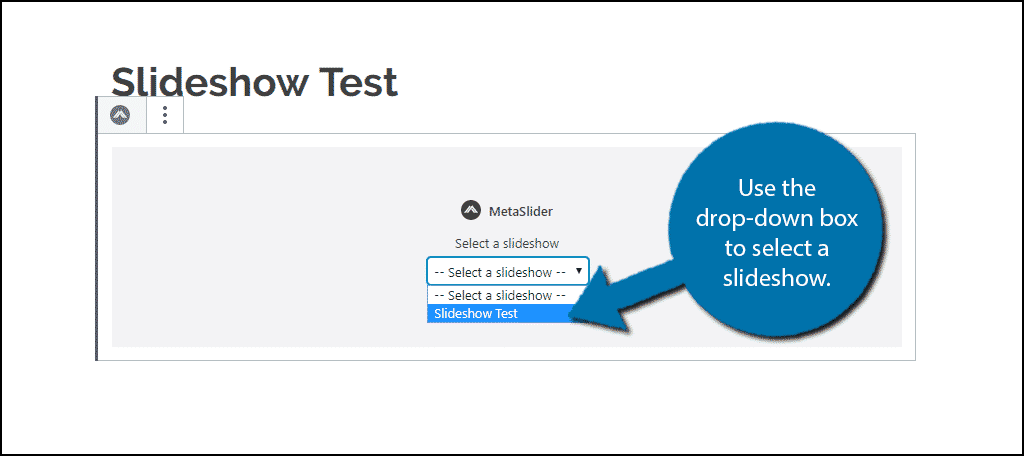
Use the drop-down box to select a slideshow. Remember, you will see the names of the slideshows, which is why naming them is so important.
Congratulations, you have successfully added your slideshow to WordPress. You can use the preview button to see it on the post or page. However, if you want to add the slideshow to your sidebar, you will need to use the widget.
Adding a Slideshow Widget to the Sidebar
The sidebar is visible on every page of your website, thus it is natural to fill it with useful information. But, it also needs to look good.
The MetaSlider plugin also adds a slideshow widget to make it easy. Although, you will need to make sure that the slideshow you add is properly sized beforehand. If not, it will not look very appealing.
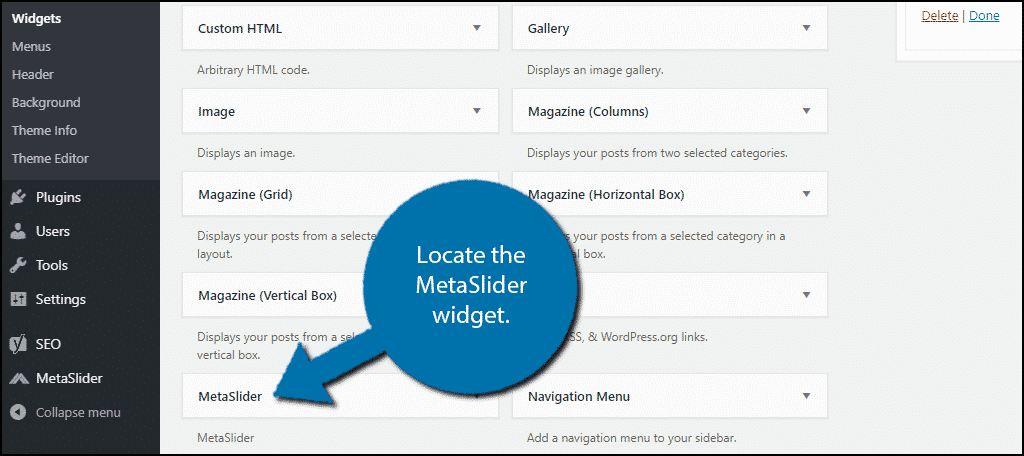
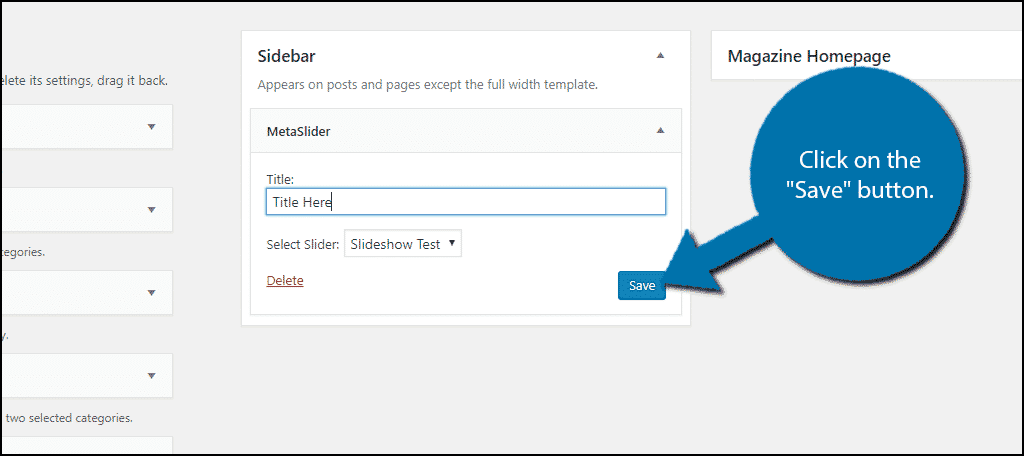
Go to the widgets area of WordPress and locate the MetaSlider widget.
Add a title and select the slideshow you wish to display from the drop-down list. Click on the “Save” button when you are done.
This is a great way to display products or grab the visitor’s attention. This will make them look at other information you may have on the sidebar like new blogs or social media icons.
Spice Up Your Content With Slideshows
Images are powerful tools when it comes to creating content. They can be used to inform, entertain and almost anything else. However, you can certainly have too much of a good thing and that applies to images.
Having too many images can disrupt your page speed and be distracting to readers.
While having a lot of images may work well for some websites, some content should not be overloaded. However, that is your choice as a creator.
How easy did you find the MetaSlider plugin to use? Why are you adding a slideshow in WordPress?
