One of the main complaints about WordPress is its performance. If you don’t take the time to optimize your website’s performance, well, it won’t be very good. That’s where a plugin like Performance Lab can help.
This plugin provides a variety of tools to help you improve your website’s performance, and they come directly from the WordPress team. This can lead to better loading times, which directly impact search engine rankings.
Today, I will demonstrate how to use the Performance Lab plugin and why every site should have a WordPress performance plugin installed.
This tutorial is for:WordPress 6.0.1Plugin: Performance Lab v1.4.0
Why Install A Performance Plugin In WordPress?
Simply put, no one likes a slow website. It’s really that simple.
While this may seem completely obvious, many websites today still run sluggishly. This directly impacts both the user experience and how well your website will rank on Google and other search engines.
Did you know that more than 50% of users will leave a page that takes longer than four seconds to load?
Well, it’s true, and it’s not hard to believe. In fact, you are probably one of those people; I know I am. And this is even more important for mobile users who are even less patient than their desktop counterparts.
Yet, this can be easily avoided by using the right tools. And in that case, this means using a performance or WordPress health plugin. These types of tools help you identify problems with your website. Sometimes, they can even fix them automatically.
Not only is this very easy to do, these types of tools even offer automatic scans.
Thus, there’s really no excuse to have a slow website in today’s fast-paced world.
How to Use Performance Lab in WordPress
Step 1: Install Performance Lab
Performance Lab is a module-based plugin, similar to Jetpack. This plugin is made by the official WordPress team, and the entire point of it is to beta test new release features before they are incorporated into the core WordPress files.
Now, I know what you are thinking, why in the world would I want to beta test features on my website? Well, you are not really beta-testing them, at least in the sense that this plugin only contains tested modules.
Anything in beta will clearly label itself as “Experimental” and be easy to identify. These modules will allow WordPress to see how much of an impact each module is having in a real website environment.
Using these features may help the developers identify performance enhancements as it aims to improve the WordPress platform.
Thus by using this plugin, you can provide feedback to the WordPress developers team.
These performance modules carry out specific tasks and this lab plugin contains quite a few. They Include:
- Dominant Color
- WebP Uploads
- Autoloaded Options Health Check
- Enqueued Assets Health Check
- Full Page Cache Health Check
- WebP Support Health Check
- Persistent Object Cache Health Check
These modules simply need to be checked and enabled to be active. Thus, all you need to actually do is decide which ones you want to use, although some of them are on by default.
Let’s begin by installing the plugin.
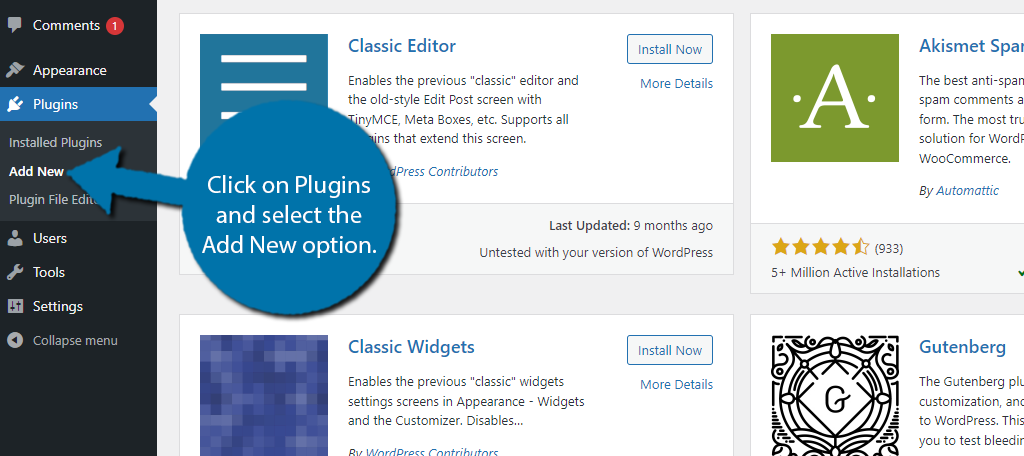
Let’s start by clicking on Plugins and selecting the Add New option on the left-hand admin panel.
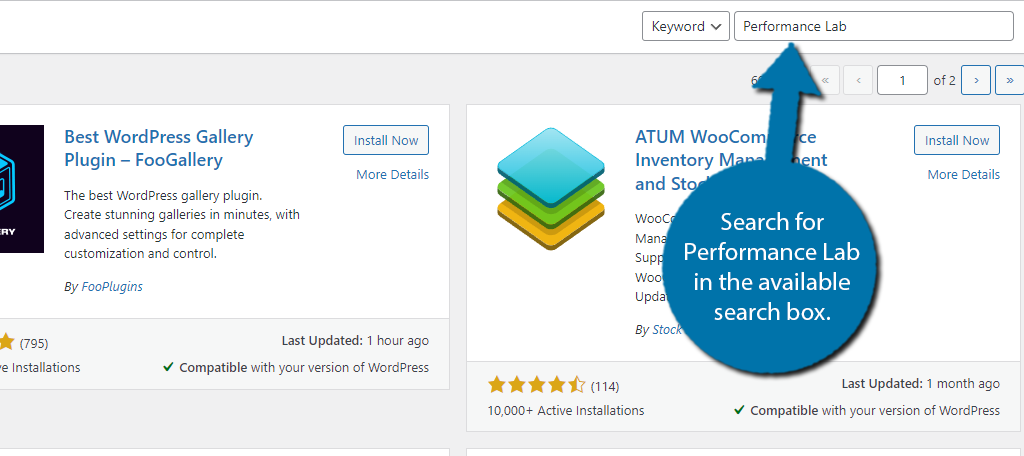
Search for Performance Lab in the available search box. This will pull up additional plugins that you may find helpful.
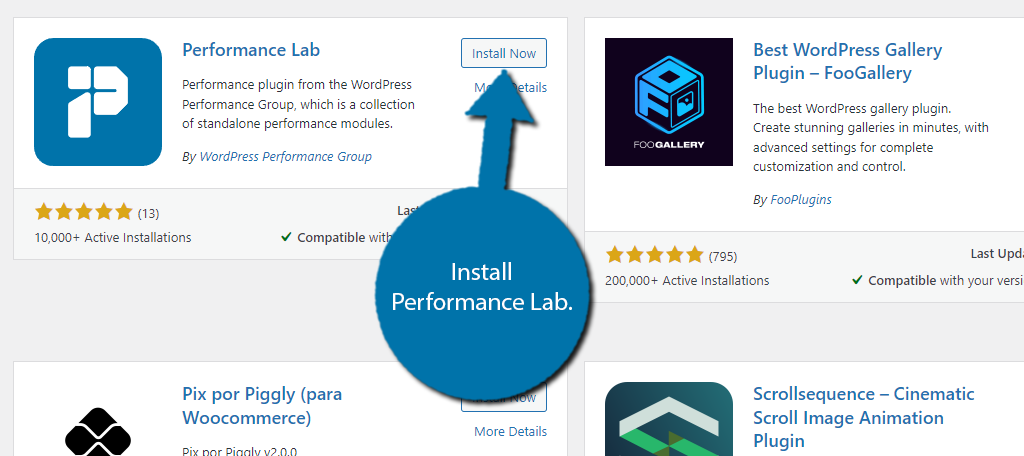
Scroll down until you find the Performance Lab plugin and click on the “Install Now” button and activate the plugin for use.
Step 2: Enable Or Disable Modules
Just to be clear, all this plugin consists of is a series of checkboxes and a “Save” button. Thus, it’s just a matter of checking or unchecking the box you want. Thus, there’s not much to explain.
On the left-hand admin panel click on Settings and select the Performance option.
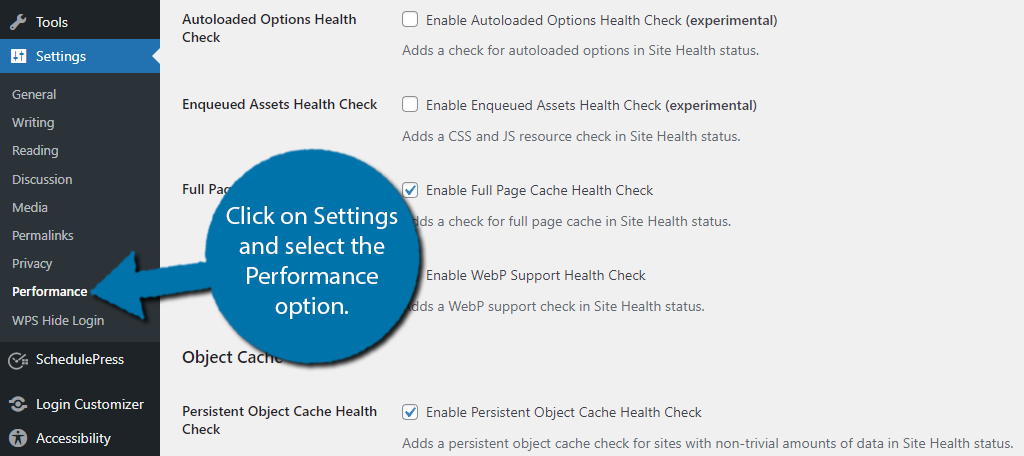
By default, only the Autoloaded Options Health Check and Enqueued Assets Health Check modules in WordPress are off. The rest are all on.
Simply check the box of the module you want on and make sure the box is unchecked for those you do not.
You can see what each one does by reading the sentence underneath it. For the most part, they just add a Site Health check, but more on that in the next section.
Click on the “Save Changes” button when you are done.
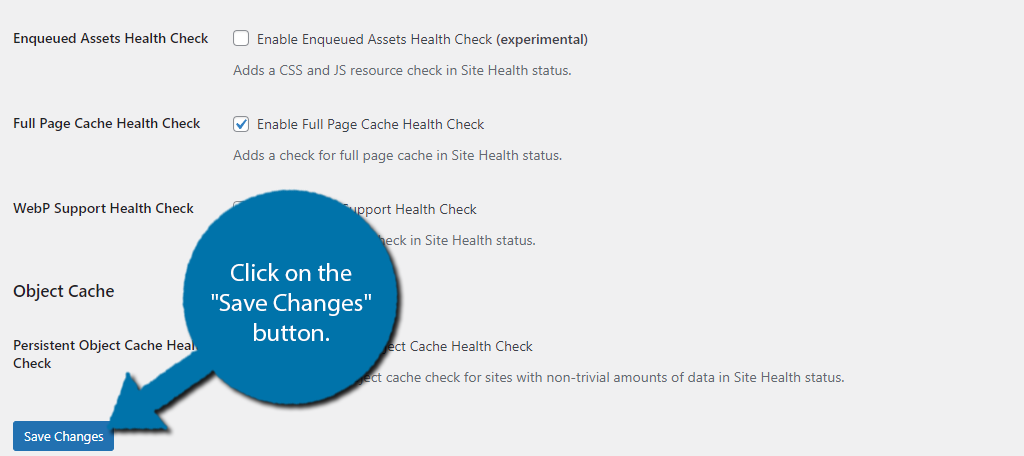
Note: There are no experimental modules at the time of writing this. However, they will be denoted with the word “Experimental” so they should be easy to identify.
Like any plugin, you are proceeding at your own risk when using one.
Step 3: View Site Health
Now if you paid attention to what each module did, you would have noticed that 5 out of 7 of those modules tell you it adds a new check to the Site Health Screen. This is a WordPress feature that helps you identify problems with your site.
Basically, they just add a new health indicator to give you a better idea of why your site may be slow. The other two just make some simple changes to how images work in WordPress on the backend.
There will be no impact on how you use the platform in any way.
To find the Site Health section, just click on Tools and select the Site Health option. Alternatively, you can actually reach this location directly from the WordPress dashboard.
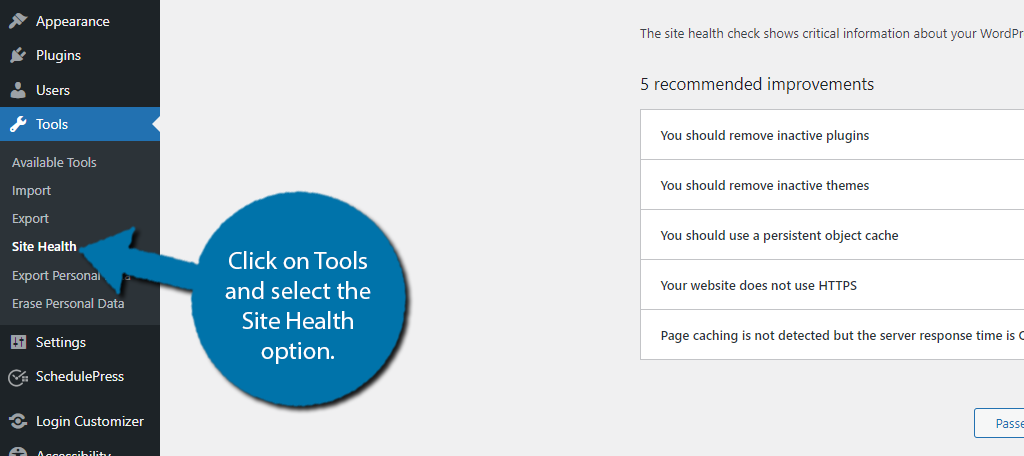
At the top, WordPress provides a site health rating. It already contains a variety of tests, so you will have to see which ones you added. So for example, the Persistent Object Cache Health Check is on from Performance Lab.
You should see a test related to this. And most likely, it will be under the recommended improvements. You can expand it for more info.
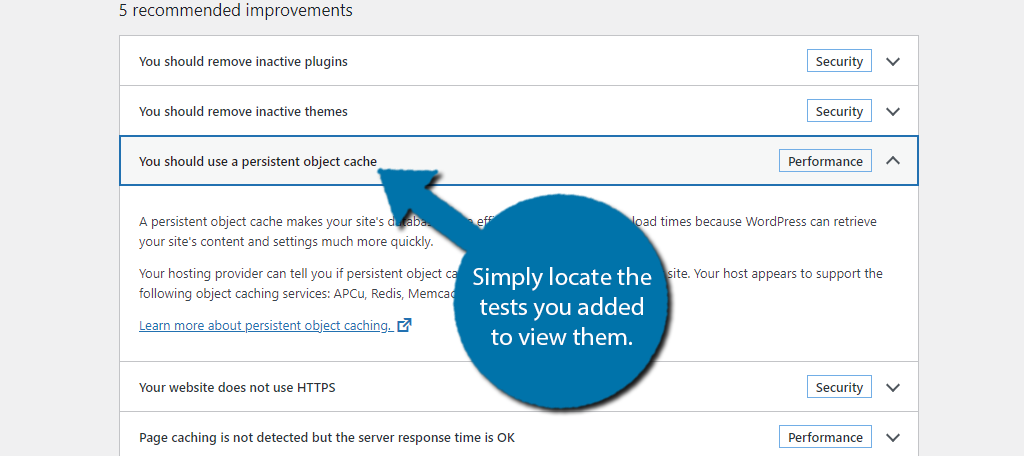
There is also a link that will take you to an official explanation of the test. Again, this plugin won’t actually fix anything, the goal is to provide you with more information to help you get better performance.
And if the WordPress team notices that websites are getting better results, they may incorporate these modules into the WordPress core files, which will reduce the need for plugins like this.
Just remember that even if your Site Health says “Good” that doesn’t mean you can’t improve.
In fact, your website may say good, but still run slow. There are too many variables, thus you should use multiple tools.
Make Sure Your Website Runs Fast
In no uncertain terms, people expect fast websites. The days of loading a website patiently are over as everyone is in a rush. Even when they are not. And the competition from other websites will drive this forward.
Not to mention that Google has confirmed page speed is a factor they use when ranking content.
Slow websites cannot be successful in today’s world, and even if people are patient, you are going to lose sales. Every second a user has to consider making a purchase, there is a better chance they won’t.
Don’t give them time to think. Get them to check out ASAP!
What steps do you take to ensure your WordPress website runs fast? Do you use any other plugins to strengthen a WordPress core feature?


