Titles of your posts in WordPress give visitors a first impression of your site and content. The last thing you want is to accidentally offend anyone. It’s often safer to set up a list in WordPress of forbidden words in titles.
This is especially helpful in a multi-author team environment. It gives you the peace of mind that a certain banned word isn’t making it into a headline.
In this tutorial, I’ll show you a simple way to create a list in WordPress of forbidden words in the titles. It uses a small bit of code, and it is effective at enforcing a blacklist of terms.
Why Use Banned Words in WordPress Titles?
Titles are the most prominent element in Google search. It’s the first thing people read when looking for content. If there is something obscene or unrelated to your industry, it may cause visitors to look elsewhere.
And this will impact traffic to the website.
Think of it as preventative measures to keep the site clean and friendly to your target audience.
Back up the Website
The first thing you’ll want to do is create a backup of your website. Since we’ll be adding code, you want to make sure it’s easy to recover should things go wrong.
You have a number of ways to save this backup when using WordPress. However, I like the UpdraftPlus plugin. It lets me save directly to my Dropbox account, which means I can access the backup from anywhere I have an Internet connection.
Use a Child Theme
A child theme is perhaps the best method when customizing a WordPress theme. One of the reasons is because a child layout protects your coded add-ons.
For example, the code you’ll add in the next steps may be overwritten when the theme’s publisher pushes an update. Using a child theme keeps your code safe while still benefiting from any upgrades.
This is an optional process, of course. You don’t have to use a child theme. It just makes it easier to modify the website without worries of losing the adjustments.
Adding the Code to Functions.php
Let’s get started.
First, we’ll need to access the functions.php file of your WordPress theme.
You can do this a number of ways. A lot of developers like using FTP applications such as FileZilla. You can also use WordPress plugins like WP File Manager.
For this tutorial, I’m going to use cPanel‘s File Manager tool.
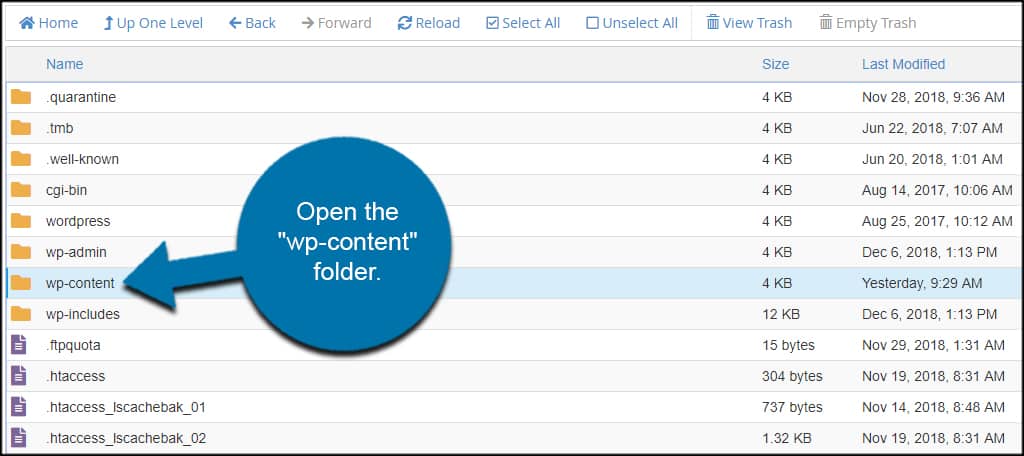
From the root directory of your site, open the “wp-content” folder.
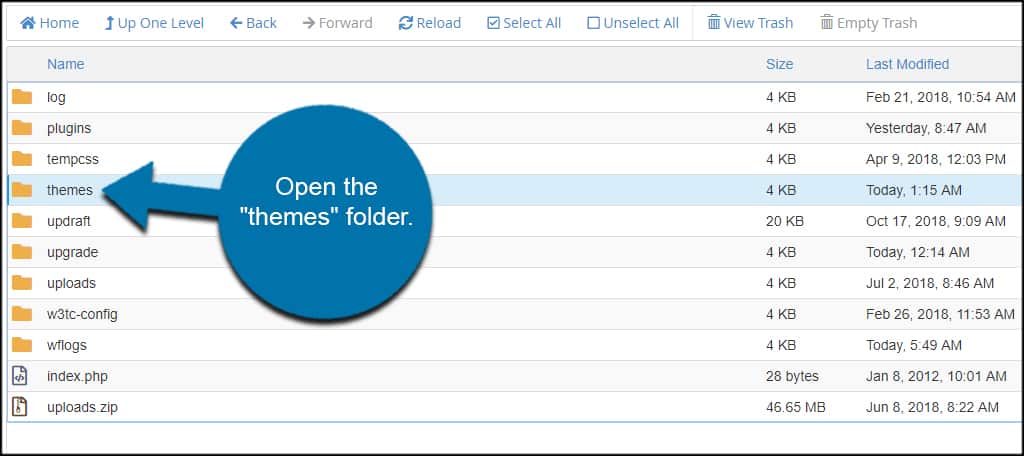
Open the “themes” folder.
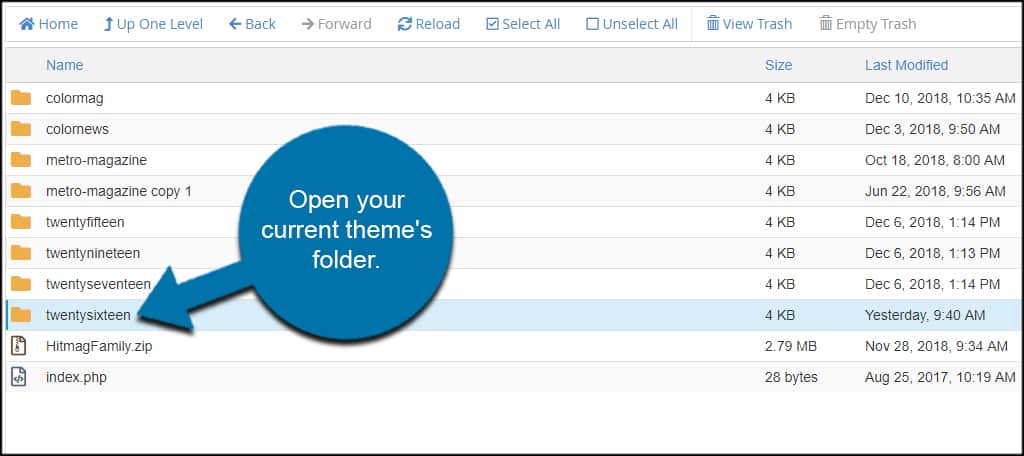
Open your current theme’s folder. If you’re not sure which one you’re using, you can click the “Appearance” section in the WordPress dashboard. This will show you what theme you currently have activated.
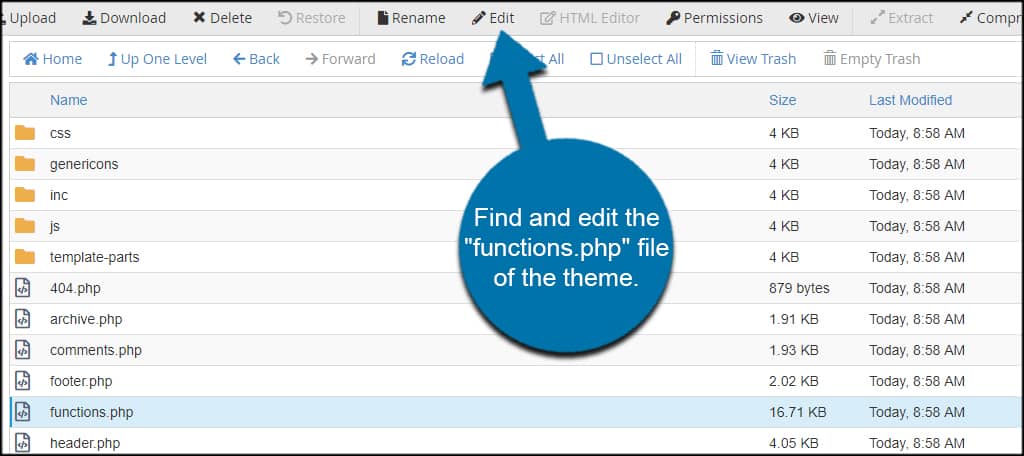
Find and edit the “functions.php” file of the theme.
Add this code to the file and save it:[ht_message mstyle=”info” title=”” show_icon=”” id=”” class=”” style=”” ]function wpb_forbidden_title($title){
global $post;
$title = $post->post_title;
// Add restricted words or phrases separated by a semicolon
$restricted_words = “banned1;banned2;banned3;banned4;banned5”;
$restricted_words = explode(“;”, $restricted_words);
foreach($restricted_words as $restricted_word){
if (stristr( $title, $restricted_word))
wp_die( __(‘Error: You have used a blacklist word “‘. $restricted_word .'” in the post title’) );
}
}
add_action(‘publish_post’, ‘wpb_forbidden_title’, 10, 1);[/ht_message]
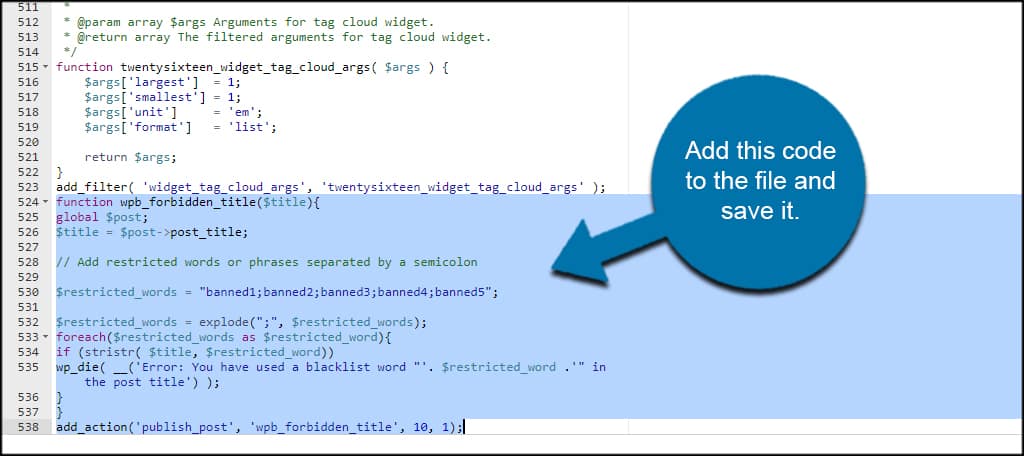
Adding Your Blacklisted Title Words
In the code above, you’ll see “banned1;banned2;banned3;banned4;banned5“. These are the placeholders for your words. You want to replace each of these with the forbidden words for your WordPress titles.
Note: In between each word you want to add, don’t forget the “;“. Do not use spaces, and do not add the semicolon to the end of the list itself.
So, if you wanted to ban a series of foods from being used in WordPress titles, the line of code would look like:[ht_message mstyle=”info” title=”” show_icon=”” id=”” class=”” style=”” ]$restricted_words = “broccoli;spinach;cauliflower;sprouts;beans;peas”;[/ht_message]
You can add as many words as you like to this list.
Save the functions.php file after making your changes.
Now when someone publishes a post containing any of your forbidden words in the title, they’ll see a warning screen.
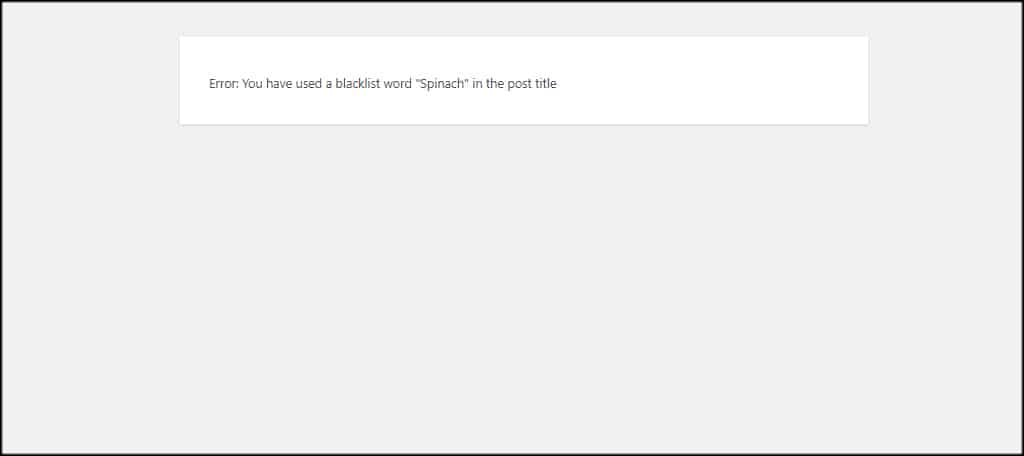
Forbidden Words in WordPress Titles are Case Sensitive
When creating your list, you want to keep in mind the coding is case sensitive. Which means you need to add the upper and lower case versions of words to really be effective.
For instance, we would add “spinach;Spinach” to the word list.
WordPress Post and Page Titles are Still Visible After Publishing
Adding this code to give WordPress a list of forbidden words in titles doesn’t stop the posts and pages from being published.
The content will still go live.
It merely gives a warning screen that the title is using a blacklisted word. At which point, the publisher can go back to make adjustments and update the post or page.
Engage Your Audience with Optimal Titles
Creating a list of forbidden words in WordPress titles is just one trick to streamline the site. I suggest using online tools to help you create awesome titles for your content.
You may also want to consider optimizing meta descriptions if you want to improve click-through rates in Google.
Do you blacklist certain words and topics on your site? What do you use to optimize your titles and descriptions?
