With WordPress, you can customize every single aspect of your website, including the loading screen animation effect. Normally, you would need to use coding to achieve this. However, you can also use a plugin. And I have found the perfect one, WP Smart Preloader.
This plugin allows you to select a loading animation and apply it to the website. It also offers users the ability to add custom CSS to customize any of the default animations. Thus the possibilities are endless.
Today, I will demonstrate how to use the WP Smart Preloader plugin to customize the load screen.
What Is A Loading Animation?
Loading animation is a small animation that is visible when something is loading. For websites, these animations appear when pages take longer than usual to load or when a certain process requires additional time to complete, like a payment transaction.
There are many famous ones that have become synonymous with certain brands.
For instance, Mac users should be very familiar with the spinning color wheel. In many cases, these loading animations can become very recognizable. It really depends on the visitor’s perspective.
Why Change the WordPress Page Loading Animation?
In reality, there is absolutely no advantage of doing this from a performance standpoint. In fact, you might even be increasing the load times to do that (almost negligible). That said, making your website looks the way you want it to is a good enough reason for most.
And many visitors will appreciate that attention to detail.
Of course, there is one main advantage, which is custom branding. Instead of using generic preloader images, you can create a custom one. And that custom visual could include your logo or company mascot.
Therefore, even when a customer is loading, they can’t escape your brand.
That said, doing this requires more coding knowledge, so it isn’t for everyone.
It’s also worth mentioning that load animations are not just for pages. In some cases, customers may have to wait for the information to process on your website. These are great opportunities to show off flashy animations.
How to Customize the Loading Animation in WordPress
Step 1: Install WP Smart Preloader
The WP Smart Preloader plugin allows you to swap between 6 loading animations for your website. Each one can be customized further with additional CSS. You can also choose to add your own custom animation, but you must fully design it with code.
Overall, the process couldn’t be easier and will only take a few minutes at most.
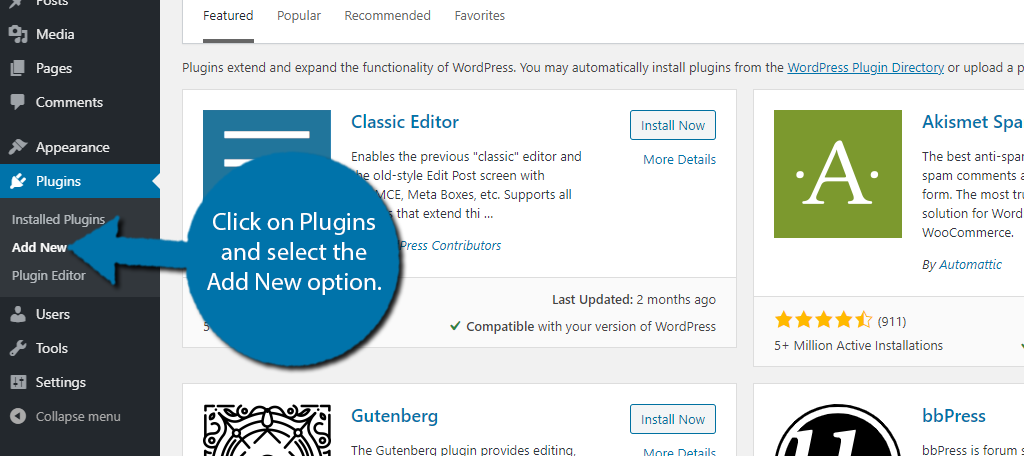
Let’s start by clicking on Plugins and selecting the Add New option on the left-hand admin panel.
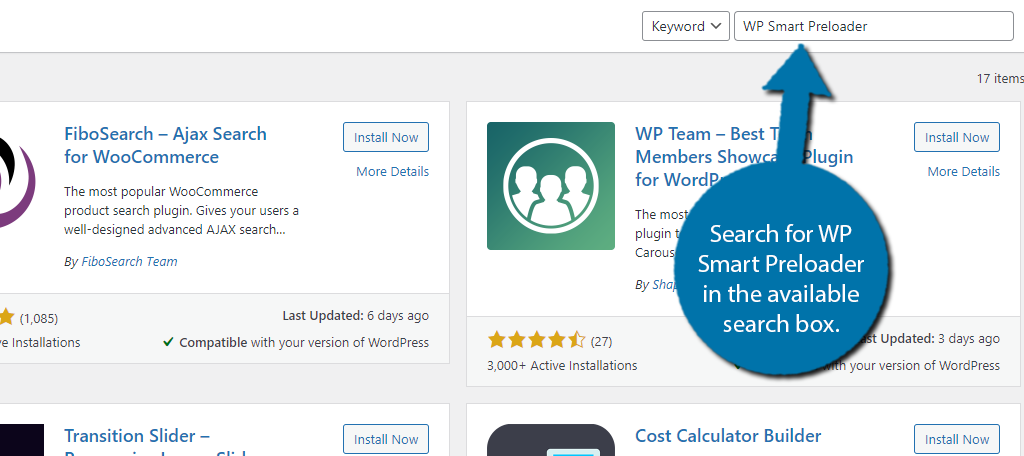
Search for WP Smart Preloader in the available search box. This will pull up additional plugins that you may find helpful.
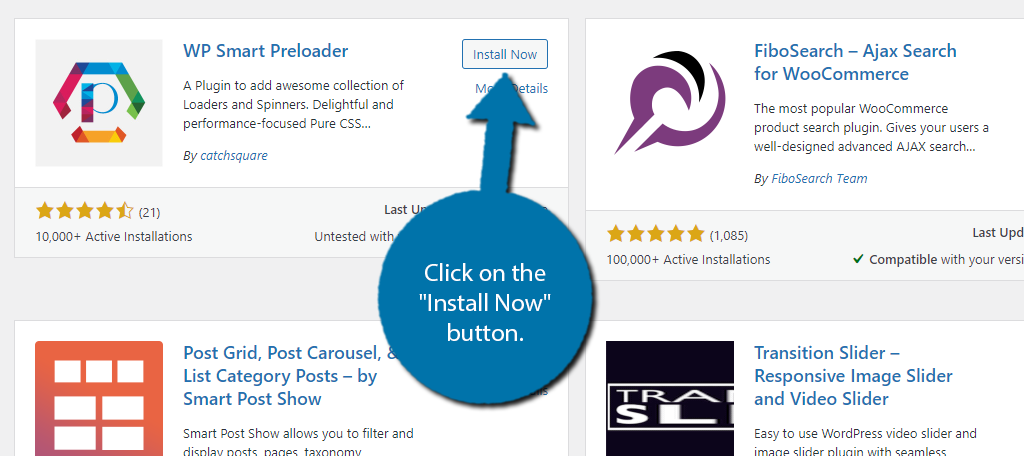
Scroll down until you find the WP Smart Preloader plugin and click on the “Install Now” button and activate the plugin for use.
Step 2: Select a Preloader Image
In terms of settings, there are not many. In reality, you just need to select the preloading gif and save your choice and everything will appear on your website.
On the left-hand admin panel, click on Settings and select the WP Smart Preloader option.

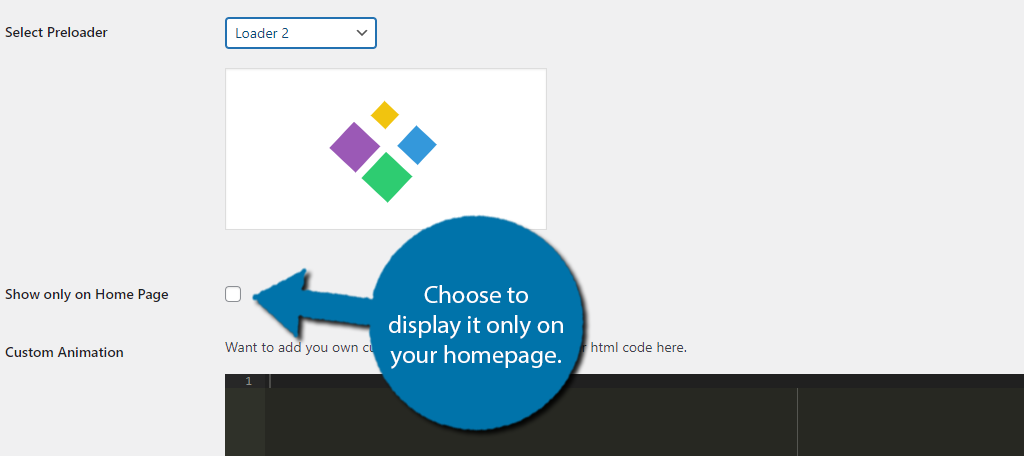
At the top, you will see a drop-down box that you can use to select a website loader. In total, there are six of them and you can create your own.
Since creating your own involves the use of custom code, I cannot demonstrate how to do that.
Instead, pick one of the preloader images.
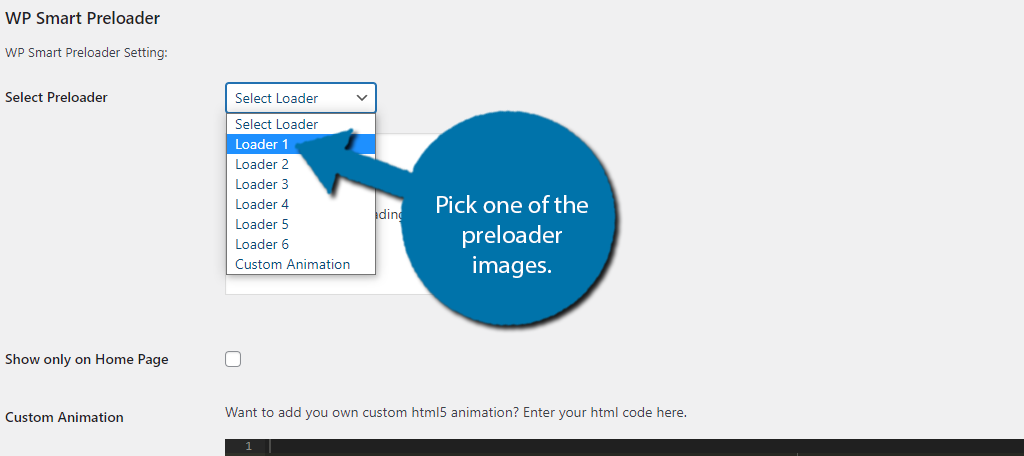
In the box below, you can see a preview of the loading animation.

There is a checkbox below this that will only display the animation on your home page. In reality, the home page is the most common spot to see a custom loading animation, thus it might make sense for your website to do the same.
Step 3: Use Custom Code (Optional)
Next, you will find two text boxes in which you can add custom code to create a new loading animation or change existing ones. The custom animation box accepts HTML, while the custom CSS box accepts CSS code.
Even if you like the default loader, it is good to make sure that it uses your website colors.
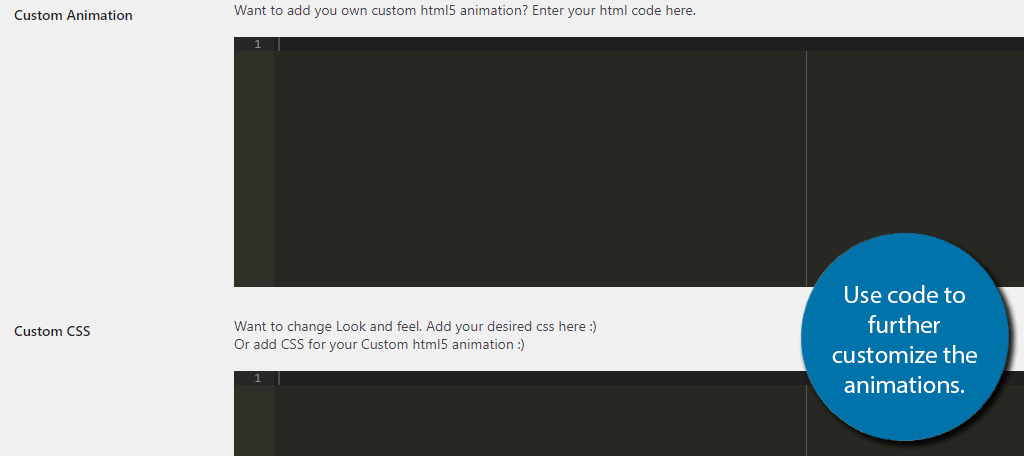
Keep in mind that these boxes don’t check for syntax errors. Therefore, you might want to use an actual HTML editor to troubleshoot.
If you’re looking for a great place to learn a bit of CSS for free, W3Schools has some awesome tutorials.
Step 4: Choose the Animation Time
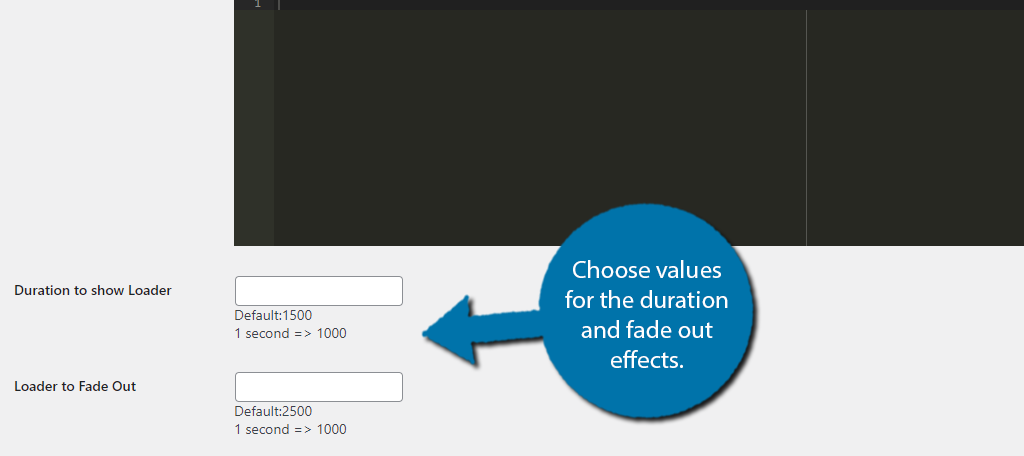
Finally, you will see two more text boxes that you can use to control the duration and fade-out times of the animation. In most cases, you can leave these blank because they have a default value that is ideal for the default load animations.
If you chose to customize these effects, you are probably going to want to edit the duration and fade-out times. Simply enter the number of seconds that the animation will last.
Note: 1 second = 1000, thus if you wanted the effect to last 2.5 seconds, you would enter 2500.
Once you are satisfied with all of the changes you have made, click on the “Save Changes” button.
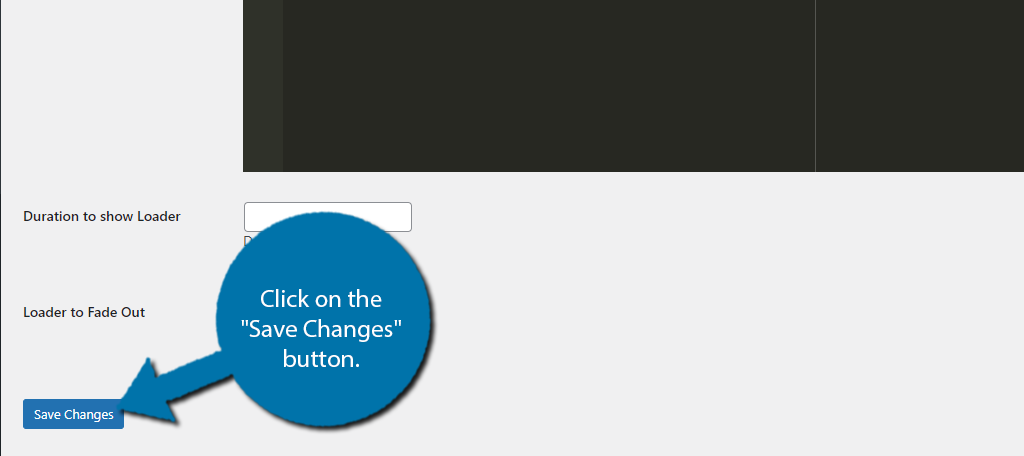
Congratulations, your new loading animation will be visible on your website. You can make changes to this section at any time.
Additional Plugins
As you might have guessed, there are quite a few plugins to choose from when it comes to loading animations in WordPress.
Here are a few other plugins you may find useful.
Preloader for Website
The Preloader for Website plugin allows users to add animated loading screens in WordPress. The plugin uses a lightweight design, which means the impact on your website is minimal. You can customize various features on the loading pages to better suit your needs.
Preloader Matrix
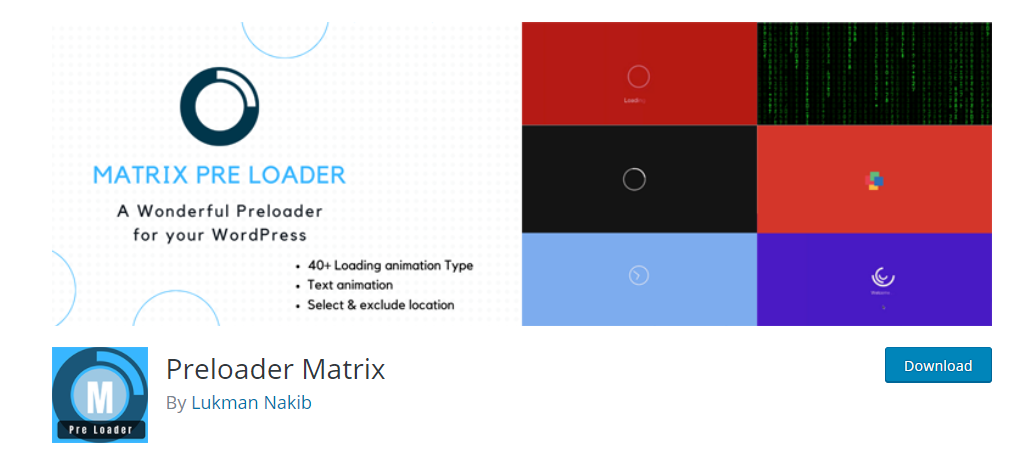
Preloader Matrix is another excellent choice if you want to customize your loading screens and animations in WordPress. This plugin offers users over 40 unique animations to choose from with a variety of customization options. You can even set how long the loading screen will last.
I highly recommend taking a look at the animation this plugin offers if you are not satisfied with WP Smart Preloader.
Avoid Long Loading Times
Sadly, some developers might think that this is an excuse to have longer loading times, but let me assure you it is not. Long loading times not only ruin the user experience, but they will tank your search engine rankings.
Thus the best loading animations are the ones you never see.
However, there are many cases of on-page loading that are not the same as page loading. For instance, say your website performs a calculation that allows visitors to enter values. If the formula is complicated, that could result in an extended wait time.
Thus, having a flashy animation on screen while they wait for the data to load makes sense.
It really depends on the type of loading.
Conclusion
Adding a custom loading animation can help make your website stand out and show off your creativity. And if you make the animation incorporate your website’s logo and colors, you can help build brand recognition.
Of course, the fewer users actually see these loading animations the better. After all, seeing these animations means they are not enjoying your content or looking at products.
Did you use a default animation or create a custom one?
