There are many news sites that use the WordPress platform to create content. Many of these sites add a live news feed that allows users to keep an eye on big stories that are happening in real-time, regardless of what page they are looking at.
Doing so can lead them to click on more stories while they are on your site, which can be great for your statistics. More importantly, all major news outlets have a news feed on their website.
Naturally, these live feeds have become a staple feature of any news site, thus, they have become a standard feature that any user would expect from such a site. Luckily, they are easy to add with the right plugin.
Today, I will demonstrate how to use the Live News plugin to add a news feed in WordPress.
This tutorial is for:WordPress 6.6Plugin: Live News v1.08
What Is a News Feed?
A news feed is a small strip, typically at the bottom of the screen, that displays headline stories for a news organization, the time of day, and the news organization’s name and logo. And most importantly, they are updated in real-time.
That said, there are several types of feeds many news sites may have.
For example, a financial news site may also include a stock ticker to show the latest prices of stocks on the site. Or in some cases, they may show a crypto ticker if cryptocurrencies are the focus.
Regardless of what kind of feed you add, the purpose is to provide real-time information that users on your site can use to find the information they are looking for regardless of what story they are currently reading about.
That said, it is important to point out that a news feed is only valuable if your site is constantly updating with new content to support the feed. Otherwise, the feed will become very static, which defeats the purpose.
How to Add a News Feed with Live News
The Live News plugin allows you to display a news feed in WordPress. You can add links directly to your content to appear in the news feed to provide users quick access to the content that catches their eye.
You can use the settings to configure where the news feed appears. For example, you can have it only appear on your homepage, or another specific URL. Alternatively, you could just have it appear everywhere on your website.
Regardless of how you go about it, you can rest easy knowing the plugin is simple to set up.
Step 1: Install Live News
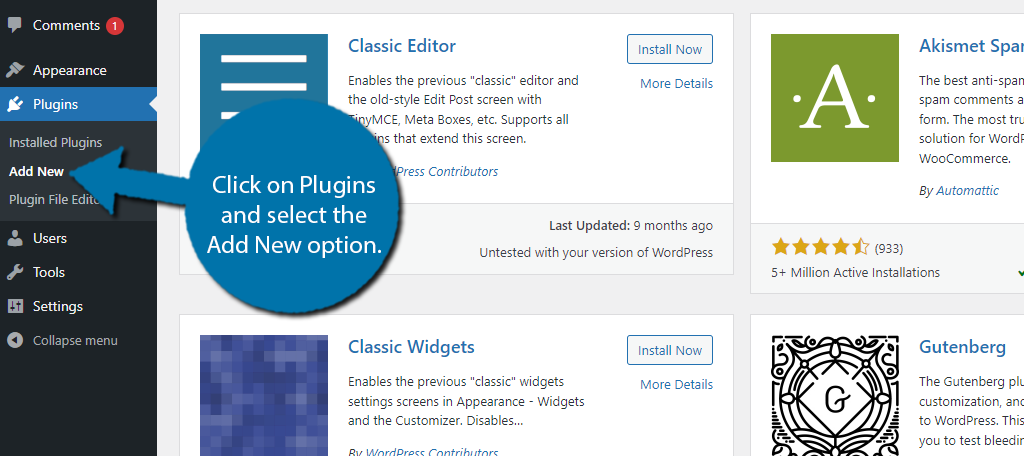
Let’s start by clicking on Plugins and selecting the Add New option on the left-hand admin panel.
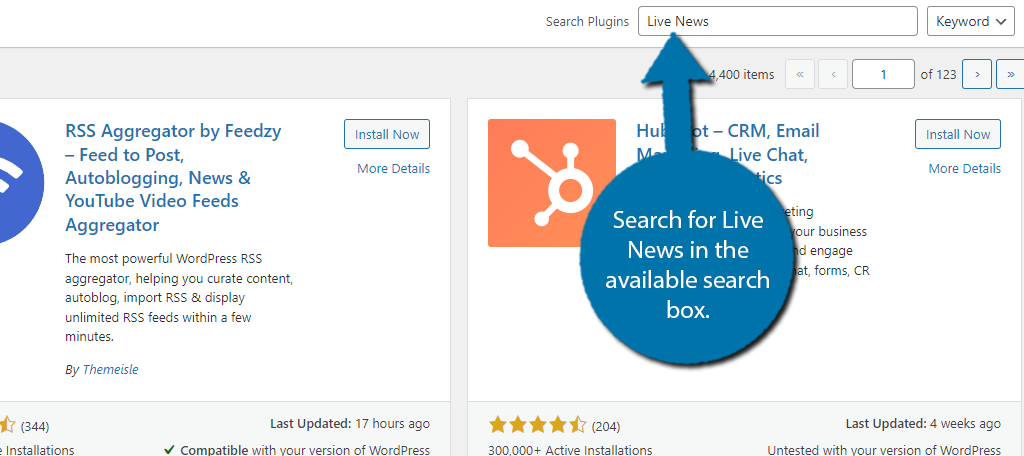
Search for Live News in the available search box. This will pull up additional plugins that you may find helpful.
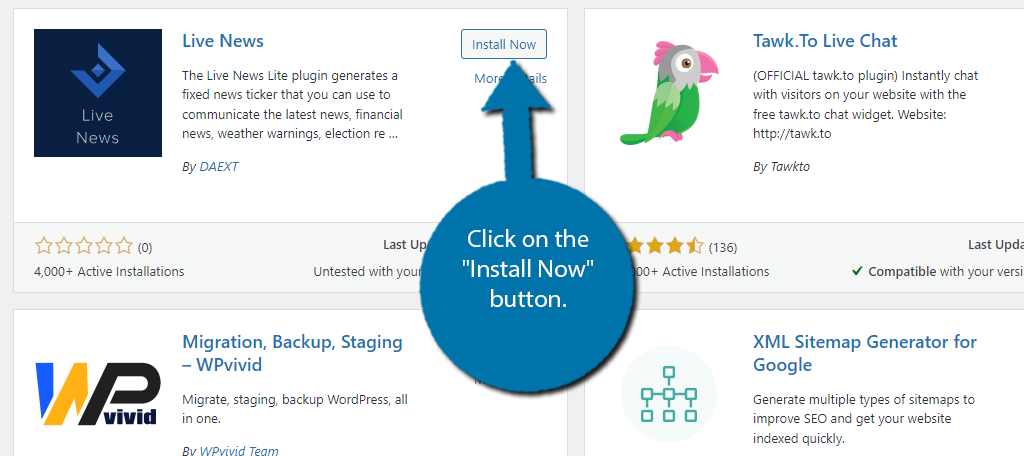
Scroll down until you find the Live News plugin and click on the “Install Now” button and activate the plugin for use.
Step 2: Create A News Ticker
The plugin itself is very straightforward. Simply put, you create an entry that will be displayed in the news feed, which is called a news ticker, and that’s really it. You just need to create multiple news tickers to create a feed.
Obviously, you will also need to delete older entries to keep the feed up to date, but we will cover that later.
To start, click on Live News and select the News Tickers option.
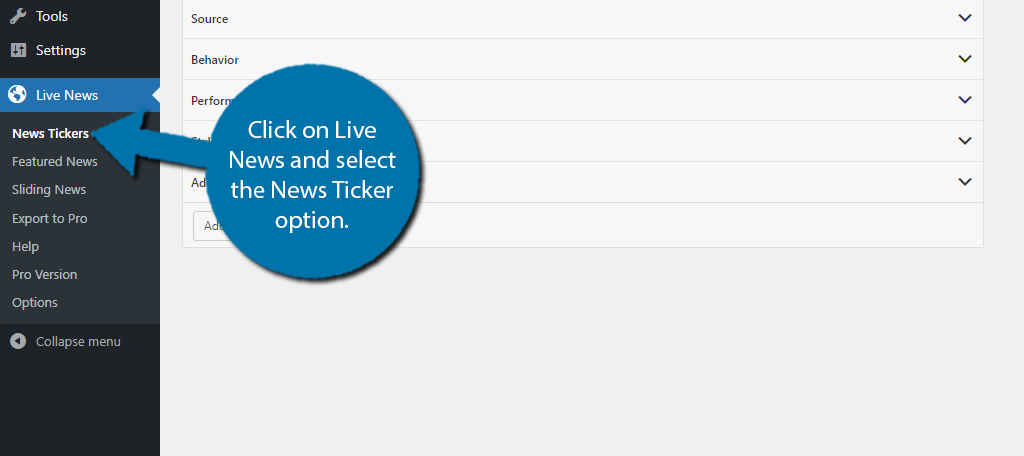
There are several sections here that control various aspects of the ticker entry you are creating. That said, most of them are rather simple, so it really doesn’t take long to add a new entry once you know what options are available.
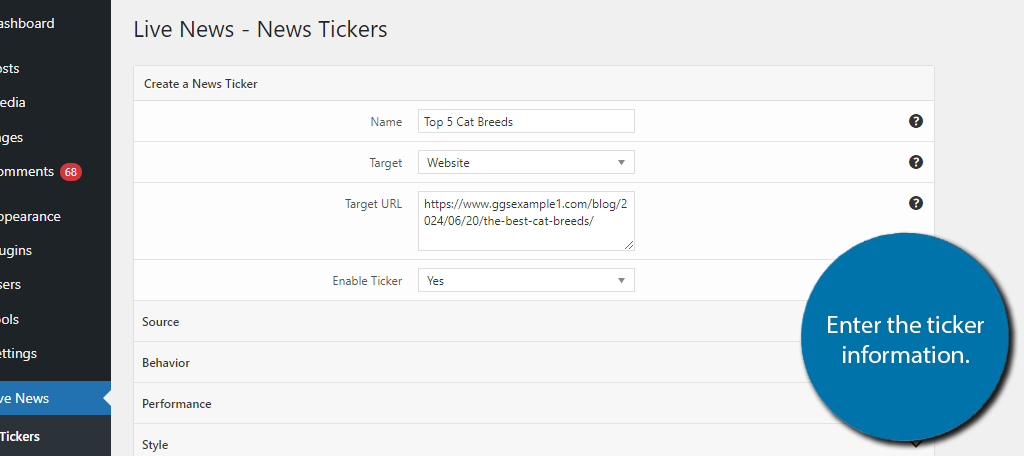
The first section is the “Create a News Ticker” section. Here you can enter the name of the ticker and add the URL of the post you want it to link to. There is also the Target option. This determines where the ticker will appear.
By default, it is set to Website, which just means it will appear throughout your website. The other option is you choose the URL and enter the specific addresses you want this ticker to appear on.
The next section is Source. This is all about the clock settings displayed on the ticker. The default settings should work for most sites as it displays the user’s current time in a standard format. You can change it if you wish.
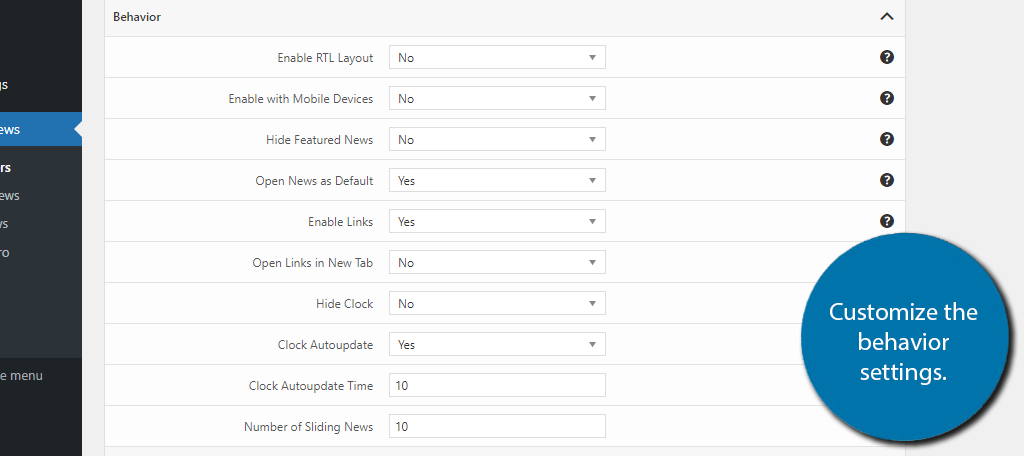
After this is the Behavior section. This allows you to fine-tune when the ticker will appear and on what devices it will. For example, you may not want a news ticker to appear on the mobile view of your website.
Mobile devices have fewer resources, and more importantly, smaller screen sizes. Thus, elements like news feeds can take up valuable screen space and be difficult to read. Simply go through the options and pick the best ones for you.
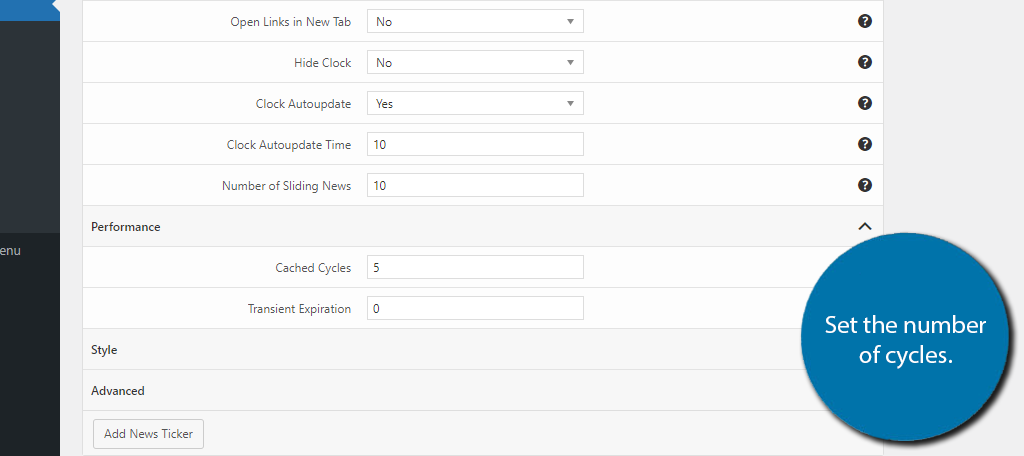
Next is the Performance section. Here, you can enter how often the news feed should check for new tickers. By default, the value is 5, which should work for most sites. The higher the value, the less frequent the ticker will check. The lower the value, the more frequently it will check.
Each time the plugin checks, that will use site resources, which impact performance, thus you may want to avoid lower values.
Following this is the Style section. This contains all of the options you will use to edit the appearance of the ticker. You can choose the color, font, and so on. It is pretty standard when everything is said and done but go through it to customize the news feed.
When you have gone through everything, click on the “Add News Ticker” button at the bottom to save it.
The settings will then revert to default, and you can enter your next news ticker. You should have several tickers up at any time so they can rotate. Otherwise, it would just be highlighting the one ticker you have, which isn’t really a news feed.
Step 3: Displaying the News Feed
Once you have your tickers created, you may notice that your news feed is still blank. That is because you have not actually loaded the news feed with the tickers. This is very simple and takes about a minute to do.
Click on Live News and select the Featured News option.
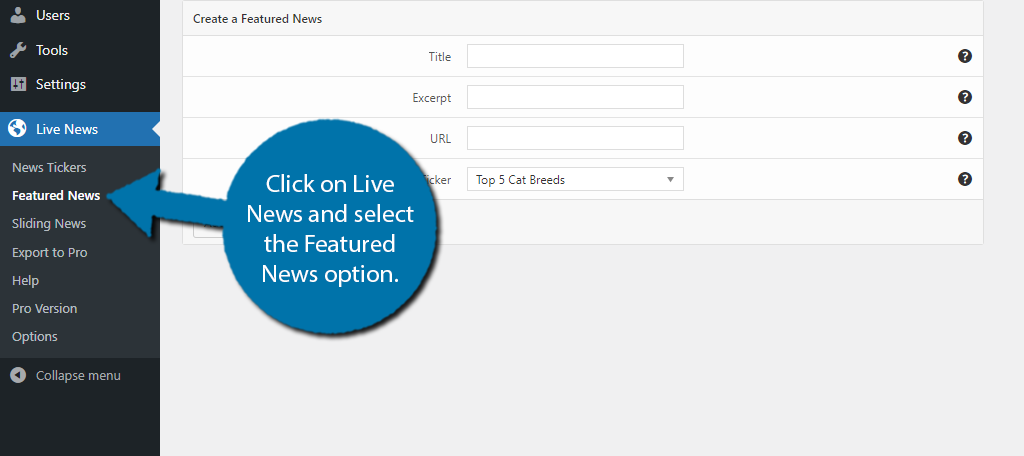
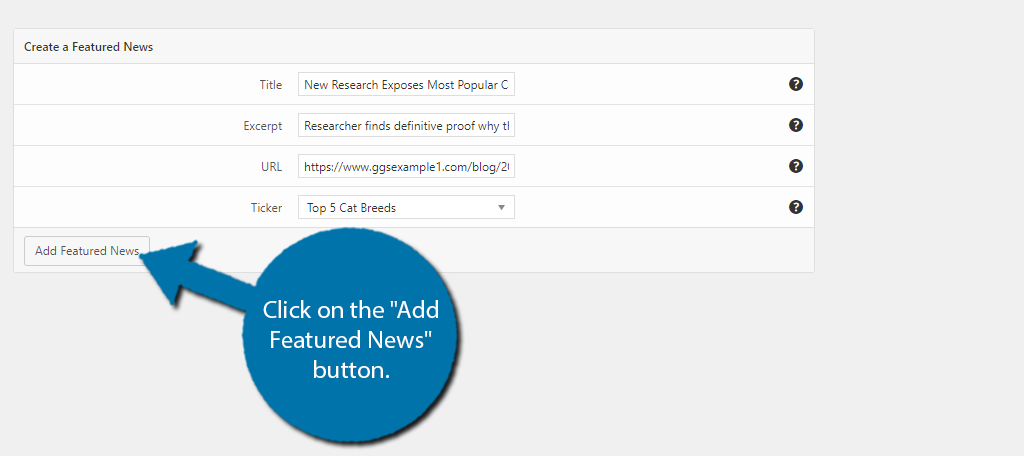
Here, you can enter the actual information that will appear on the News feed. Enter the Title, which will act as the headline, and the Excerpt which will add as the extra information below the headline.
You don’t have a lot of room to work with, so keep it very brief. You can also use the drop-down to select the news ticker you just created. Click on the “Add Featured News” button to finish.
If you check your live website, you can see the news feed in action.

And that’s it. Be sure to regularly update which tickers are in your featured news to keep it fresh. Updating this should become a part of your daily routine, otherwise, it may not be worth adding to your site.
Add A News Feed in WordPress Today
As you can see, the Live News plugin makes it extremely easy to add your own custom news feed in WordPress. While it is easy to add one, it is worth pointing out that maintaining one is a lot of work.
Essentially, you have to constantly update it every time something happens, which can be very difficult for smaller sites with limited resources. That said, it makes a great addition to any site focused on covering the news.
I hope you found this tutorial helpful in learning how to add a news feed in WordPress.
How easy did you find the Live News plugin to use? How often do you update your feed?


