When it comes to live streaming, Twitch is the biggest platform on the internet. While the platform is mainly used for video game streaming, there are many other uses, and you can directly embed your Twitch stream in WordPress.
This allows you to ensure anyone viewing your site can also view you on Twitch at the same time, which can help elevate your numbers for those watching. Luckily, this is really easy to do as Twitch provides an embed for your stream.
Thus, you just need to add that embed to WordPress and you’re good to go. Alternatively, you can use a plugin that can add it for you automatically, and even show when you are live or offline.
Today, I will demonstrate two methods you can use to embed your Twitch stream in WordPress.
Why Add a Twitch Embed in WordPress?
If you are trying to grow your stream, embedding your stream on a website is a great choice.
The way Twitch calculates your current viewers includes users viewing the embed on another website. This effectively means that if you put a Twitch embed on a popular site, your stream will look much bigger than it is.
This can help you grow naturally as some users may want to check out what’s going on in a larger stream.
With this said, it is also worth pointing out that there is a downside to this. Many content creators on Twitch frown upon this behavior because it undermines the work that many creators put into organically building their presence.
Many of them even refer to this behavior as view botting. And if you are associated with it, many may look down on your channel.
Thus, it is important to weigh the risks and rewards for doing this.
Method 1: Using An Embed Link
The easiest way to embed a Twitch stream in WordPress, or any site, is to use the embed link provided by Twitch. This really just involves copying the link and pasting it in the desired location on your site.
Step 1: Obtain the Embed Link
First, visit your own stream (or any stream you want to embed). Underneath the video, you should see a share icon – click on it.

This will give you several options to share the stream. In this case, click on the Embed option.

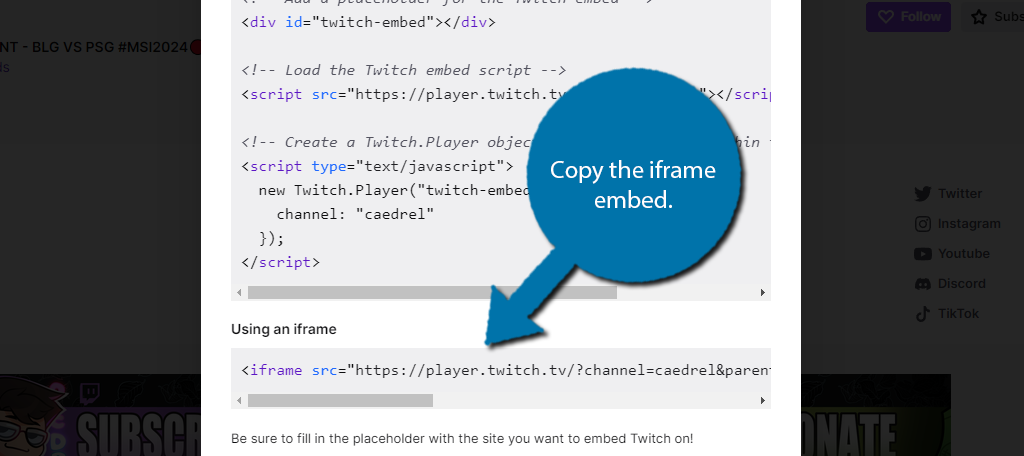
Twitch provides two options. The first is a JS embed link that you can add to your site, while the second is an iframe embed. The latter is much simpler to add, especially since WordPress handles iFrames quite well. Let’s focus on the iFrame and copy the embed code.
Step 2: Add the Embed in WordPress
Now that you have the embed, all that you have to do is add it to the desired location in WordPress with one minor change. Go to any post, page, or widget area where you want to add it. Once there, add a Custom HTML block.
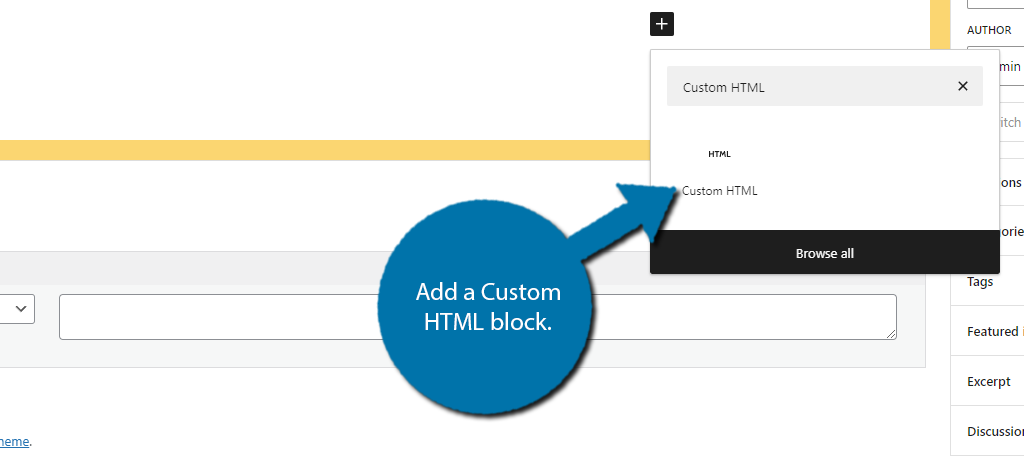
Paste the iframe code into it.
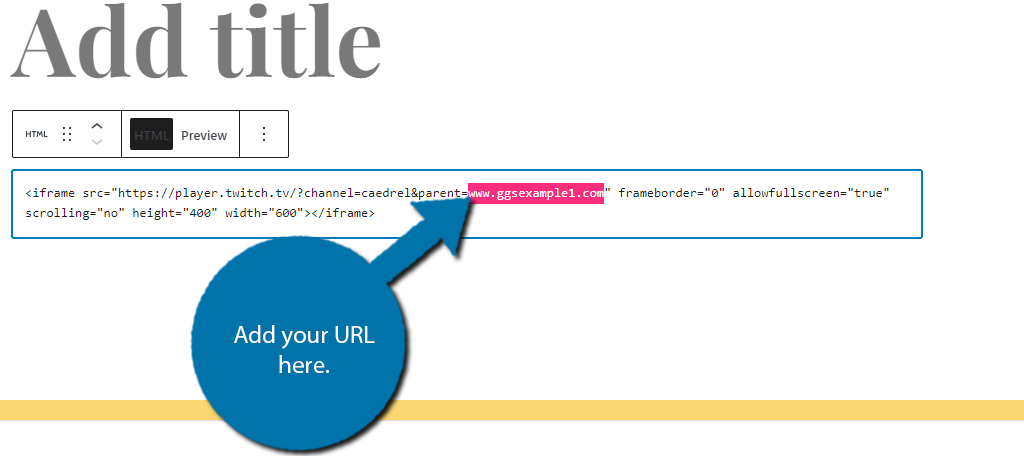
Due to a change that Twitch made, this unedited link will not work. Instead, you need to enter your website’s URL into the embed link. Simply replace the “example.com” with your own URL.
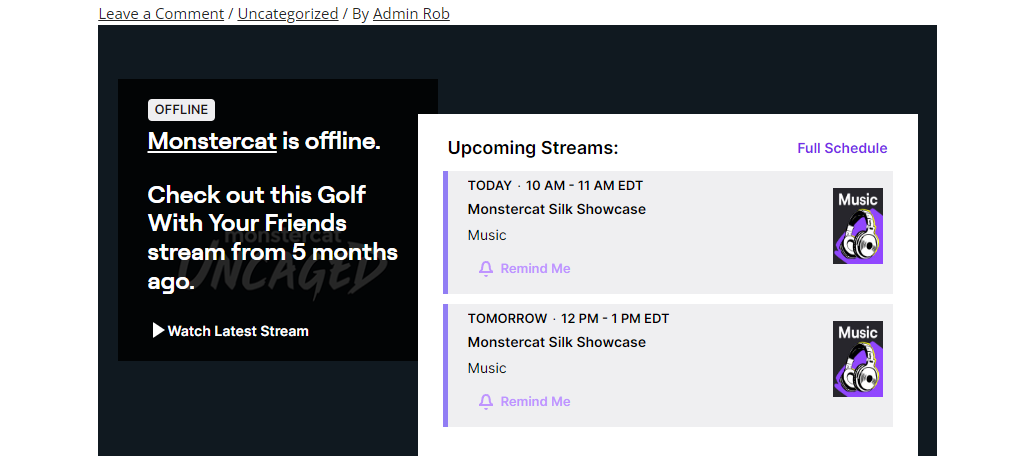
And that’s it. Save the changes and view it on your live site. If the stream is live, it will play, if it is not, then you will see an offline message appear.

You can do this on a post, page, or widget area, just be sure to make sure the dimensions meet Twitch’s minimum requirements.
Method 2: Using A Plugin
There are multiple plugins that can help you embed a Twitch stream in WordPress. In this case, I will demonstrate how to use the StreamWeasels Twitch Integration plugin. It allows you to embed a Twitch stream anywhere in WordPress.
In fact, you can display up to 1000 streams using this tool, but we are just focusing on one today. So start off by installing and activating the plugin on your site.
Step 1: Add Your Twitch Stream
Once you do that, simply go to any post, page, or widget area in WordPress where you want to embed a stream. Add the StreamWeasels Twitch Embed block.
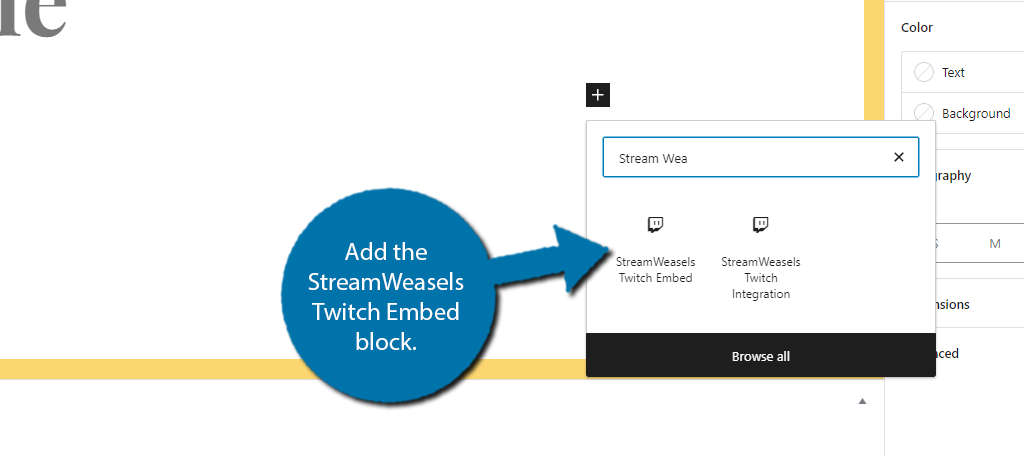
This will add a Twitch player inside of Gutenberg. All you need to do is enter the channel name in the block settings.
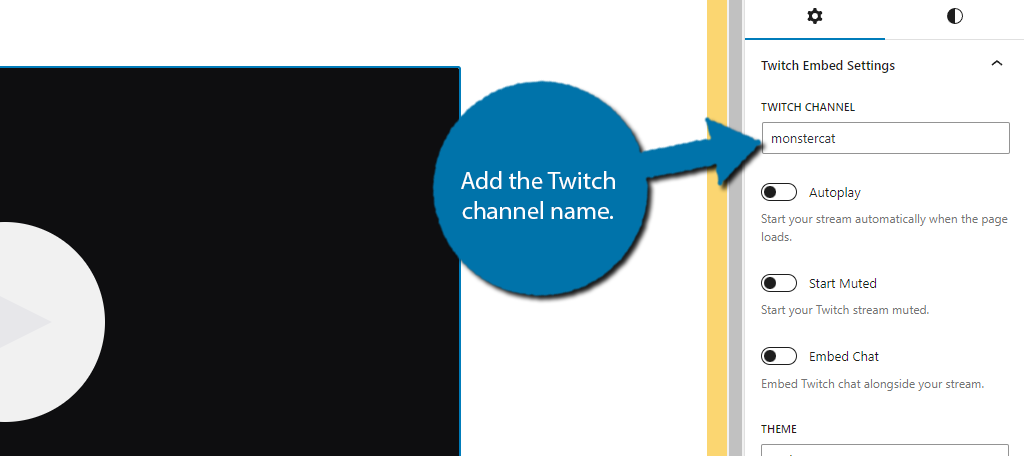
That’s all you need to do with this plugin. That said, there are several settings you may want to configure.
Step 2: Configure the Block
The first three options you can configure are the most important, with the first one being Autoplay. This means that when the post or page is loaded with this block present, the Twitch stream will automatically play.
The second option is if the player should start with Audio, or if it starts muted. And the third option is to display the Twitch chat or not.
All of these use a switch, so simply toggle the options as you see fit. One recommendation I will make is that if you choose to enable autoplay, make sure you also start it muted, as that can be really annoying/problematic to some users.
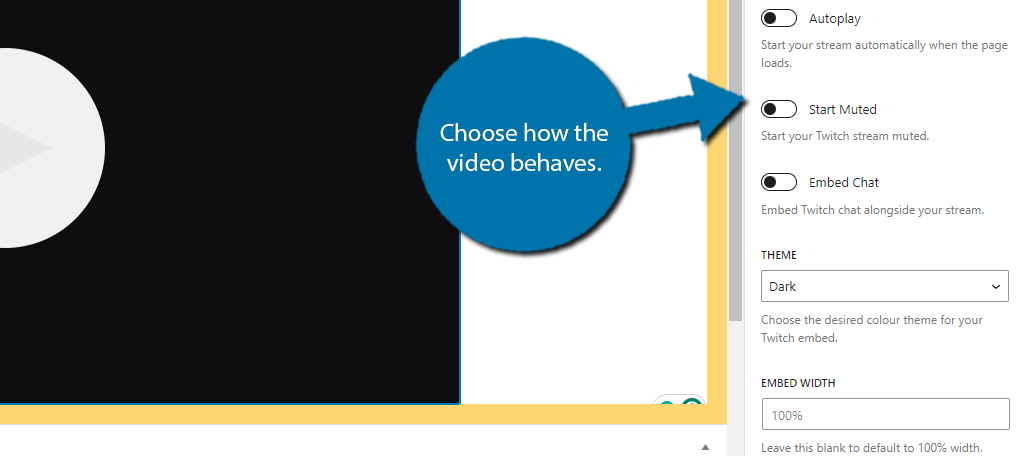
Below these options, you will be able to customize the appearance of the player. This includes choosing between Dark and Light mode, the embed width and height, and even a spot to add your own custom CSS if you wish.
Configure the player however you want. You can then save the changes and view them in action on your website.
Other Twitch Plugins for WordPress
Of course, this is just one plugin you can use to embed Twitch streams in WordPress. One we previously covered was Twitch TV Easy Embed, but that hasn’t been updated in some time.
Luckily, there are plenty to choose from so here are my top picks.
EmbedPress

When it comes to embedding content in WordPress, the EmbedPress plugin is simply the best option. It makes it easy to embed any kind of content in WordPress from virtually any platform.
Naturally, that includes Twitch. To use the plugin, simply go to the desired location where you want the stream to appear and add the EmbedPress block. Then just add the Twitch URL for the stream and you are good to go.
It is definitely one of the easiest ways to Embed a Twitch stream in WordPress, and it goes way beyond that. Some of the other high-profile embeds include YouTube, Google Docs, PDF embeds, and more.
Embed Extended

Embed Extended is another awesome plugin for WordPress that focuses on making it easy to embed multiple types of content. While it is not as extensive as EmbedPress, it is a great choice for many sites.
And similarly, it can make it very easy to embed Twitch streams in WordPress. The plugin is actually easier than EmbedPress because there is no block. Instead, just add the URL to the site and the plugin will automatically embed it for you.
That said, this can somewhat be annoying if you do not want a certain link to work as an embed, so be aware of that. It is also compatible with Elementor, so you have nothing to worry about.
Iframely
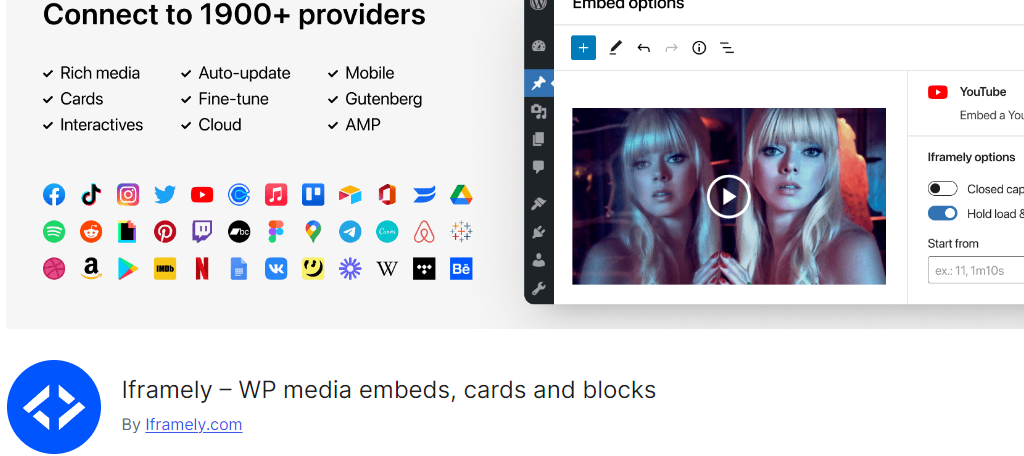
Iframely is another excellent option for embedding any kind of content in WordPress. It boasts being able to connect with over 1900 providers with support for most media types, thus it is a great choice for most sites.
The plugin utilizes blocks that are highly customizable. You can adjust the size, borders, mode (dark or light), and much more. For videos, you can even choose where the video starts, which is great for tutorial content.
As for Twitch, you can choose if you want the stream to autoplay and if it should start muted or not. Overall, it is a great way to embed a Twitch stream in WordPress with minimal effort.
Embed Your Twitch Stream in WordPress Today
As you can see, it is very easy to embed your Twitch stream in WordPress and there are several ways to do it. I think manually embedding the Twitch stream is quite easy and a great option, but has limited display options.
For that reason, using a plugin like StreamWeasels is a great choice because it has an excellent display and several options to control how the player behaves on your site. After all, autoplay can be very annoying, and choosing to disable it can be a great choice.
I hope you found this tutorial helpful in integrating your Twitch streams into WordPress.
Which method did you use to integrate Twitch into WordPress? What is your favorite embedding plugin?

