Speed is an extremely important aspect of your website for multiple reasons. It is a factor that search engines use to determine your rankings. On top of this, visitors are more likely to leave a website that is slow. It’s vastly important to increase website speed in WordPress.
Luckily, you can speed up your website with a performance plugin. These kinds of plugins are designed to make your website optimized for faster load times.
Today, I will demonstrate how to use the Asset CleanUp plugin to speed up your WordPress website.
Speed Is King
Let’s be honest, speed is one of, if not the most important, stat on your website. It keeps visitors happy and helps you rank higher on search engines. However, it can be tricky to figure out what is slowing down your site.
Thus, I recommend using a tool like GTMetrix to perform a WordPress speed test. Of course, just about everything you add to a site slows it down. This includes adding additional plugins or loading a page with a lot of images or video content.
One of the best ways to speed up your website is to remove unnecessary HTML code and that is exactly what the Asset CleanUp plugin does.
Installing Asset CleanUp
The Asset CleanUp plugin boasts that it will trim the fat out of your website and only load the scripts that are needed. In particular, it focuses on cutting out unnecessary CSS and Java, while reducing the actual HTML code.
This is a very good way to optimize your website for speed and the plugin makes it easy to do. Let’s begin.
Note: Asset CleanUp recommends using a caching plugin alongside to get better results. Combined, tools like this can increase website speed in WordPress while making it more efficient.
Click on Plugins and select the Add New option on the left-hand admin panel.

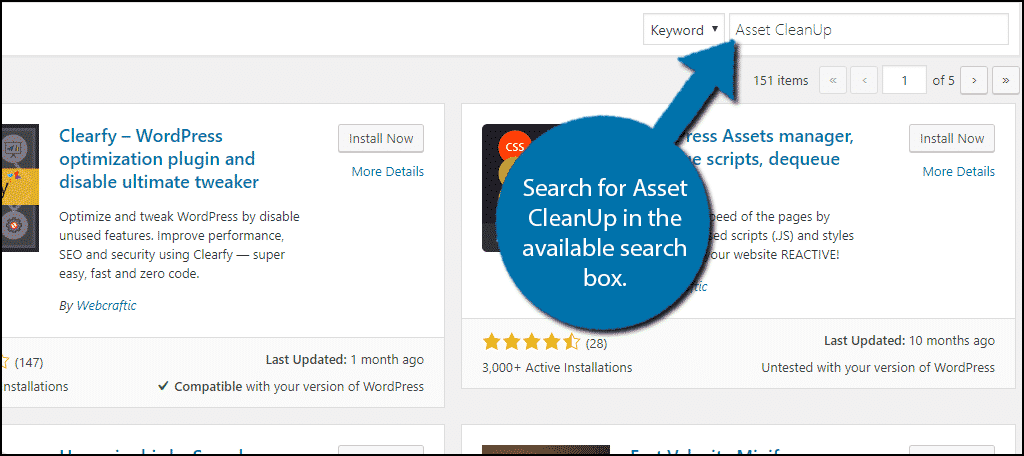
Search for Asset CleanUp in the available search box. This will pull up additional plugins that you may find helpful.
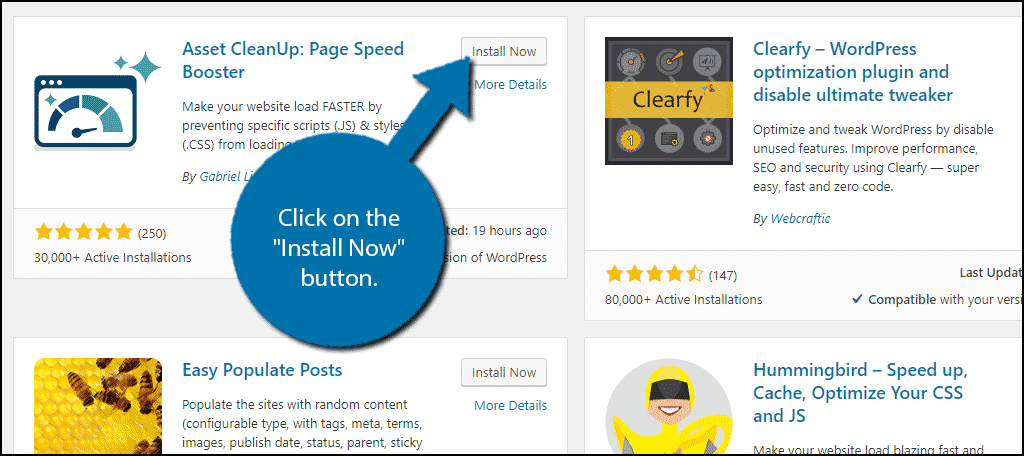
Scroll down until you find the Asset CleanUp plugin and click on the “Install Now” button and activate the plugin for use.
Make A Backup
Before going any further, I strongly recommend creating a backup of your website. This plugin gives you the freedom to disable CSS and Java scripts. While disabling them will speed up your website, they could have unintended results.
For instance, it’s not unheard of for a minifying plugin for CSS and JS to actually break a website. You should only disable scripts when you know what they do.
A backup will allow you to revert before any changes were made.
Using Asset CleanUp
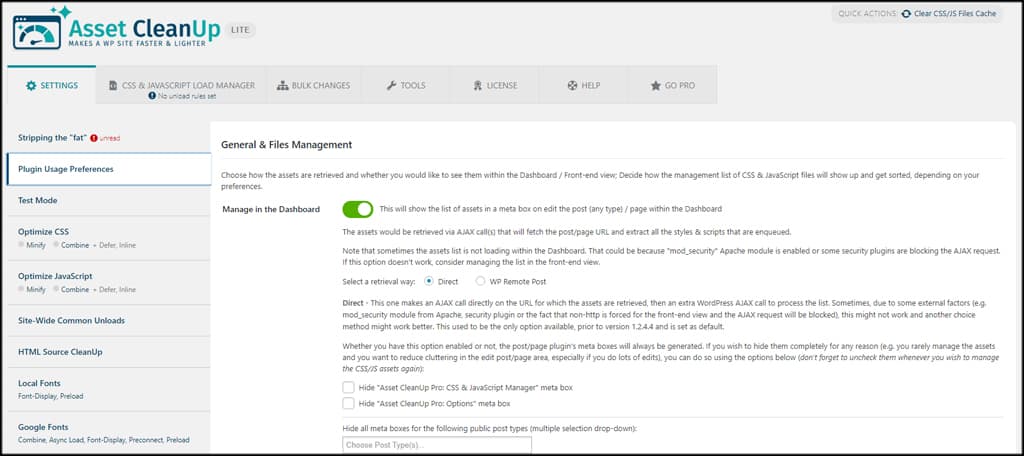
In the Asset CleanUp settings screen, you’ll have a variety of options for how the plugin works. For the most part, these options will depend on your site and what you need to accomplish.
Here is a brief breakdown of what these options do, and you should take your time making adjustments. It’s easy to break a site when you’re trying to increase website speed in WordPress while enhancing performance if you’re unsure what a setting controls.
Plugin Usage Preferences
This section manages the overall behavior of Asset CleanUp. Things like managing in the dashboard or front-end, Asset List layouts, usage tracking and more are found here.
Test Mode
In the Test Mode tab, you can enable the feature for debugging. This is useful if you’re trying to pinpoint exactly what CSS and JavaScript you want on the website.
Optimize CSS
The Optimize CSS portion gives you the chance to combine stylesheets to reduce the total page size of your site. It comes with minifying, deferring and combining options.
Optimize JavaScript
The JavaScript optimizing section works just like Optimize CSS above. You can minify, combine and inline JavaScript as necessary. However, inlining is locked in the pro version.
Site-Wide Common Unloads
If you have elements on the site that are unnecessary, you can unload them from here. You can disable emojis, oEmbeds, Gutenberg CSS blocks and other elements.
HTML Source CleanUp
In HTML Source CleanUp, you can remove tags in the <head> section of the website. For instance, you can remove RSD tags, Windows Live Writer and WordPress version tags.
Local Fonts
If you use local fonts on your site, you can set them to preload. This can cut a few MS off of your time depending on the fonts you have.
Google Fonts
While Google Fonts are great for adding style to a website, they also slow it down in some situations. In this section, you can combine, preload and preconnect to improve performance.
Disable XML-RPC
If you need to disable XML-RPC, Asset CleanUp makes this easy. You can choose to leave it, disable pingbacks only, or disable XML-RPC altogether.
NOTE: Some of these options may be disabled if you have another optimizing plugin installed. For instance, W3 Total Cache also has minifying options. Asset CleanUp will let you know if this is the case.
CSS and JS Load Management
On the left-hand admin panel click on Asset CleanUp and select the CSS/JS Load Manager option.
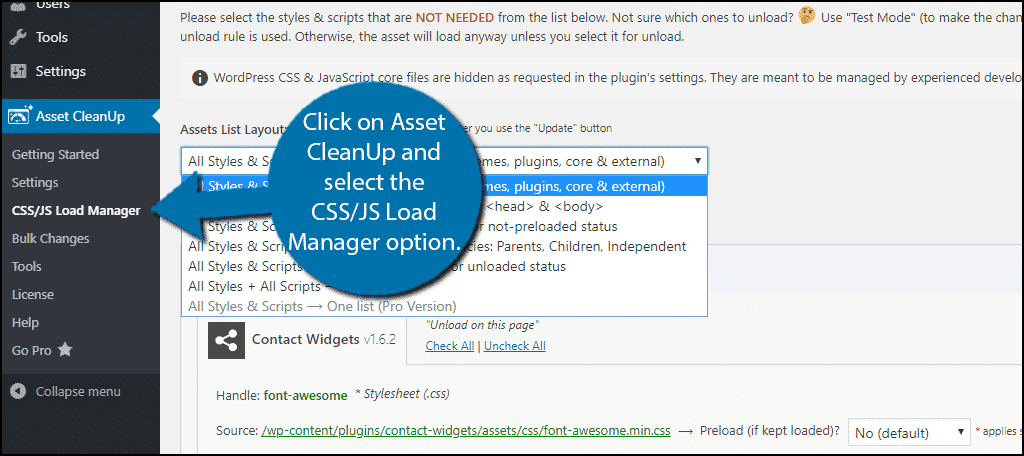
Here, you will be able to disable CSS and Java scripts. You will see multiple tabs, but each only tells you where to retrieve the scripts. All of the disabling and enabling is done from the Homepage tab.
First, you can choose the Asset List Layout by selecting where the plugin should list scripts. This simply chooses which scripts will be visible and they are clearly labeled by groups. You can select whichever one is more relevant to you.
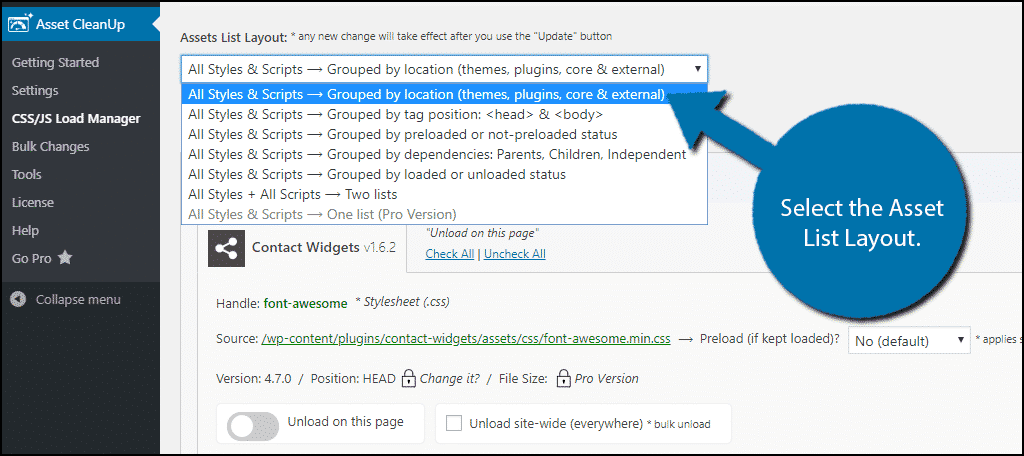
I selected the themes, plugins, core & external list layout. This is broken into 4 sections and it will be similar for other options.
Simply scroll down and you will see all of the scripts that apply to a certain area of your website.
Each script has multiple options to select. To disable a script, click on the slider. If the script is disabled, it will turn red.
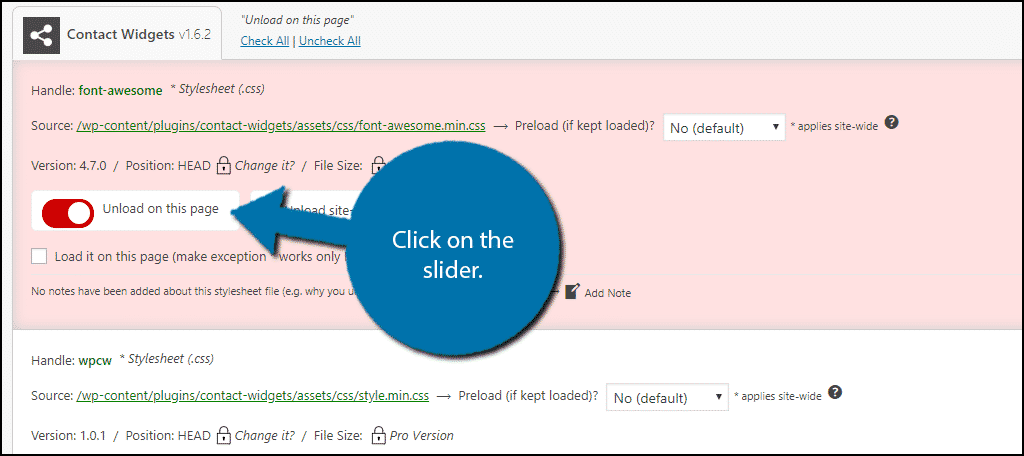
Next, to the slider, you will find a checkbox. This is a bulk disable. If you check it, the script will be disabled throughout your website.

However, if you do need to enable it on a specific page, go to that page and click the checkbox underneath it.

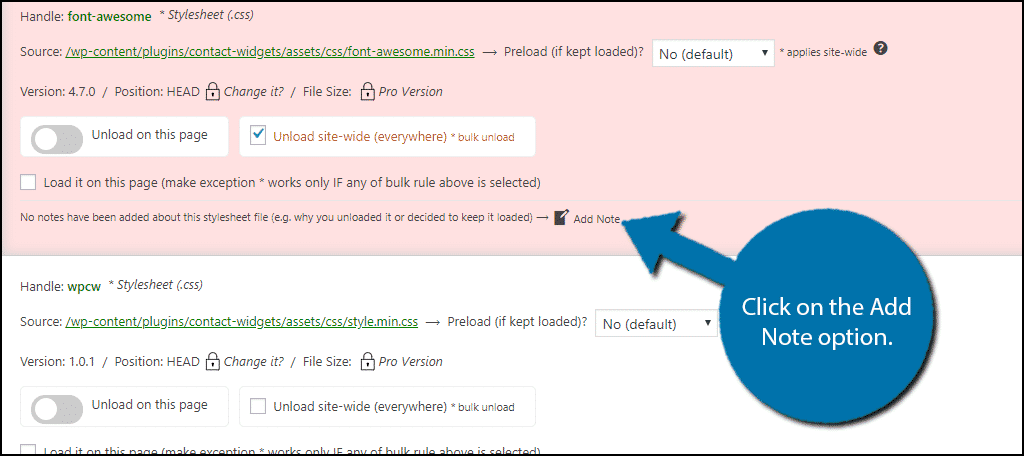
If you have multiple administrators with access to this plugin, it is a good policy to add a note when a change is made. You can do this by clicking on the Add Note option. You can also use this feature to list what the script does in case you forget.
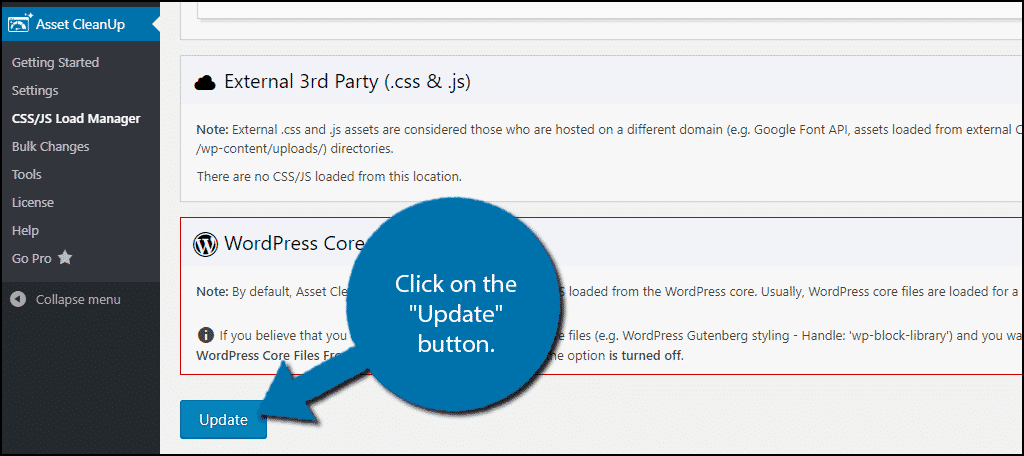
Carefully go through the scripts on your website and disable them as necessary. Click on the “Update” button at the bottom to save your changes.
Congratulations, you have successfully set up Asset CleanUp.
Check Your Load Times
It is very difficult to tell if your website is actually faster without a tool. I strongly recommend using GTMetrix to run a speed test on your website. It will also list what it found wrong on the page and potential ways to fix it.
Regardless of what testing app you use, the data is valuable if you want to increase website speed in WordPress.
However, if you notice that something is wrong, remember to use your backup to fix it.
Which scripts did you disable with the Asset CountUp plugin? Did you notice faster load times afterwards?

The plugin has the TEST mode option. We can enable that and test our site. Any change we make will be visible only to the admin and on the live site. After disabling certain CSS or JS and everything works fine..we can deploy.
This is an extra safety measure.
Of course taking a backup before using such a powerful plugin is a good idea.
For a usual blogger, this plugin is difficult to configure IMHO
Sorry, read as ” Any change we make will be visible only to the admin and NOT on the live site.”