Are people leaving your site without filling out forms? Sometimes this happens because a visitor will accidentally back out of a page or otherwise inadvertently close the browser window. In either case, it’s helpful to create a popup for incomplete form confirmation in WordPress.
This gives the visitor a chance to stay on the page and finish without losing his or her information.
Think about it, how often does the confirmation to “stay” or “leave” save you when accidentally leaving a post you’ve spent hours creating? I know I cannot count the number of times WordPress has saved me time and effort because I accidentally clicked on something.
In this tutorial, I’ll show you how to create a confirm navigation popup plugin in WordPress. Don’t worry, it’s relatively easy and straightforward. In fact, you don’t need to know a lot about coding for this to work.
Creating Your Popup for Navigation Confirmation Plugin
Plugins are arguably the bread and butter of WordPress. They expand what you can do on the site and often boost engagement from your visitors.
Today, you’ll build a small plugin of your own to show an empty form confirmation.
Creating confirm_leave.php
The confirm_leave.php file is what will drive this plugin. First, create a new folder on your computer called, “confirm-leaving-form.”

Now you’ll create a new file inside this folder. Open a plain text editor application from your computer. For example, Windows users have Notepad.
Paste the following code in your text editor (replace “ggexample.com” with your domain):[ht_message mstyle=”info” title=”” show_icon=”” id=”” class=”” style=”” ]<?php
/**
* Confirm Leaving
* Plugin Name: Confirm Leaving Form
* Plugin URI: https://www.ggexample.com
* Description: This plugin shows a warning to users when try they forget to hit submit button on a comment form.
* Version: 1.0.0
* Author: Your Name or Business
* Author URI: https://www.ggexample.com
* License: GPL-2.0+
* License URI: https://www.gnu.org/licenses/gpl-2.0.txt
*/
function wpb_confirm_leaving_js() {
wp_enqueue_script( ‘Confirm Leaving Form’, plugins_url( ‘js/confirm-leaving.js’, __FILE__ ), array(‘jquery’), ‘1.0.0’, true );
}
add_action(‘wp_enqueue_scripts’, ‘wpb_confirm_leaving_js’); [/ht_message]
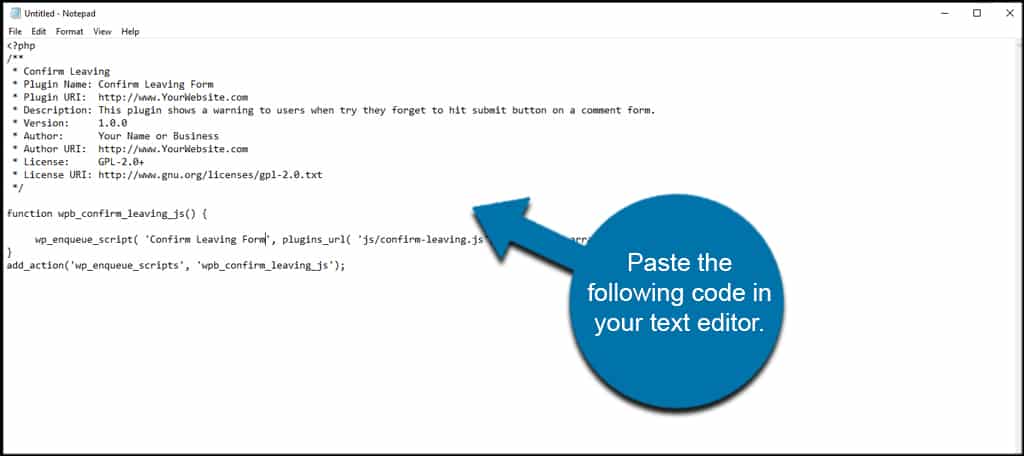
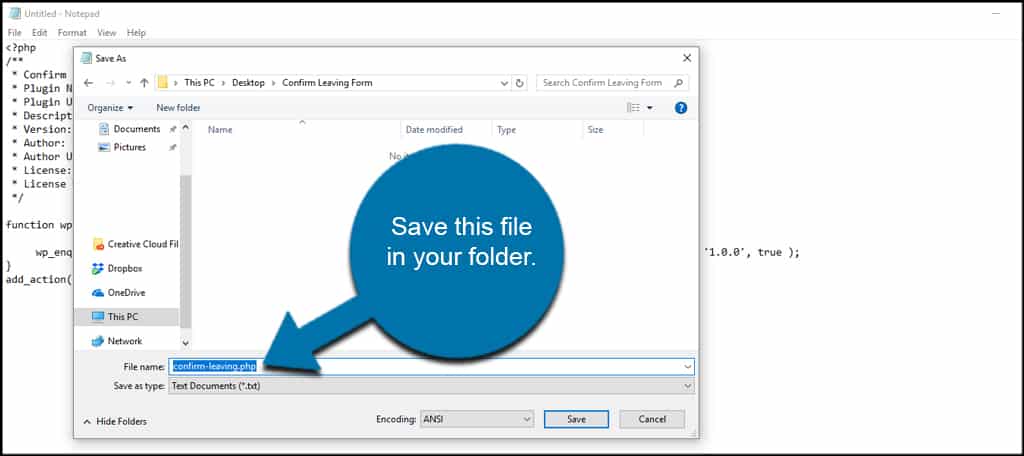
Save this file as “confirm-leaving.php” in your folder.
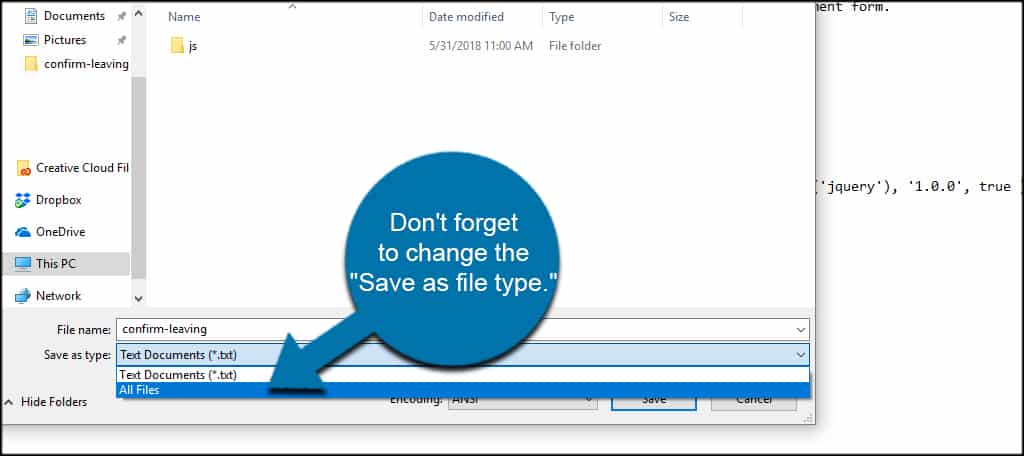
When saving a PHP file in applications like Notepad, don’t forget to change the “Save as file type” to “All Files.” Otherwise, you’ll create a text document and not a PHP file. This will cause the plugin to fail when trying to add it to WordPress.
Creating the JavaScript for the Confirmation Plugin
Now we need some JavaScript to control incomplete form confirmation in WordPress. Without it, the above PHP file is useless.
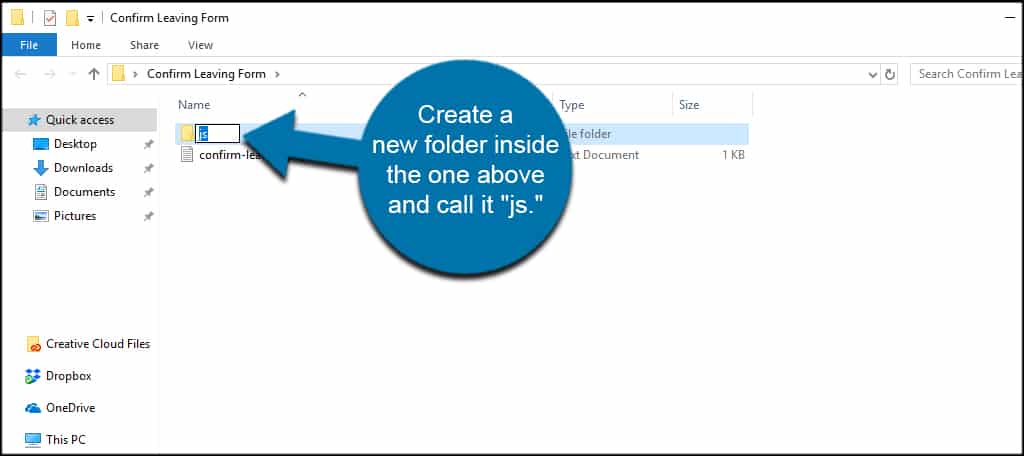
Create a new folder inside the one above and call it “js.”
Create a new text document and paste this code into it:[ht_message mstyle=”info” title=”” show_icon=”” id=”” class=”” style=”” ]jQuery(document).ready(function($) {
$(document).ready(function() {
needToConfirm = false;
window.onbeforeunload = askConfirm;
});
function askConfirm() {
if (needToConfirm) {
// Put your custom message here
return “Leaving so soon? Your data will be lost if you continue.”;
}
}
$(“#commentform”).change(function() {
needToConfirm = true;
});
})[/ht_message]
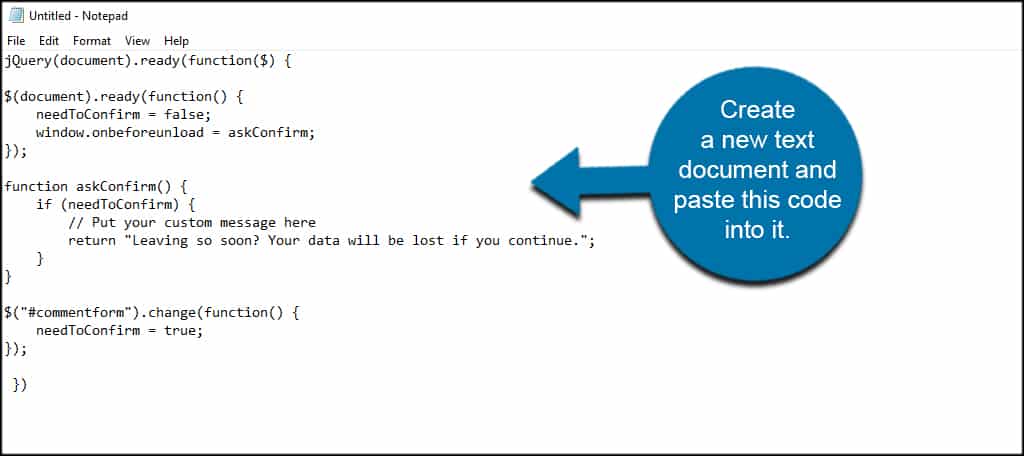
This particular code focuses on the comment section of your site. This segment is located in the code as “#commentform.” To add other forms to this code, you’ll need the form ID of each and place them in the JavaScript coding. I’ll cover a bit of that in a second.
Save this file in the “js” folder you created as “confirm-leaving.js.”
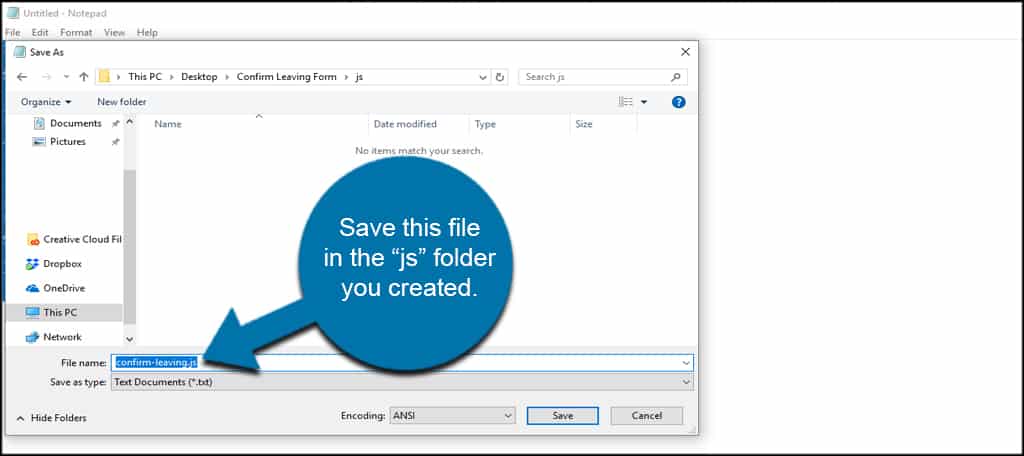
Adding Confirm Leaving Form to WordPress
Now we have our small plugin ready to help WordPress with confirming navigation from forms. All that’s left is to add it to the site and activate it.
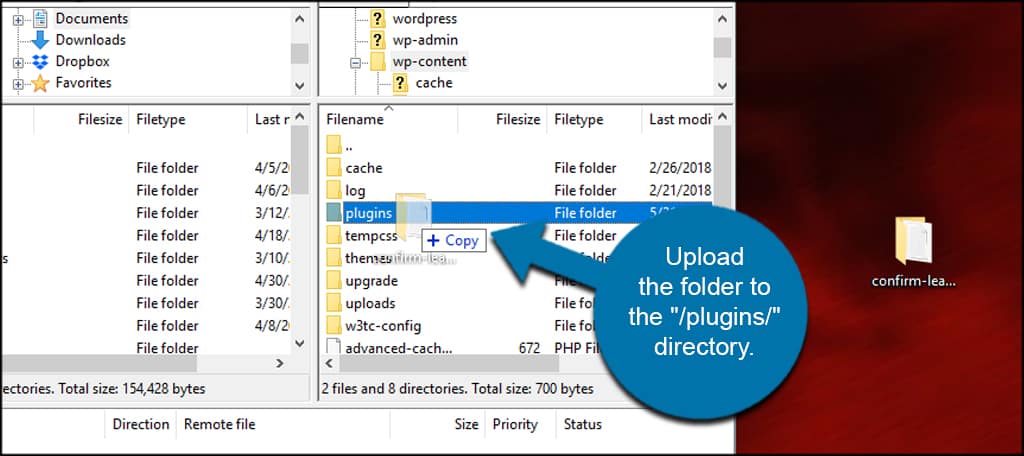
To upload it to your site, you’ll need to use an FTP application like FileZilla. This connects your computer directly to your website and gives you access to all of its resources.
Upload the confirm-leaving-form folder to the “/wp-content/plugins/” directory of your website.
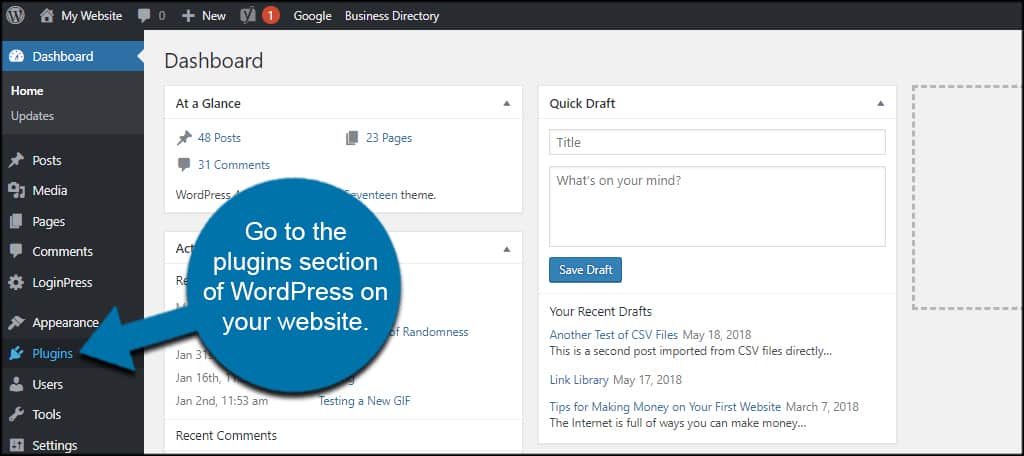
Go to the plugins section of WordPress on your website.
Find your new plugin and click the “Activate” link.
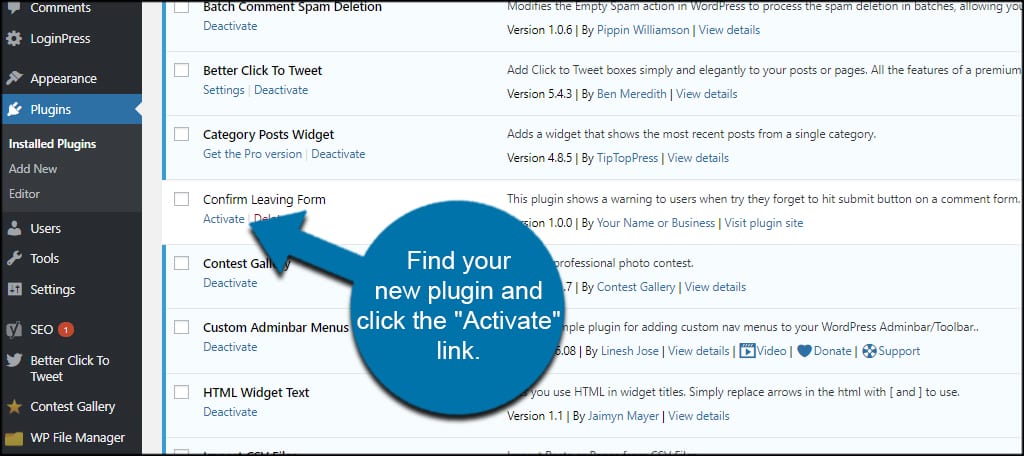
Now users will get a message when not submitting data from the comment form.
Adding Other Form IDs to JavaScript
The comment section probably isn’t the only form you’ll use on your website. What about adding others? What if you have contact forms you want people to submit before leaving?
For this, you’ll need the Form ID of each that you want to add. For this tutorial, I’m just using a very basic page using Contact Form by WPForms.
Go to your form’s page and “inspect” the element. You can do this in a number of ways. Since I am using PC, I simply right-clicked the form area and clicked inspect. MAC users will use Command+Click.
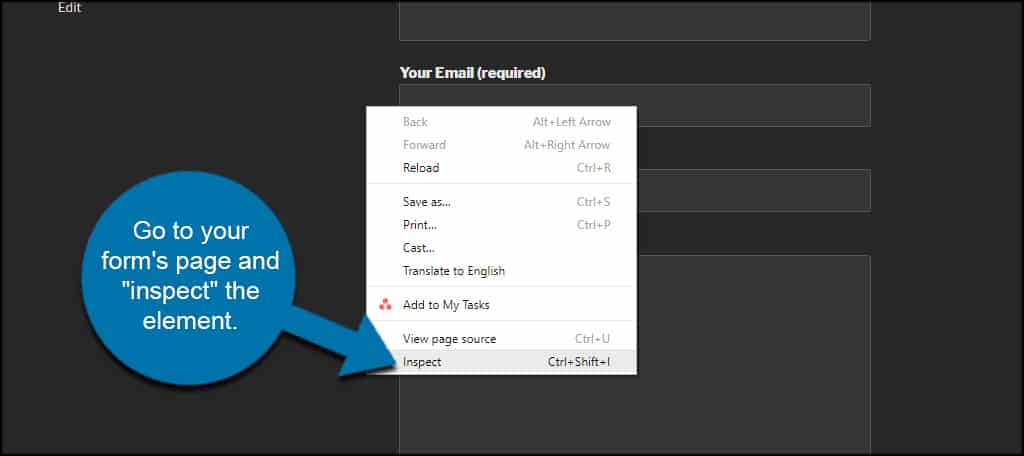
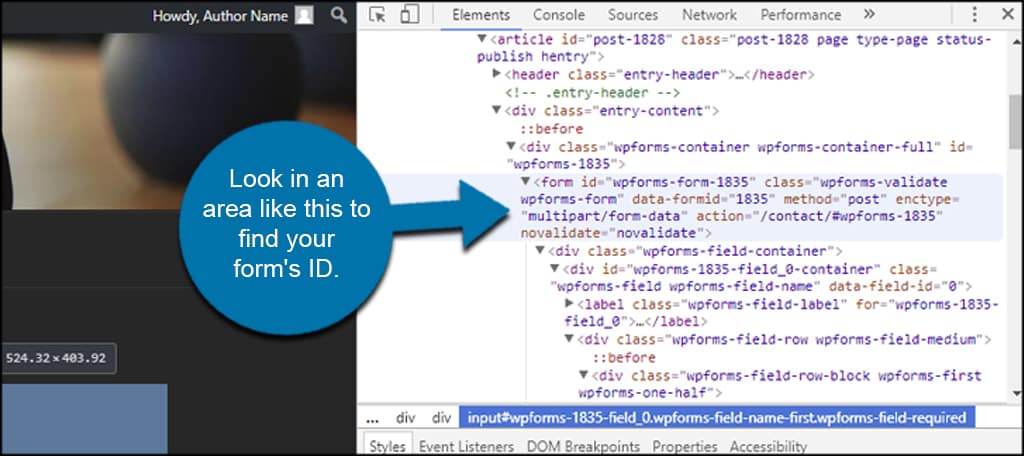
Look for the form ID within the code. It will start with “<form”. Unfortunately, every form creation plugin is different. This means you’ll have to dig around a bit to find the correct ID of the form you wish to include.
As you can see from the image, my ID is “wpforms-form-1835.” I get this from the ID= portion of the code. Look in an area like this to find your form’s ID.
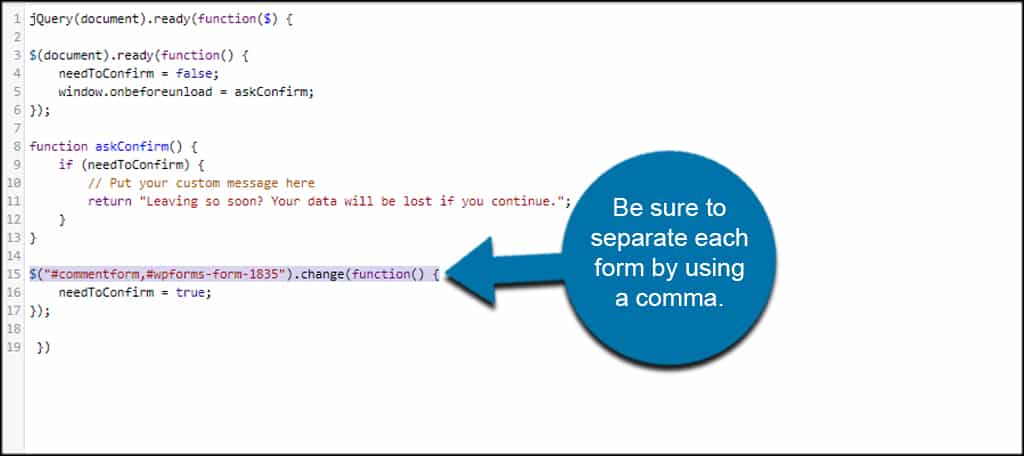
Input your form ID into the JavaScript coding. You do this by using a “#” and then the ID. For instance, the segment of JavaScript I would use looks like this:[ht_message mstyle=”info” title=”” show_icon=”” id=”” class=”” style=”” ]$(“#commentform,#wpforms-form-1835”).change(function() {[/ht_message]
This tells WordPress to launch the popup for both the comment section and the contact form. Be sure to separate each form by using a comma.
Make it Easier on Guests
Incomplete form confirmations in WordPress help people remember to submit data or prevent losing it by accidentally clicking something wrong. It’s just one of those minor improvements visitors appreciate and often take for granted. Give your guests the best experience possible and help keep their attention on forms they start to complete.
How often do you use actual code to make modifications to your WordPress website? How many forms do you have available for visitors to fill out?
