Creating an email account in cPanel is easy. But what if you have a long list of email addresses to set up? You’re in luck because it’s easy to import email addresses into cPanel.
In this tutorial, I’m going to show you how to import a list of email addresses, as well as a list of email forwarders.
How to Format an Address List for Import
To import your list of email addresses, the list has to be either an .xls (Excel) spreadsheet or a .csv (Comma Separated Value) file.
You don’t necessarily need the Microsoft Excel program to create a .xls file. Some open source spreadsheet programs will save files in the .xls format. Note that cPanel will not import email address lists saved with the newer Excel .xlsx extension.
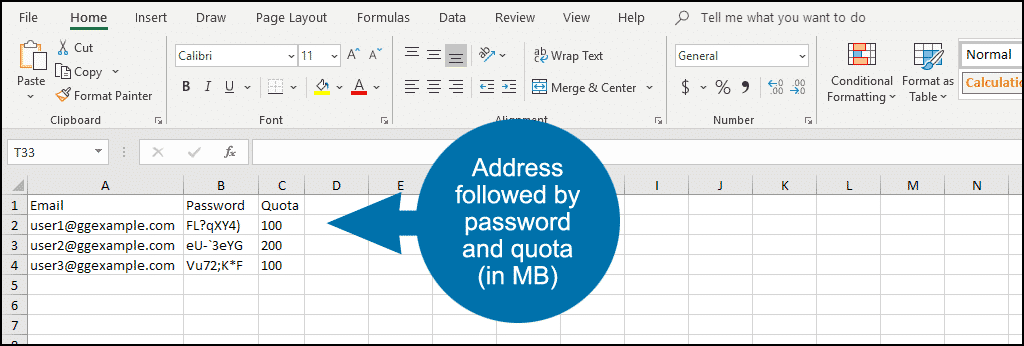
The .xls file should be formatted with one address per line, followed by the email account, password and the mailbox quota in megabytes:
You can create a CSV file with many spreadsheet programs. If you don’t have access to one of these, you can use a text editor.
If you use a text editor, save the file as a .txt (text) file, then change the file extension to .csv before importing into cPanel.
The .csv file should also be formatted with one address per line followed by the email account, password and the mailbox quota in megabytes, all separated by commas:
Note that in both examples above I used the first rows as column headers. Column headers are not required for import.
How to Import Email Addresses into cPanel
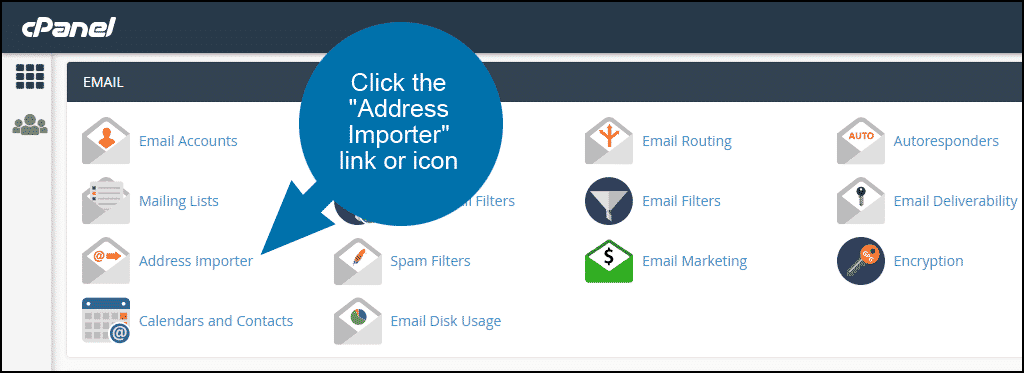
Log in to cPanel and in the “Email” section, click the “Address Importer” link or icon.
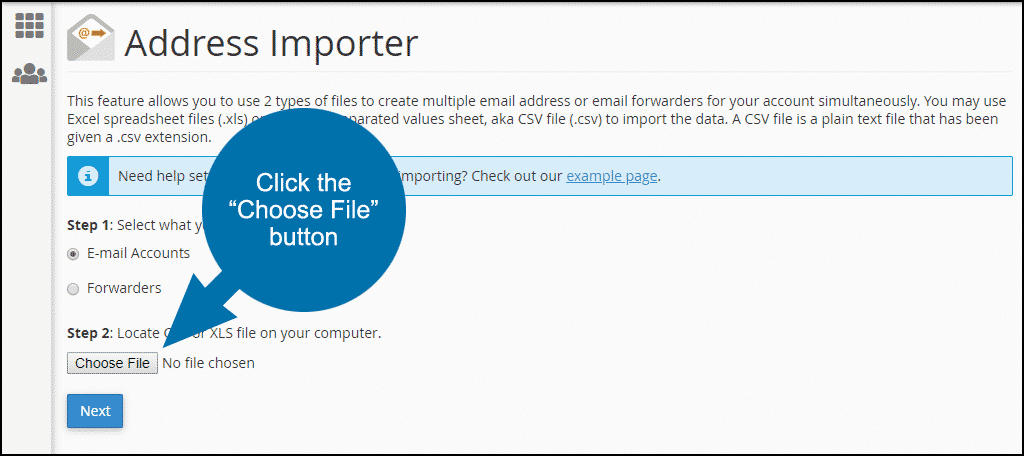
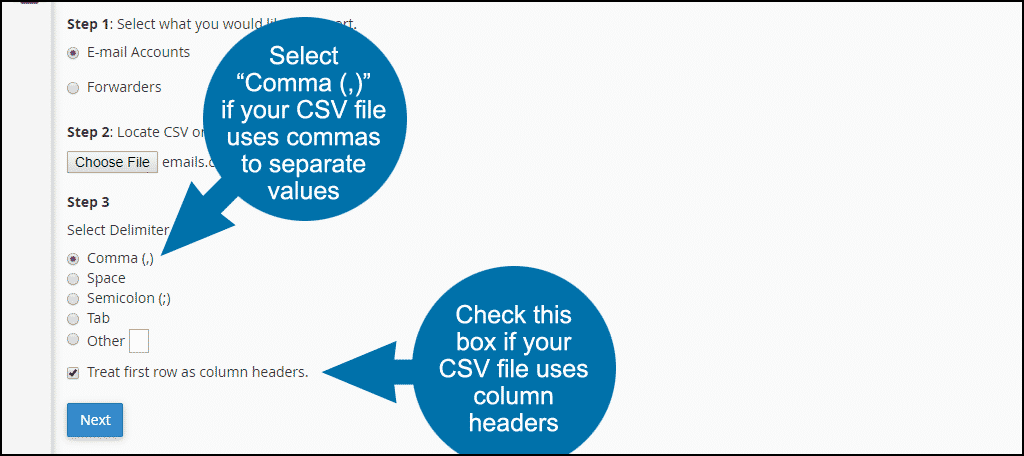
Click the “Choose File” button.
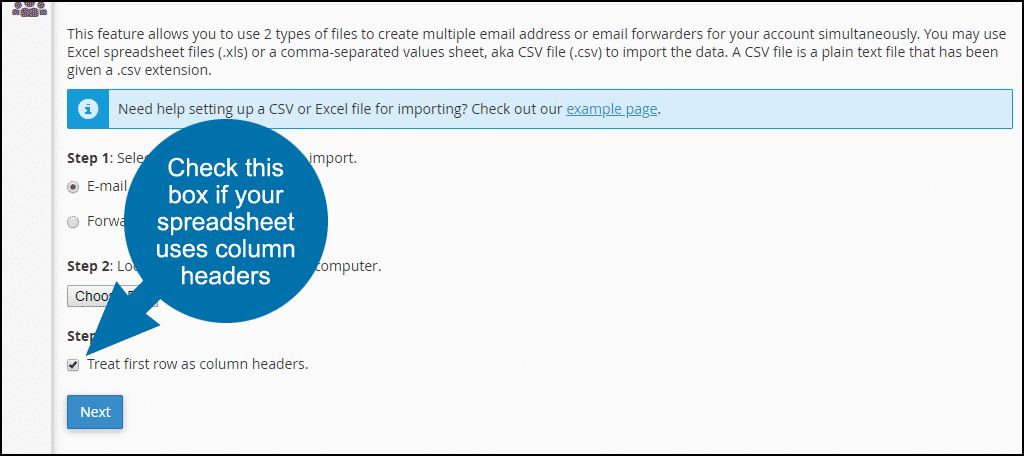
If you upload an .xls file, you will see the option, “Treat first row as column headers.” If the first row of your spreadsheet is column headers as in the example above, make sure the option is checked.
Click the “Next” button.
If you upload a .csv file, in addition to the “Treat first row as column headers” option, you will also have a “Select Delimiter” option.
Since you created a comma-separated list, select “Comma (,).” As you can see, the list could also be separated by tabs, semicolons or other delimiters.
Click the “Next” button.
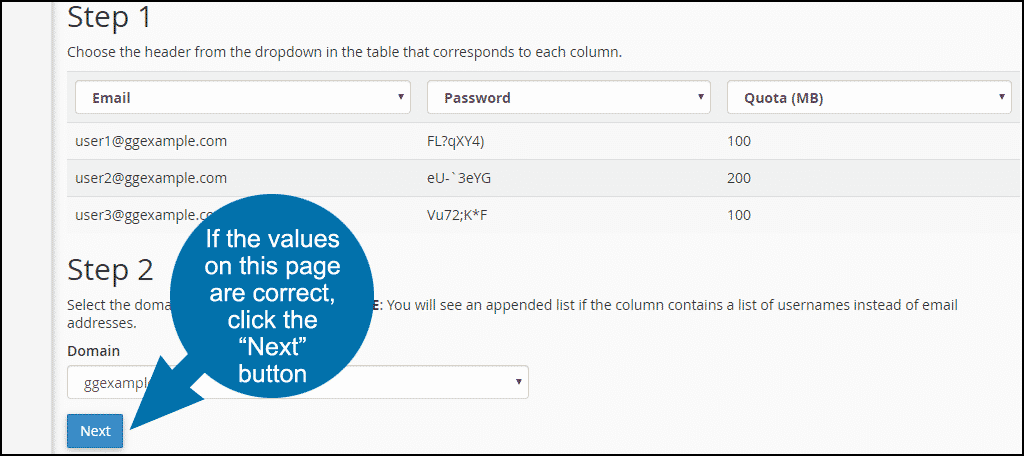
The next page will display a list of the addresses that were in your uploaded list. Here you can change the header for each column if necessary.
There is also an option to “Select the domain for the users in the list.” If your cPanel account only has one domain attached, there’s no need to change the setting.
If you have multiple domains in cPanel, make sure the domain in the drop-down matches the addresses you are importing.
Click the “Next” button.
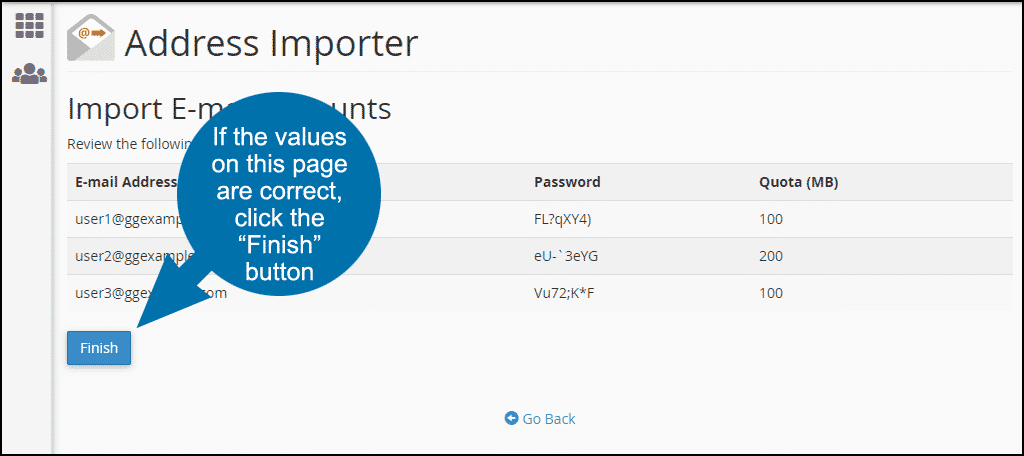
You will get a final opportunity to verify that all the information is correct. If it is, click the “Finish” button. If it is incorrect, click the “Go Back” link under the list.
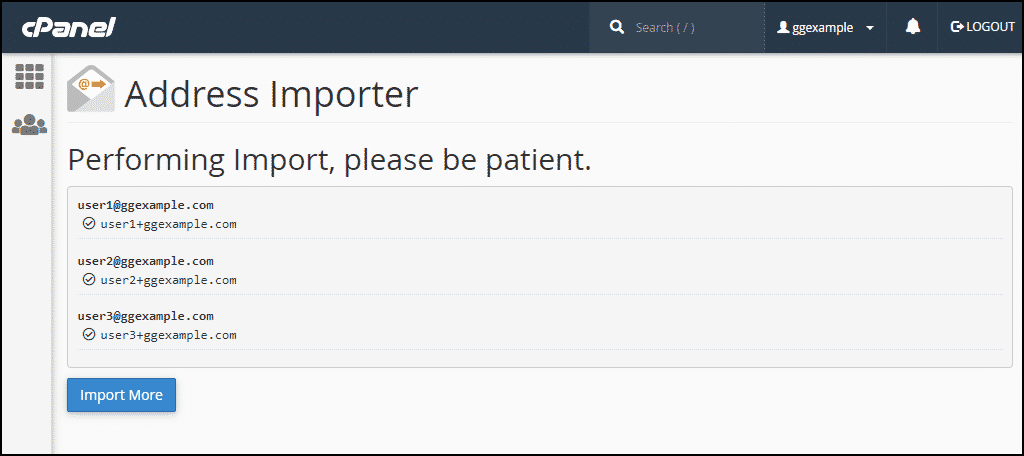
The import will proceed, and you’ll see a readout of successful address imports.
Importing Email Forwarders into cPanel
Importing a list of email forwarders is the same as the process above, but the address list that you import is formatted slightly differently. It’s still one address per line, but here the forwarder address is followed by the forward-to address:
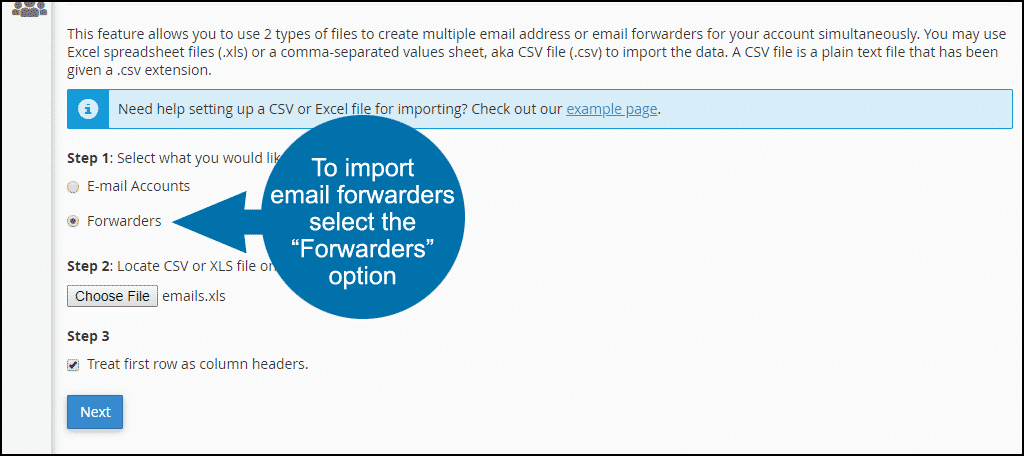
And in the first step, instead of “E-mail Accounts,” select the “Forwarders” option.
Importing Made Easy
Now that you know how to import lists of email addresses into cPanel, you can save the time and the headaches of creating addresses one by one.
Have you ever had to move a large number of email addresses to a new account? If you have to move a large number of email addresses in the future, do you think you’ll use the cPanel import method?

