
The featured image is an integral part of developing a post or page in WordPress. It’s how the system creates thumbnails and it works as the primary image in most themes. As important as these pictures are, there may come a time when you need bulk edit your featured images.
Why Would You Want to Bulk Edit Images?
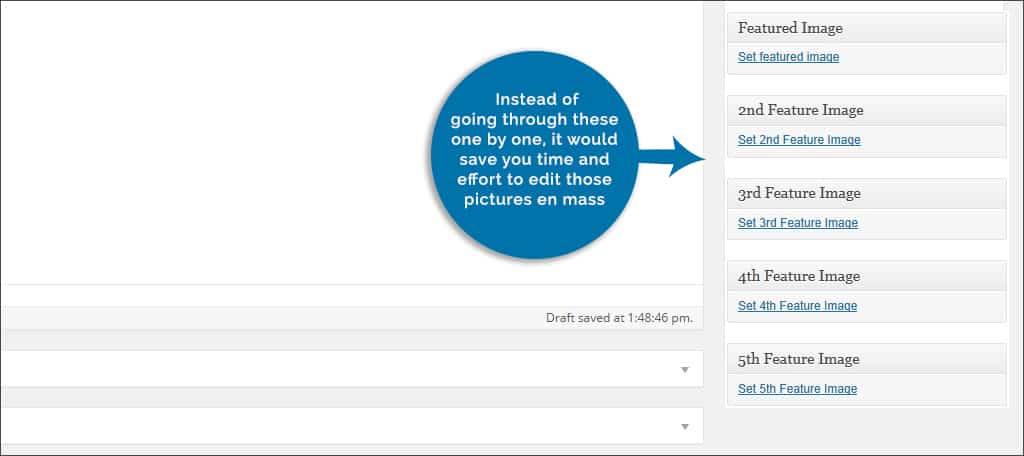
To bulk assign a featured image in WordPress means to modify several images at once. This has several purposes ranging from changing the perfect dimensions of featured images to completely removing them entirely in bulk. It’s a time-saving ability, especially if you change your WordPress theme.
New Themes
Changing your theme often means you change the layout of the featured image. Many themes use specific dimensions that may not be compatible with the pictures you’ve uploaded in the past. As a result, the may appear distorted.
Changing Images
Perhaps you want to replace all of your featured images in bulk because you prefer a certain look to your posts. This could be anything from logos to randomly selected pictures by the system.
Removing the Graphics Entirely
What if you decided that you wanted to remove all of the featured images completely? This could take a lot of time if you have to go into each post and page one by one.
Licensing Problems
Although it doesn’t happen very often, licensing problems could cause you lose your images. This is when an owner of a graphic demands that you take it down because you didn’t have permission to use it. This can be an innocent mistake, but you may have to pull all those featured images down.
Fixing those pictures is what brings us to this tutorial. Today, we are going to show you how to easily bulk edit images in WordPress.
How to Bulk Edit Featured Images
One of the best ways to edit featured images in bulk is to use a plugin called, “Quick Featured Images.” Once the plugin is installed and active, WordPress gains the ability to set, replace, or remove featured images from various posts and pages.
Step 1: Getting the Right Plugin
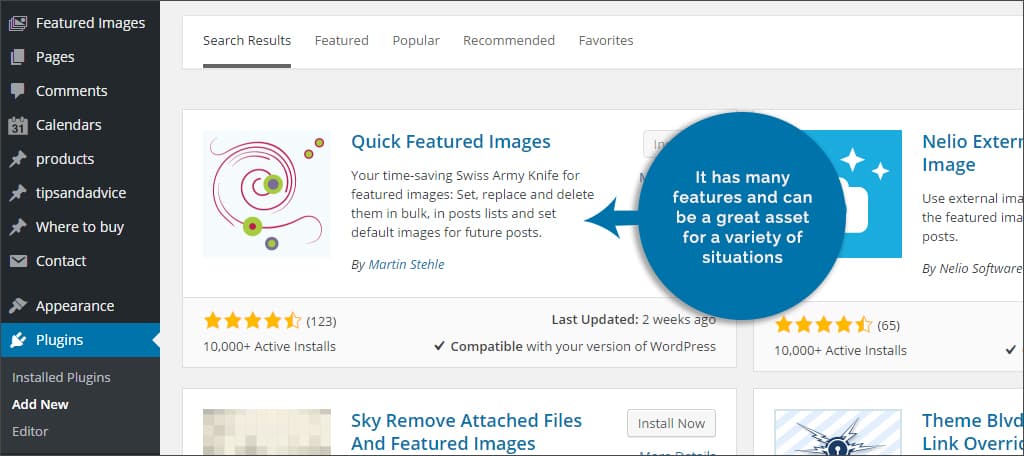
Before you can start editing all of your featured images in bulk, you’ll need the right tool. For this tutorial, we are going to use the Quick Featured Images plugin for WordPress. It has many features and can be a great asset for a variety of situations.
To add the tool, go to “Plugins” in your WordPress dashboard. There, you will click on the “Add New” button on the top and search for “Quick Featured Images” in the text bar on the following page. Then, install and activate the plugin to get started.
This will add a new function to the side of your dashboard called, “Featured Images.” It may show up directly under the “Media” area of WordPress.
Step 2: Selecting Your Options

When you access Quick Featured Images, you’ll have three primary options available:
- Set, Replace, Remove
- Preset Featured Images
- Settings
For this tutorial, we are only going to be focusing on the Set, Replace, Remove feature. However, you may find some value by exploring the other abilities this plugin provides.
Actions with one image
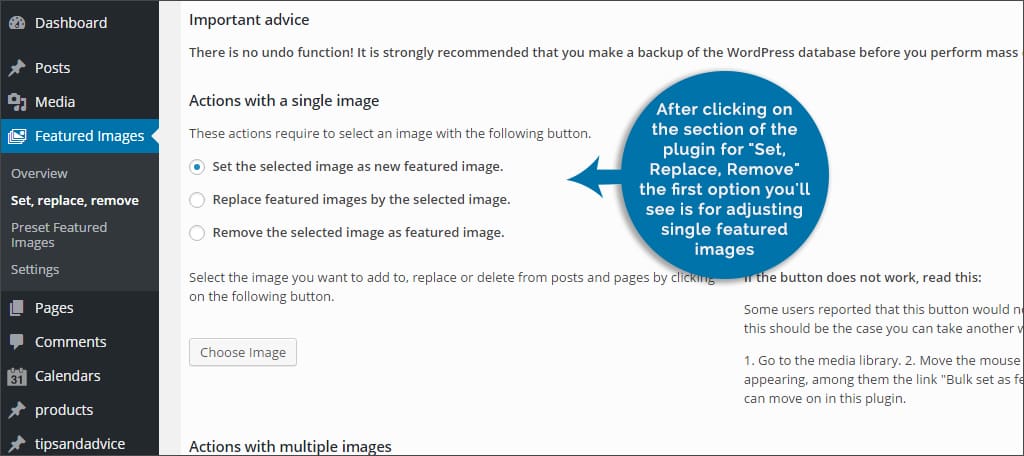
After clicking on the section of the plugin for “Set, Replace, Remove,” the first option you’ll see is for adjusting single featured images. Three radio buttons are available for this ability:
- “Set the selected image as a new featured image” – This allows you to replace all featured images in pages and posts with a graphic of your choosing.
- “Replace featured images by the selected image” – This option allows you to replace existing featured images by one that you select.
- “Remove the selected image as featured image” – This will allow you to remove all instances of a featured image based on the image you select.
Actions with multiple images
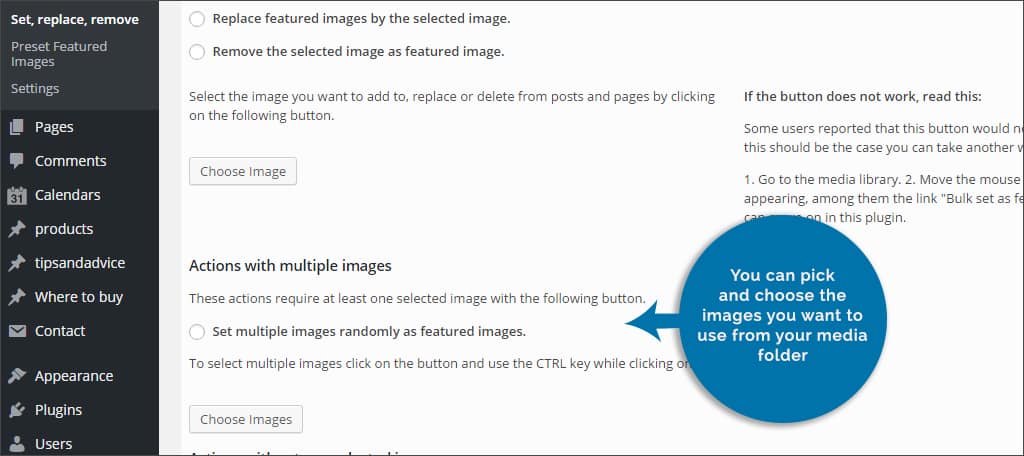
Below the single options stated above, you’ll find an area where you can set multiple images randomly as your featured image. This can be very useful if you just removed images but need something back up on the site to engage your visitors. You can pick and choose the images you want to use from your media folder.
Click into the radio buttons to “Set multiple images randomly as featured images.” To select the pictures you want to use at random, hold down the CTRL key when selecting each graphic after you press the “Choose Images” button.
Actions without any selected image
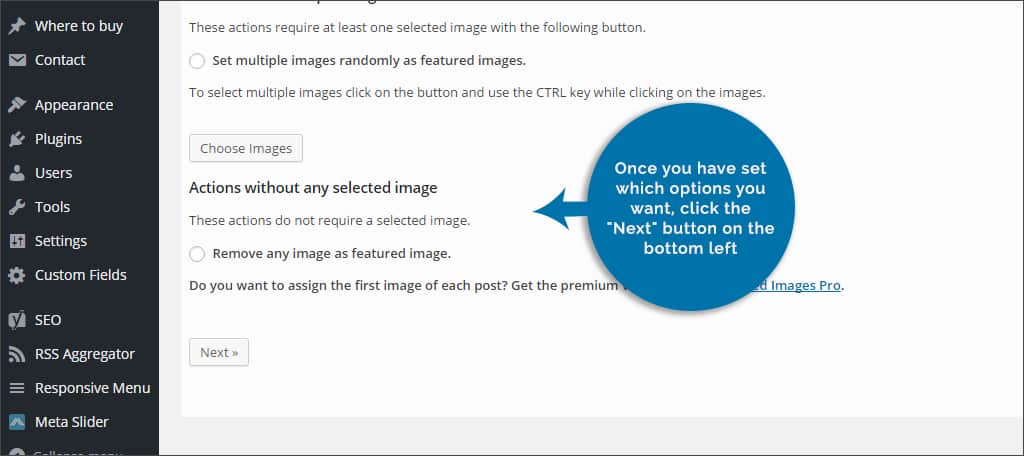
If you want to simply remove any graphic from being used as a featured image without choosing a replacement, you’ll want to click on the radio button in this section.
Once you have set which options you want, click the “Next” button on the bottom left.
Step 3: Adding Filters

The next screen you will be taken to is the filter section. Here you can choose from a variety of ways to refine what you’re trying to accomplish. For instance, you can search to change featured images in posts by tags or categories. After making your selection, click the “Next” button to continue.
It’s important to note that you may be faced with different options in this screen based on your previous choices. Make sure you select the correct methods for your replacements. Because there is no way to undo the changes, you need to be certain of your selections.
Step 4: Refine
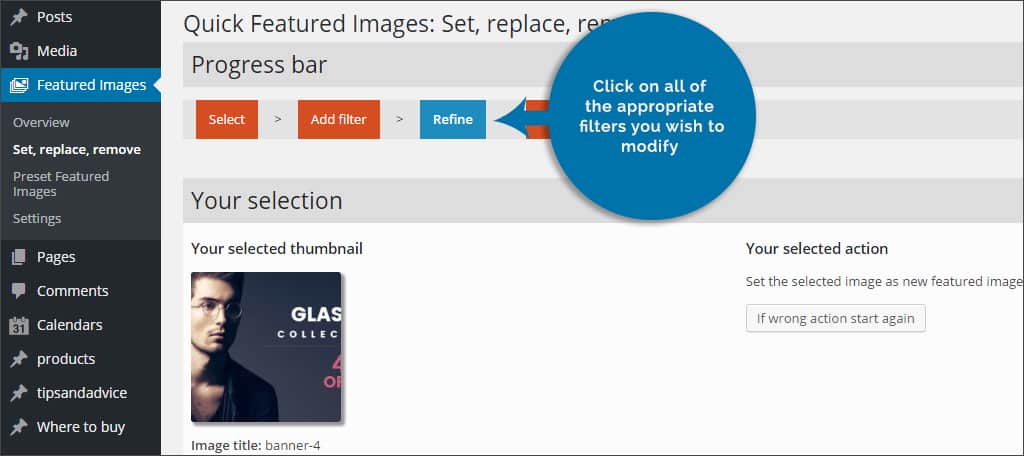
In the refine screen, you can drill down into your website even further to find the featured images you want to replace in bulk. For example, the “Category Filter” will be displayed if you choose to add the category filter in the previous screen.
Using the drop-down lists in each area, you can select specifics of where you want WordPress to operate when making changes to the images. Click on all of the appropriate filters you wish to modify.
Once you’re ready to proceed, click the “Preview filtering” button. This will take you to the confirmation screen.
Step 5: Confirmation
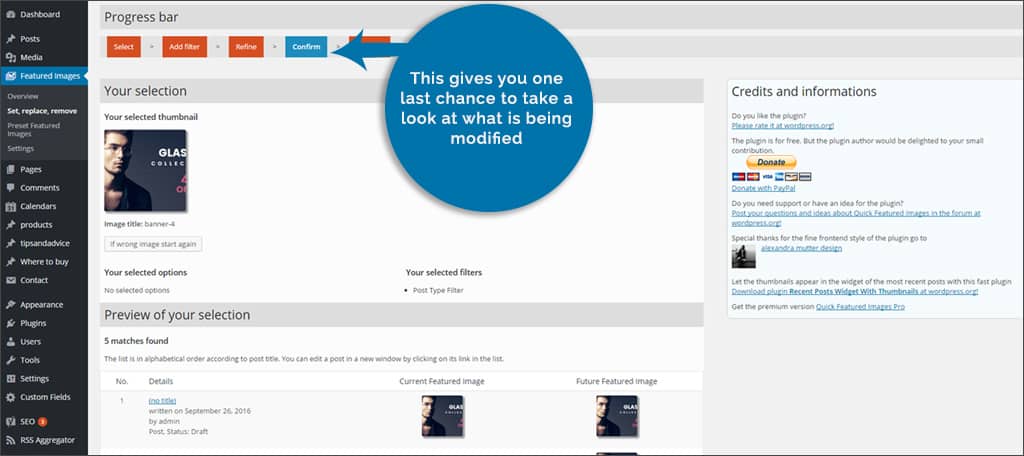
Once all of your selections have been made, you’ll have the option to confirm the process. This gives you one last chance to take a look at what is being modified before committing to the action.
Remember, you won’t be able to go back and undo those changes once you have performed the bulk edit.
Once you have verified the changes that are about to be made, click the “Apply” button located under “Confirm the change.” Once you do this, all of the changes you set will be made.
Step 6: Perform
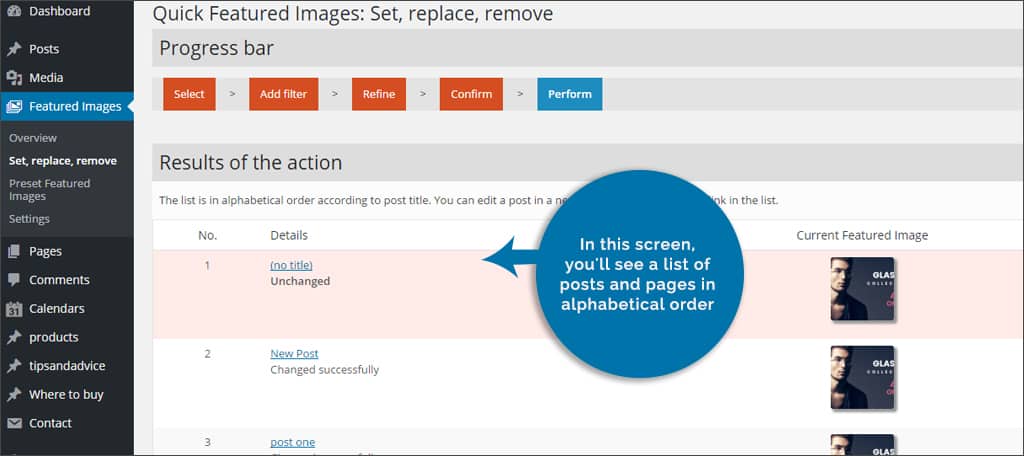
In this screen, you’ll see a list of posts and pages in alphabetical order of all the changes that were made. From here, you can go into each one individually and make direct edits. Otherwise, you can click the “Start Again” button under this list to create a new edit of images.
When it comes to features, there isn’t much that WordPress cannot do. Whether you need to replace all of the graphics with random pictures or you want to resize them for a new theme, being able to bulk edit images will take a lot of the work out of the process for you.
How many times have you added new featured images to your posts and pages? What kinds of editing tools do you find the most useful in WordPress?
