Backups are extremely important whenever you make significant changes to your website. With them, you can make a copy of your website. UpdraftPlus is one of the best ways to backup your WordPress site and restore it if something goes wrong.
It is very easy to backup and restore WordPress websites thanks to the many plugins available. There are many reasons to backup and restore WordPress and they include making a mistake when manually coding, recovering from a security attack, or your host terminating or losing your account information.
Today I will demonstrate how to restore WordPress from backups using UpdraftPlus.
Why it is Important to Backup Your WordPress Website
There are many advantages to backing up your website. The best use is to guard against mistakes that you would make when changing something major on your website. You can easily mess up your site by installing and improperly using certain plugins.
You may also be in the process of switching web hosts and you will want to backup your website when switching so you can easily transfer your website. If any issues arise, you can simply restore your website using the backup.
Security is one of the biggest concerns of any website and you will want to always be on the lookout for ways to improve it. Attacks can cripple your website, but if you have a backup stored somewhere, you can easily restore your website and fix the problem.
Using one of the many WordPress backup plugins can help you keep your site running even after the worst events have happened.
How to Install and Use the UpdraftPlus Plugin to Backup and Restore WordPress
Today I am going to demonstrate how to install and use the UpdraftPlus plugin to backup and restore your WordPress website. This is the most popular backup plugin with over 3 million active installs.
It has all of the features you will need to backup and restore your website, which includes scheduled backups and manual backups. The best part is it can all be done with the free version, which makes it very convenient to make a WordPress backup with UpdraftPlus.
Step 1: Install UpdraftPlus
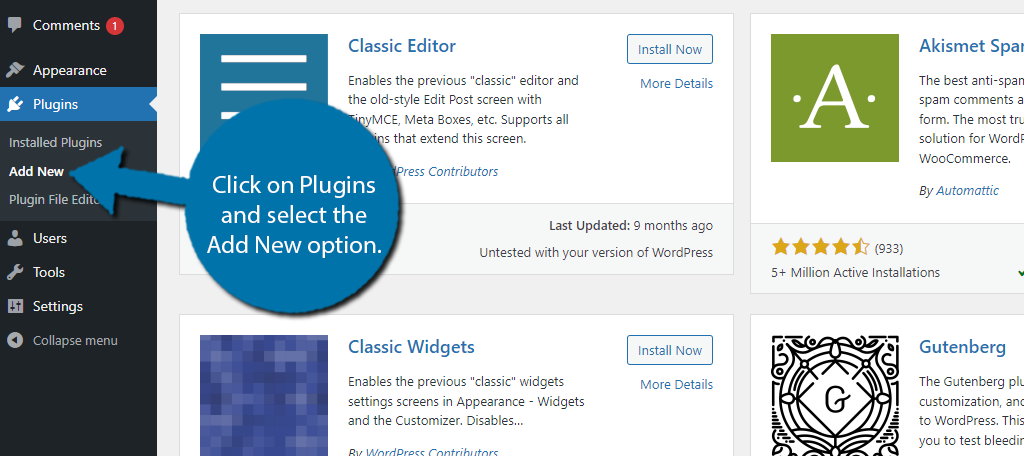
Let’s start by going to the plugin area of WordPress and click on the “Add New” button.
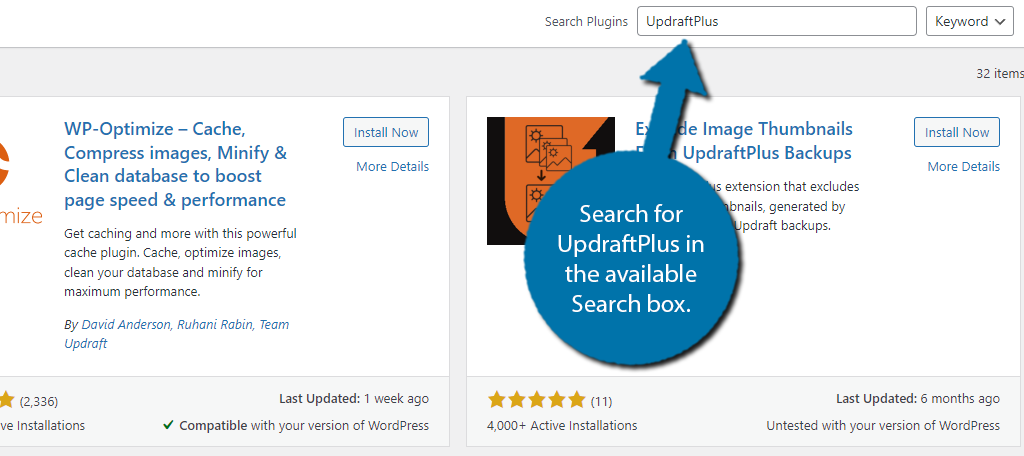
Search for UpdraftPlus in the available Search box. This will pull up other similar plugins that you may find helpful.
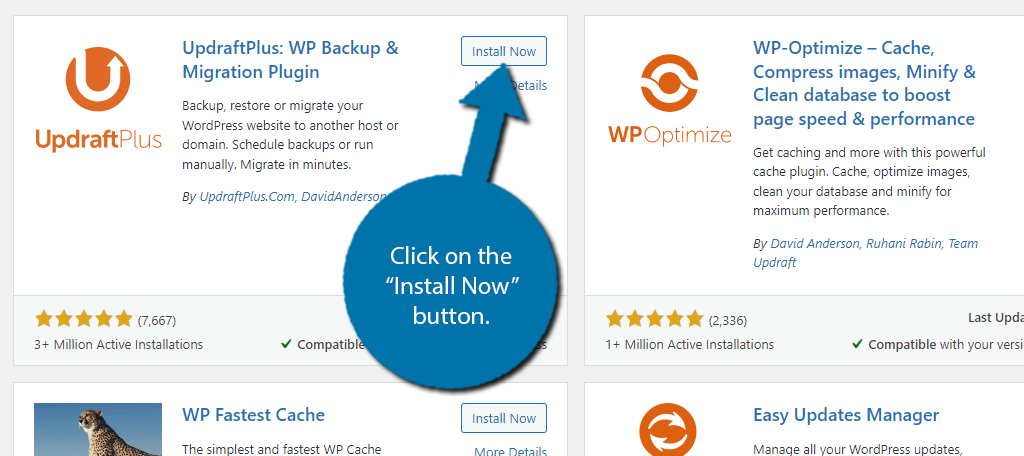
Scroll down until you find the UpdraftPlus plugin and click on the “Install Now” button and activate the plugin for use.
Step 2: Configure the Settings
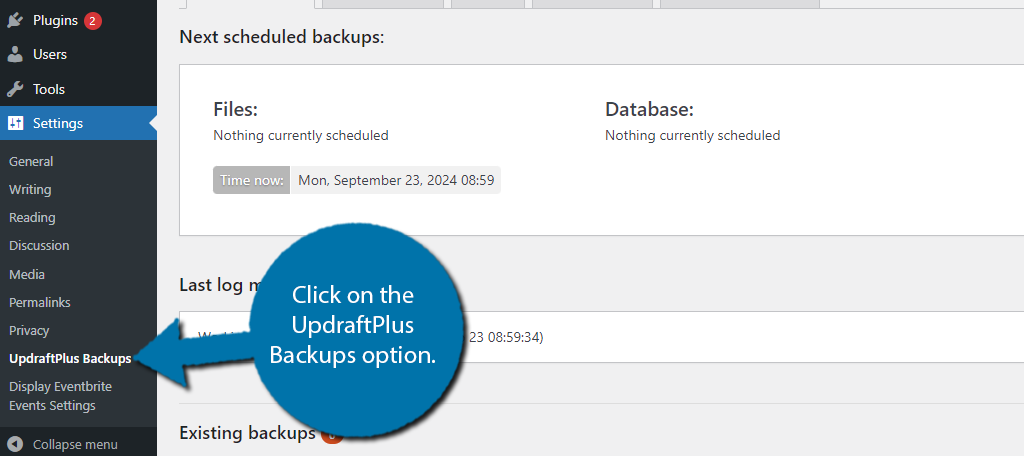
On the left-hand admin panel go to Settings and click on the UpdraftPlus Backups option. This will bring you to the main settings page of the plugin.
Let’s click on the Settings tab in the middle. In this section of the plugin, you can set up scheduled backups. With these on, the plugin will regularly backup your site based on the settings you select.
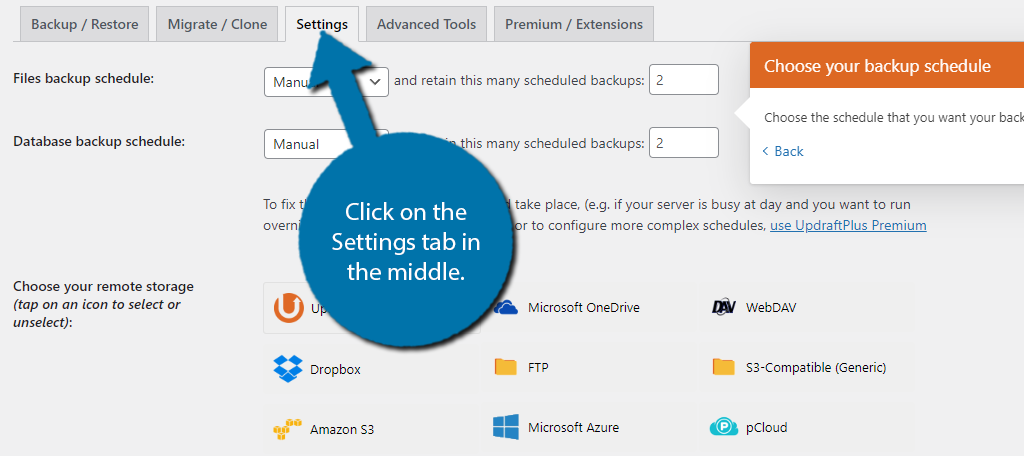
The first two options are “Files backup schedule” and “Database backup schedule”.
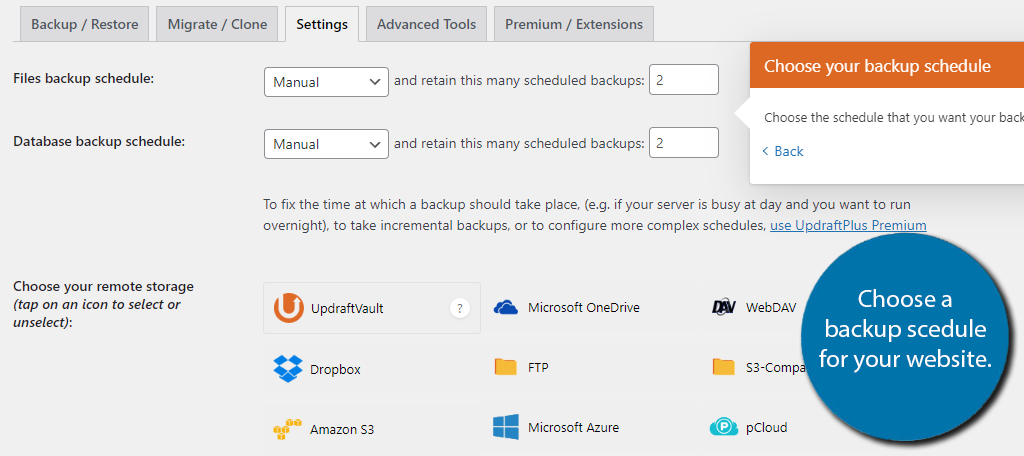
For both of these options, you will want to choose how often they are updated and how many of the updates are kept. Remember, websites can be very large, and you may not have the room for multiple copies. Select the best schedule for your website.
Once you have selected your schedule you will now want to select where you wish to save your backup like on Dropbox.
Obviously, you do not want to save your backup where your website is located. If there is a problem, you will lose both the website and backup. Luckily, UpdraftPlus gives you many options to upload your backup to. Select whichever option is best for you.
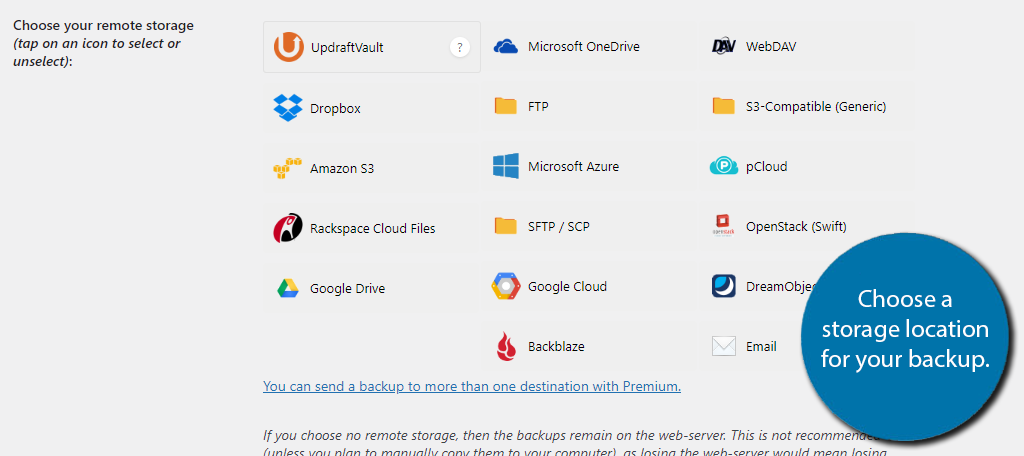
When you have made your selection, you will have to sign in or set up an account depending on which storage system you have chosen. Each option is slightly different to sign into and setup, so refer to that platform’s documentation for further help.
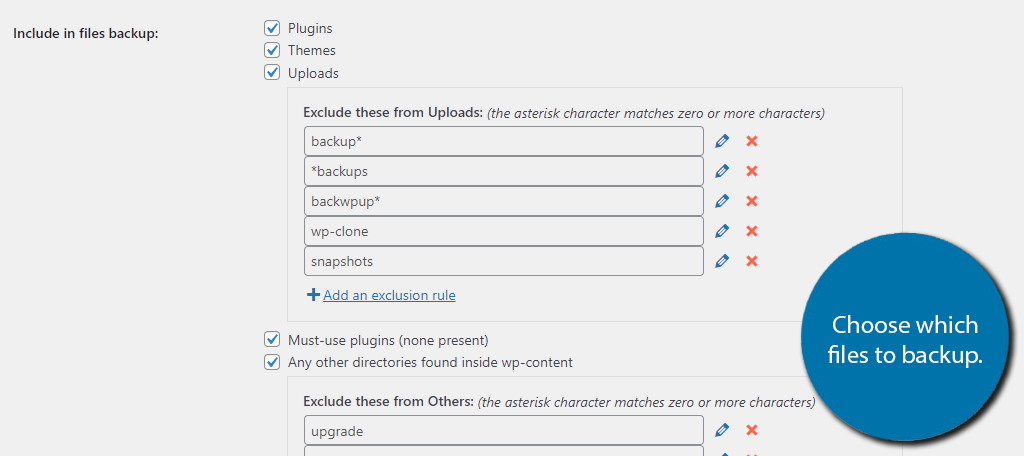
Next you will want to choose what files you are backing up. These include your plugins, themes, uploads, and even databases. I would recommend backing up everything in the scheduled backups. Select the files you wish to back up.
Once you have made all of your choices click on the “Save Changes” button on the bottom. You will have successfully created an automatic backup system for your website.
Step 3: Manually Create A Backup
Of course, you may want to manually backup your website and UpdraftPlus can do that. Let’s go back to the Backup/Restore tab that we started on.
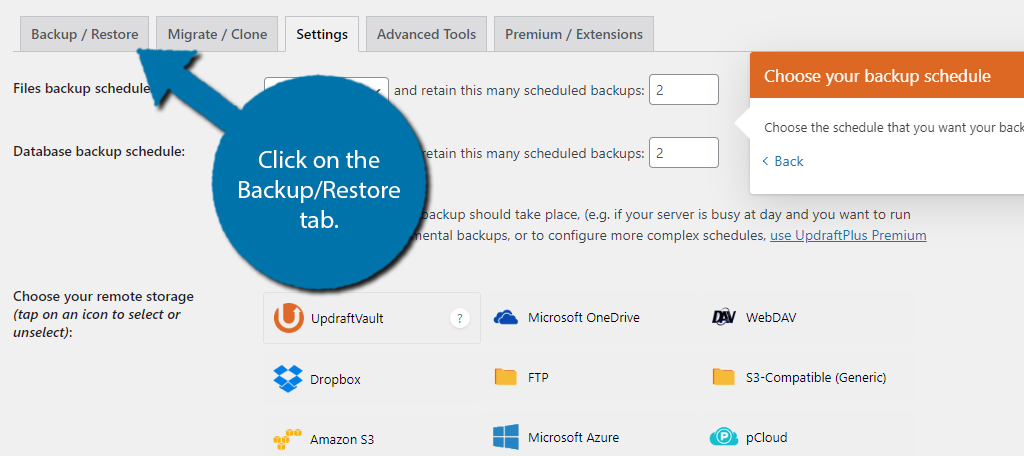
If you want to manually backup your website at any time, simply click on the “Backup Now” button.
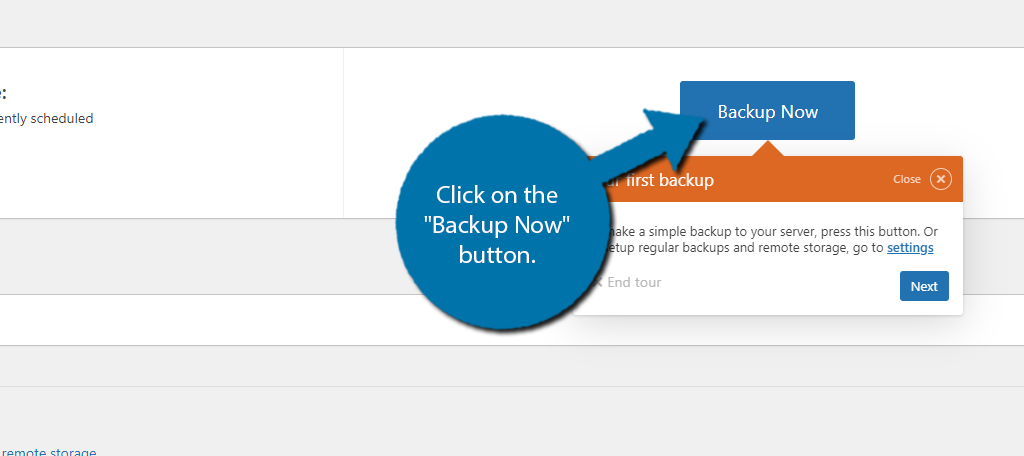
A new window will pop up. Here you can choose what files you would like to backup. Once you have made your choices click on the “Backup Now” button. The process will begin and may take some time depending on how large your website is.
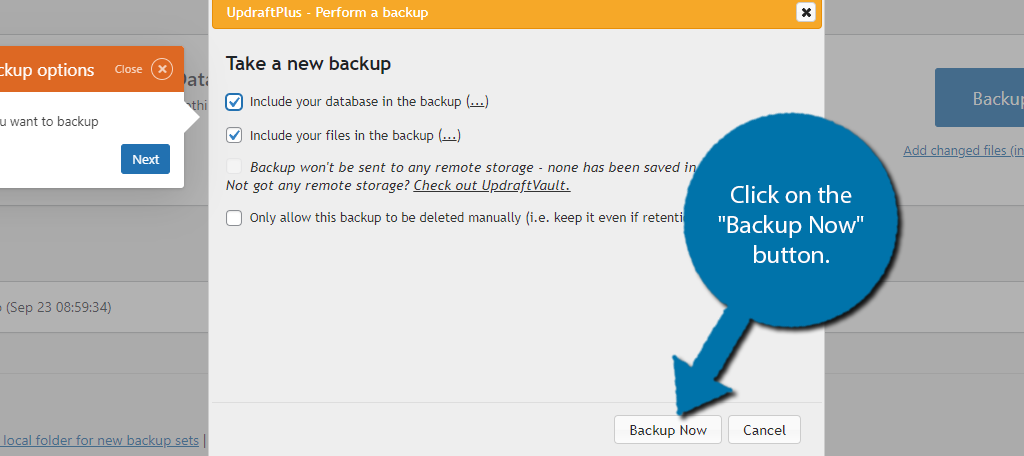
Upon clicking this, a small progress bar will appear showing you how long is left for the backup to be complete. The larger the website, the longer this will take. After several minutes, the process will complete.
Restoring Your Backup
Backing up your website is only the first step. You must also know how to restore your website using one of these created backups. Below where you created you backup will be a list of your existing backups.
Simply, click on the “Restore” button on the backup you wish to restore.
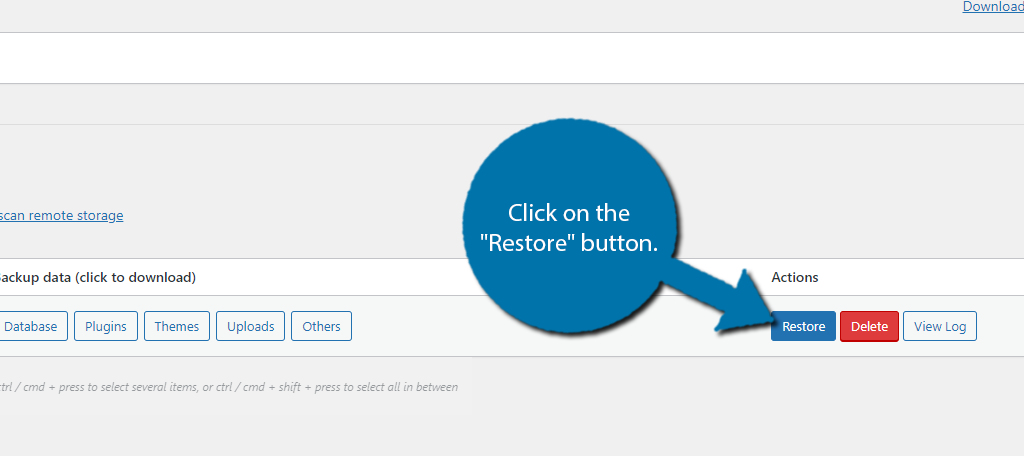
You will now be asked which part of the backup you would like to restore. Use the checkboxes to make your selection.
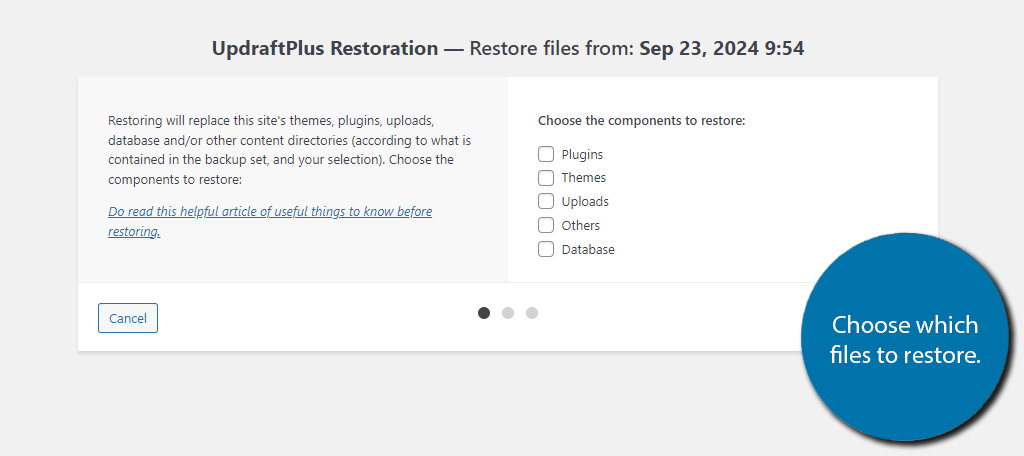
Click on the “Next” button and then on the “Restore” button. This will initiate the restore process which will take several minutes depending on the size of your backup. Once it is complete it will say Restore Successful.
Congratulations, you have successfully set up a scheduled backup system and learned how to restore your website at any time.
Remember to pick a schedule that will benefit your content uploads. If you create new content every week it may be good to schedule a backup every week.
Keep Your Website Backed Up
It is extremely important to always be prepared in case there is an issue. This may be your mistake, a plugin’s issue, or even your web host’s mistake, but regardless of who causes the issue, it is your responsibility to keep a backup of your website.
This will prevent long periods of downtime if it is a major issue. While scheduled backups are extremely useful, do not think they are full proof. If you do have a serious issue with your website and a backup is created when this happens, you will essentially be deleting your backup in case you only keep one.
You should always keep multiple copies in a different location other than the one where your website is stored. Always make a manual copy whenever you make big changes to your website.
If you follow these basic guidelines, you will always have at least one backup that you can use to fix your website.
Have you prevented any extended downtime on your website by restoring a backup file? Do you line up your scheduled backup with your content schedule?

