Google and Bing are not the only ways people can search for relevant content. Many will use the search bar on your website to find materials. However, not all searches pull up good results or an attractive appearance. This has potential to hinder the performance of your site from the human perspective.
Luckily, there is a way you can add the best WordPress search methods. This can also be done without programming knowledge or creating your own extensive algorithms. With a few selections in settings, the search bar can turn into one of the most important areas of your website.
In this tutorial, I’m going to show you how to use the best search engine alternatives for your WordPress website. After all, giving visitors an easier way to find what they’re looking for only serves to benefit you in the long run.
Why revamp the search method on the site?
While the default searching ability of WordPress is useful, it lacks some of the capabilities many people have come to enjoy. For one, the autocomplete feature can be quite handy when trying to find content before hitting the enter button.
Another thing to consider is that some search methods are severely lacking when it comes to finding specifics. For example, some plugins that will look amazing pale in comparison to when someone uses the “site:” command in Google. I’ll explain this capability later.
It’s all about giving people what they are looking for as quickly as possible. If someone has to spend too much time trying to refine their search because it’s not matching with results, they’ll lose interest in the site rather quickly. While it may not be the worst design addition to a website, it still has potential to be a hindrance.
Giving the search bar a more elegant and efficient display can also boost visitor retention. People enjoy interaction and having more of an “experience” when visiting a site than just merely viewing text on a screen. This is why many developers are putting in more interactive elements into designs and content.
Using the SearchIQ Plugin
The Search function in WordPress gives visitors a useful tool. However, you can take it a step further and receive detailed metrics about how they use it. searchIQ has that capability. Although this plugin does offer a free version, the “pro” upgrade expands what you can do.
Other features of searchIQ include cross-domain searching, autocomplete fields, real-time analytic data and a sleek thumbnail display to show the content of your site in results. This plugin requires the use of an account in searchIQ’s website, but the starter account is free.
To use searchIQ:
Go to the website for searchIQ and create a free account.
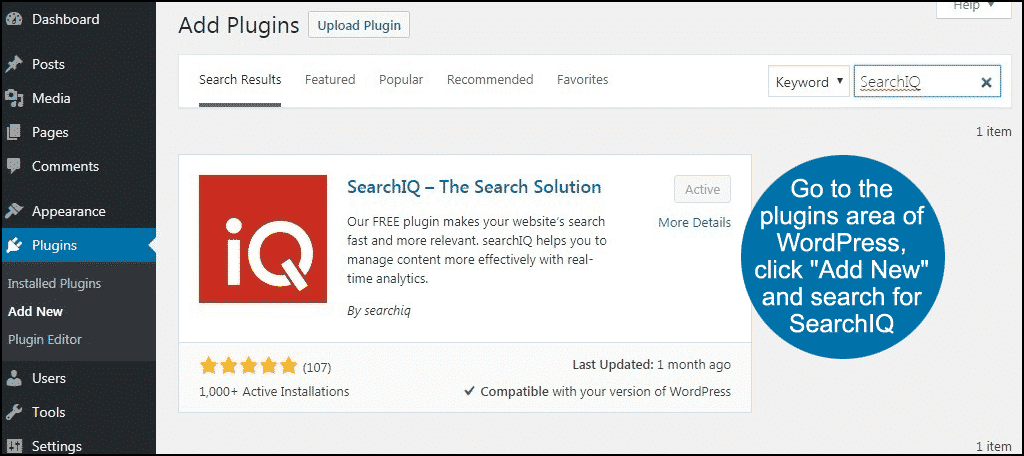
Go to the plugins area of WordPress, click “Add New” and search for searchIQ.
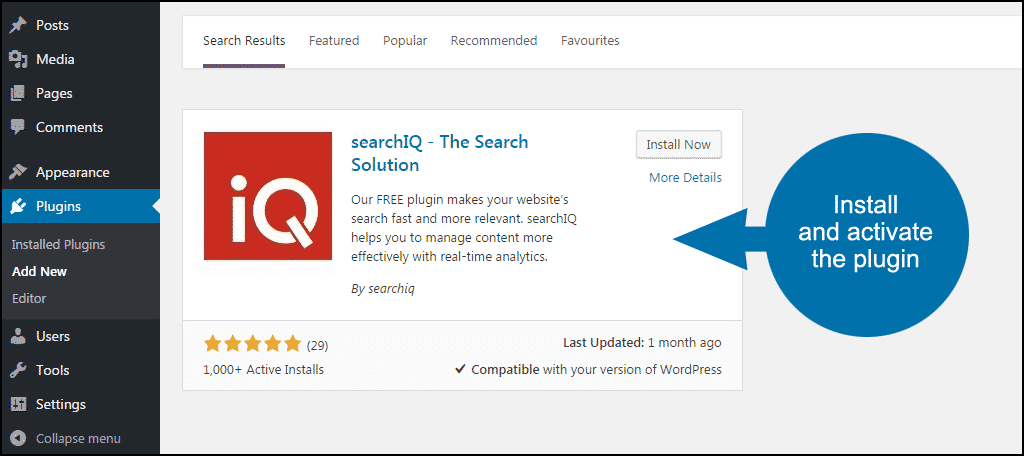
Install and activate the plugin. This will add a new function to the left admin panel in WordPress called, “searchIQ.”
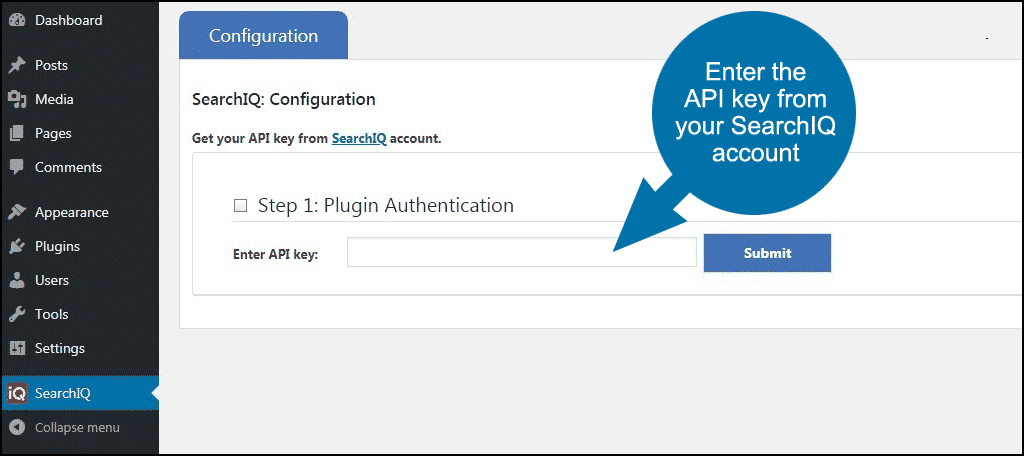
Click into this link. Here is where you enter the API key from your searchIQ account.
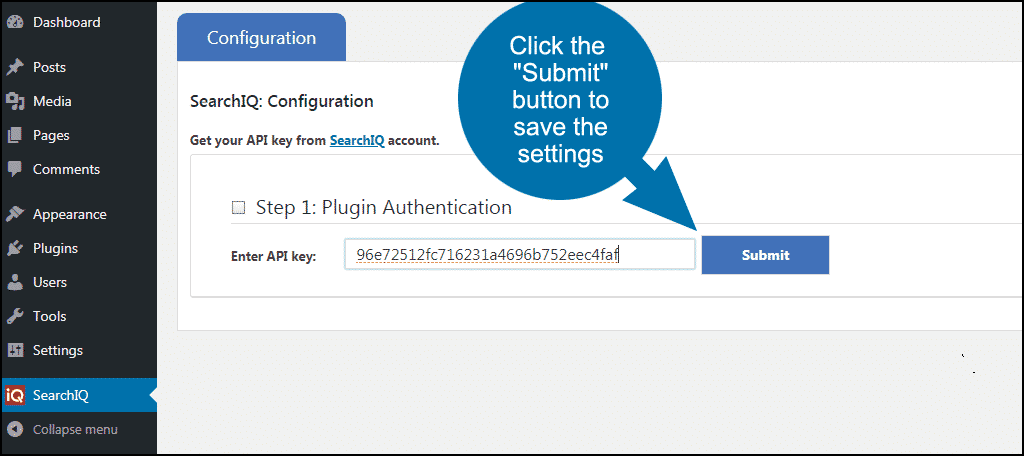
Once the API key is inserted, click the submit button to save the settings.
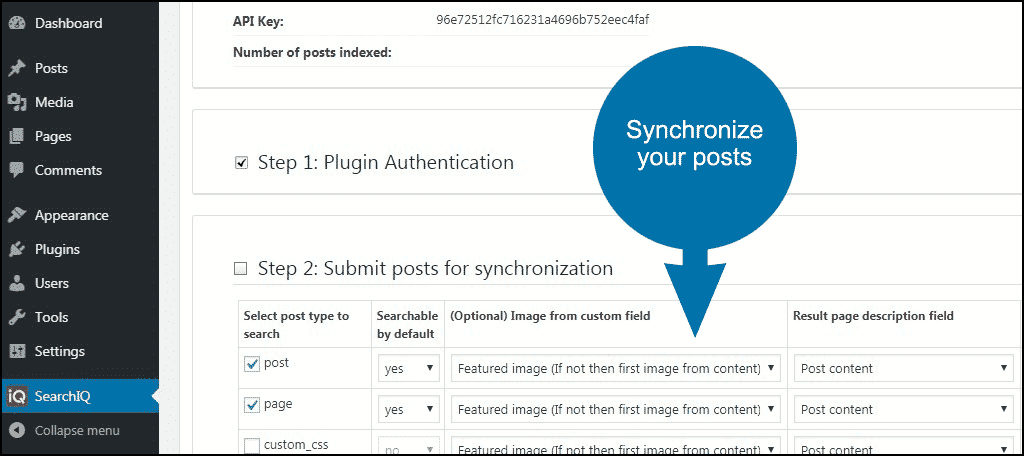
The next step from this plugin is to synchronize your posts. This gives you an option of what kind of content you want to add to the database for searching. For example, posts, pages, custom CSS files, feedback, FAQ plugins and more can all be added with a click of the corresponding check box. Once you make the selections for what to include, click the “Synchronize Posts” button.
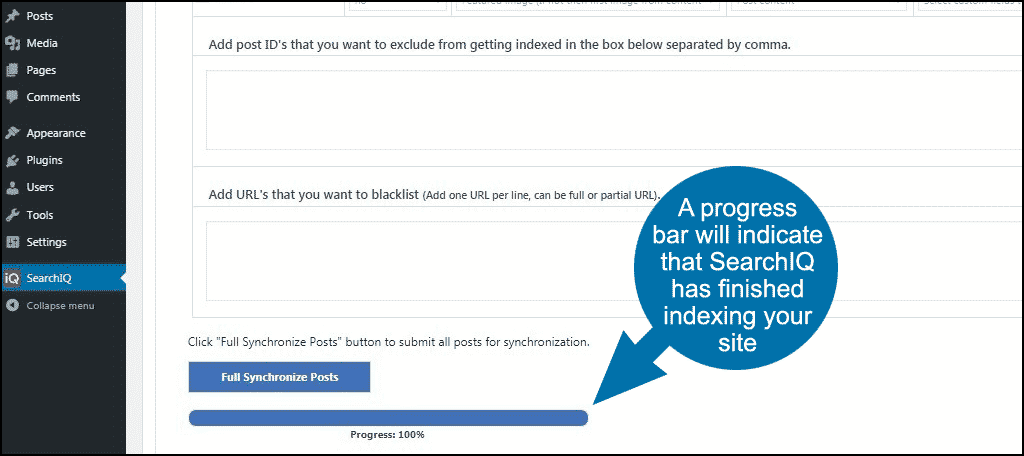
A progress bar will appear and show you when searchIQ has finished indexing your site.
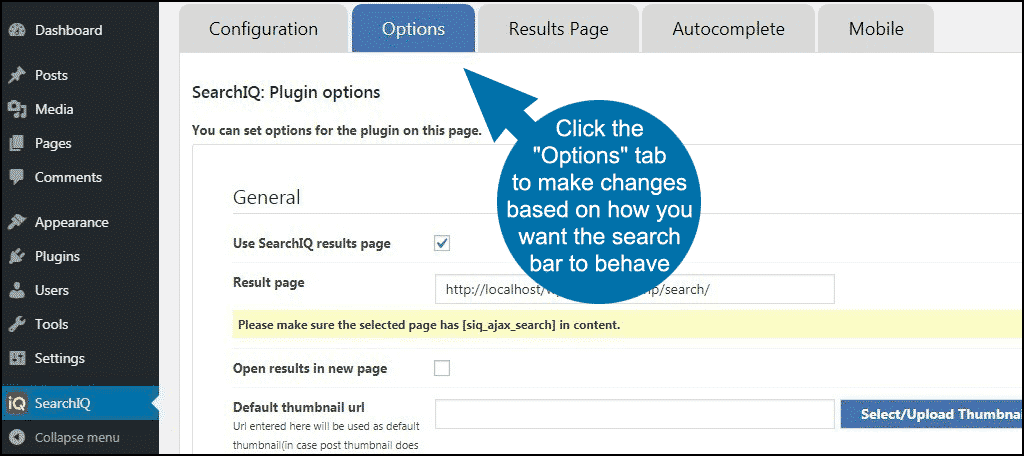
Click the options tab. From here, you can make a variety of changes depending on how you want the search bar to behave. Autocomplete, setting up a static page in WordPress for results and the search algorithm can all be adjusted. Click “Save” when you’re ready to continue.
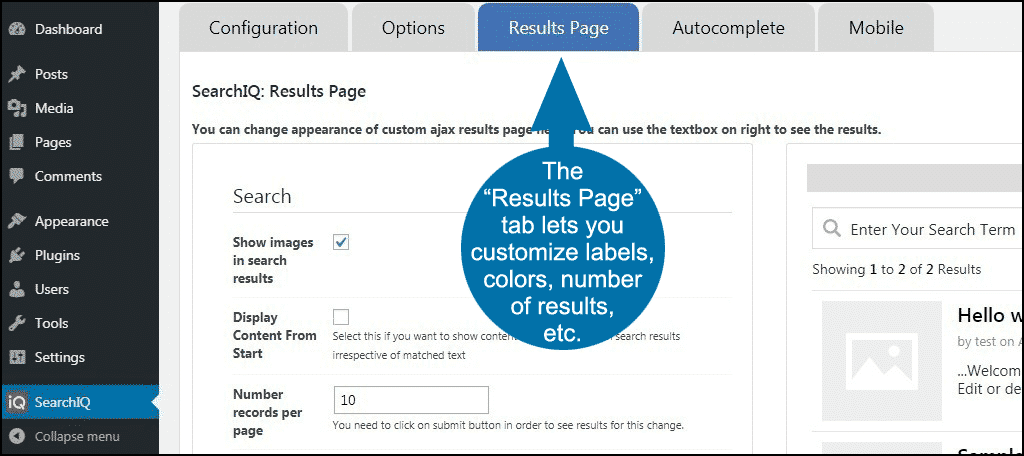
Click the tab for the Results Page. In this section, you have a great deal of customizing control that lets you alter labels, colors, number of results and more. You’re even provided with a preview window to show what your changes will look like on the site. Click the button to submit your changes when you’re done.
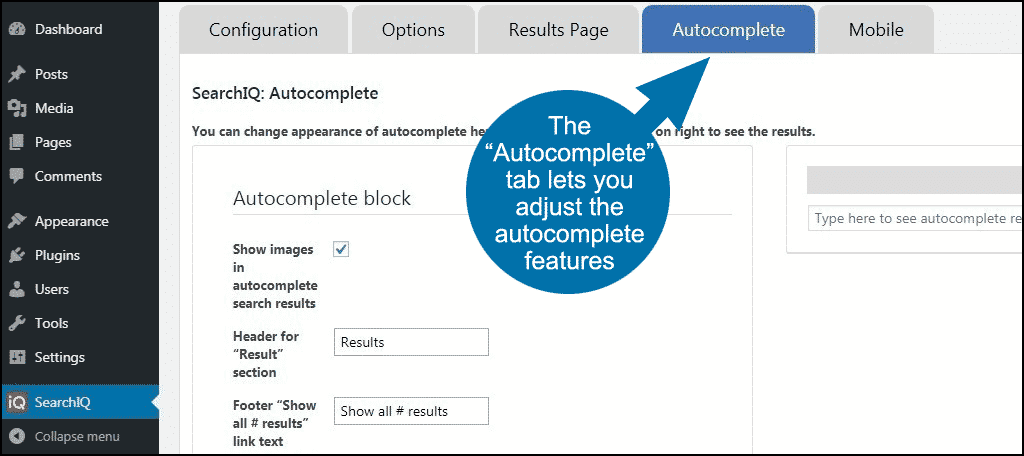
Click the Autocomplete tab. Here, you can alter how the autocomplete feature appears when someone searches for a topic. Click the button to submit changes if you’ve made any.
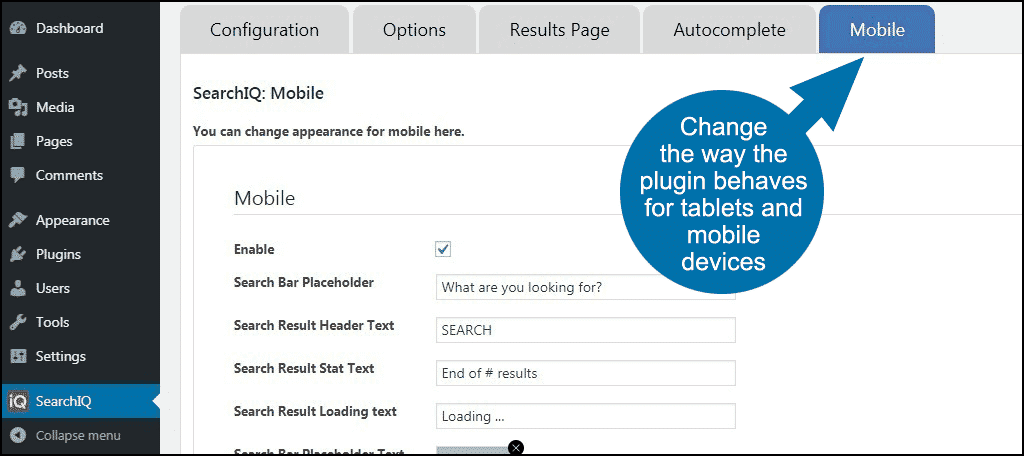
Click the Mobile tab. The searchIQ plugin is optimized for mobile users. Here, you can make changes to how the plugin behaves for smartphones and tablets. Unfortunately, this section doesn’t have a preview window like the others.
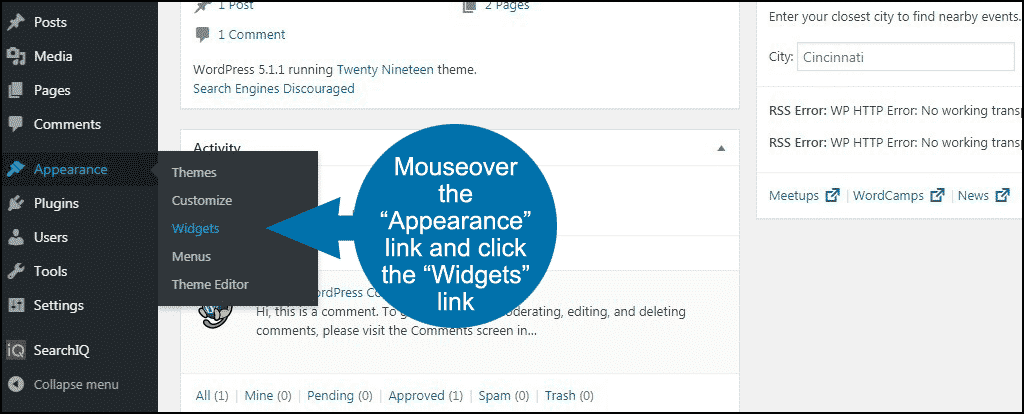
Go to the widgets area in WordPress located under, “Appearance.”
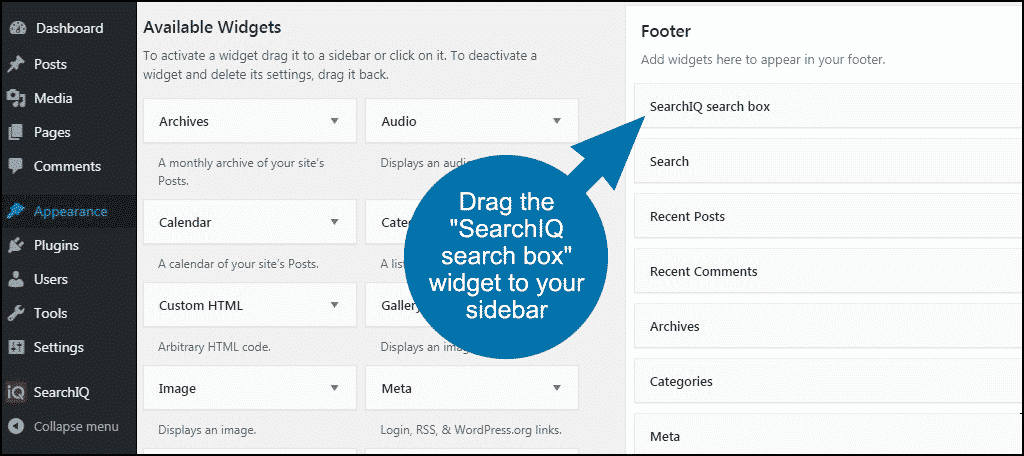
Locate the “searchIQ search box” widget and drag it over to your sidebar.
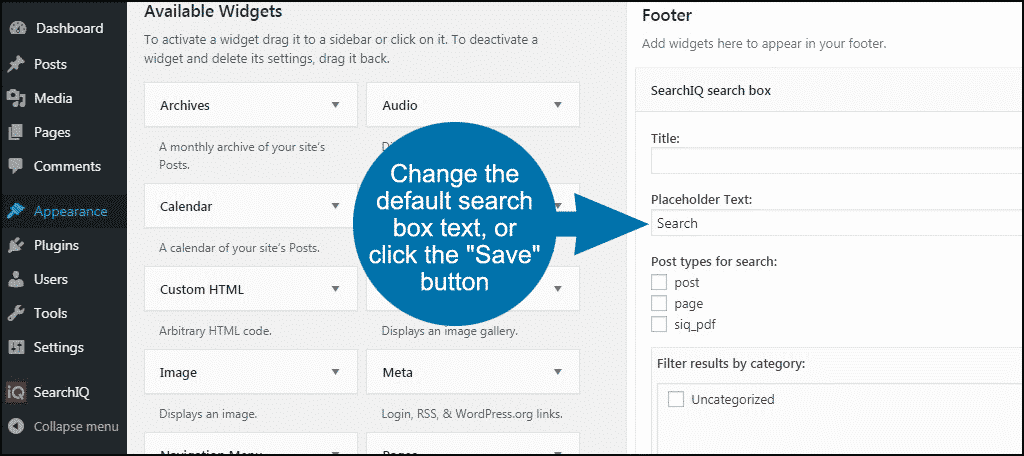
From here, you can change the default text that shows in the box before users begin typing. Otherwise, simply click save.
Now, your website will use the abilities and features of searchIQ. You will have to access the plugin’s website directly if you wish to view statistics regarding how your new tool is working for visitors.
Other Plugins to Add Engagement to Searching
Alogolia

Algolia is another third-party engine requiring an account to activate it. Like the one I featured above, this plugin also has a free account. It can handle up to 10,000 records and allows for 100,000 requests from website users. It is similar to searchIQ in almost every way but fewer customization options.
WPSolr
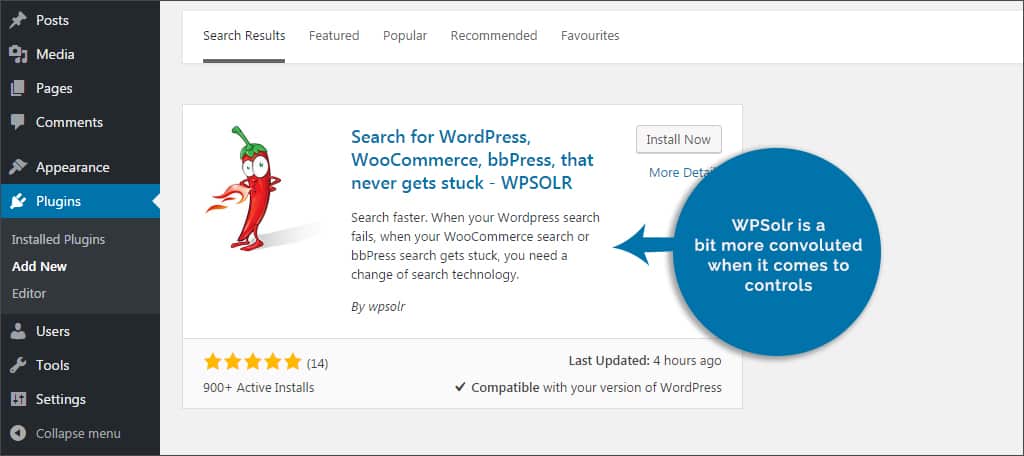
WPSolr is a bit more convoluted when it comes to controls. However, this also means there is great possibility for customization. While the free version does offer some great capabilities for search, the premium services include integrations with various eCommerce plugins and other tools for WordPress.
Search & Filter
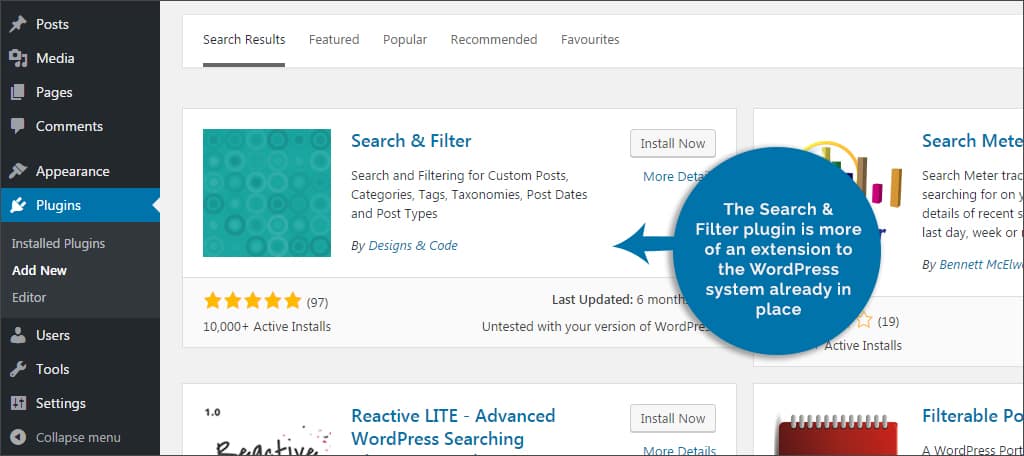
The Search & Filter plugin is more of an extension to the WordPress system already in place. I mention it in this tutorial because it expands what can be done through the basic function. You can add custom fields, templates and uses a drag-and-drop editing system. One of its endearing features is the ability to work with WooCommerce and WP eCommerce for those setting up an online store.
Ok, so what is the “site:” command in Google?
When searching for content, a lot of people simply put in the keyword and cross their fingers. What if you want to find content and a specific website? This is when you would use the “site:” ability. It looks like this:
site:greengeeks.com WordPress
This command will search GreenGeeks.com for every instance of WordPress using its famous algorithm for discovering quality content. When you install some of the best WordPress search plugins, compare the results to using the above command on your site. Of course, you want to replace the domain and keyword with your own.
Alternatively, you can incorporate a Google custom search in WordPress to have the most popular engine in the world work for you.
More than a search feature…
You don’t have to be limited to the default search abilities of WordPress to accentuate the site. There are many ways you can add the best WordPress search ability without being a programmer. Give your visitors the interactive experience they crave and make your content easier to find. It may just convince someone to add your site to their bookmarks.
What kind of additions have you added to WordPress to engage your users? Is your site easy to use when it comes to looking for specific content?


So I just had the worst experience I have every had with a plugin developer in my life. Patrice from WPSOLR is really not the most friendly person and essentially the plugin itself is poorly coded and prone to issues.
I got a white screen of death the moment I installed the plugin and when I asked for a refund the Patrice told me that it is not their policy to give refunds. The white screen of death was caused by a conflict with Woocommerce BTW.
After some back and forth (begging for a refund, trying to plede). I was ignored. $50 buck down the drain. Not worth it, dont do it
SEO encompasses a wide range of strategies and techniques, so it can be a little bit intimidating.