Keeping your website elements updated is a great way to protect it from being the target of hacks and bugs. Even using content management systems, you still need to upgrade the core files to protect the site. Textpattern is no different.
In this upgrade Textpattern tutorial, I’m going to show you the easiest way to update your files using cPanel and File Manager. It’s perhaps the least time-consuming process when compared to FTP applications such as FileZilla.
This tutorial is similar to when you installed Textpattern for the first time. Instead of copying all of the files, though, you’ll only be selecting a few of the core updates.
Let’s get started.
Upgrading Textpattern
Currently, there is no automatic update feature within Textpattern like there is with other content management systems. This means files need to be transfered manually. While you may be tempted to refrain from upgrading Textpattern, you want to for the simple reason of protecting the site from programming exploits.
Hackers love it when they have an easy target…even if your site is small.
Step 1: Download the Newest Textpattern Core
Take note of what version of the system you’re using by logging into your site. The version of Textpattern will be displayed in the bottom left.
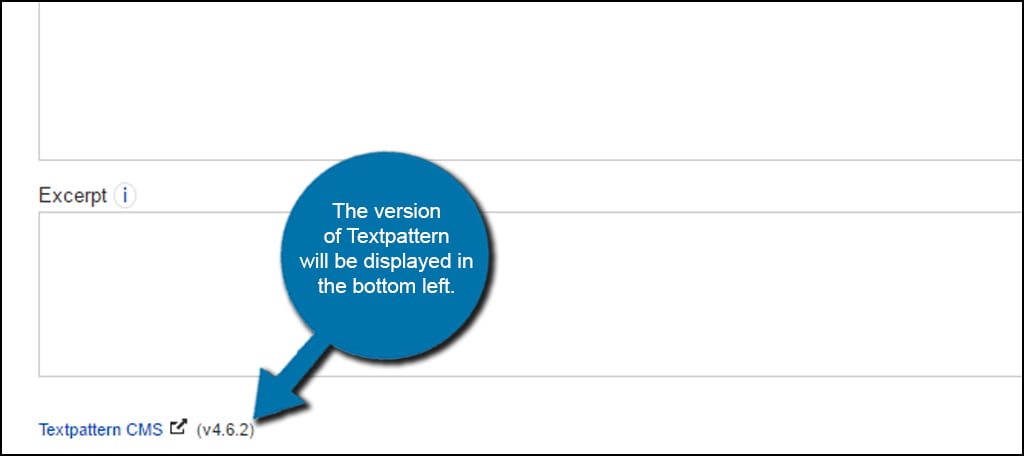
Go to the Textpattern website and download the latest version.

Step 2: Create a Backup of Your Website
Any time you make adjustments to any website, you should always create a backup. This can save you from a great deal of frustration in the event something goes wrong when transferring files. If something gets corrupted during the updating process, you could lose all of your data.
These backups can be done from File Manager and phpMySQL. You can also use FileZilla to download all of your website’s files to keep them safe on your computer system.
Either way, it’s important that you create this copy before you continue.
Step 3: Upload New Version to Website
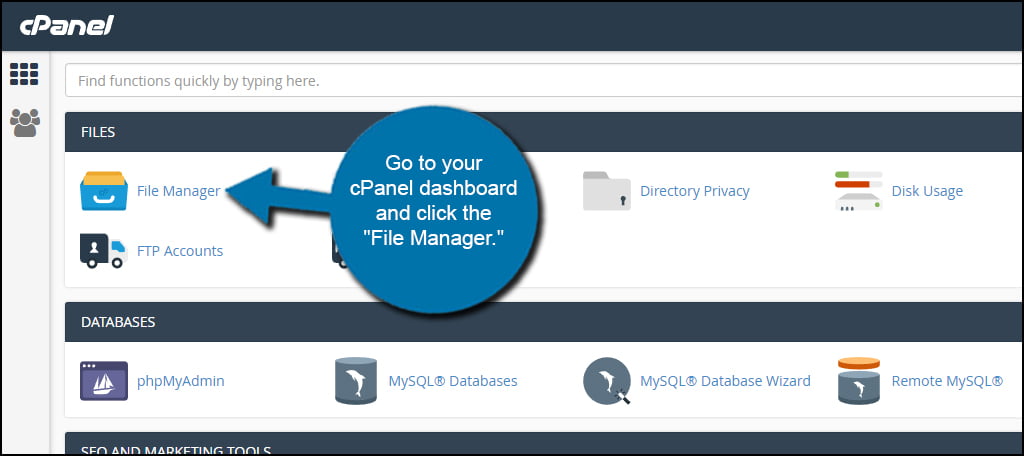
Go to your cPanel dashboard and click the “File Manager.”
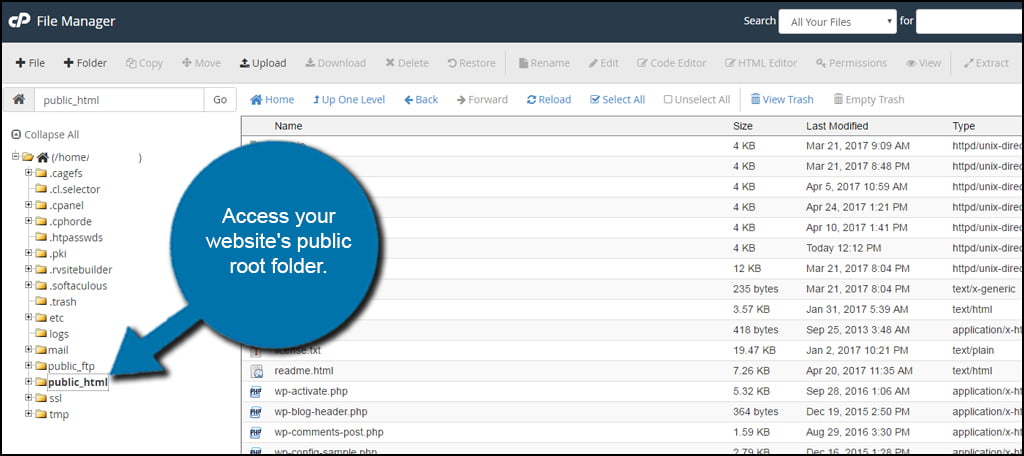
Access your website’s public root folder. In most cases, it will be in the “public_html” directory.
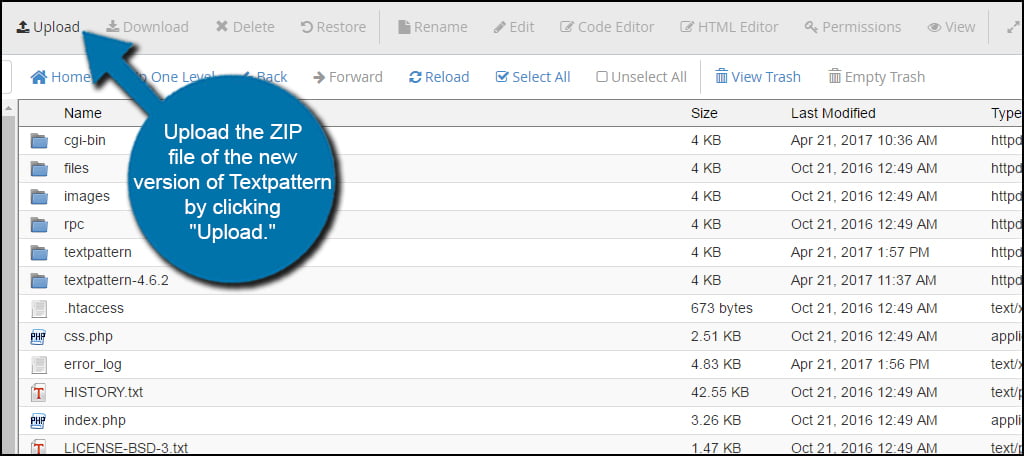
Upload the ZIP file of the new version of Textpattern by clicking “Upload.”
Step 4: Unzip the Upgrade File
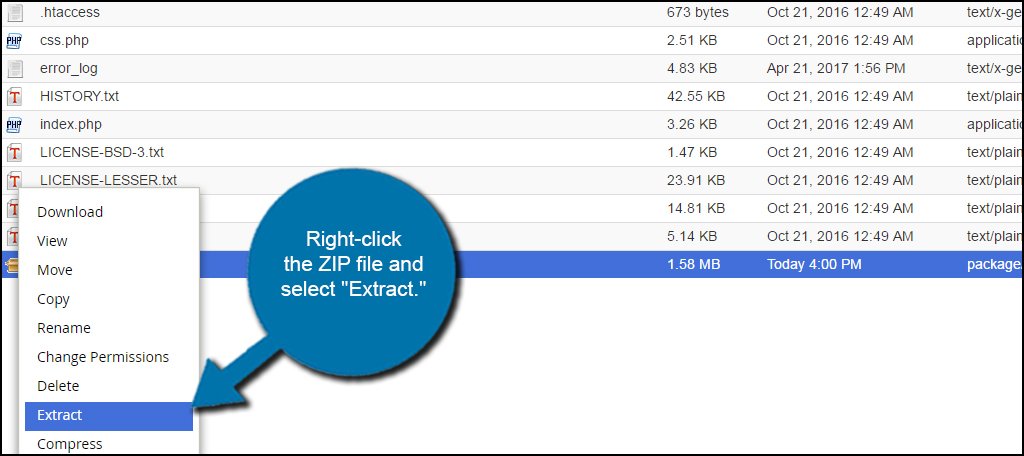
Right-click the ZIP file and select “Extract.” Those on Macs will use CMD+click.
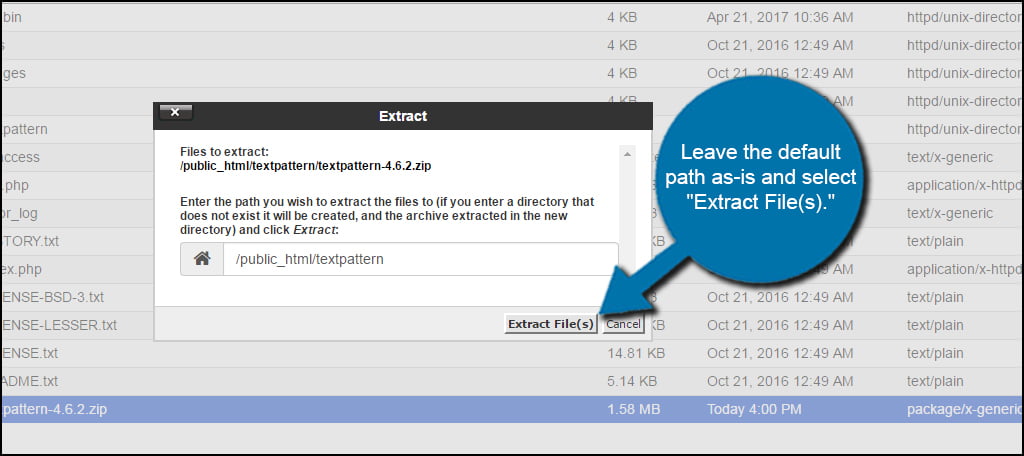
Leave the default path as-is and select “Extract File(s).” Don’t worry, this will create a new folder within Textpattern with the version as part of its name. It won’t overwrite any data.
Step 5: Copy New Files to Textpattern
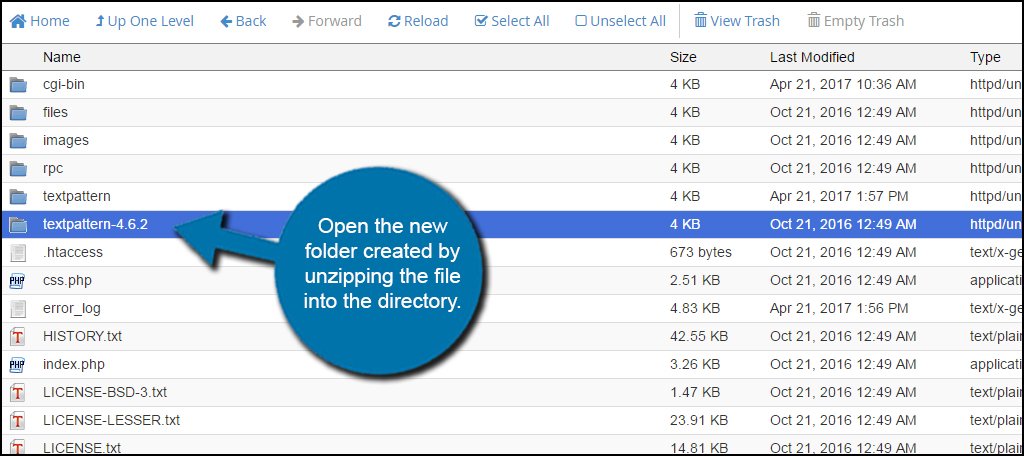
The new folder will appear with the same name as the zip file. Open the new folder created by unzipping the file into the directory. This can be done by double clicking the folder icon.
Highlight both index.php and .htaccess files by holding down CTRL and click.
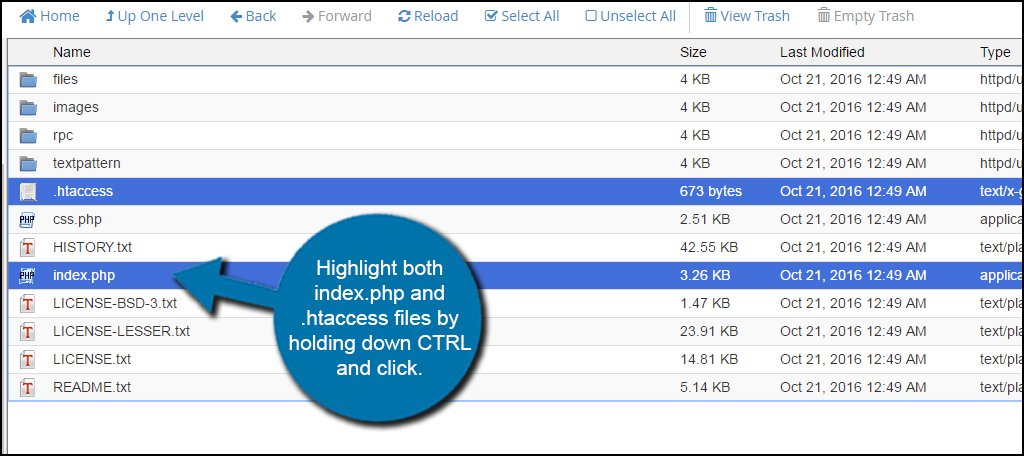
Hold down your mouse click on the “index.php” file and drag both files over to the Textpattern folder for your website. You want to drop these files in the “public_html” directory.
NOTE: You need to drop these files in the precise root folder for your Textpattern website. This will automatically overwrite any files of the same name without giving you an “are you sure” message. Coincidentally, this is why you create backups – in case you drop a file in the wrong folder.
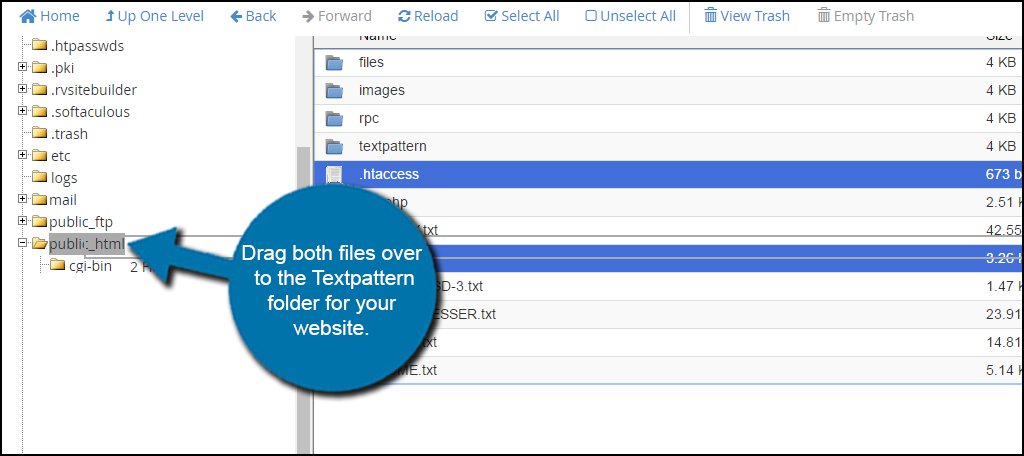
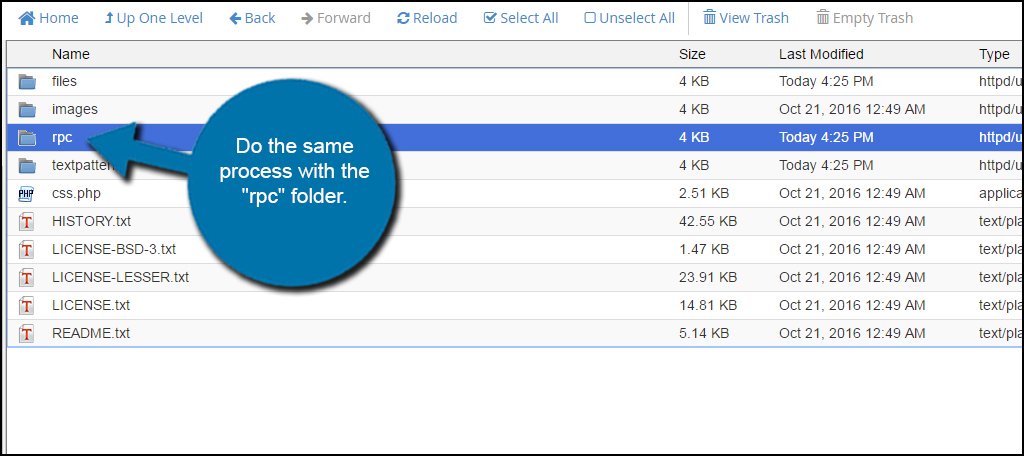
Do the same process with the “rpc” folder. Except, you want to open the folder and move its contents rather than the entire directory. That way, you don’t accidentally overwrite anything you’ve placed into the rpc folder while developing your site.
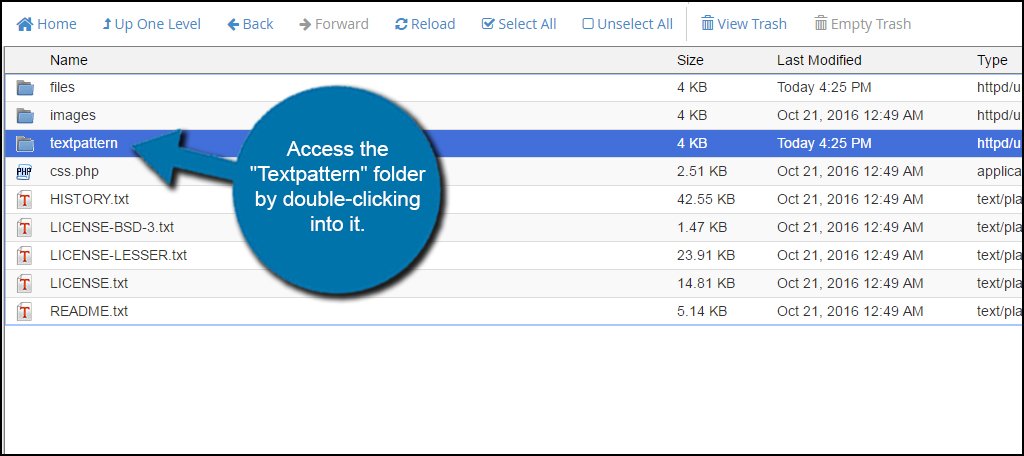
Access the “Textpattern” folder by double-clicking into it. Notice we are still working from within the upgraded Textpattern folder we unzipped earlier.
Here is where it may get a bit confusing for some. You need to copy everything from this Textpattern folder into your live Textpattern folder…not the public_html section.
Real quick, Textpattern will install its own folder in your root directory. While technically the site still operates from “public_html,” the primary data operates from the “Textpattern” folder itself.
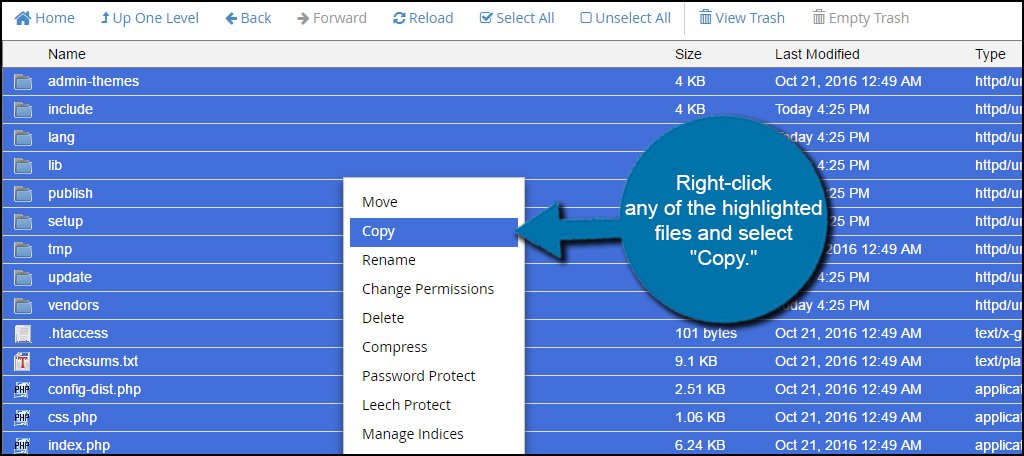
Select all of the files by clicking “Select All” from the tool bar.
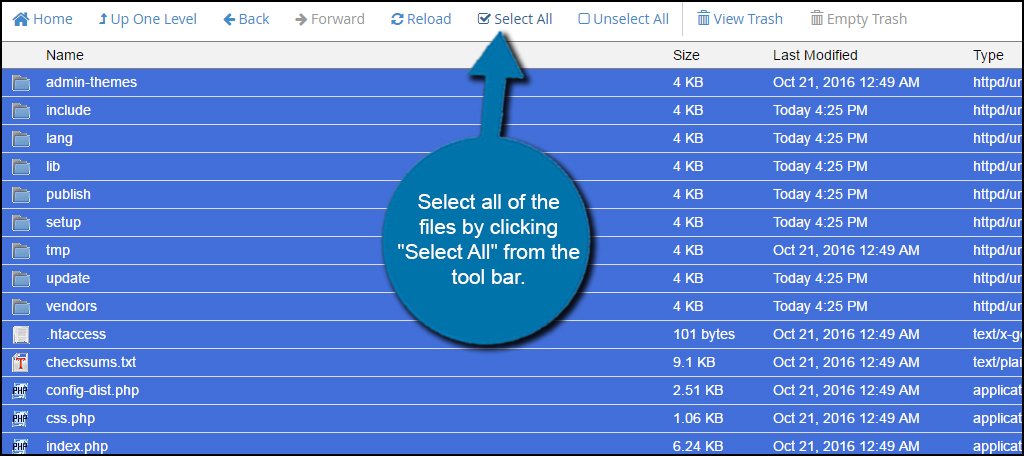
Right-click any of the highlighted files and select “Copy.” Mac users will do CMD+click.
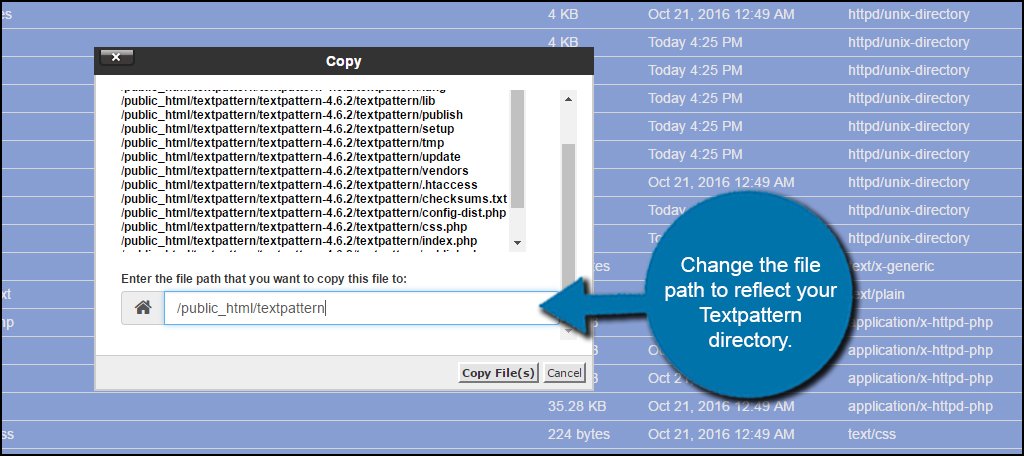
In the file path, make sure you are copying the contents to your Textpattern folder. Remember, you are not putting this into the root folder. This will go in the actual “Textpattern” folder that is within the root. So, you may have a path such as “/public_html/textpattern“.
Change the file path to reflect your Textpattern directory.
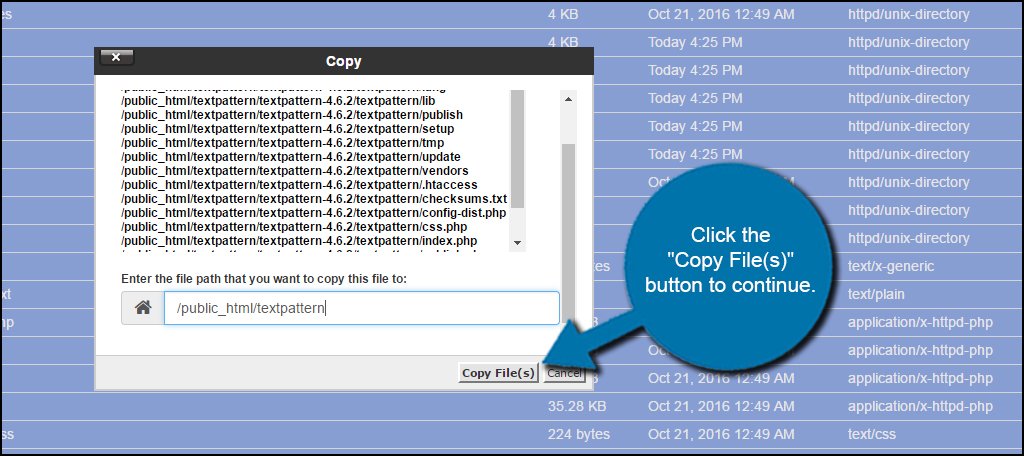
Click the “Copy File(s)” button to continue.
After the files have all been copied, access your Textpattern website from the admin portal. The upgrade script will run automatically and finish the process.
It may not be a bad idea to run the diagnostic tool from the Admin panel after the upgrade just to make sure the site is functioning properly.
It’s imperative that you always remember to create a backup of your files before doing an upgrade. If you move something to the wrong folder, it can be a painstaking process to fix. This is a process that needs to be done if you want to keep your web hosting account safe from hackers and bots. Updates such as these often come with bug fixes and more efficient programming which improves site performance.

how to fix textpattern which is missing class after it is updated? Previously I used version 4.5.7 and tried update 4.7.1
It did not work for me
I fixed the issue. I had to add the css.php file too.