Not everyone wants to use the web-based application, “Webmail” to access messages. If you’re on a Mac, you can set up your email accounts in macOS mail. This is often a preferred method simply because you won’t need a browser to view your email.
Mail is a standard component of Mac computers. This app gives you basic abilities when it comes to sending and receiving messages. While it may not have all of the bells and whistles of other programs, it does its job efficiently.
However, it’s advisable that you set up some form of email security in cPanel. This will greatly reduce complications with spam and other issues later on.
In this tutorial, I’m going to show you how to set up an email account in Mac and Mail. It’s a quick procedure that will have you reading messages in no time.
Using Mac and Mail to Access Email Accounts
Click on the Apple icon in the top left of your screen.
![]()
Click the System Preferences from the drop down list. It should be the second one down from the top.

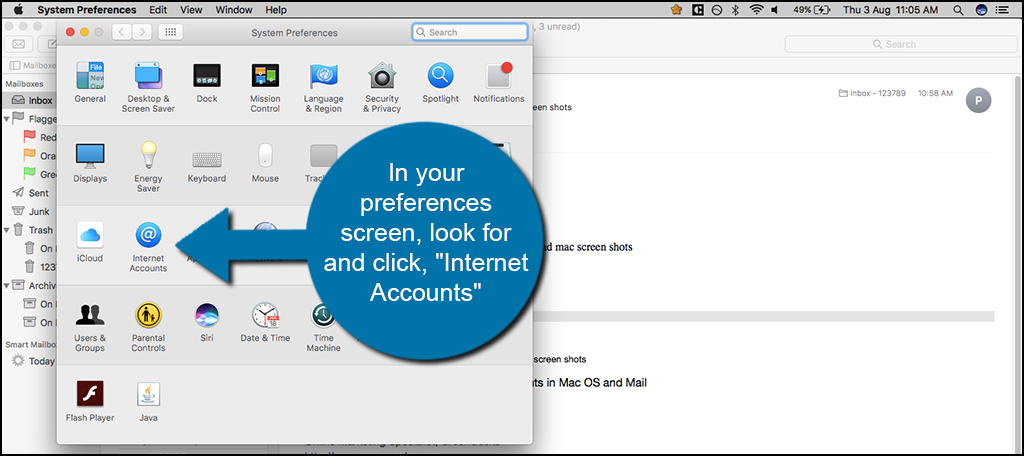
In your preferences screen, look for and click, “Internet Accounts.”
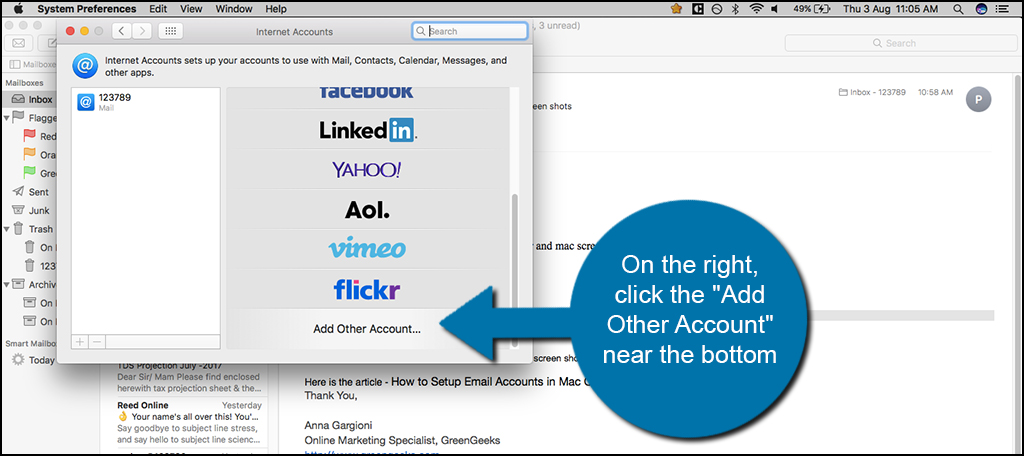
This will open a new window for your preferences. On the right, click the “Add Other Account” near the bottom.
Click the “Mail account” option available. It may have an “@” symbol next to it.
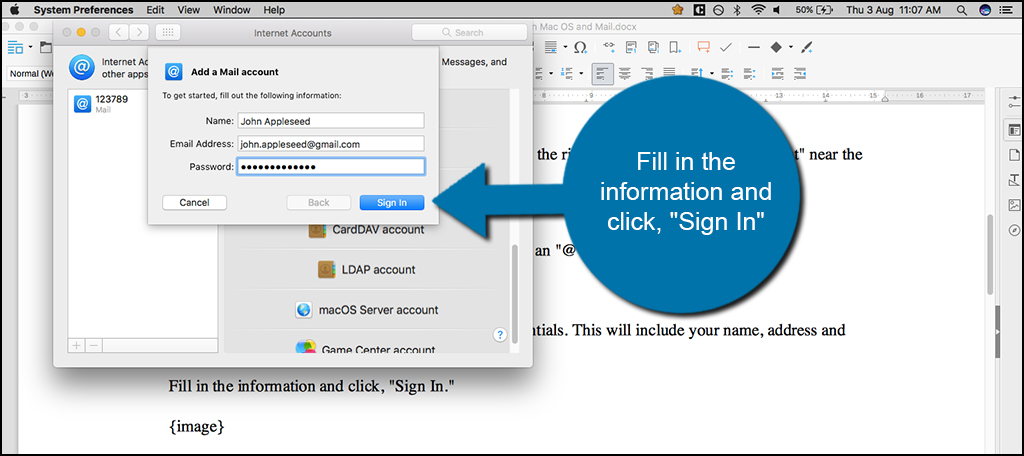
A new window will pop up asking for your mail credentials. This will include your name, address and password.
Fill in the information and click, “Sign In.”
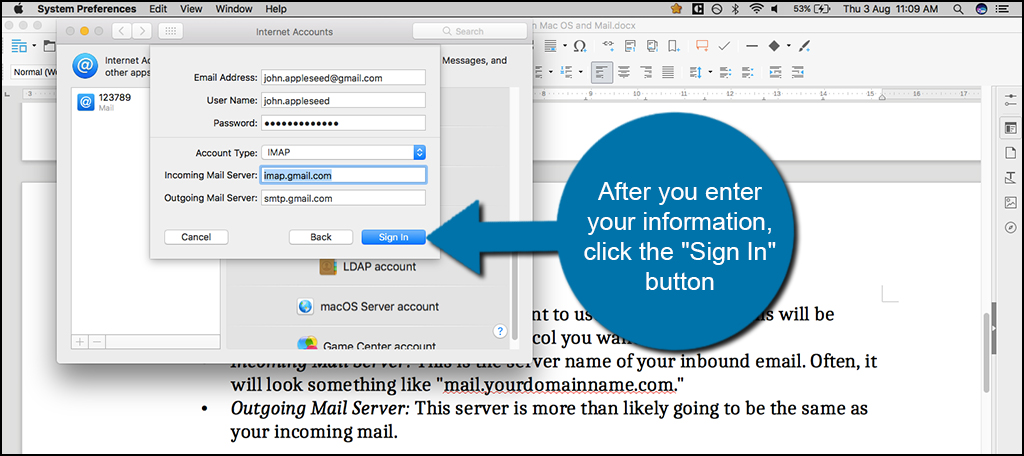
Next will be the server settings for the account. You will need to know:
- Username: Which is often your email address depending on your web host provider.
- Password: Obviously the password for the account you wish to access.
- Account Type: Choose which you want to use, POP3 or IMAP. This will be dependent on the type of mailing protocol you want to use.
- Incoming Mail Server: This is the server name of your inbound email. Often, it will look something like “mail.yourdomainname.com.”
- Outgoing Mail Server: This server is more than likely going to be the same as your incoming mail.
After you enter your information, click the “Sign In” button.
Now, you will have a new account available on the Mac. If you have third-party applications tied to your mail account, they will be available in a list. Use the check box to select any apps that you want to associate with your mailing system. This is often an optional ability depending on the apps you currently have installed.
Click the “Done” button on the bottom right.

Getting Your Mail On Your Mac
This is but one of the easiest methods to receive email on a Mac computer system. You can use other applications available from other vendors, but this should already be part of your computer software. Just bear in mind that some Internet providers block certain ports from operating on their networks. As a result, you may not be able to send messages whether it’s done from a Mac or a PC. Check your ports if you have any question about sending unsecured email.

I was expecting to find imap configuration data for my greengeeks webmail, not instructions for checking my gmail
Hello. Try this article and see if it is of help. If not, our support staff can easily point you in the right direction. https://www.greengeeks.com/support/article/getting-started-setting-up-email-applications/
Hi, I tried the steps and I always get the message: UNable to verify account name or password.. I changed my password, and it’s still showing the same error message.. I’m able to login online via roundcube.. but somehow its not working with apple mail. Any suggestions?