All online stores need to be able to accept payments, otherwise, customers cannot pay for the products in your store. While there are tons of options to accept payments within WordPress, Stripe continues to be one of the most popular options.
Stripe is a payment processor that accepts the majority of major payment options from around the world and works on an international level. It is generally built for an online environment, but even brick-and-mortar stores can utilize the system.
Luckily, integrating Stripe with your online store is extremely easy with the right plugin, and in this case, we will be looking at how to do it with the Accept Stripe Payments plugin. It is easy to use at any skill level, and Stripe is also free to set up.
Today, I will demonstrate how to set up Stripe payments in WordPress using this plugin.
You Must Have an SSL Certificate to Continue
Stripe is a very popular tool and requires its users to follow safety guidelines to utilize the platform. One such requirement is ensuring your website utilizes a Secure Sockets Layer or SSL certificate.
This helps encrypt the information from your website to the visitor, which lowers the chance of any nefarious actions.
This is not exclusive to Stripe. Most payment gateways require an SSL certificate, and you should have one anyway for SEO purposes. Since it is a requirement, if you do not already have one, you need to take a moment to install an SSL certificate in WordPress.
It’s worth pointing out that virtually every web hosting company offers SSL certificates to its customers for varying price points. It is a cheap annual subscription that should only take a few moments to set up.
If you are in need of assistance your web host should be able to provide support, so be sure to contact them.
How to Setup Accept Stripe Payments in WordPress
The Stripe Payments plugin is a free way to set up Stripe in WordPress, but keep in mind that while I say it is free, Stripe will charge you a small commission fee on every sale, which is a standard practice amongst payment processors.
You can refer to Stripe for the exact values, as rates change depending on how many sales you make.
In terms of the plugin itself, it has the ability for you to create products that users can use Stripe to pay with. It is certainly less robust than something like WooCommerce, but it gets the job done if you just have a few things to sell.
IMPORTANT NOTE: You must create a Stripe account to obtain the Stripe API Keys you will need to connect WordPress to Stripe. This tutorial will not cover this, but the codes are located on your Stripe dashboard.
Step 1: Install Accept Stripe Payments
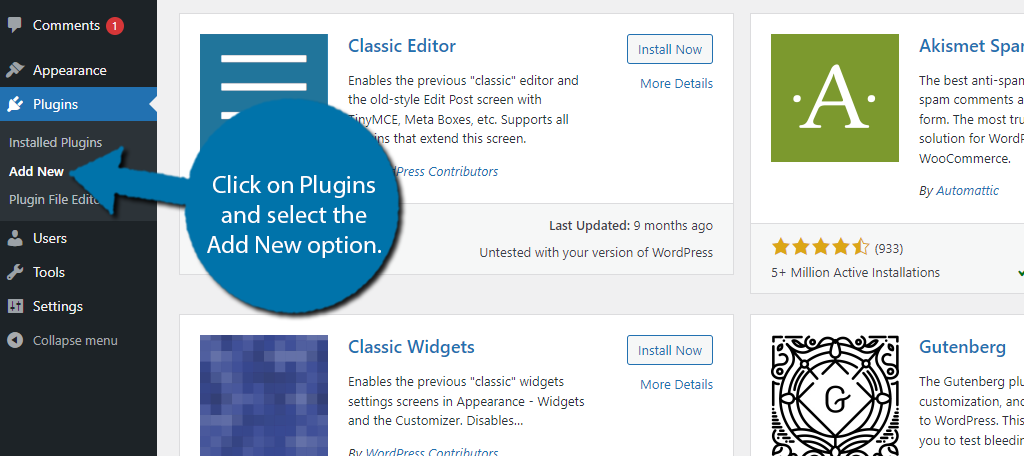
Let’s start by clicking on Plugins and selecting the Add New option on the left-hand admin panel.
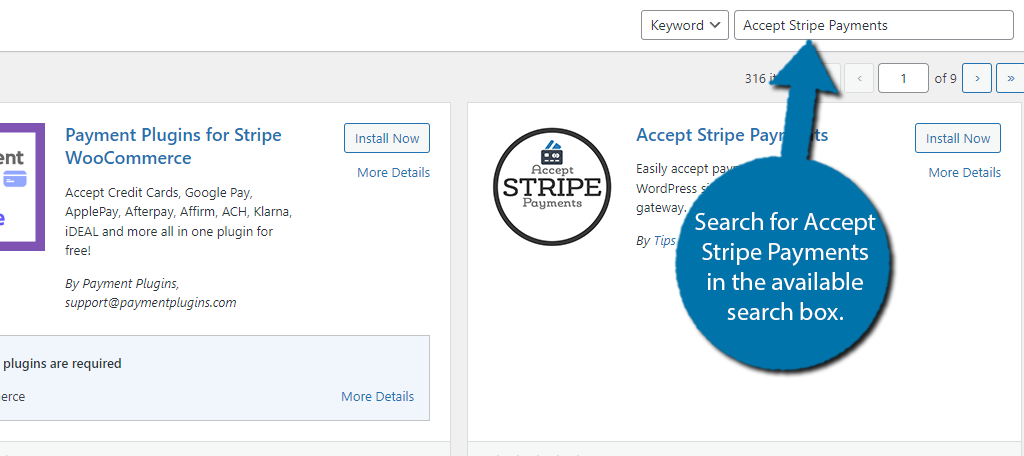
Search for Accept Stripe Payments in the available search box. This will pull up additional plugins that you may find helpful.
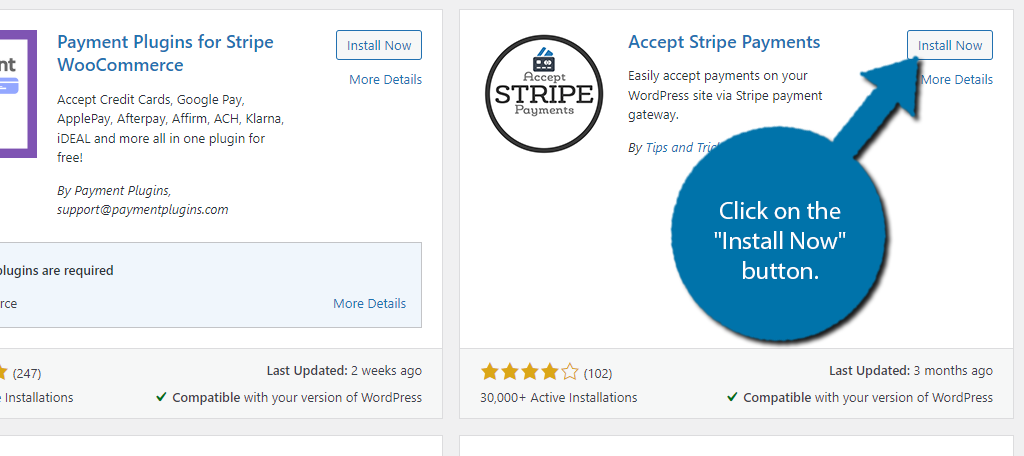
Find the Accept Stripe Payments plugin and click on the “Install Now” button and activate the plugin for use.
Step 2: Configure The Settings
The best place to begin is to configure the plugin’s settings. It has quite a few options, but for the most part, they are straightforward. Due to the sheer quantity, I am not going to cover every one of them, but instead show you where they are and what you can expect to find.
To find the settings, click on Stripe Payments and select the Settings option.
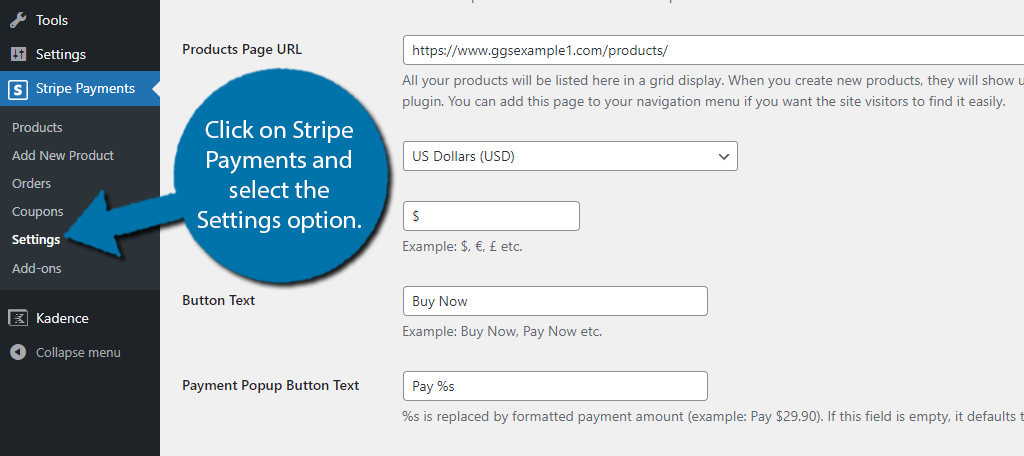
The settings are broken up into multiple tabs. Let’s begin with the General Settings.
General Settings
The general settings allow you to configure some of the key aspects of your online store. Here, you can set which page is the product page and which one is the results page (the page that thanks the user for the payment).
You can also adjust various settings about your store like choosing what the main currency will be, the appropriate symbol for the money, choosing a variety of button names, if it should remember a credit card number, and much more.
For the most part, you will just be entering the data into the appropriate box, or clicking a checkbox to enable or disable a feature. There is a lot here, so go through it carefully to make the best choices.
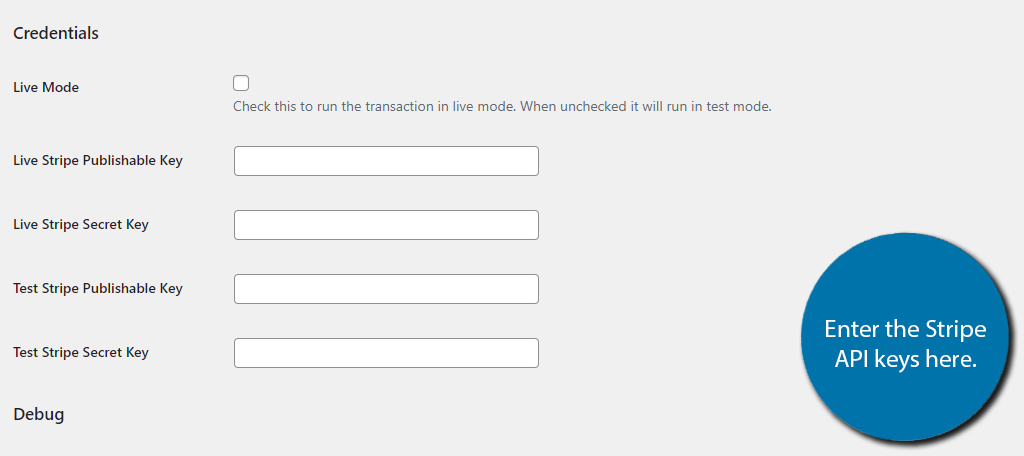
The one part of this section that you MUST COMPLETE is connecting the plugin with Stripe. Log into your Stripe account and go to the dashboard. You will find your API keys. Copy these and paste them into the appropriate boxes in this area.
Email Settings
This section is dedicated to telling the plugin when it should send out emails and what kind of information they should contain. Virtually all online stores email customers a receipt of their most recent transaction.
This usually contains all of the transaction information and will also usually contain any shipping information. All of this can be set up. You can tell the plugin to send an email every time a transaction is made and configure the message.
Perhaps the most important option you will want to change is the email address. By default, it will use the one registered to your WordPress account. I highly recommend creating a new email specifically for this to help you keep track of things.
Other Settings
There are two more tabs to explore. The Advanced setting tab gives you additional customization options for the plugin. This includes things like a currency position, decimal placement, custom field generator, and more
There is also a dedicated tab for CAPTCHA. Here you can choose which CAPTCHA to enable on your site. This helps prevent bots from making purchases. The plugin will have a warning message if you do not enable CAPTCHA.
Step 3: Create A New Product
With all of the settings configured and the plugin connected with Stripe, you are now ready to use it. To do this, you need to create a product. Begin by clicking on the Add New Product option.
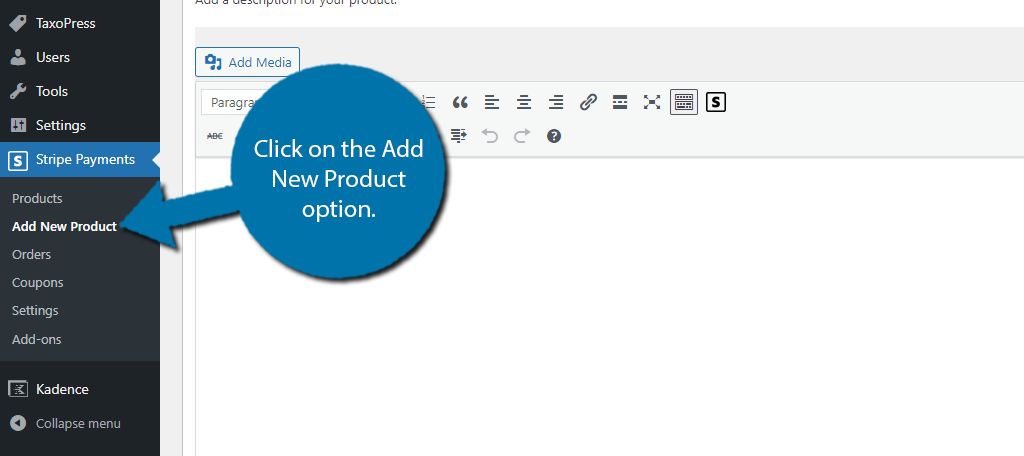
At the top, you can add a title for the product. Below this, you will find the classic editor where you can enter the product information. This can contain text, image, and video content. Once you enter the product information, scroll down.
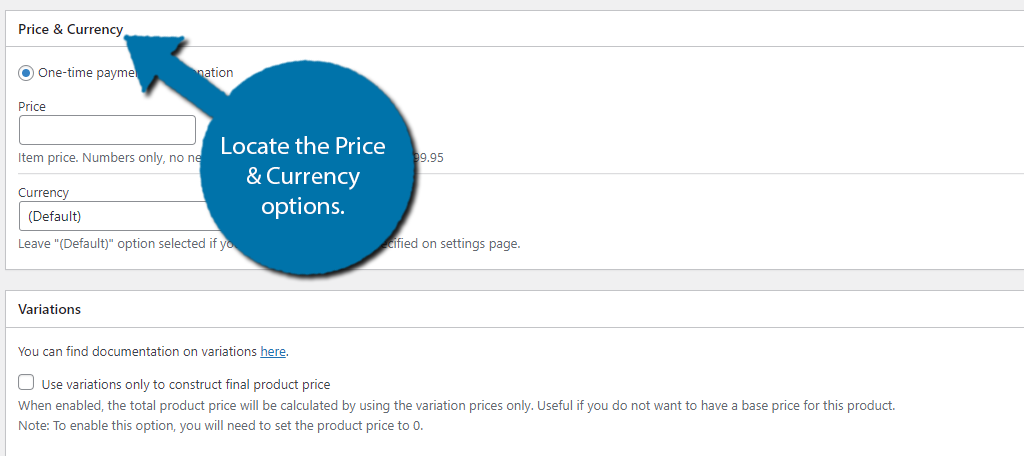
Locate the Price & Currency options.
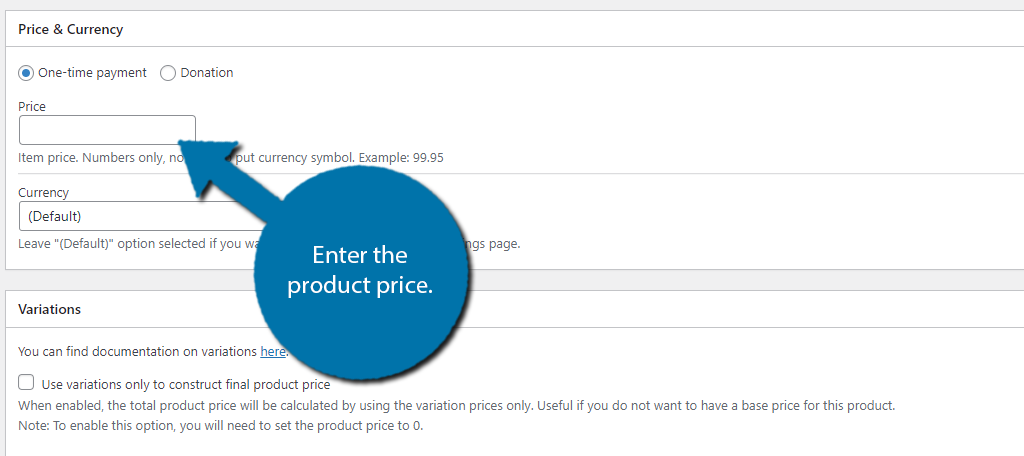
Here, you can choose if the product is a one-time payment or a donation by checking the box. The box below this is where you will enter the product price. You do not need to add the currency symbol ($).
There is also a currency option that should be set to the default you chose in the General Settings. Scroll down to the Quantity & Stock section. As the name suggests, you can enter the quantity of the product you have.
Or you can use the Quantity Control to only make a certain number of the products available.
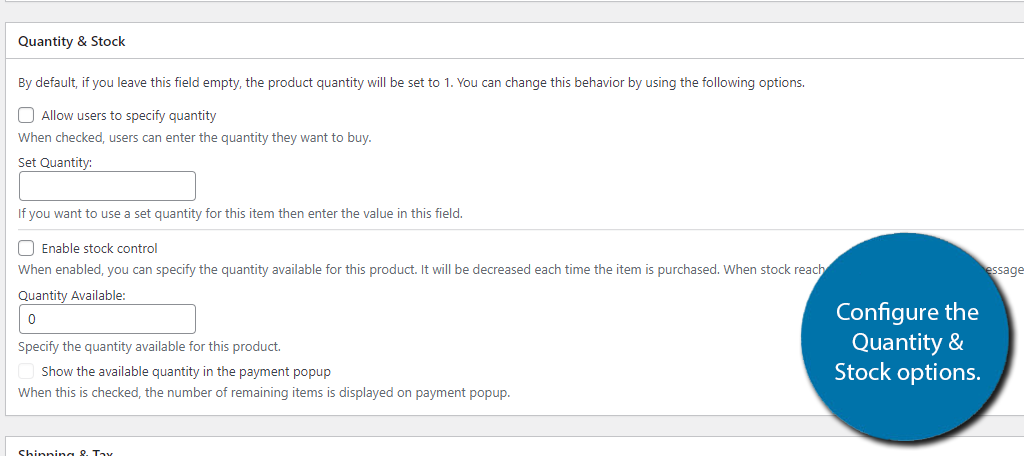
Next, scroll down to the Shipping & Tax section. Here you can enter the shipping cost, or leave it blank if shipping is free. You can also set if the product is only available for pickup.
You can also set up the tax price. While you can enter a flat tax rate, the better option is to use the variation option.
The Tax variation option uses the customer’s shipping or billing address to determine what the tax rate should be. This is important in the United States because each state has a different tax rate.
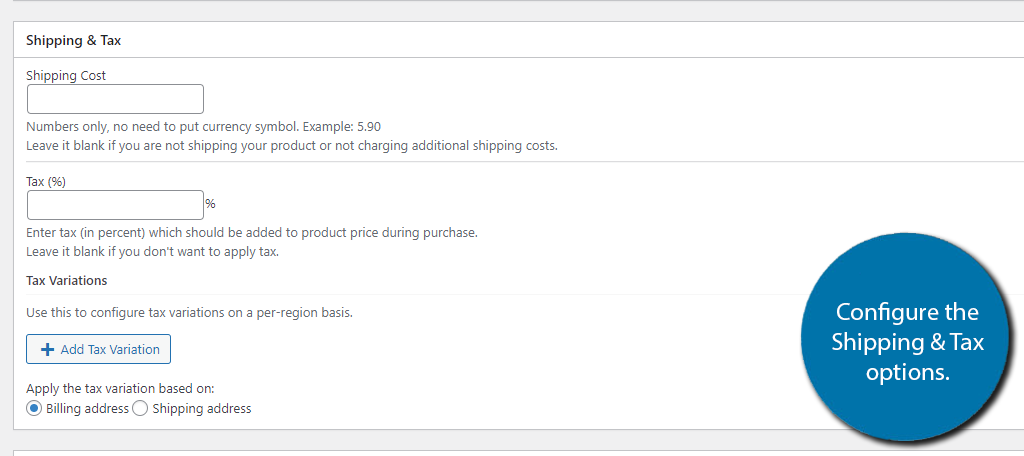
There are several other options you can configure. This includes things like collecting the user’s address, the download URL (for digital goods), entering a Thank You page URL, customizing the Buy Now button, and much more.
Simply go through all of the options available. Be sure to save the changes by publishing the product.
Step 4: Place the Product
Now that the product is published, it will generate a shortcode that you can use to place the product. Simply copy the shortcode.
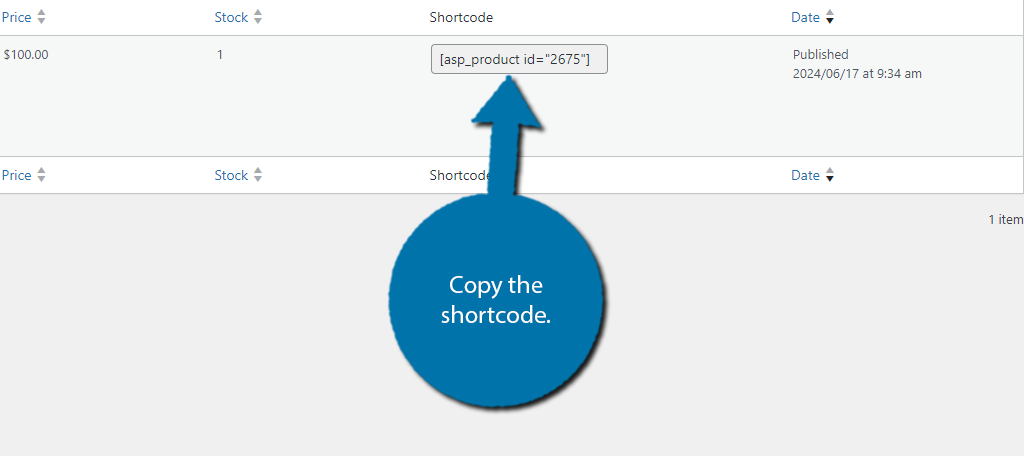
Now, simply go to the post or page where you want this product to appear, add a shortcode block, and paste the shortcode you just copied. Save the changes, and your product will now be visible in WordPress.
Customers can purchase it using Stripe if everything is set up correctly.
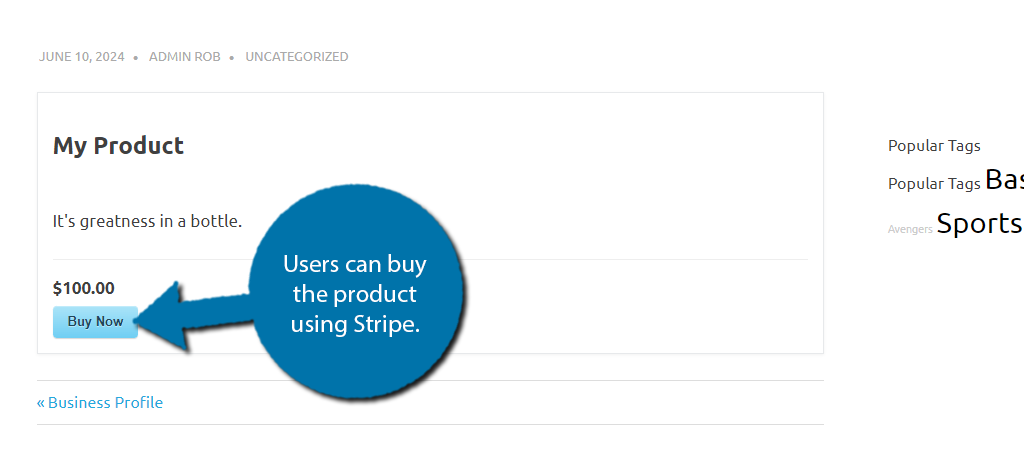
And that’s it. You can add as many products as you want. The plugin is easy to use but can take some time to set up as there are just a lot of options to go through, but that is par for the course when it comes to eCommerce.
Another Option for Using Stripe
Many users of WordPress already use WooCommerce for their eCommerce needs. And you can certainly use Stripe as a payment option by using the Stripe Extension for WooCommerce.
This extension fully integrates Stripe as a payment option in your WooCommerce store. And just to be clear, this is in addition to any other payment options you already support. Thus, you’ll have more options than ever.
The extension itself is free, but Stripe does include fees on every transaction. If you already use WooCommerce to create an online store, the Stripe extension should be your go-to way for adding Stripe to WordPress.
Give Users Multiple Payment Options
Stripe is an extremely common way of accepting payments online, but it is far from the only option. Another popular option is PayPal. Most major companies try to have as many options as possible to make it easier for customers.
Let’s face it, manually typing your credit card into every website is annoying, logging into PayPal and selecting which card to use is more convenient. You should be sure to collect information from customers and see how they feel about your current options.
I hope you found this tutorial helpful in learning how to set up Stripe Payments in WordPress.
how easy did you find the Accept Stripe Payments plugin to use? What other payment processors do you use?


Hi Josh,
I was wondering if the Stripe Payments interface has changed since you wrote this? I just activated the plugin and it looks much different than your screen captures. I’m only given the ‘orders’ and ‘settings tab’. I’m having issues finding where to populate the Stripe shortcode.
Thank you!