Do you want to restrict content on your WordPress website so that only certain users can access it? Perhaps you’re using a paid subscription platform on your site. Maybe you just don’t want anyone but your editors to access certain posts and pages.
Whatever the reason, you can restrict content by user roles in WordPress. Unless the registered user has a certain role attached to his or her account, you can display a message or even redirect unauthorized access.
In this tutorial, I’ll show you how to enable a WordPress page access control based on the roles of your users.
Using Profile Builder
Today, I’ll demonstrate some of what Profile Builder can do. It’s a plugin that has a wide range of abilities such as monitoring user roles when it comes to showing certain content. This is in addition to creating a great way for users to register.
Let’s take a quick look at the plugin together and see what all it has to offer. After that, we will install it and get it up and running so that you can easily restrict content using different user roles.
Profile Builder is basically an all-in-one user profile plugin for WordPress. It allows you to control everything related to user roles in WordPress, including giving you the ability to restrict content based on certain user roles.
The plugin comes with a ton of functionality and features. Not only will you be able to create front-end logins and user registration forms by using shortcodes, but you will also gain access to some of the following amazing features.
- Drag and Drop Builder
- Email Confirmations
- Choose Login Styles (email, name, both)
- Assign User Specific Roles at Registration
- Redirect Users at Login
- Admin Bar Settings and Options
- Registration and Lost Password Links
- Customizable User Login Widget
- Custom Stylesheet
- User Profile Fields
- Roles Editor
- Restrict WooCommerce
- reCaptcha Support
And that is just a start. The plugin is packed with functionality. That being said, it is lightweight and will not slow your site down when used. Let’s get it installed and running so you can start building user roles and restricting content how you see fit.
Restrict Content Using Profile Builder
Step 1: Install and Activate the Plugin
Before you can start restricting content based on user roles, you first need to install and activate the Profile Builder plugin. You can do this by popping over to the Plugins page in the WordPress admin dashboard.
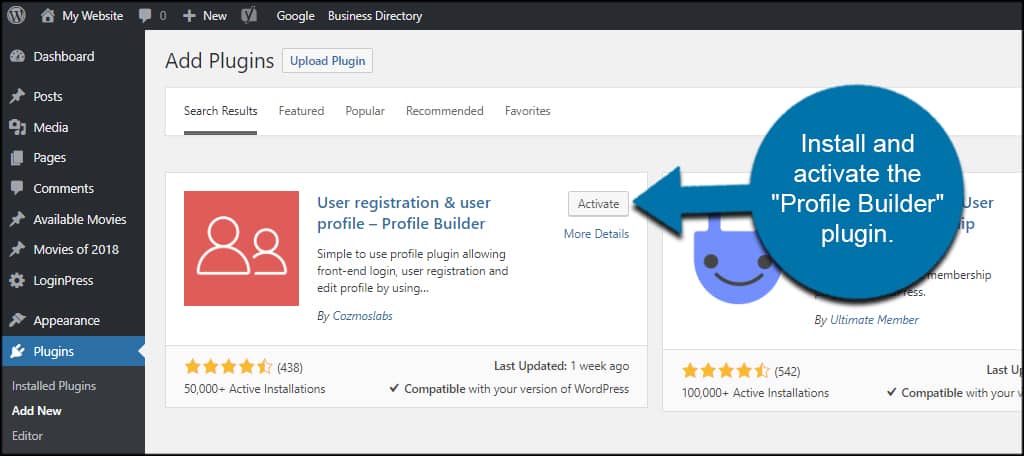
Simply use the available search field on that page to search the plugin by name. When it pops up, install and activate it right from there
Upon activation, you’re taken to the basic information of Profile Builder. For now, I’m going to assume that you allow user registration.
Step 2: Go to General Settings
By default, user restrictions are disabled. We’ll have to turn them on manually.
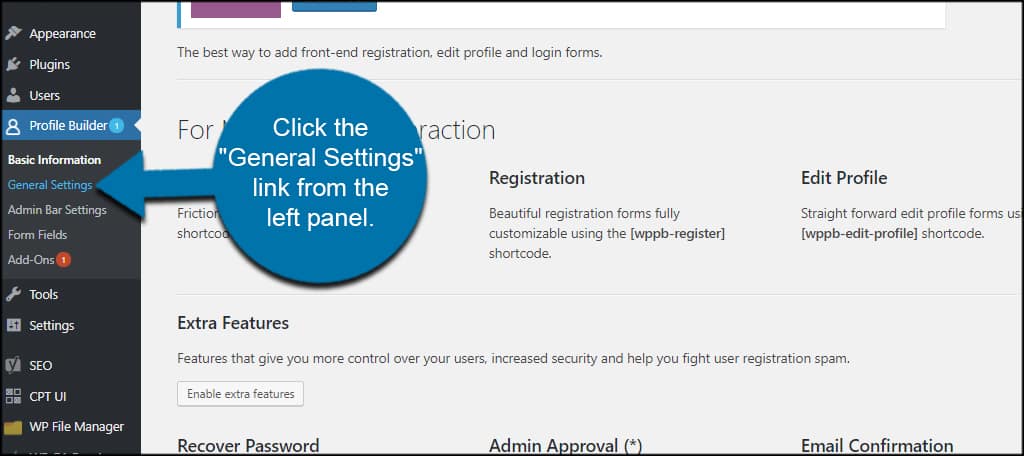
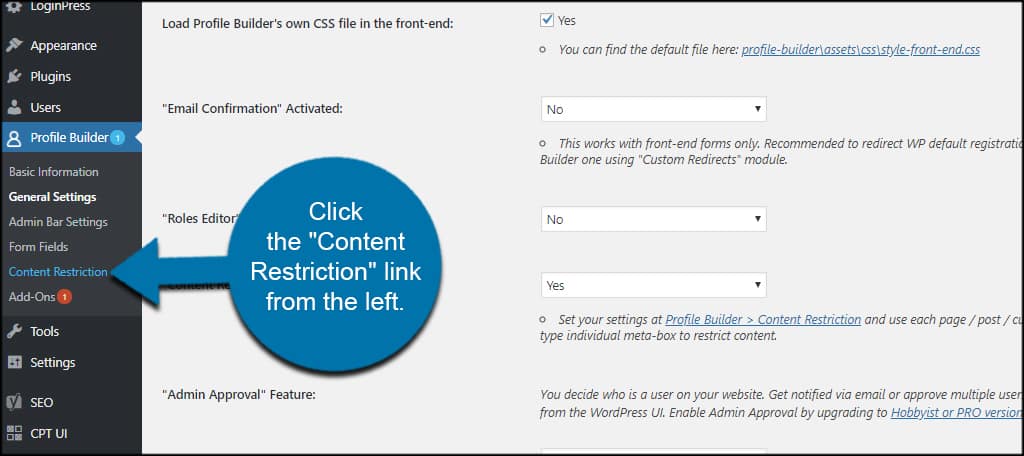
Click the “General Settings” link from the left panel of your dashboard. You will see all these new options are now available because you activated the plugin.
Step 3: Activate the Restrict Content Option
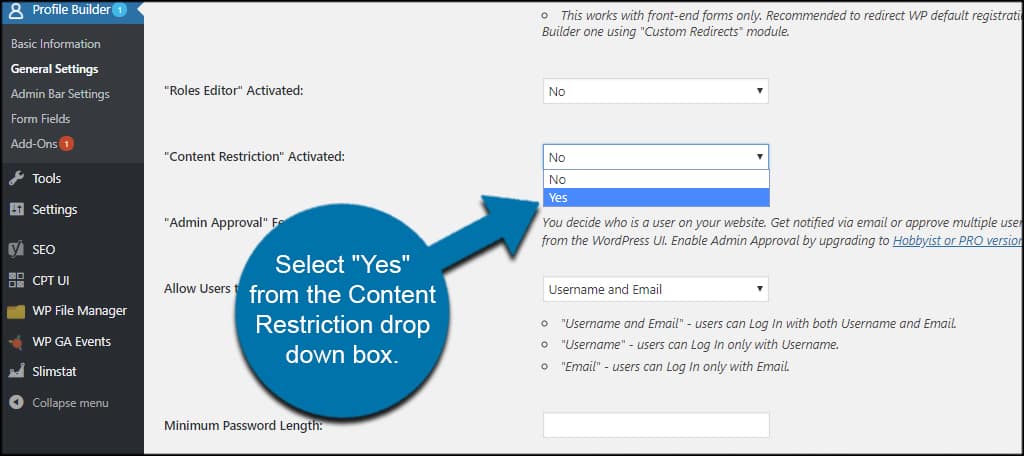
Here you will see a bunch of general settings that are available. In this case, we are focusing on content restriction. So, scroll down until you see that option and when you do, select “Yes” from the Content Restriction dropdown box.
Step 4: Save Changes
Scroll down and click the “Save Changes” button.
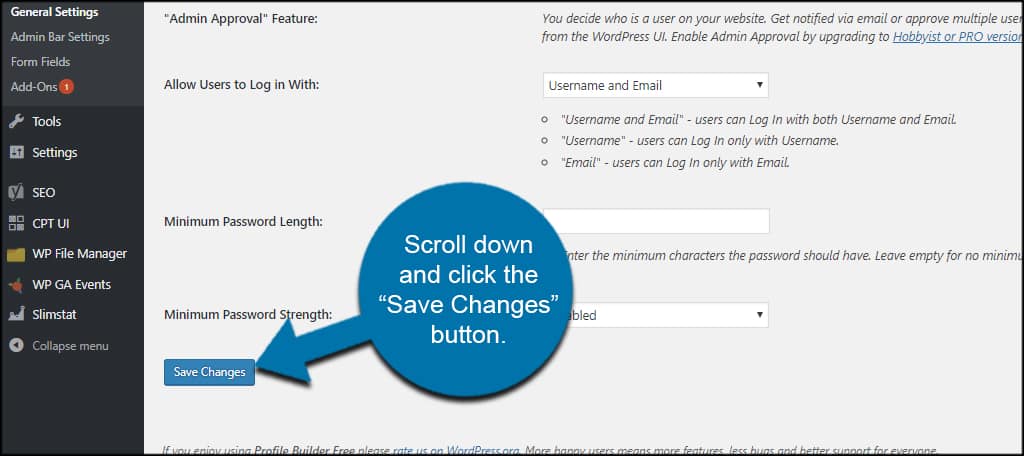
Profile Builder will then add the feature to its list of tools as well as post and pages.
Step 5: Access the Content Restriction Tab
Click the “Content Restriction” link tab located on the left side menu area of the dashboard.
Step 6: Start Restricting Content
Profile Builder gives you two ways to manage unauthorized access. You can either use a custom message for users or redirect them to a specific URL. This is ideal if you create a registration landing page specifically to inform users about the benefits of registering.
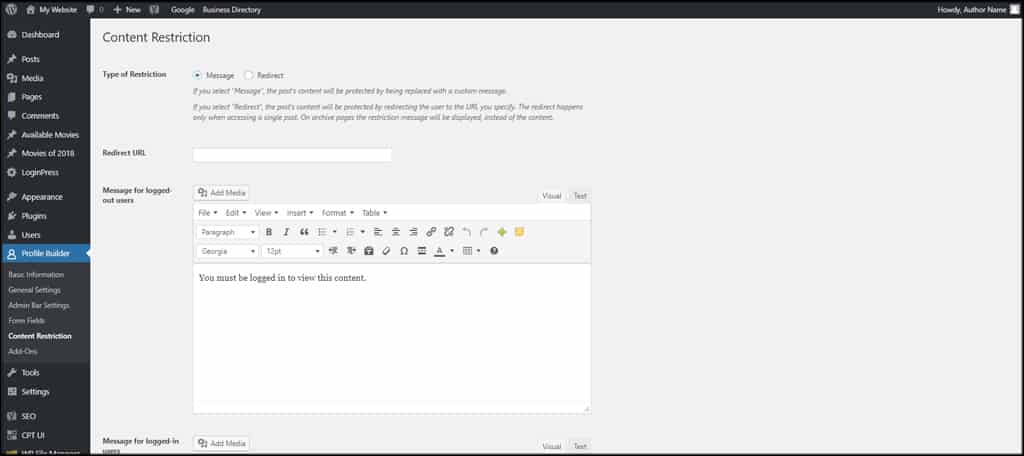
How you set this section up is completely up to you and your ideas for the website. You can even show the first so-many words of the post or page before denying users as a kind of teaser to register.
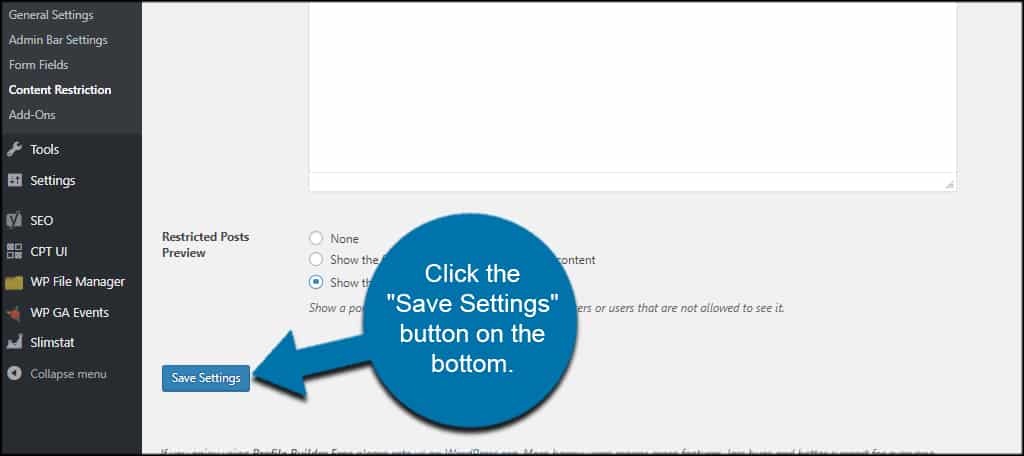
In any case, click the “Save Settings” button on the bottom after making your changes.
Step 7: Set Posts and Pages for User Roles
Now that you have your restrictions set, it’s time to enable them on your content. This feature is now accessible from any post or page you have in WordPress. This includes most custom post types you have as well.
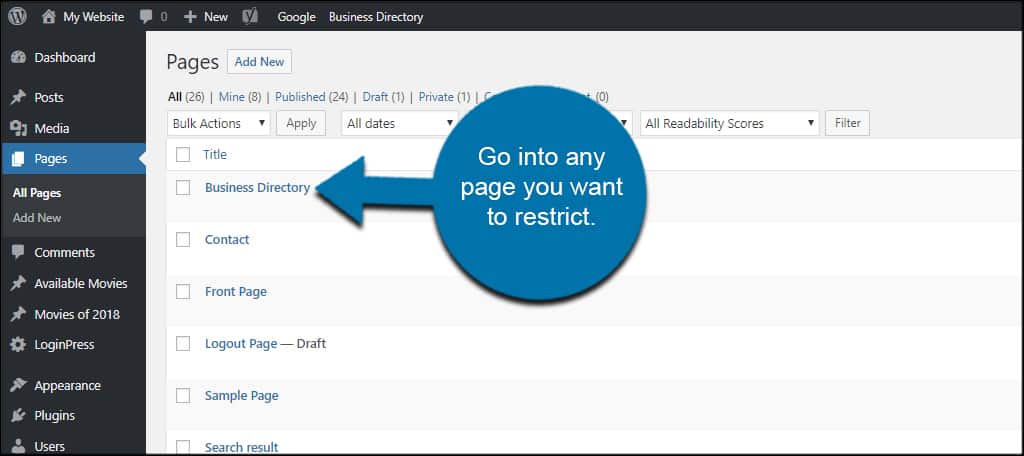
For now, let’s just see where the function is located. Go into any page you want to restrict.
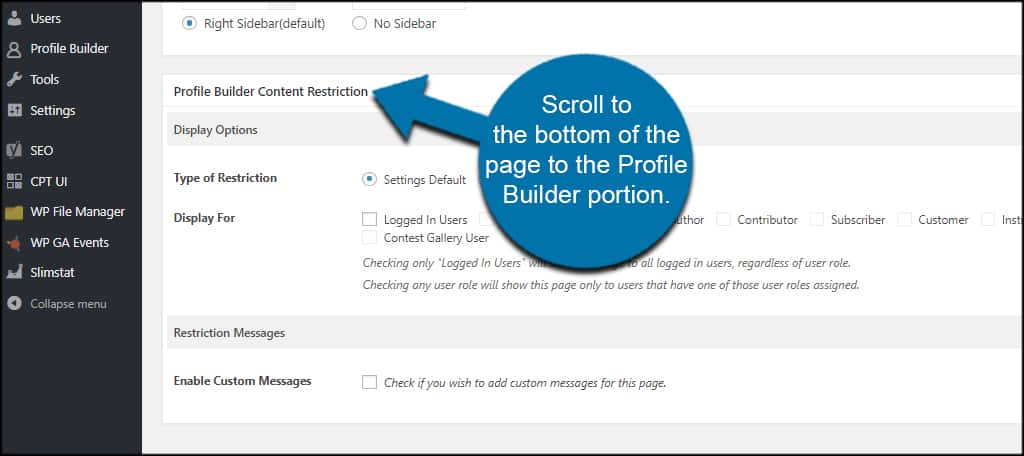
Scroll to the bottom of the page to the Page Builder portion.
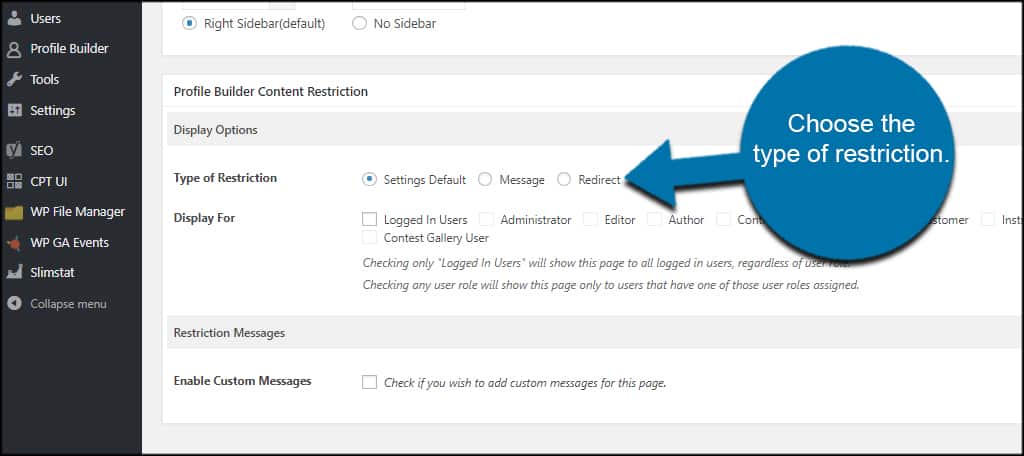
Choose the type of restriction. You can leave it as your default that you set earlier. However, you can also choose to use the message or redirect depending on your needs.
By default, all users can access the page whether they are logged in or not. Click the “Logged In Users” checkbox. This will then allow you to select the users you want to have access to the page.
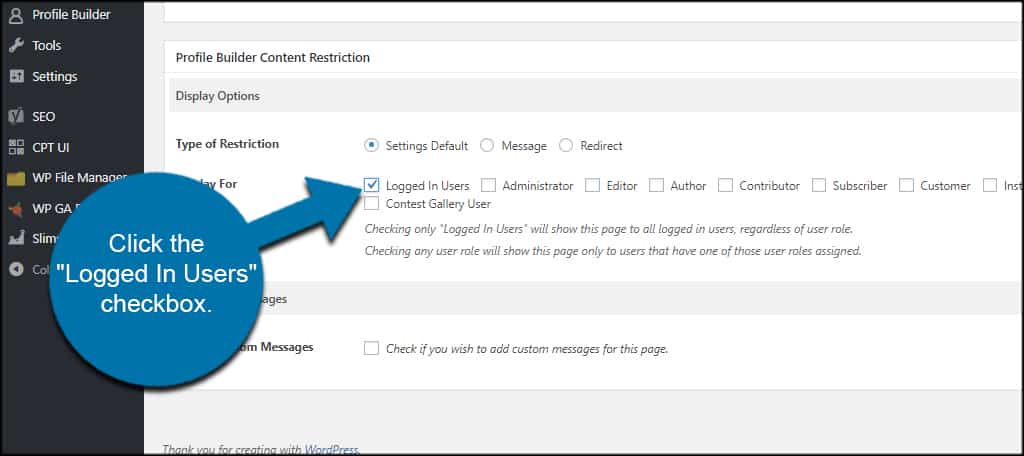
Check all of the boxes of user types you want to have access to the page. As you can see, your custom roles are also available as are any that are created from other plugins.
As an option, you can enable a custom message to show on the specific page aside from the default you set earlier. This gives you a chance to customize each page or post for the audience.
However, this is completely optional and only if you don’t want to use the default messages from the Content Restriction page.
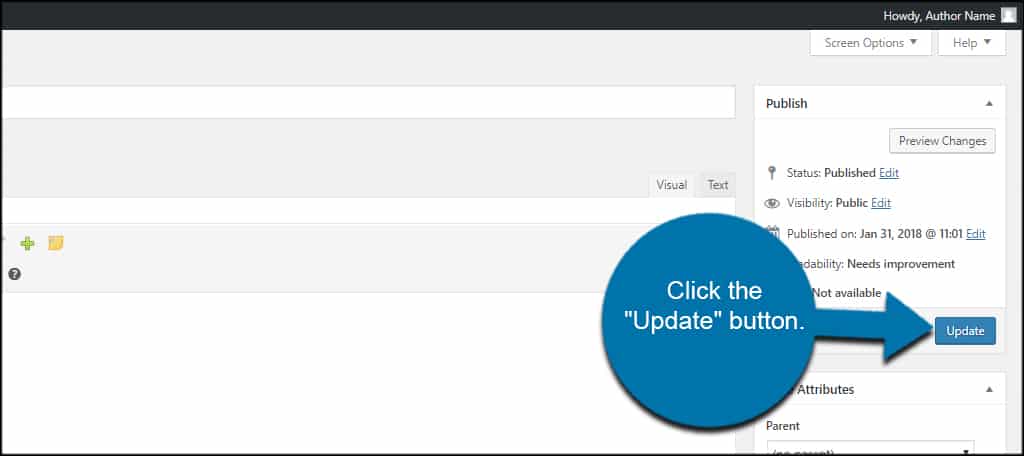
Step 8: Publish or Update Page
Click the “Update” button and your page is then protected by restrictions.
Do You Need to Use the Rest of the Profile Builder Tools to Use This Feature?
Restricting pages and posts by user role in WordPress works whether you take advantage of the other tools in Profile Builder or not. However, Profile Builder does have a lot of excellent tools for user registration including Google reCAPTCHA integration.
This helps keep the spam down from user registrations.
You may want to spend a moment taking a look at some of the other features this plugin delivers as well, just so you can take advantage of them when applicable. You can even integrate your site with Mailchimp, one of the best email services for marketing campaigns.
The only downside is that not all add-ons are supported by the free version of Profile Builder. It just all depends on how much you want to add to the website.
Keeping Content Private
While you could create a completely private website, sometimes it’s easier to just deny people access to certain content based on their user roles. Profile Builder is perhaps one of the best to use for this purpose, and it comes with a variety of other tools to accentuate the website.
I hope this tutorial was able to show you how easy it is to actually restrict content on your WordPress site based on user roles. When you have the steps needed, it really isn’t too difficult at all.
What plugins do you use to prevent spammy user registrations? Do you have your own reCATPCHA key from Google, and how often do you use it?

thank you, you saved my life after hours
Thanks