A free website from WordPress.com is a good way to get started, but it has a lot of limitations. For one thing, you’re unable to take advantage of some of the best plugins available. You also cannot commit certain modifications to your site such as editing the wp-config.php file and other elements to customize the experience.
This isn’t saying that WordPress.com is pointless. However, hosting services offer far more in terms of customization and versatility. If you plan to take a website to its fullest potential, a paid hosting service is the way to go.
Today, I’m going over how to move your blog from WordPress.com to WordPress.org and get more out of your site. It’s a quick and easy process, and you can start upgrading your plugins and themes almost immediately.
What is the Difference Between WordPress.com and WordPress.org?
Although both .com and .org are governed by the same owners and developers, there are significant differences you need to be aware of. Both are based on the popular content management system, but the tools and functionality are vastly different.
WordPress.com
WordPress.com is the free web service offered by the developers of WordPress. Instead of using a traditional domain, you’re given a subdomain to create content. So, instead of “www.ggexample.com,” your site will look like, “ggexample.wordpress.com.”
Using WordPress.com also limits the tools you can install on your website. For instance, not all plugins are available in WordPress.com. You also have limited access to files for editing if you want to make coding changes.
WordPress.org
WordPress.org is the site where the actual WordPress application is available. It’s the central hub of connections when looking for plugins, themes and other pieces of information regarding the system. It is here where you can download the WordPress CMS for manual install.
If WordPress.com is a free taste of the system, WordPress.org is where you’d get the entire meal. Although the WordPress CMS is free to use, you’ll have to pay for a hosting account or build a web server yourself to get the most out of it.
Exporting From WordPress.com
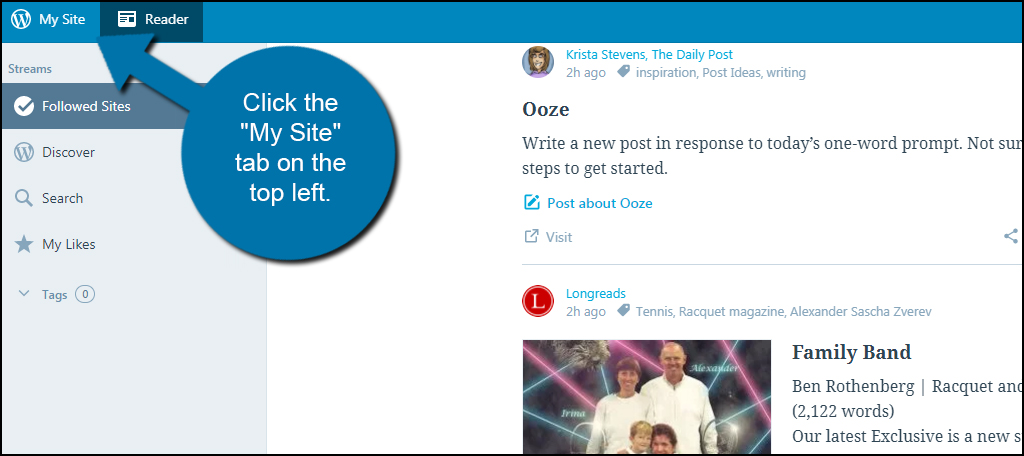
Log into your WordPress.com account and click the “My Site” tab on the top left.
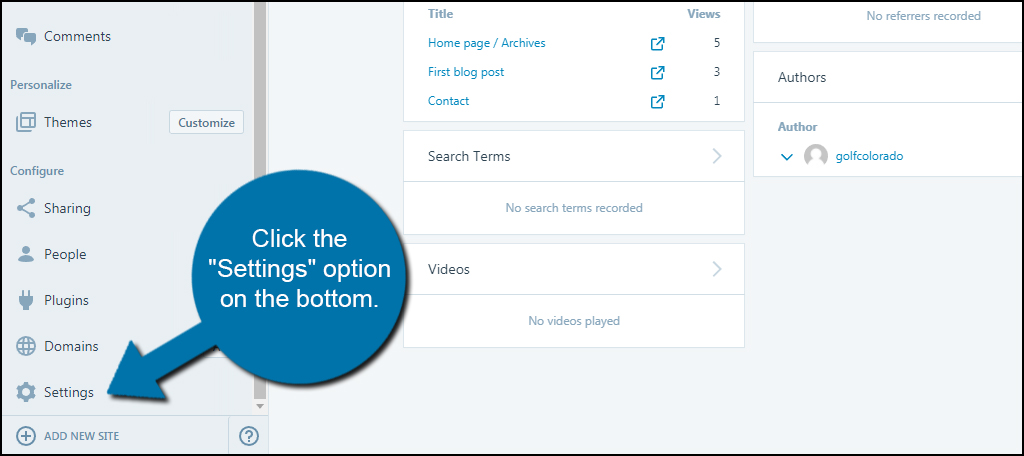
Scroll down the left panel and click on the “Settings” option on the bottom.
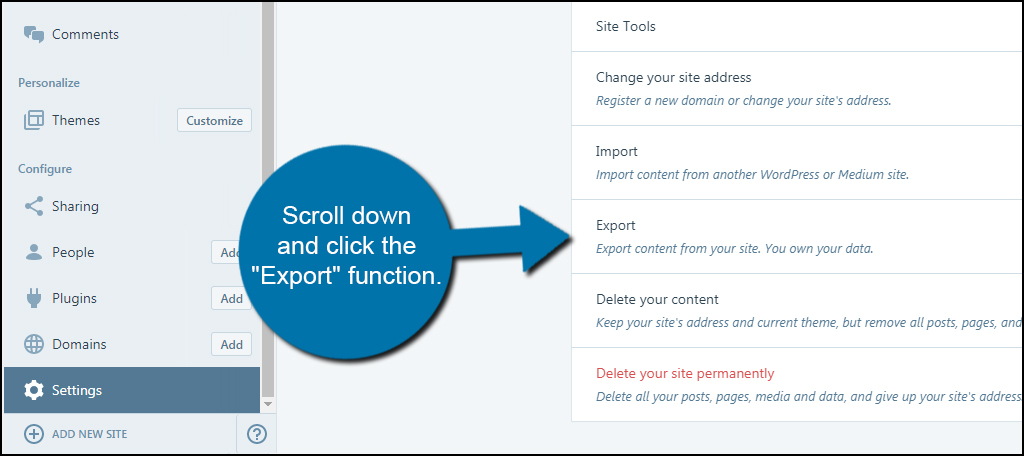
In the right panel, scroll down and click the “Export” function.
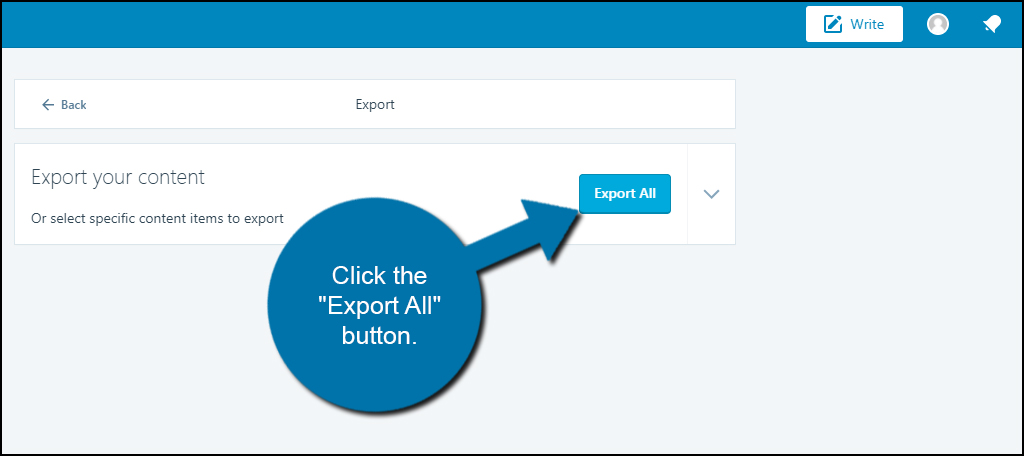
Since you’re moving the entire site, click the “Export All” button. On a side note, you can select certain elements to export from WordPress.com by using the down arrow next to the button. For now, let’s export the entire site.
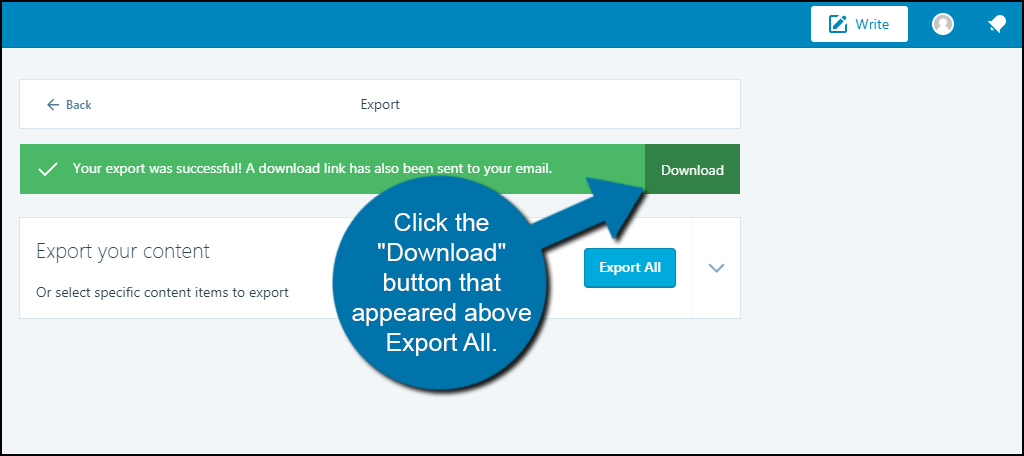
WordPress.com will then collect all of the site’s data and create a ZIP file copy. This is sent to your email address if you want to download the file later. For now, click the “Download” button that appeared above Export All.
Your save dialog window will appear. Save the file in a location where you know you can find it. Some systems are designed to save Internet files to the “Downloads” folder of your computer.
Extract the XML
The WordPress importer is one of the few tools that does not use a ZIP file for installations. You will need to extract the XML file from the ZIP you downloaded from WordPress.com.
If you try to use the importer with the ZIP, you’ll receive an error:
“This does not appear to be a WXR file, missing/invalid WXR version number.”
Open the ZIP file and pull the XML out onto the desktop.
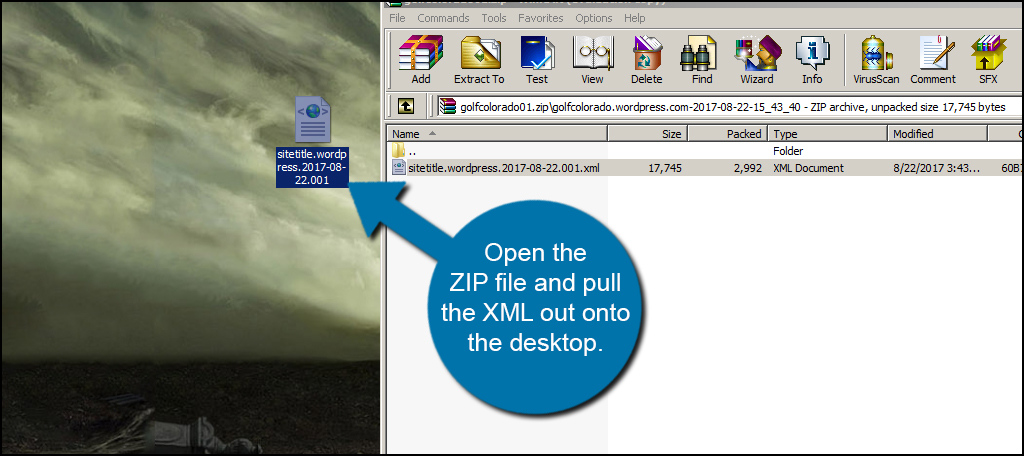
Placing the file on the desktop makes it much easier to find when you import it in the next step. You can save it where you’d like, but you need to pull it out of the ZIP file if you want to use it.
Importing to WordPress
The next step requires you have a WordPress installation available. This is the backbone of the site, and you need it to import your data. If you want a quick and easy setup, I’d suggest using Softaculous to install WordPress.
Newer versions of WordPress come with an import feature built-in. This means you don’t have to worry about installing plugins so you can upload your WordPress.com files. The WordPress importer works with a wide range of blogging and website systems.
Just another reason why so many people like the CMS so much.
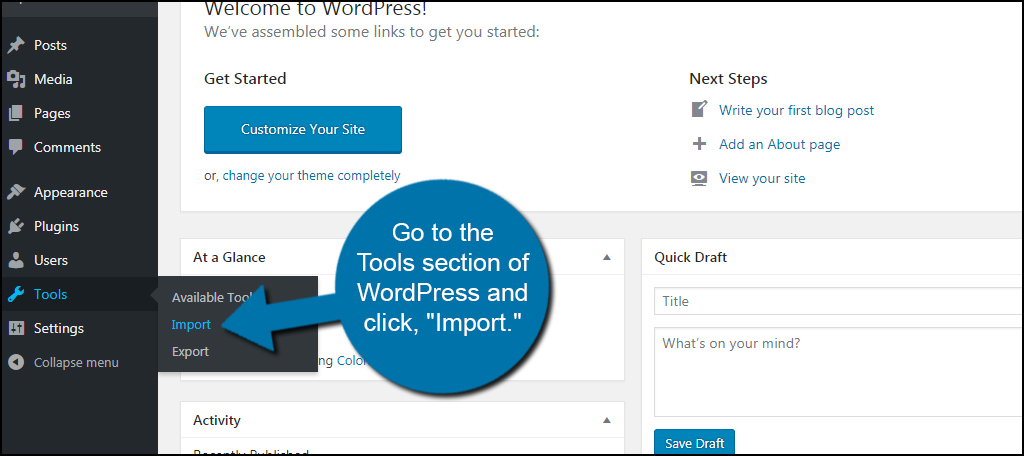
Go to the Tools section of WordPress and click, “Import.”
Click the “Install Now” link located under the WordPress option.
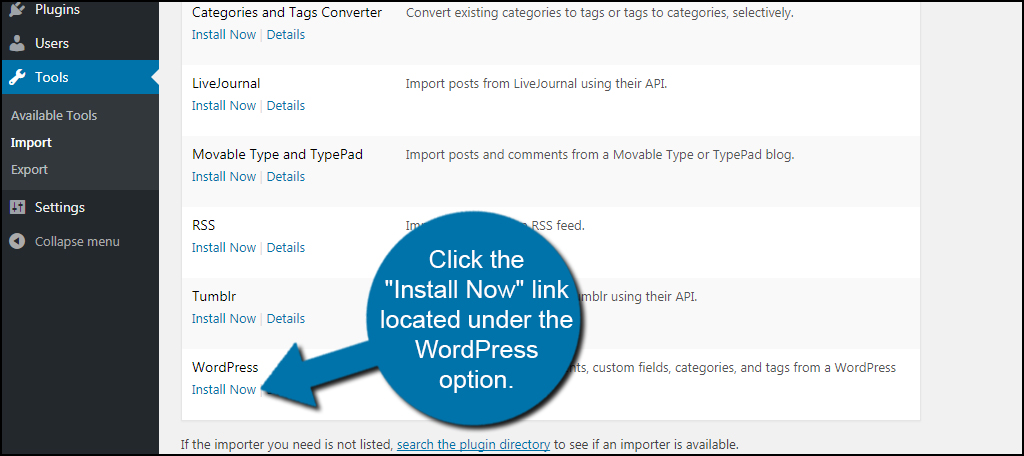
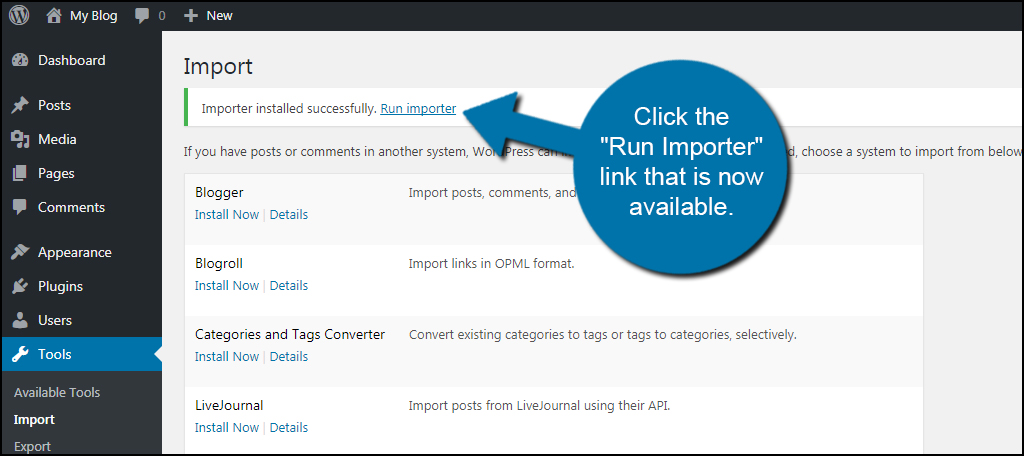
WordPress will then install the extension it needs for importing files, which is a one-time process. A new message will appear on the Import screen stating its success. Click the “Run Importer” link that is now available.
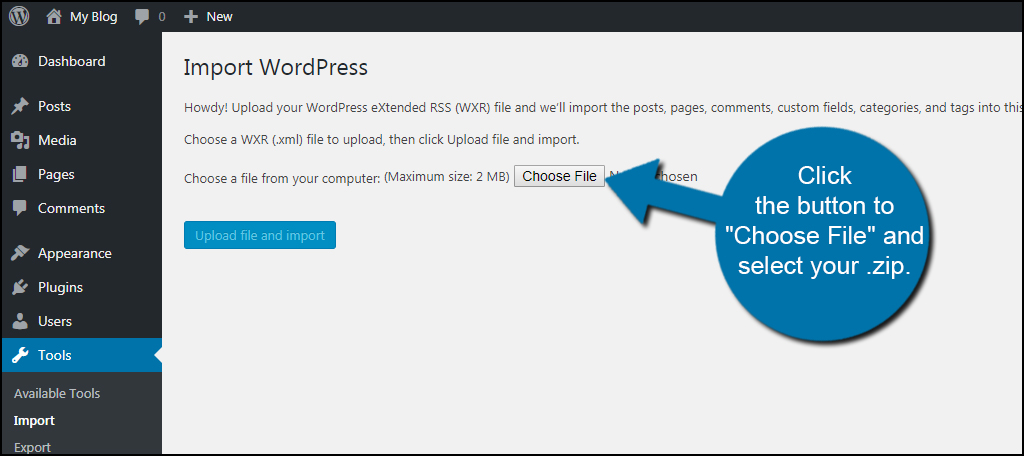
Click the button to “Choose File” and select the XML you downloaded earlier.
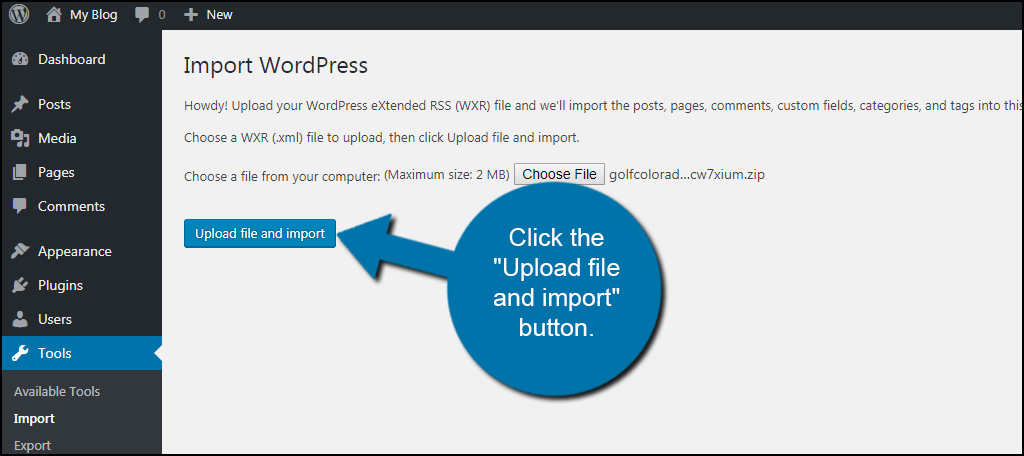
You’ll see that you’re limited to 2MB files. This is fine as most XML files from WordPress.com will be very small in comparison. Click the “Upload file and import” button. The system will then add the content of your WordPress.com website.
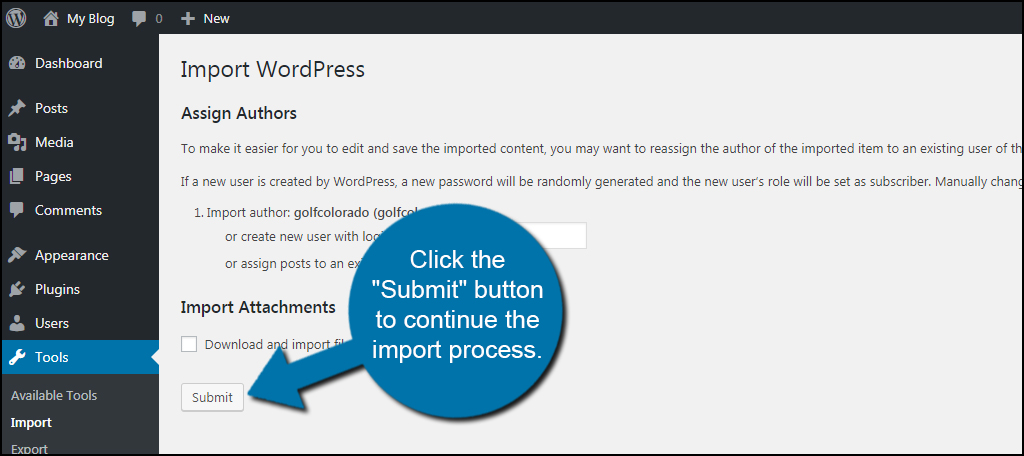
WordPress will then ask to assign authors to the posts from the old website. You can import the author directly, or you can create a new user with a specific login name. You can also assign the old posts to go under an existing user on the new website.
For this tutorial, I’m simply going to import the old author as well as the content.
It may not be a bad idea to select “Download and import file attachments” if you used any in the past. Since I know I don’t have attachments, I’m going to leave the check box clear.
Click the “Submit” button to continue the import process.
Now, your website has been moved, and all of your old data is readily available.
Technically, the content and data will still be available on the WordPress.com subdomain until you delete the site. However, you may want to leave it until you verify all of your information correctly transferred.
One benefit to keeping your WordPress.com account active is when using the Jetpack plugin. Because a lot of its features connect to WordPress.com, you won’t have to worry about registering a new account to use them. Jetpack is loaded with all kinds of useful modules, which makes it a great tool for building a site.
Why Would You Move from a Free Server?
While free can sound tempting to many, it’s not always the most logical course of action. It’s true that you can have a degree of success on these types of platforms, but you’ll be missing out on vital components that take success to even greater levels.
Here are just a few points to consider:
- Lack of features to promote SEO, traffic engagement and content development.
- Unable to fully customize the experience and be seen as unique.
- More difficult to monetize as some systems do not accept subdomains.
- A domain URL is more professional in appearance than a subdomain.
Getting More Out of WordPress
WordPress.com is a great system for those who are more casual about creating a website. It’s a good platform for learning how to manage the system, but it’s severely lacking when it comes to features. If you want to explore what you can accomplish, consider a switch from WordPress.com to WordPress.org. The potential is far greater when you’re able to fully control your site.
What kind of free systems have you used in the past? How many of you remember Geo Cities and was your site successful?
