Have you ever looked for a way to do image editing in WordPress? While there is plenty of great image editing software, like Photoshop, WordPress comes equipped with plenty of basic features. You can rotate, flip and crop images inside of WordPress without additional software.
The best part is that you can view what the image will look like on your website before publishing. Today, I will show you how to edit images in WordPress with the default tools.
Why Edit Images In WordPress
Image editing software is extremely powerful and professionals can really take advantage of it. However, there is one catch, many of them are not free.
WordPress comes built with these basic features, and there are plenty of situations when you may find your self in need of them.
For example, if you find yourself traveling often, odds are you haven’t packed your computer. Instead, you may have a laptop to work on, but you might not have the software you need installed. Using the tools within WordPress allows you to easily make simple edits to keep your content flowing.
Thanks to how cheap web hosting has become, you can make a website for almost nothing. However, there are other costs of running a website. Being able to have a reliable and free way to edit images for your website is extremely valuable for beginners.
It allows you to test a content idea without wasting money.
However, it is important to point out that while the WordPress image editor is a very handy tool, it does not have half the features of paid software. It is great for starting out, but you should make plans to learn more advanced software in the future.
Uploading An Image
Before you can begin editing an image, you need to upload one first. For the purposes of this tutorial, any image will work.
On the left-hand admin panel, click on Media and select the Add New option.
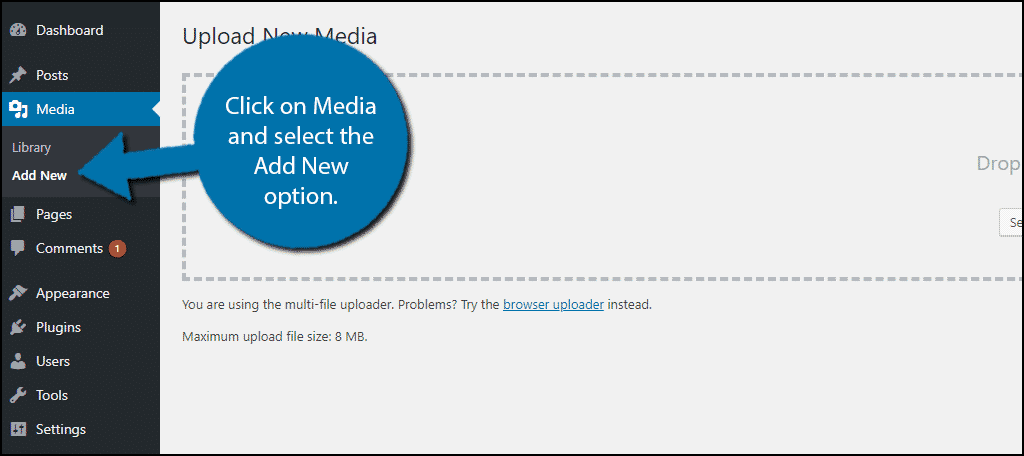
Click on the “Select Files” button. Select an image to upload to WordPress.

Now that the image is uploaded, we can edit it.
Accessing the Image Editor
On the left-hand admin panel, click on Media and select the Library option.
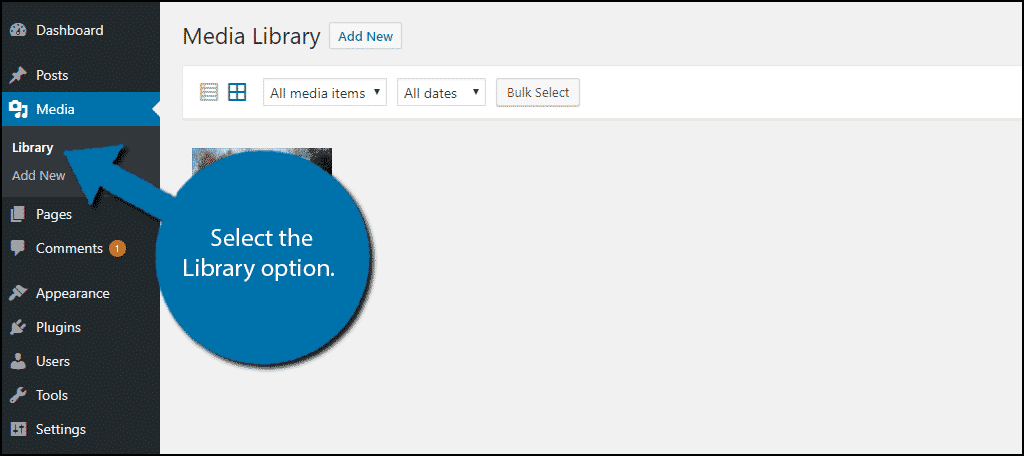
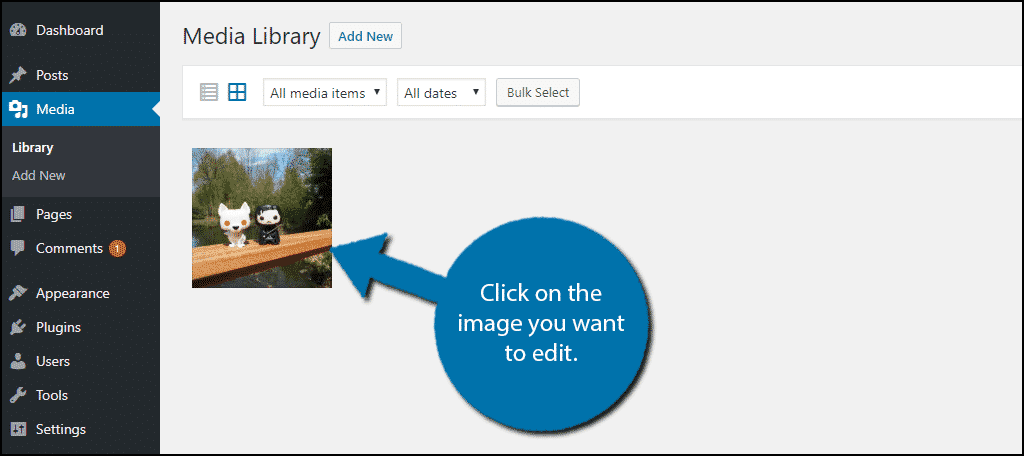
This will open up your media library. Here you can view all of the images you have on your website. Click on the image you want to edit.
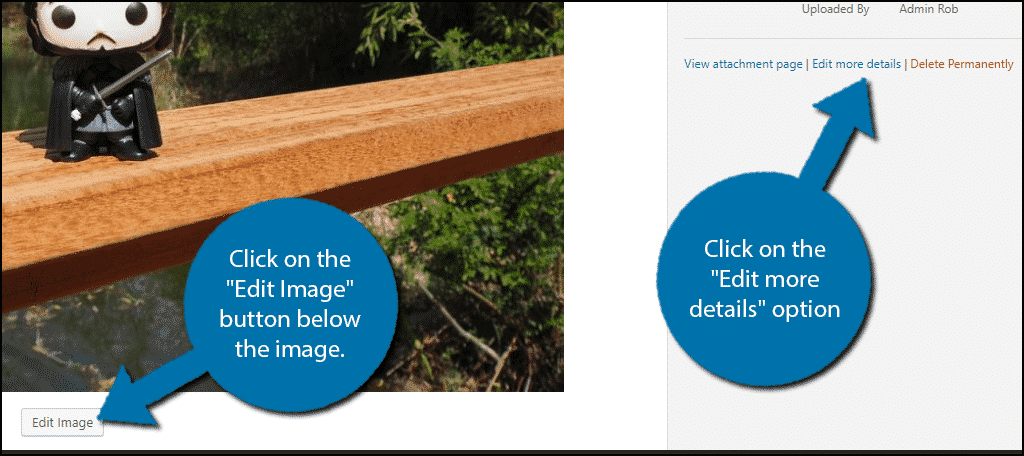
A window will appear that contains an enlarged image and multiple settings. There are two ways to access the WordPress image editor. Click on the “Edit Image” button below the image or click on the “Edit more details” option on the right-hand side.
You will now be in the WordPress image editor.
Editing WordPress Images
Above the image, you will see 7 buttons. From left to right you have the Crop, Rotate Left, Rotate Right, Vertical Flip, Horizontal Flip, Undo and Redo buttons.
The “Crop” button allows you to crop images in WordPress. This means you can select any portion of the image and crop it out. For example, if I want to focus on little Jon, I will click on the Crop button and select the area around him.
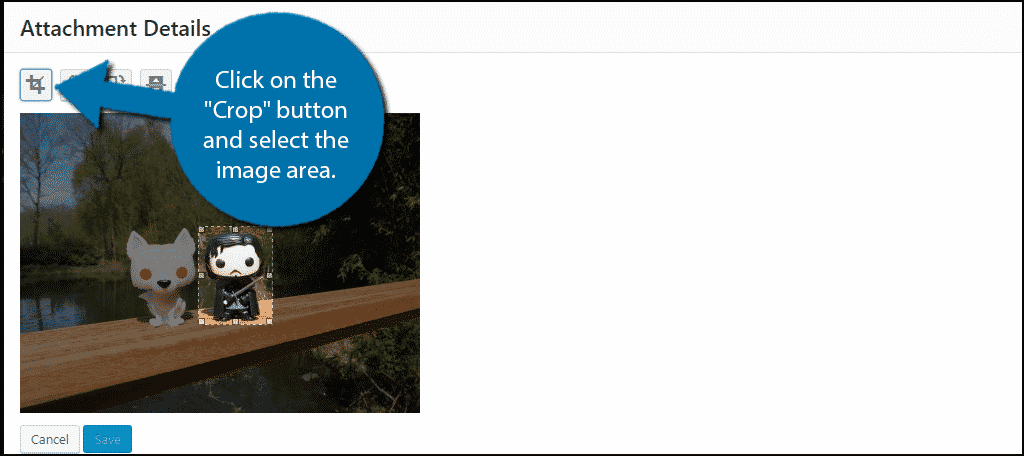
Press the Enter button to crop the image. Now Jon is all alone. If you are unhappy with the crop, simply press the “Undo” button.
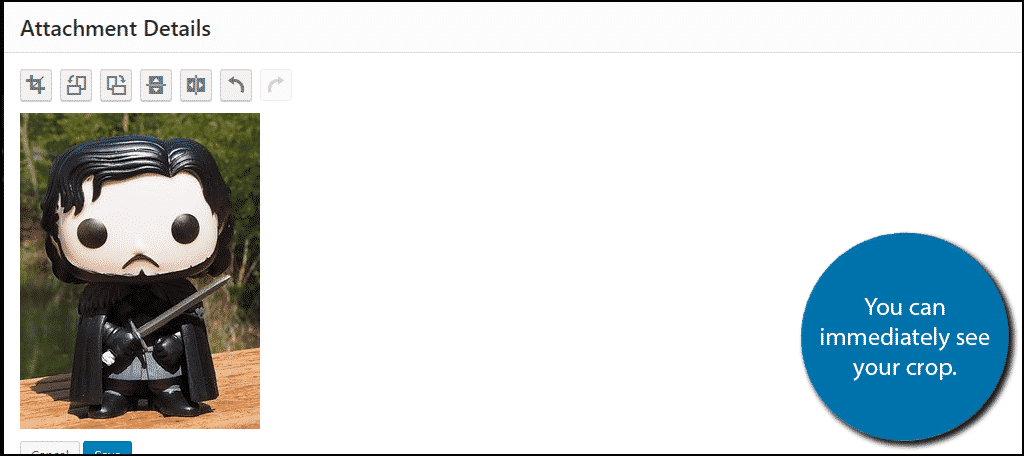
The “Rotate” buttons allow you to rotate images in WordPress. There is one for rotating left and one for rotating right. These buttons are extremely useful if you want a vertical picture to become a horizontal one or vice versa.
The buttons are tied to the top of the image. In this example, that would be Jon’s head. If I click the “Rotate Left” button, the following will be the result.
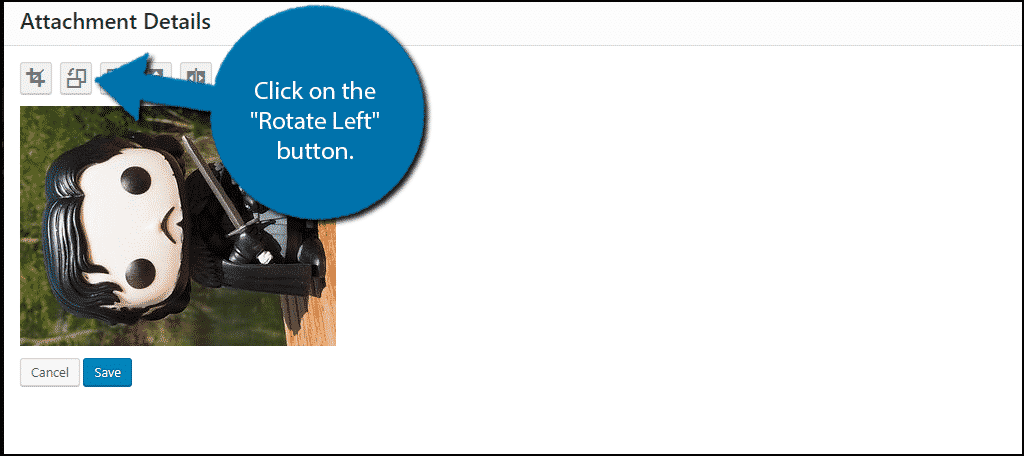
You can click on the “Rotate Left” button again and Jon would be upside down. Alternatively, you can click on the “Rotate Right” button to put him back into his original state. You can also use the “Undo” button as well.
This option does not affect the material in the image only its orientation.
The “Flip” buttons allow you to flip WordPress images. Unlike the “Rotate” buttons, the “Flip” buttons will affect the image. These buttons can give your image a brand new perspective.
For example, if I click on the “Horizontal Flip” button, the entire image will be flipped. One result is Jon holding Longclaw in his left hand instead of his right. In less focused images, you will notice many other changes in the background.
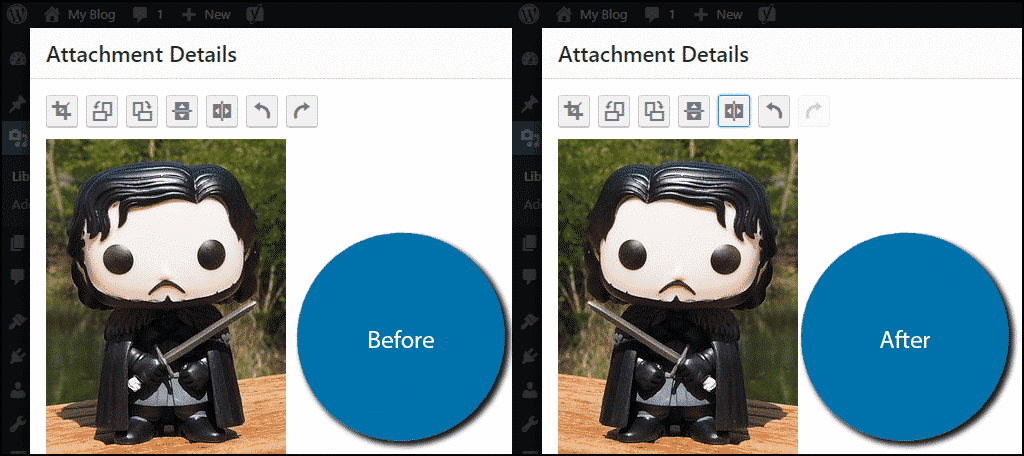
You can combine this with the “Vertical Flip” button. To get even more Results, but always ensure that the image makes sense. Click on the “Save” or “Update” button to save any changes.
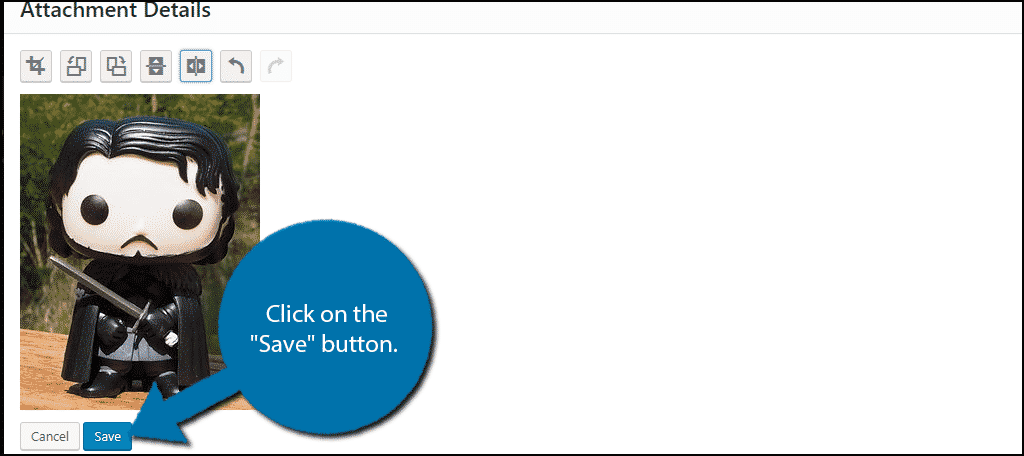
Image Settings
While utilizing the previously mentioned buttons, you may have noticed the various settings on the right side. These allow you to scale the image, set an aspect ratio, adjust thumbnail settings and even restore the image to its original state.
Scaling an image is extremely simple. All you need to do is enter a value for both the height and width of the image. the first number you enter will affect the width of the image, while the second will affect the height.
WordPress will automatically enter a height while you are changing the width. It will try to ensure as little stretching as possible occurs.
The aspect ratio helps you preselect the crop area. When you scale an image, you can end up with stretch marks. By cropping it to the proper ratio, you will not have any stretches. You will be able to see the crop area on the image.
The thumbnail settings are simple. You can choose if the changes you made will affect the thumbnail size or not. By default, it will affect all sizes of the image.
Your edited image will now appear in the media library. You can click on it and re-enter the WordPress image editor to restore the image to its original state.
Click on the “Restore Image” button to do so. This button will not appear unless you have already saved an edited image.

Your image will now be in its original state.
Congratulations, you now know how to do everything the WordPress editor offers.
Image Editing Software Is Important
While the WordPress Image Editor is quite handy, it lacks a lot of features that paid software offers. Your featured images and thumbnails are crucial to getting clicks on social media platforms. Therefore, investing in software to improve them is necessary.
How easy did you find the WordPress editor? Will you be using it in the future?

Such a great explanation and step by step tutorial about wordpress back-end image editing technique. Thanks a lot for sharing these tutorial.