Joomla is a great system to use for setting up a website, whether you need a business page or personal blog. The system is stable and can be customized in a variety of ways to give it a unique appearance while engaging your audience. With Joomla website hosting, you’re only limited by the imagination.
There have been many changes to the Joomla platform over the years. The system has become more user-friendly, versatile, and customizable. Thanks to an active community of supporters, new additions are created for it regularly.
In this Joomla installation tutorial, I’m going to go over how you can install this content management system onto your hosting account. Before long, you can start setting up your site and adding content to drive traffic.
Downloading Joomla
When installing Joomla manually, you always want to make sure you’re using the most recent version. This helps keep the site safe and functional as older versions may have exploits and other issues.
For instance, Joomla 1.5 has an exploit where hackers can gain control of the primary email account and send spam from your server. Because version 1.5 is no longer supported, you can’t expect an update to be released to plug up these kinds of holes.
Go to the Joomla.org website and click the button to download the most recent version of the system.
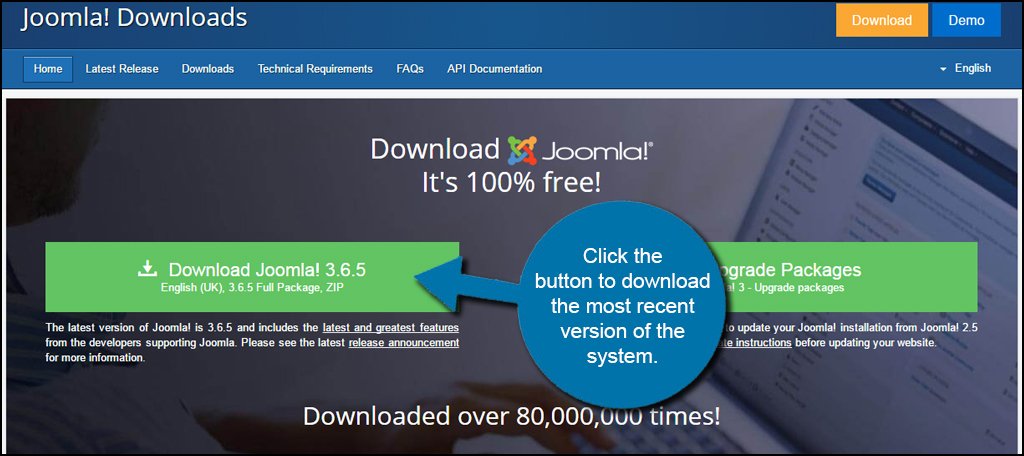
This is a small file that you save directly to your computer system.
Uploading Files to Your Host
Now, there are two ways you can install Joomla onto your web host. You can either use FTP programs such as FileZilla or directly upload the ZIP file through cPanel. Today, I’m going to use the cPanel option as it is much faster than uploading all of Joomla’s files from the computer.
Log into cPanel and go into the File Manager.
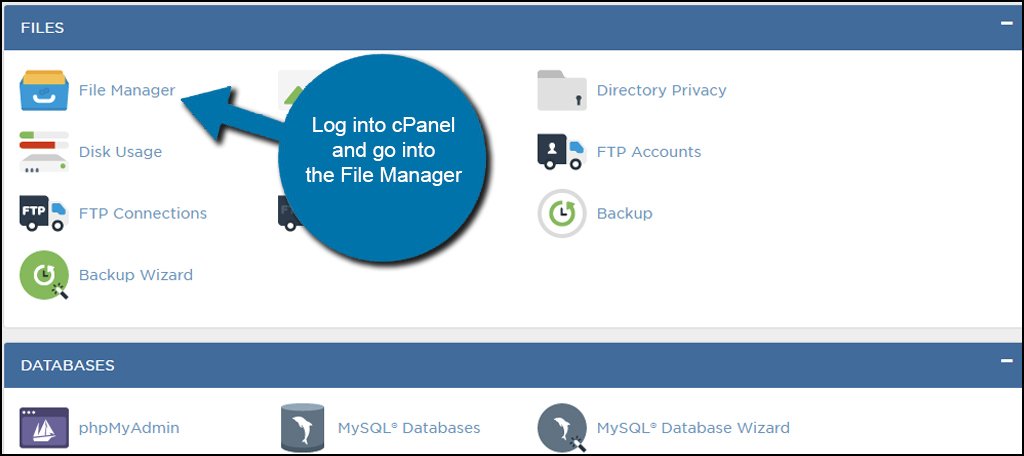
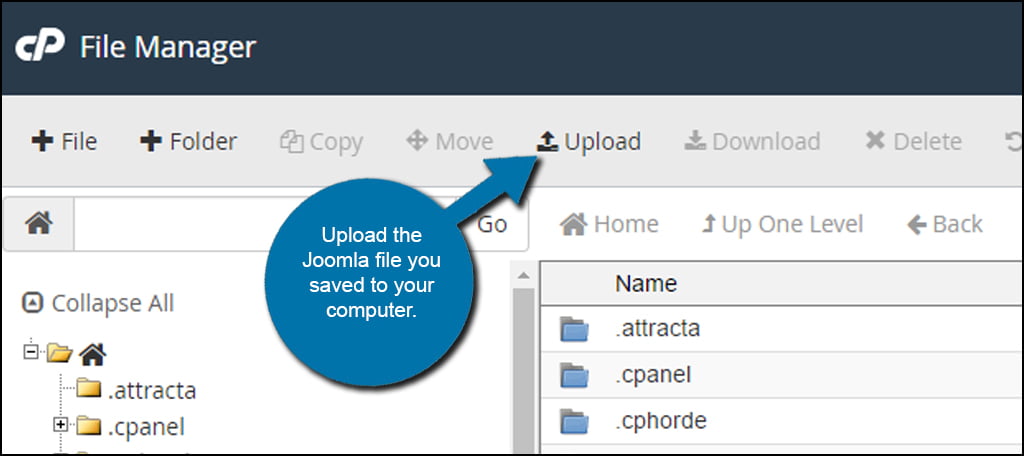
Once you access the root directory of where your website will be, upload the Joomla file you saved to your computer.
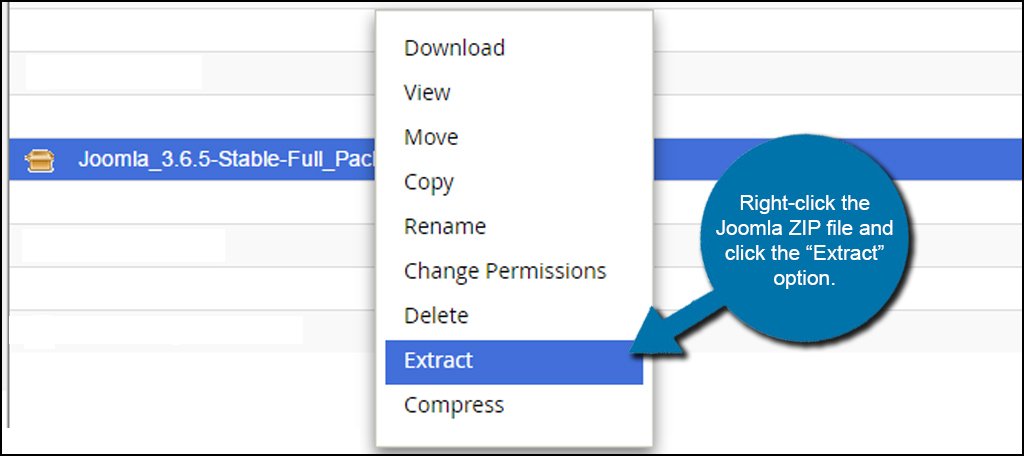
Right-click the Joomla ZIP file and click the “Extract” option. Mac users will hold down CMD and click.
You will need to tell the system what folder in which to extract the files. This path needs to match the file path of the domain you’re working on. Because you uploaded the file directly into the root folder of your website, you can click the “Extract File(s)” button to continue.
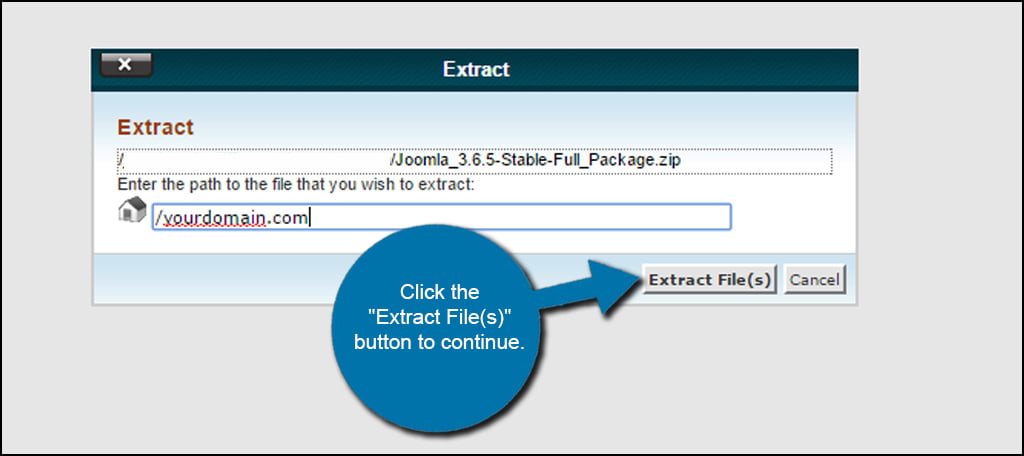
The system will then unpack all of the files needed for Joomla to operate.
Creating the Database for Joomla
Next, you will need a database for Joomla. You need to build this before you install Joomla fully, as the system will ask for credentials.
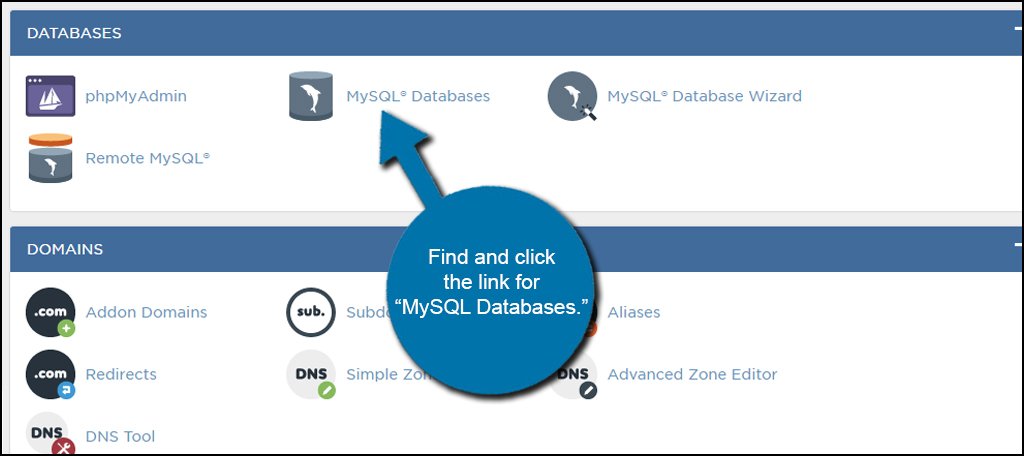
From cPanel, find and click the link for “MySQL Databases.”
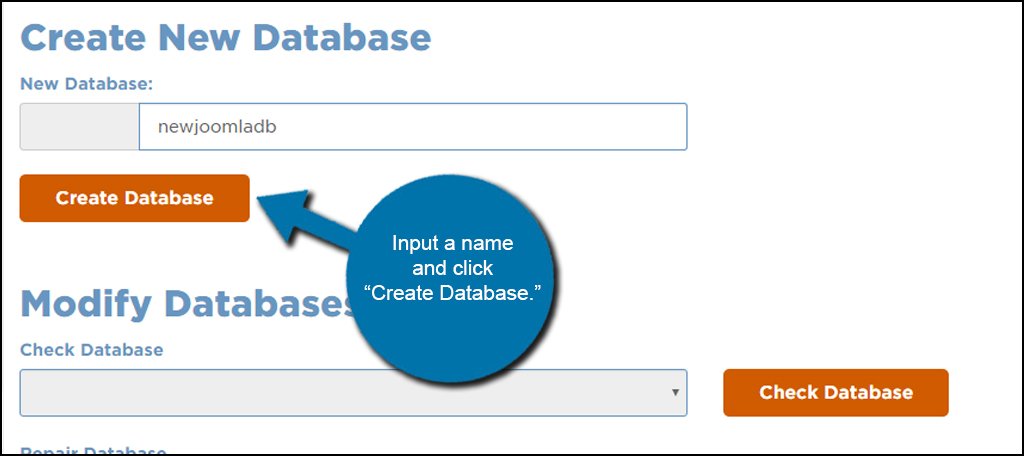
In the “New Database:” text field, input a name and click “Create Database.” In this example, I am just going to name it “newjoomladb.” This makes it easy for me to remember during the rest of the installation.
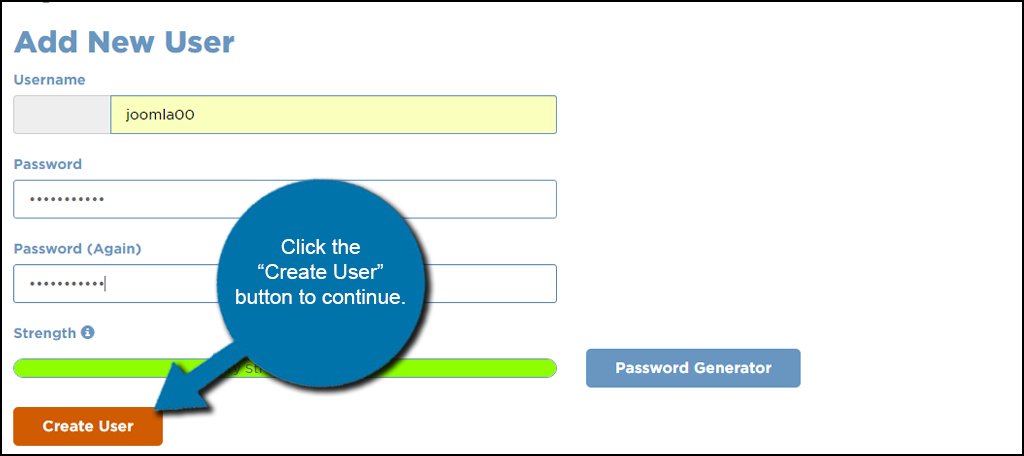
After cPanel sets up the database, go back to the MySQL screen. Now, you want to scroll down until you see the “MySQL Users” area. Fill in the information to create a new user. For the username, you want this to be something unique but easy for you to remember.
NOTE: Do not use something like “admin.”
Once you fill in the username and password credentials, click the “Create a user” button to continue.
NOTE: Make sure you write down the database, username, and password as you will need them all to install Joomla.
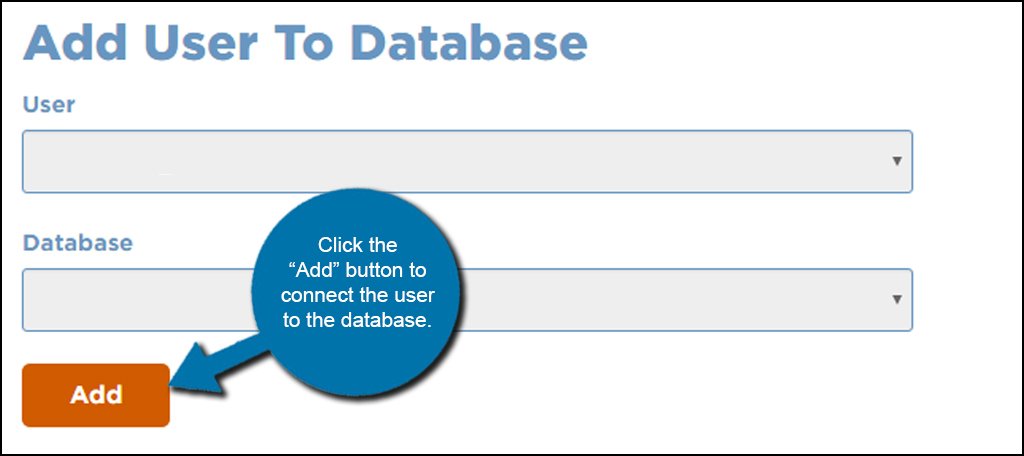
Go back to MySQL Databases and scroll down yet again to the “Add a User to a Database” section. Select the user and database from the drop-down windows for the new Joomla installation. If you only have one website, they may already be selected. Click the “Add” button to connect the user to the database.
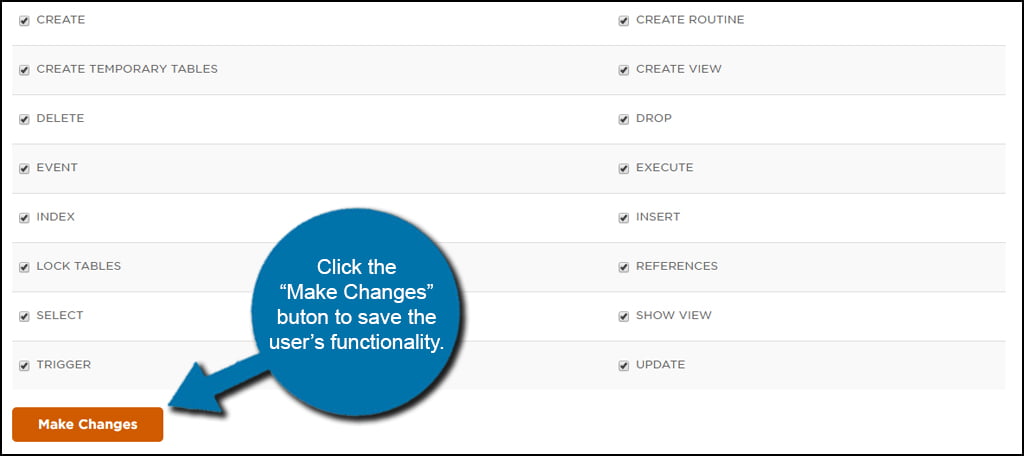
In the next screen, click on the option for “All Privileges.” Since we are making an administrator account, we want to make sure that the login has access to the entire database. Click the “Make Changes” button to save the user’s functionality.
You now have a database complete with a new user ready for your website.
How to Install Joomla
Now that the files are uploaded to your web host and the database is set up, it’s time to install Joomla. Access your website by using a web browser and typing in the address.
For example, you would type in something like “https://ggexample.com/” if you uploaded the files for Joomla in the root directory of your website. Of course, “ggexample.com” is going to be the actual name of your domain.
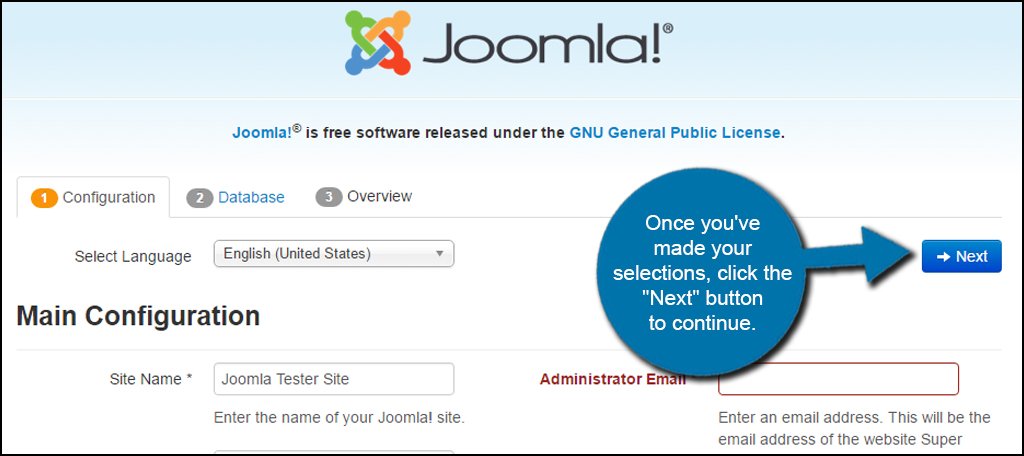
The first screen that will display is the “Configuration” tab. Here is where you put in the site’s name, a description, administrator’s email address, username, and password. Keep in mind that the admin username and password are not the same as the database credentials you created earlier.
NOTE: Use a unique admin username. Using something like “admin” is a poor practice and may lead to your site becoming hacked.
Once you’ve made your selections, click the “Next” button to continue.
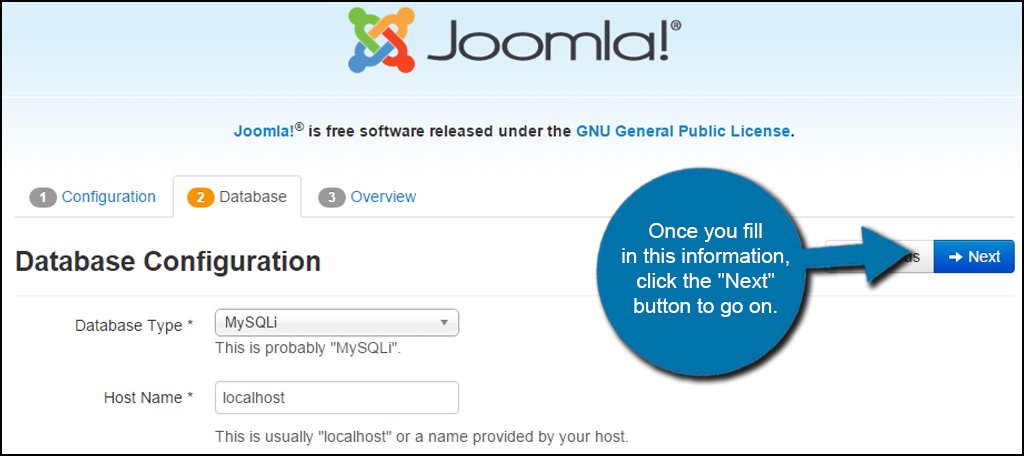
In the next section, input all of your credentials for the database you created earlier. The Host Name is usually set to “localhost” unless your hosting provider tells you otherwise. Once you fill in this information, click the “Next” button to go on.
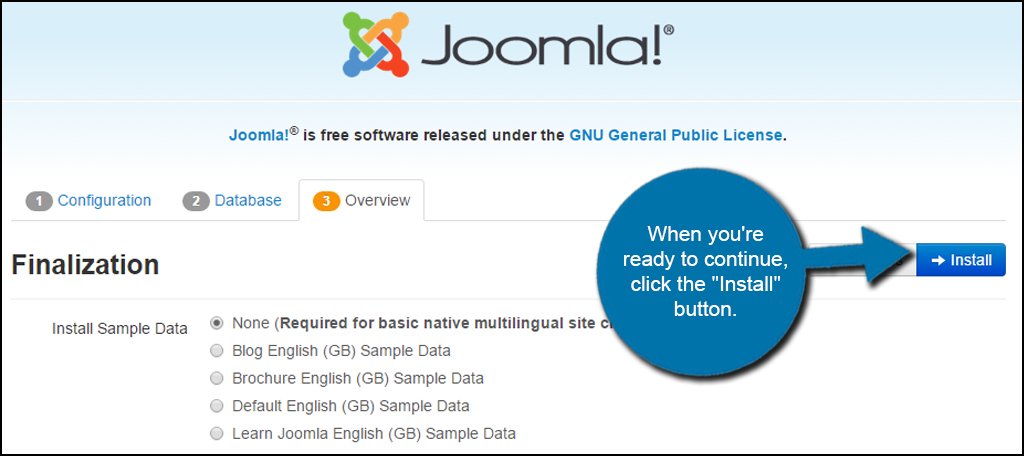
In the “Overview” screen, you can select sample data to be installed with Joomla. Depending on the type of site you want to build, this information can be quite invaluable to help you learn. However, you can select the “None” radio button if you want a clean install of Joomla.
It may also be a good idea to glance through the configuration settings to make sure everything looks good and is set how you want it. When you’re ready to continue, click the “Install” button.
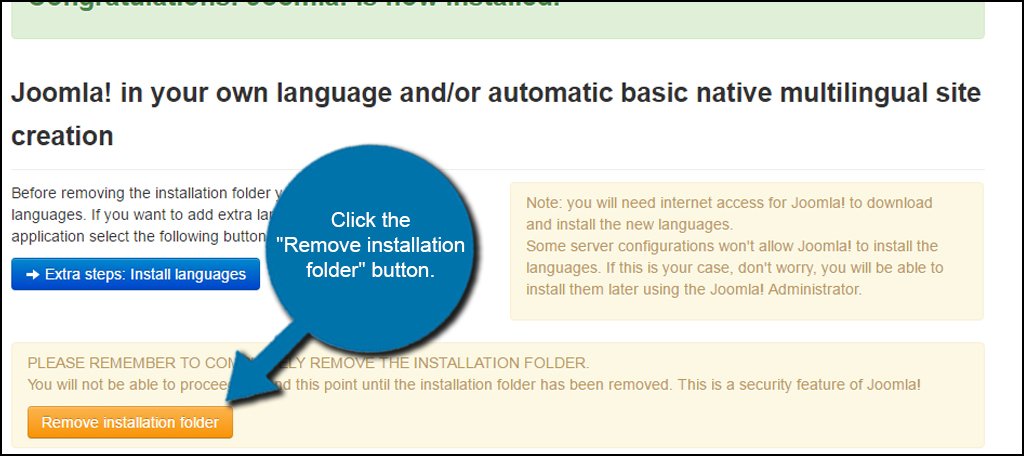
After a moment, a “Congratulations” screen will appear. All that’s left is to click the “Remove installation folder” button on the bottom, and your site is ready for content and customization.
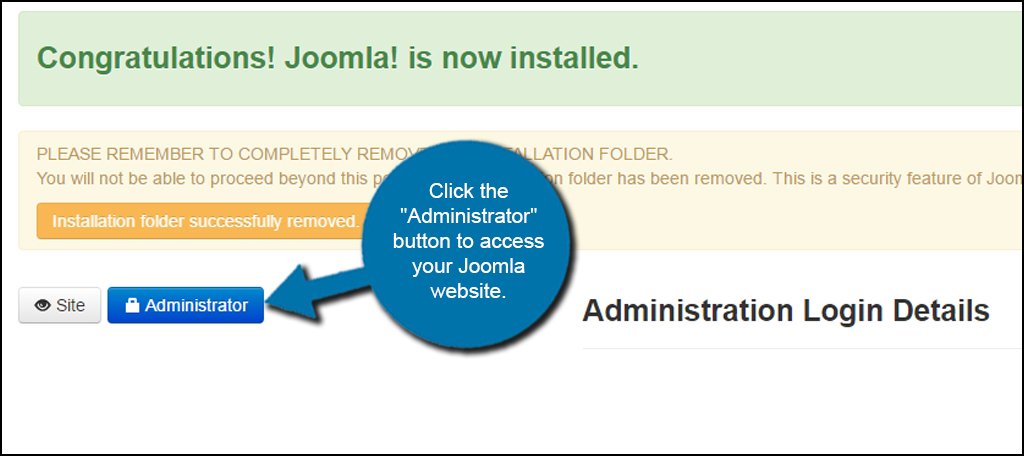
Click the “Administrator” button to access your Joomla website.
When it comes to building a website, Joomla has the potential to be a powerful and versatile system. No matter what kind of a site you’re building, some templates and add-ons can take the experience to greater levels. Now that you know how to install Joomla, it’s time to develop your online presence by building a fantastic website.

Hi.
Afraid this doesn’t seem to work.
Got as far as ‘Now that the files are uploaded to your web host and the database is set up, it’s time to install Joomla. Access your website by using a web browser and typing in the address.’
but when I access ,y site, I do not see the Zoomla page. Instead I see the ‘page under construction’ page I created in Site Publisher. So I do not know how to proceed 🙁
Hi Ricardo. If you have an index.htm or index.html page in your root directory and then install a CMS that uses index.php, you may have to delete or rename the old index.html before the CMS index page will show up on the domain.
I’m not sure where you’re seeing the typos you mentioned. I couldn’t find them…