Many site developers will have a variety of people either to help create the website or allow registered users for posting comments. Over time, this list of Drupal users can become quite extensive. Luckily, it’s not that difficult to manage those who use your website.
Managing users gives you the ability to promote and demote users while keeping the system free from spamming accounts. It’s always a good idea to perform routine maintenance of this list of people as it can help keep the system running smoothly while avoiding troublesome issues from visitors.
From creating articles and pages to administrative abilities, managing your users can keep the site efficient and operating like you intended.
In this tutorial, I am going to demonstrate how you can manage users in Drupal. Learning this can be an extension of learning how to build a Drupal website from scratch.
Managing Users in Drupal
To access Drupal users, click on the “People” control in the top admin tool bar.
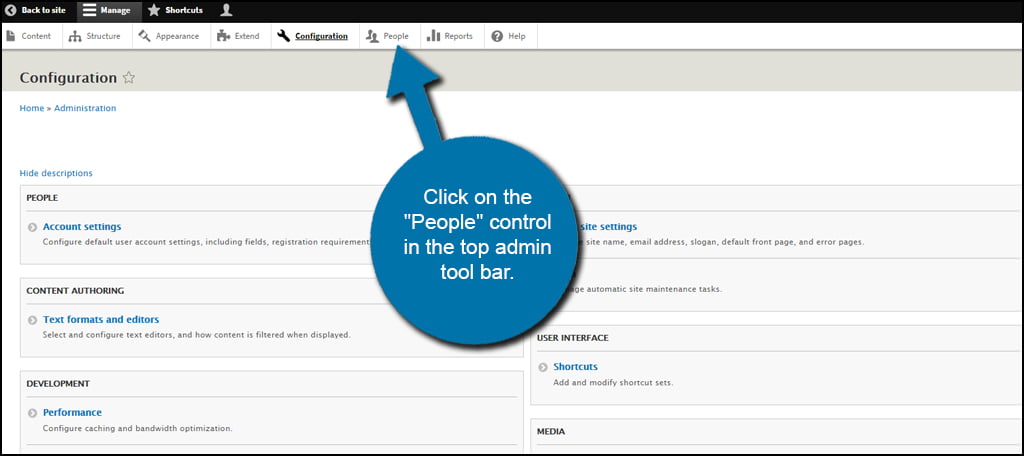
In the People area, you can modify the different users of your website. Here are a few things you can do in this section:
- Add users manually
- Edit individual roles
- Set permission status of accounts
- And mass-edit the profiles on the site
Let’s take a closer look at some of the things you can do.
Adding New Drupal Users
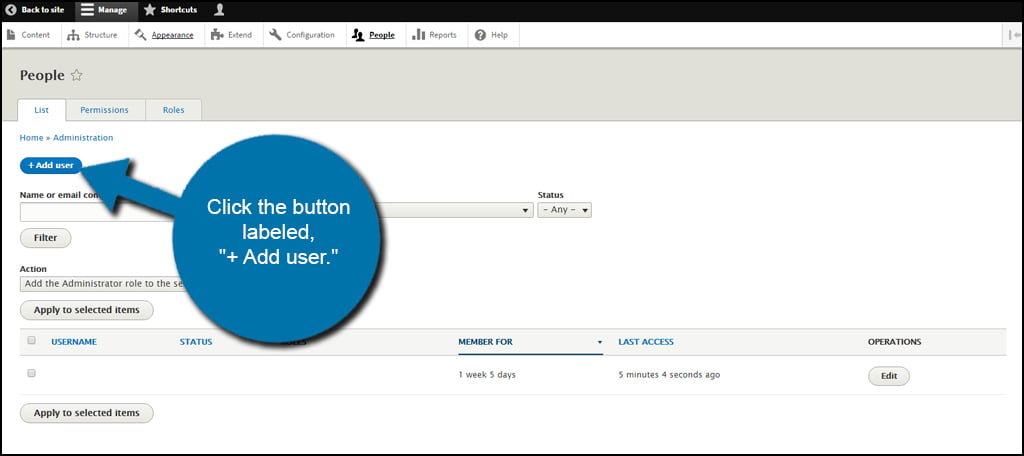
Adding a new profile to Drupal is pretty straight forward. In the People screen, click the button labeled, “+ Add user.”
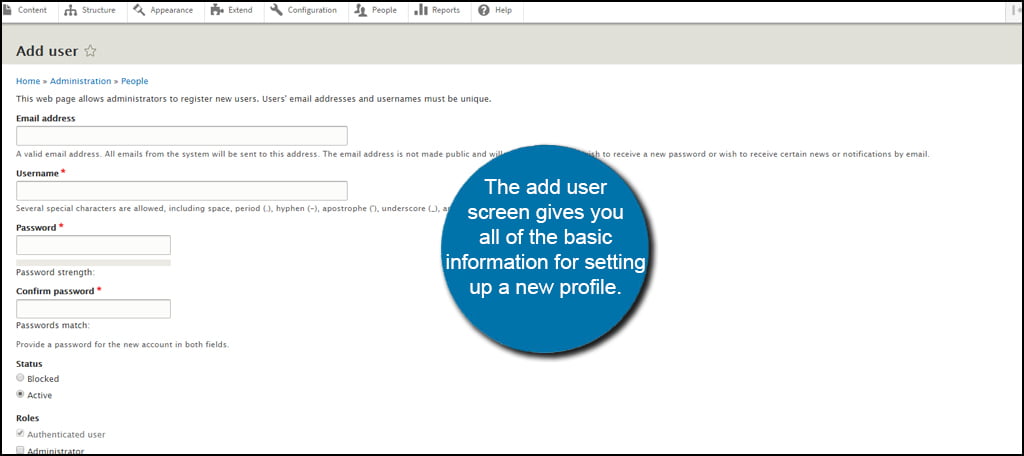
The add user screen gives you all of the basic information for setting up a new profile.
The elements to set up this profile include:
- Email address of the user
- Username
- Password
- Status: either blocked or active
- Roles: This defaults to “Authenticated user,” but you can also change it to be an administrator account.
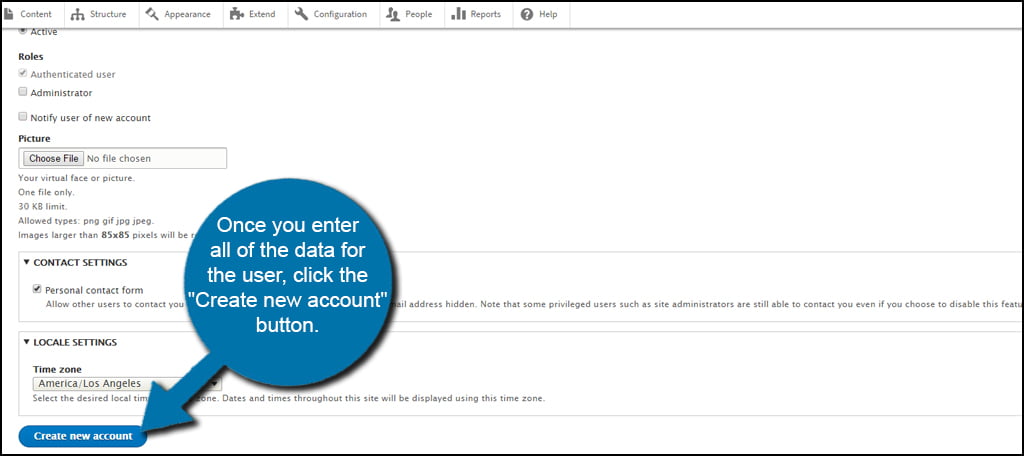
- Picture
- Contact settings: which allow users to contact you through a personal contact form that does not show your email address
- Local time zone settings of the person you are adding
Once you enter all of the data for the user, click the “Create new account” button.
Editing Drupal Users
Manual Edits
The edit screen to manage users in Drupal looks just like the display to create a new profile. It gives you all of the elements I mentioned above giving you access to do everything from change email addresses to altering the password.
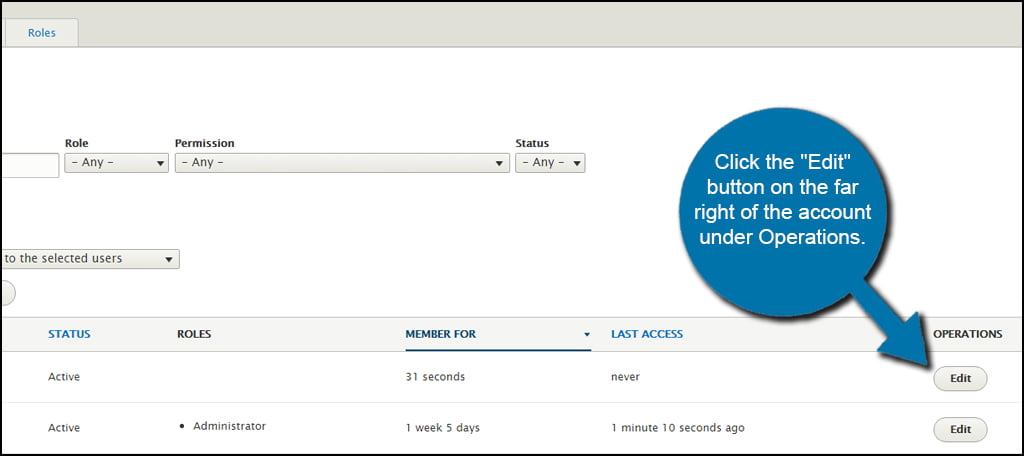
To access this section, click the “Edit” button on the far right of the account under Operations.
Bulk Edits
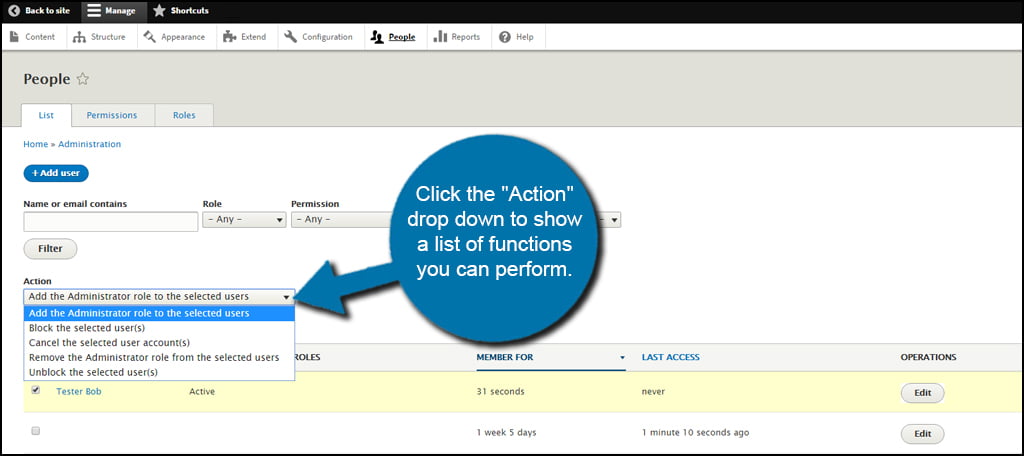
Drupal provides a method to bulk edit accounts for specific purposes. This is done by clicking the check box next to the names of all the users you want to alter. Then, click the “Action” drop down to show a list of functions you can perform.
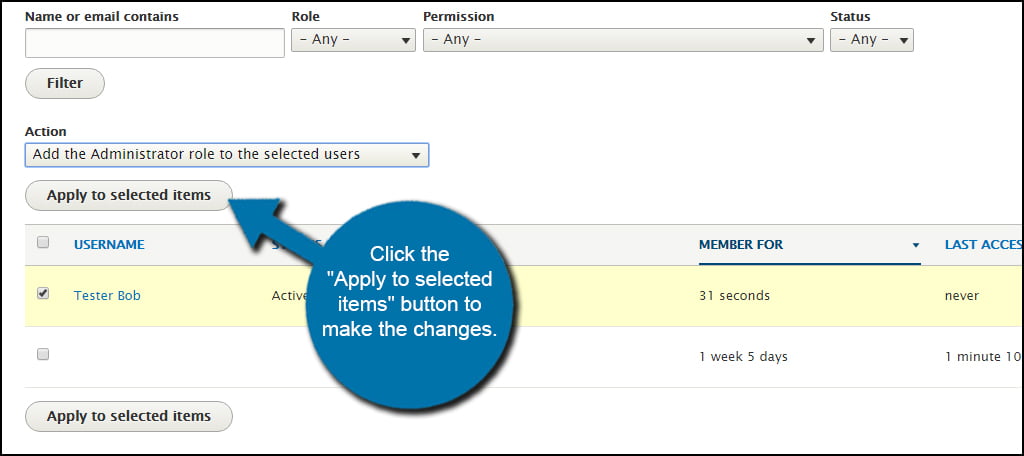
Once you select the action you want to take, click the “Apply to selected items” button to make the changes.
Editing Permissions
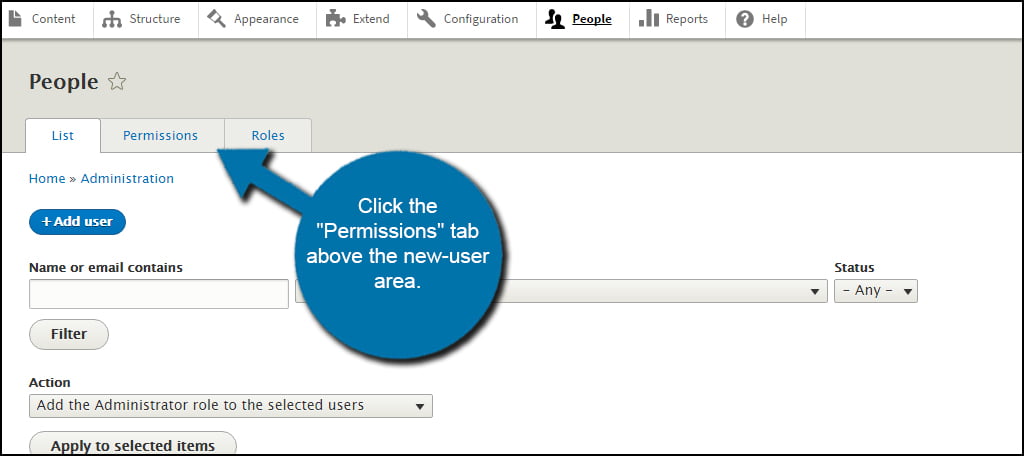
In the People screen, you’re also able to edit permissions of your users. Click the “Permissions” tab above the new-user area.
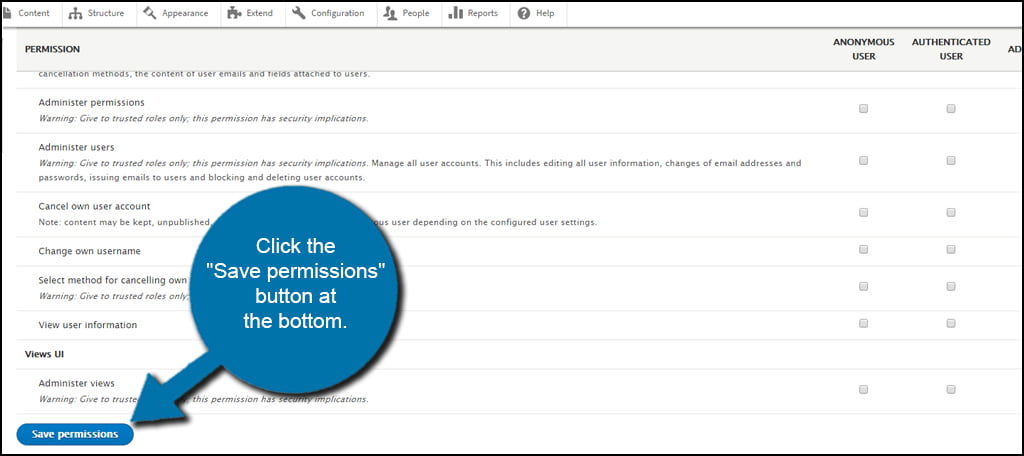
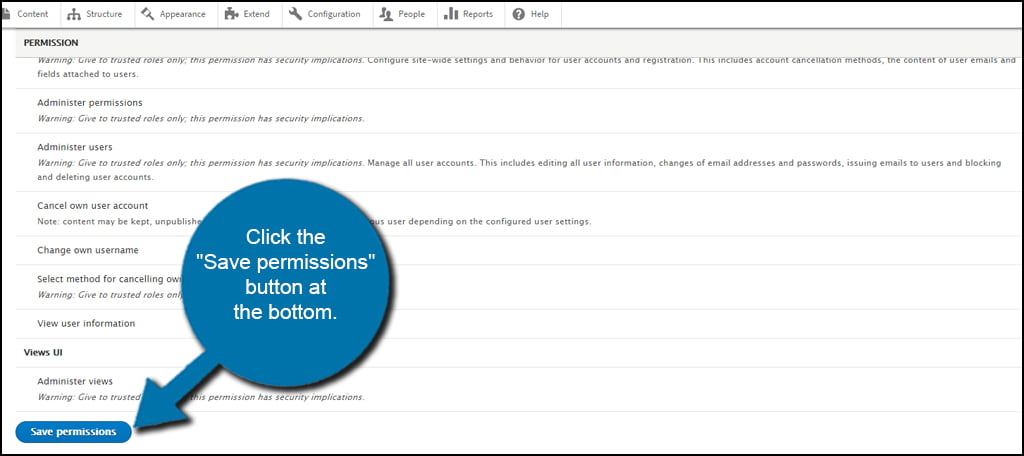
From this screen, you’re able to change a great deal of how anonymous, authenticated and administrator users can alter the website. This covers everything from writing content to changing the user interface. Once you’re done making selections, click the “Save permissions” button at the bottom.
When you create new roles for your visitors, they will automatically be added to this list. I’ll go over how to do that in a moment.
I would advise leaving this as default until you get a feel for how Drupal works. The last thing you want to do is give someone permission to cause damage to your website. All it takes is to give the wrong person access to vital material.
Adding New Roles
What if you wanted to create new roles for those who use your website? This can easily be done through Drupal. Click the “Roles” tab at the top next to Permissions.
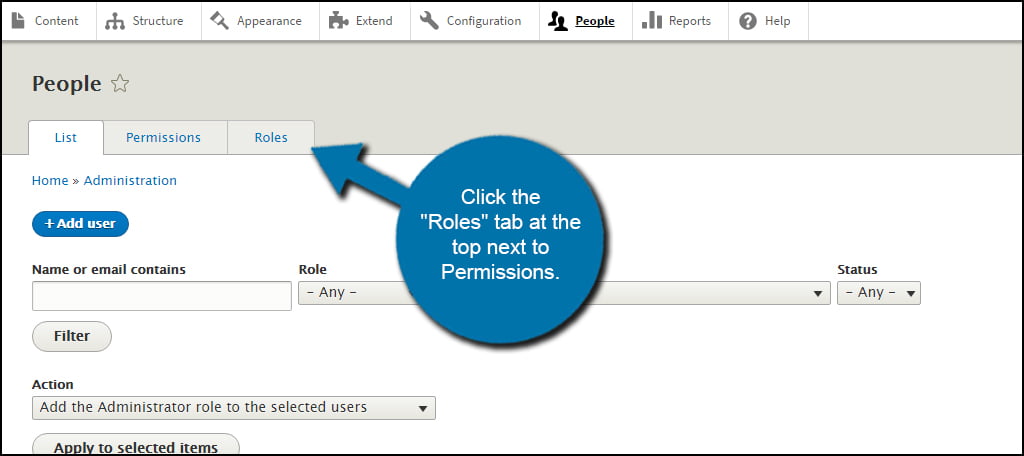
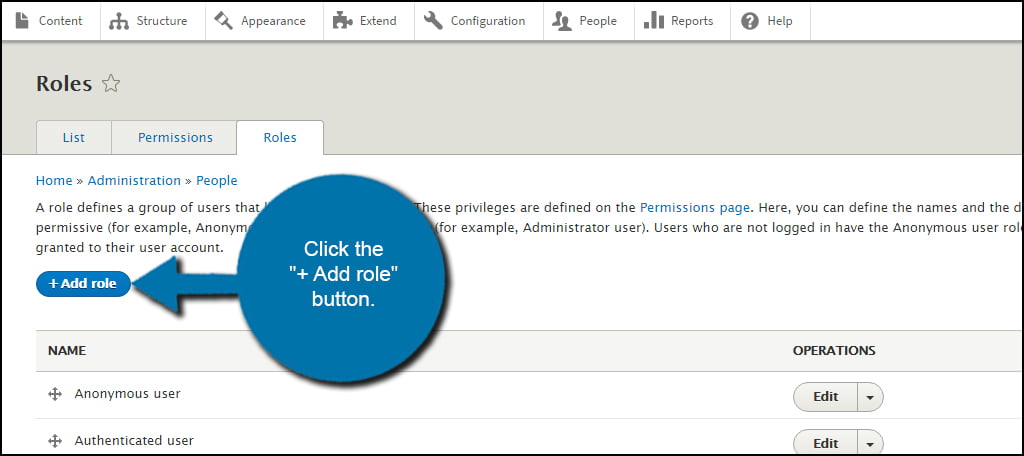
From this screen, you can add a new role, edit the ones that already exist or rearrange how roles appear using drag-and-drop.
In this example, I’m going to make the role for any authors I will use. To do this, click the “+ Add role” button.
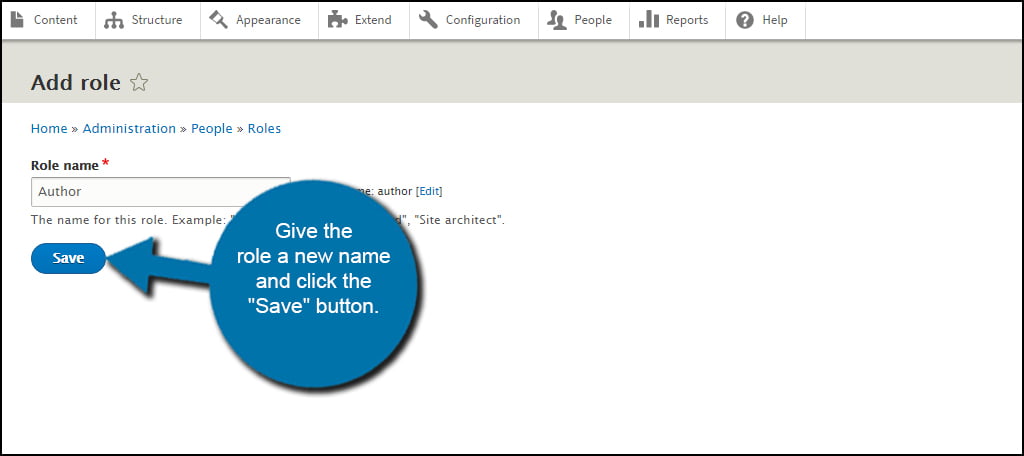
Simply give the role a new name and click the “Save” button. I am going to enter, “Author” for this tutorial.
After creating the role, you will see it appear at the bottom.
By default, new roles you create will acquire all of the permissions that any authenticated user can do. This is stuff like posting comments, using the default text editor and viewing published content.
If you want specific roles to do certain things in the website, you need to set permissions. For instance, the “Author” role I just created would need to create new content for the site. In this case, I would need to add that feature to the role.
Editing permissions for new roles can be done in two different ways. You can either click on the Permissions tab I demonstrated earlier, or click the down arrow next to the “Edit” button of the role you want to change.
For now, let’s click the down arrow next to a role to open the small drop-down window of functions. Click the label to “Edit permissions.”
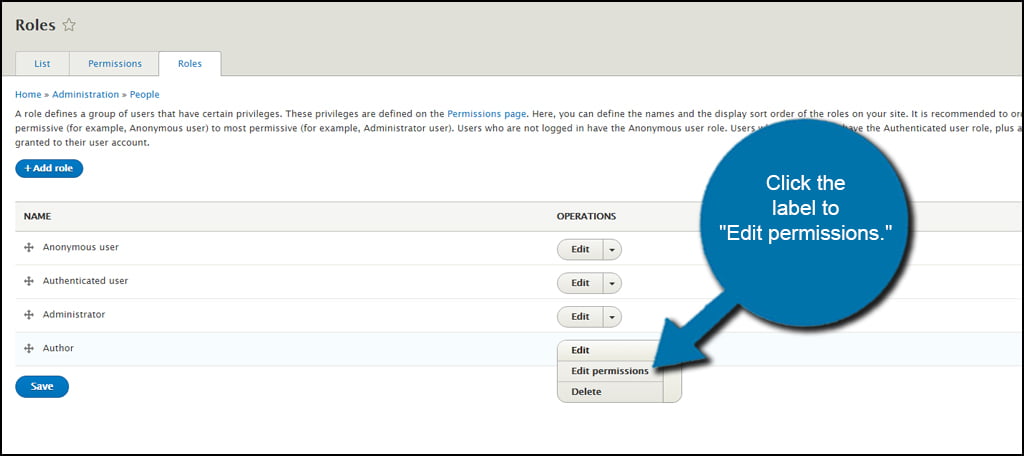
In this screen, you can select the permissions you want to give this specific role. Although this is accessible in the Permissions tab I mentioned earlier, this may be easier as you only see the one role you created. The Permissions tab will show all of your roles, which can become quite an extensive list over time as you add new abilities to the website.
Once you’re done making your changes, click the “Save permissions” button at the bottom.
Drupal website hosting will help you get the site up and running. It’s then up to you to design and manage the site to keep it running smoothly. Managing users in Drupal isn’t a difficult process. However, you still want to keep an eye on what permissions you give various users. The wrong permissions can cause all kinds of havoc on any website.
