Textpattern is a flexible system that allows users to quickly set up a website. In a matter of moments, you can start creating a layout to mesmerize and engage your audience. All it takes is a bit of know-how and some imagination. Today, I’ll show you how to install Textpattern and kickstart your journey into web development.
Whether you’re setting up a website to make money or simply want to give customers a method for contacting you, Textpattern is a good system to use. Once you get the hang of what this content management system can handle, everything else falls into place.
In this Textpattern installation tutorial, you’ll learn how to set up the package directly from your website. This is an easy process that shouldn’t take you very long to master.
Step 1: Add Textpattern to Your Website
In this tutorial, I am assuming that you have a web hosting account with access to cPanel or your root directory. This is because you’ll need to upload some files to your empty domain.
Download Textpattern
Go to the Textpattern website and click the download button. The newest version should be available from the homepage.
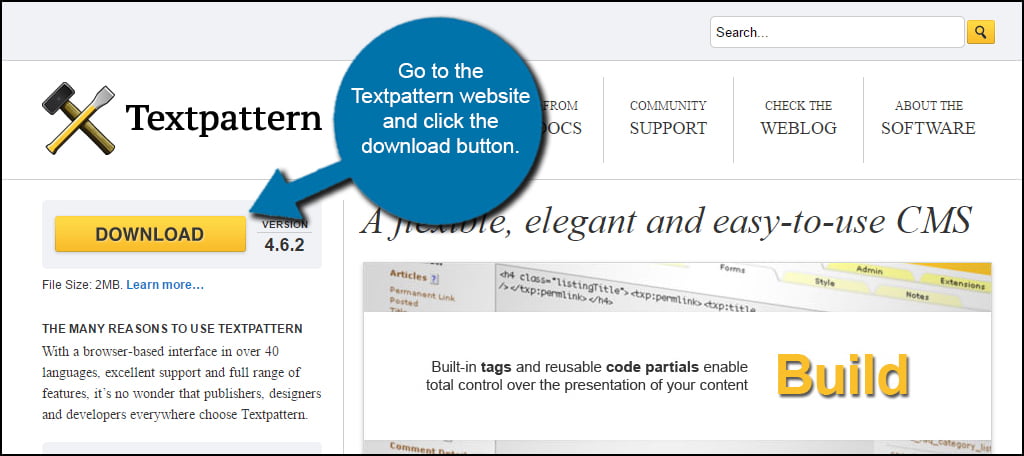
You may be prompted to save the file into a specific location. However, some computer systems are set up to save the file automatically to the “Downloads” folder.
I prefer to install things like this to the desktop as it makes it easier to find. Then, I move them to either an archive folder or delete them outright. It all depends on what the file is.
In reality, you won’t need this file again once you’re down installing Textpattern.
Upload Textpattern to Your Host
In this tutorial, I’m going to use cPanel’s File Manager to upload the package. You can also use FTP programs like FileZilla if you want to go that direction. If you do use FileZilla, you may have to unzip the Textpattern package to upload all of the files for the installation.
Go to your cPanel dashboard and click on “File Manager.”
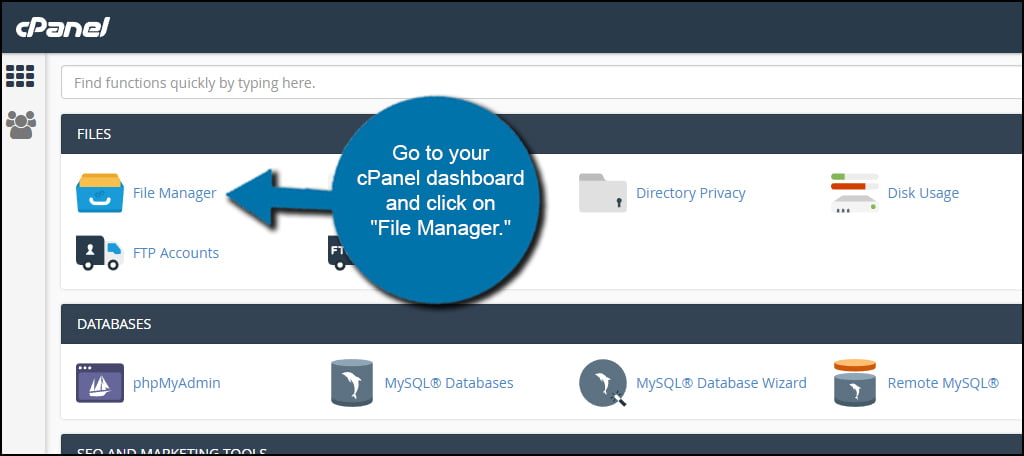
You’re going to use File Manager to unzip the archive into your website. This is a much faster method than trying to upload Textpattern’s files one by one.
Access the root directory of your website by clicking “public_html.”
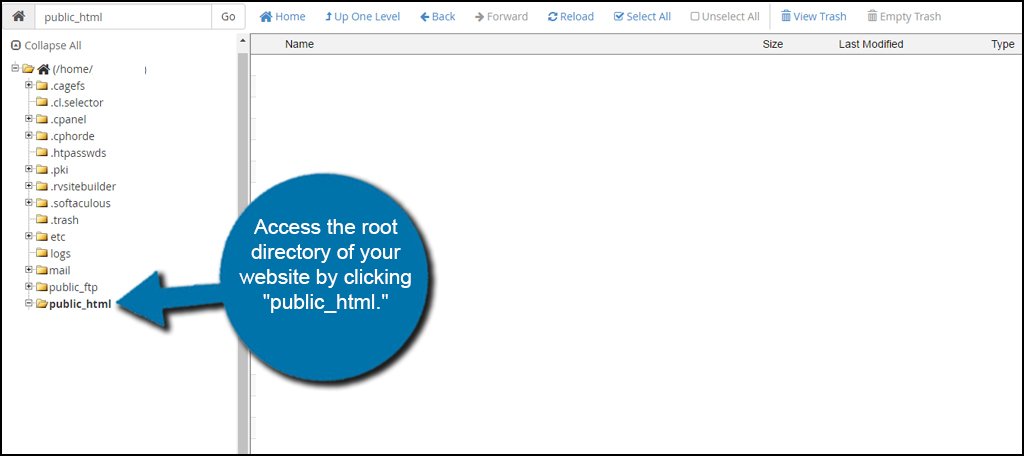
Click the “Upload” control from the top task bar in File Manager.
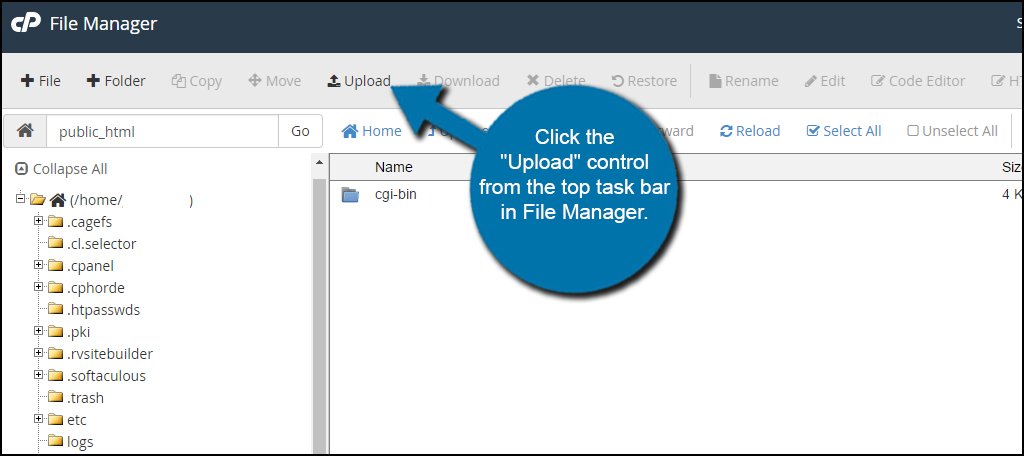
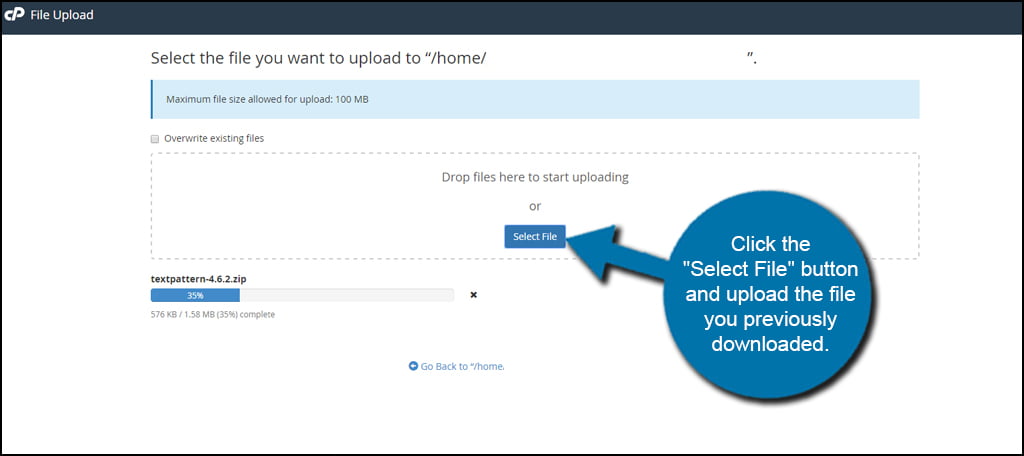
Click the “Select File” button and upload the file you previously downloaded.
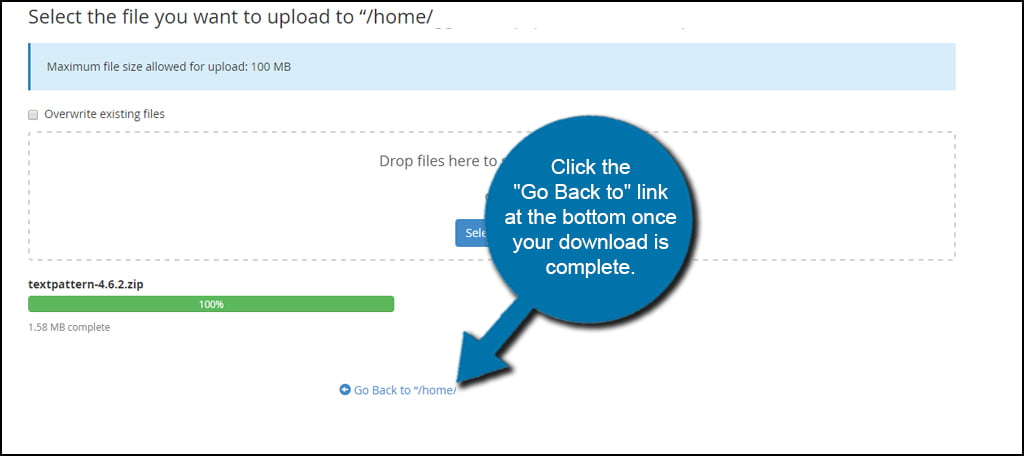
Click the “Go Back to” link at the bottom once your download is complete.
Unzip and Move the Textpattern Files
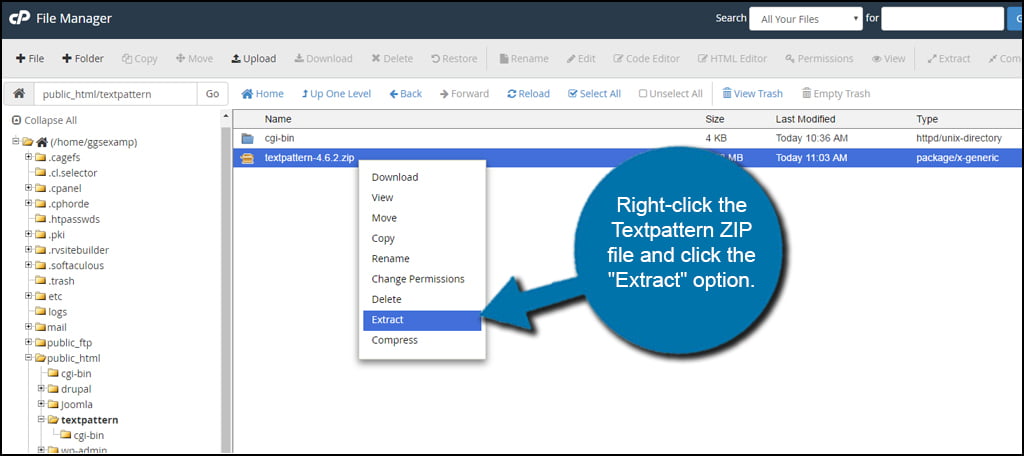
Right-click the Textpattern ZIP file and click the “Extract” option. Mac users will need to use CMD+click.
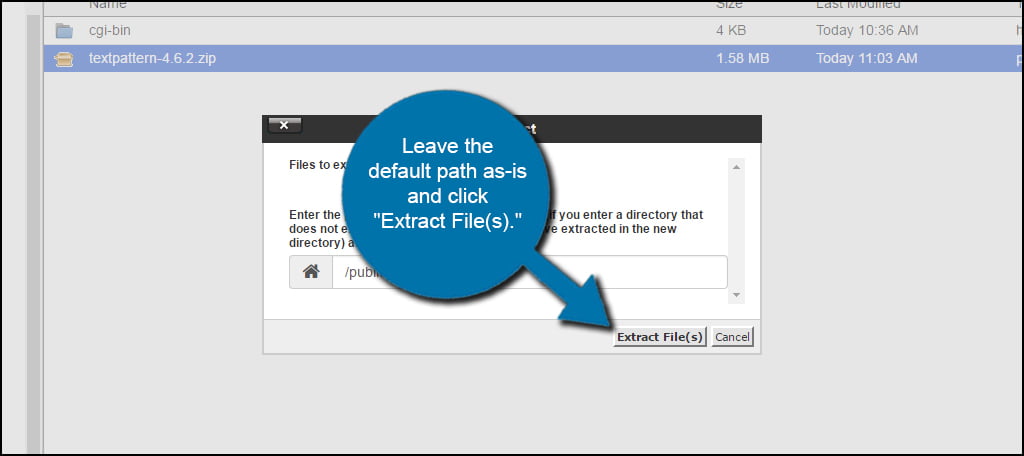
Leave the default path as-is and click “Extract File(s).”
Once the extraction is done, click the “Close” button in the bottom corner.
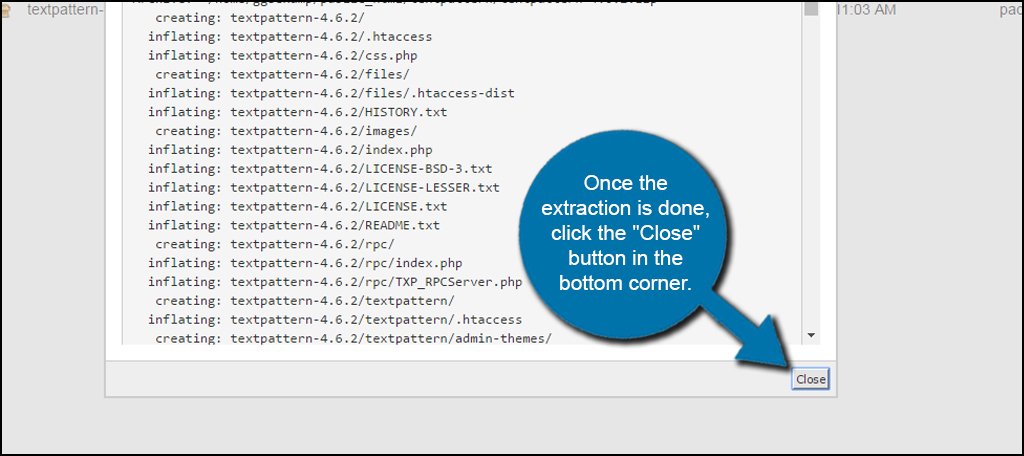
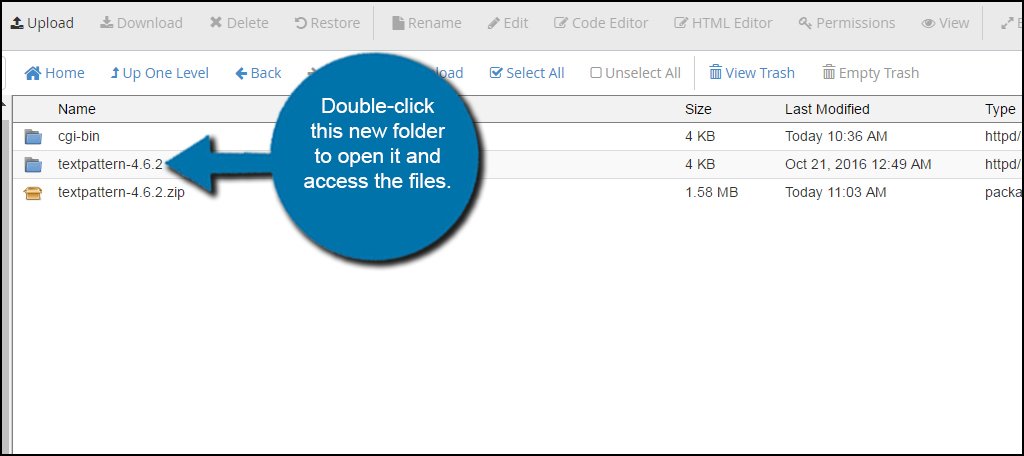
Now, you will have a folder with the Textpattern version similar to the ZIP file.
Double-click this new folder to open it and access the files.
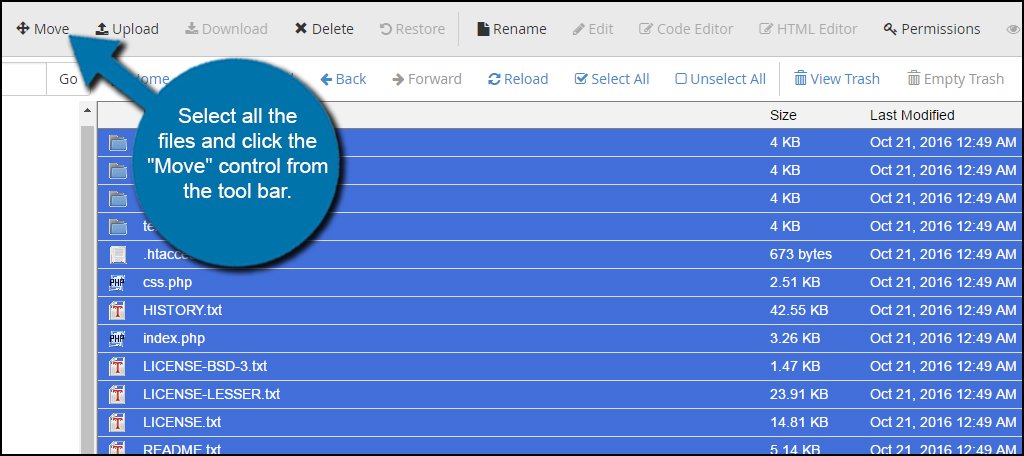
Select all the files and click the “Move” control from the tool bar. You can do this by clicking the “Select All” tool just above the list of files in the directory.
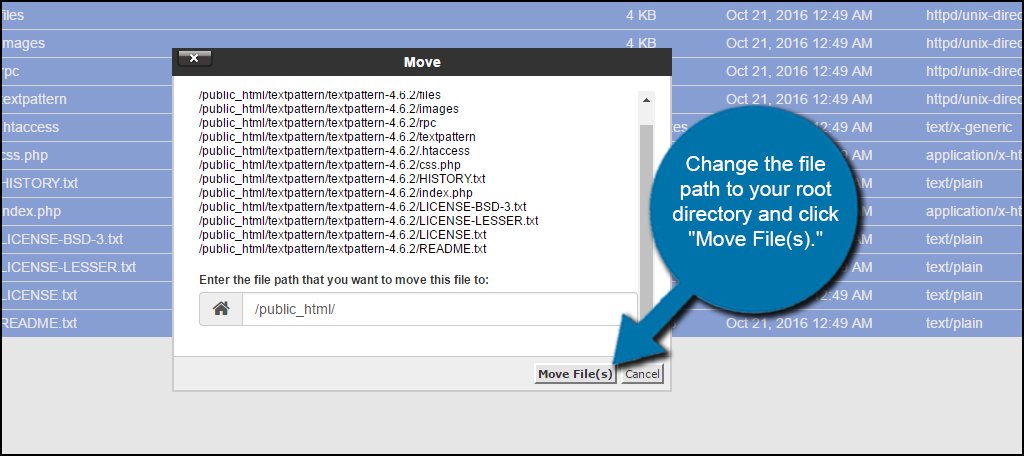
Change the file path to your root directory and click “Move File(s).” Most people will just use the “/public_html/” folder.
Click the “Up One Level” button to go back to your site’s root directory.
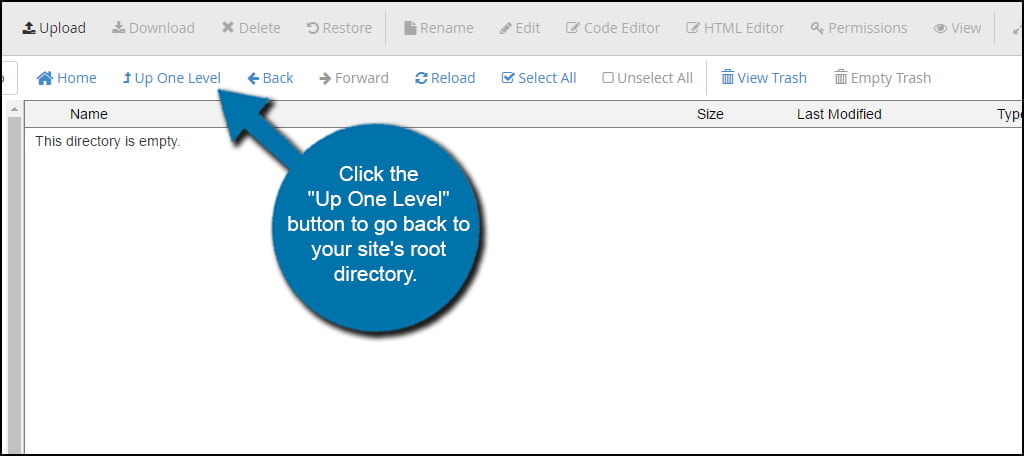
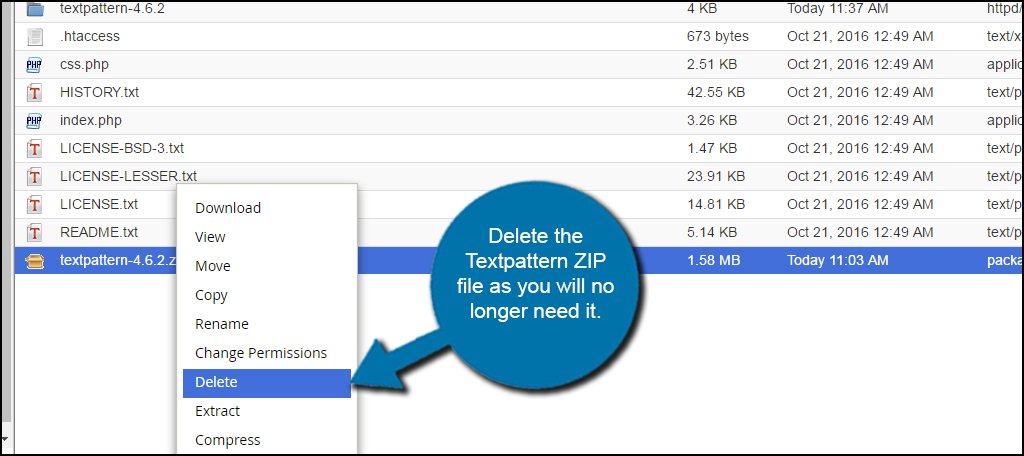
Now, you will see the beginnings of a website. Delete the Textpattern ZIP file as you will no longer need it. The same can be done with the Empty folder you just moved everything out of.
Step 2: Creating the Database for Textpattern
Textpattern will not create the database on its own. You will need to set this up for the Textpattern installation. However, it’s not a very difficult process.
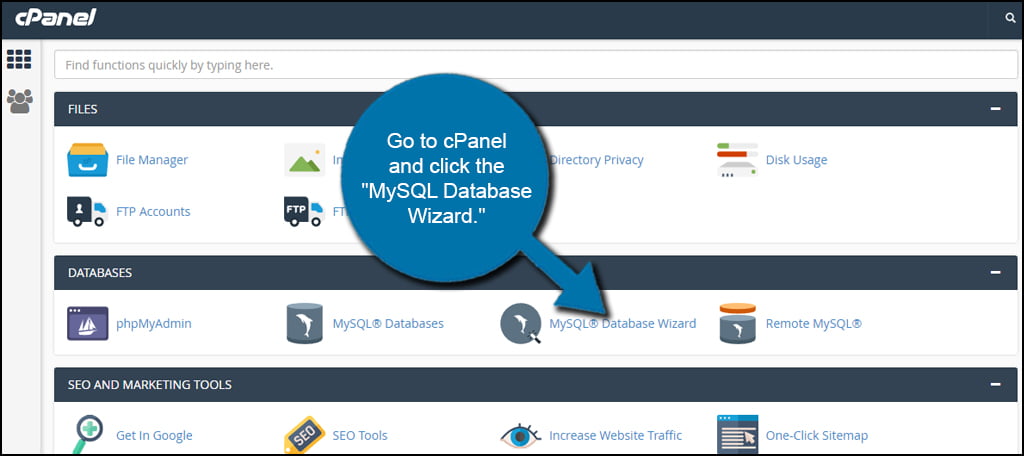
Go to cPanel and click the “MySQL Database Wizard.” This is perhaps one of the easiest ways to set up the database especially for those who have never done it before.
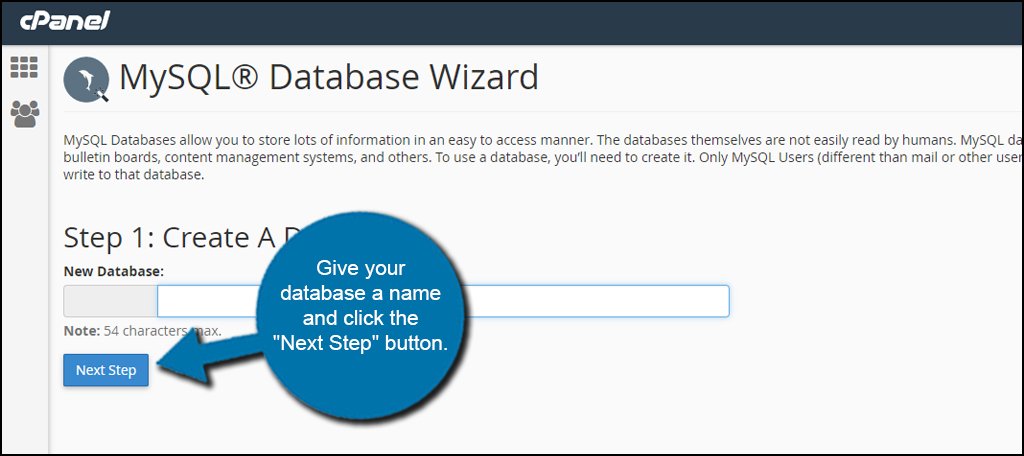
Give your database a name and click the “Next Step” button. This will be used when first installing Textpattern and will govern over all of your site’s data. For this example, I’m simply setting up “textpattern.”
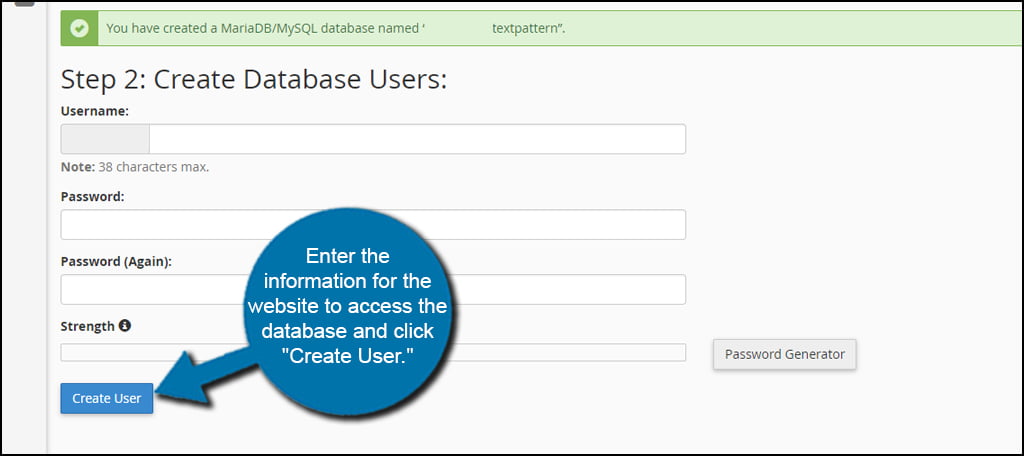
Enter the information for the website to access the database and click “Create User.” You’ll need a username and password for your Textpattern website. Without this, the site will not be able to access data.
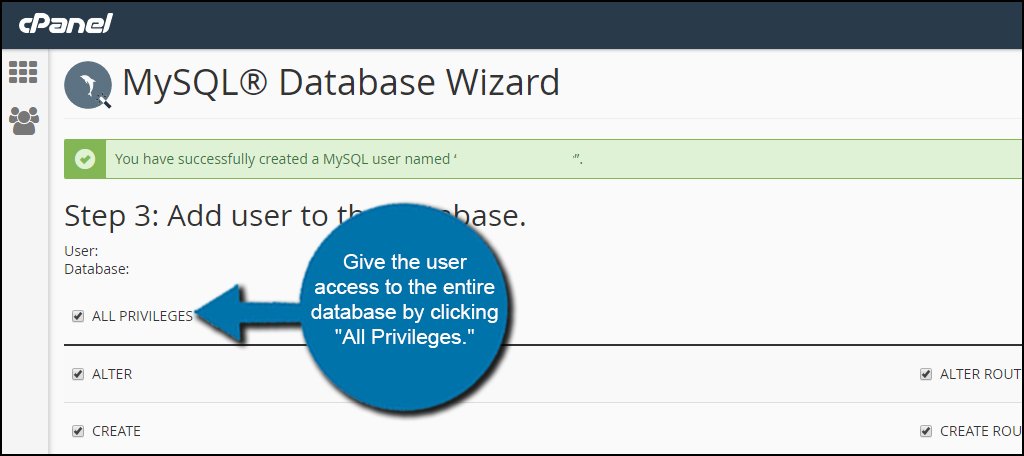
Give the user access to the entire database by clicking “All Privileges.”
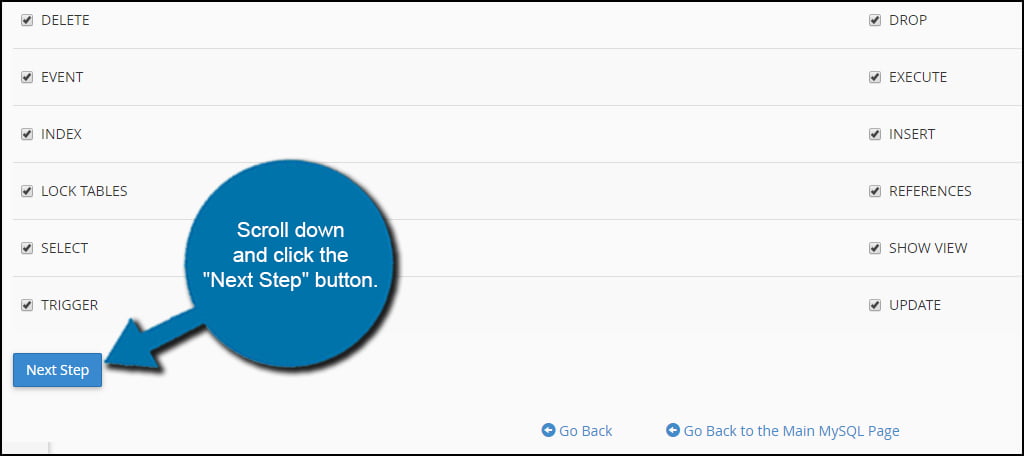
Scroll down and click the “Next Step” button.
Now, you have a new user ready for the Textpattern website.
Step 3: Running the Site to Install Textpattern
OK, now it’s time to access the website and start the installation script.
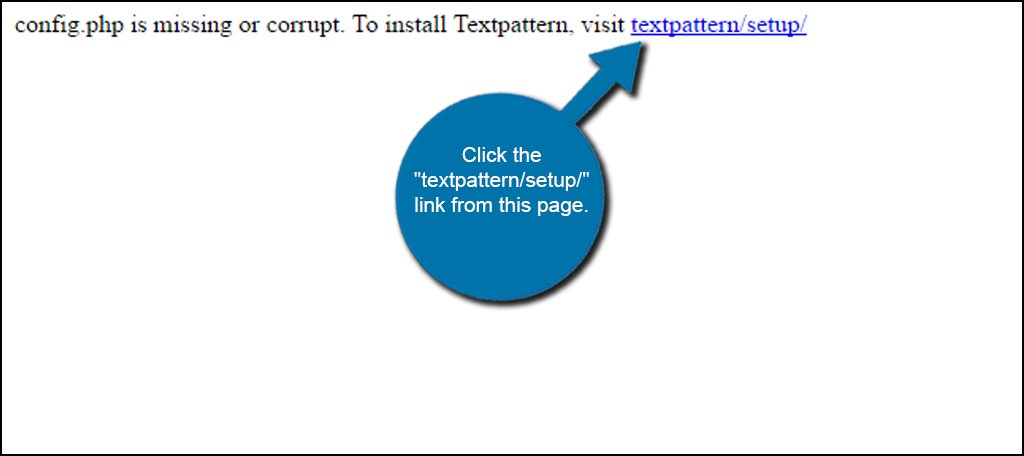
Go to your domain’s web address from your browser. You will immediately see an error message:
[ht_message mstyle=”info” title=”” ” show_icon=”” id=”” class=”” style=”” ]”config.php is missing or corrupt. To install Textpattern, visit textpattern/setup/”[/ht_message]
This is normal. Click the “textpattern/setup/” link from this page.
Choose your preferred language and click the “Submit” button. Textpattern is available in about 40 or so languages if English is not your native tongue.

Input the credentials for your database that you created above in Step 2 and click “Next.”
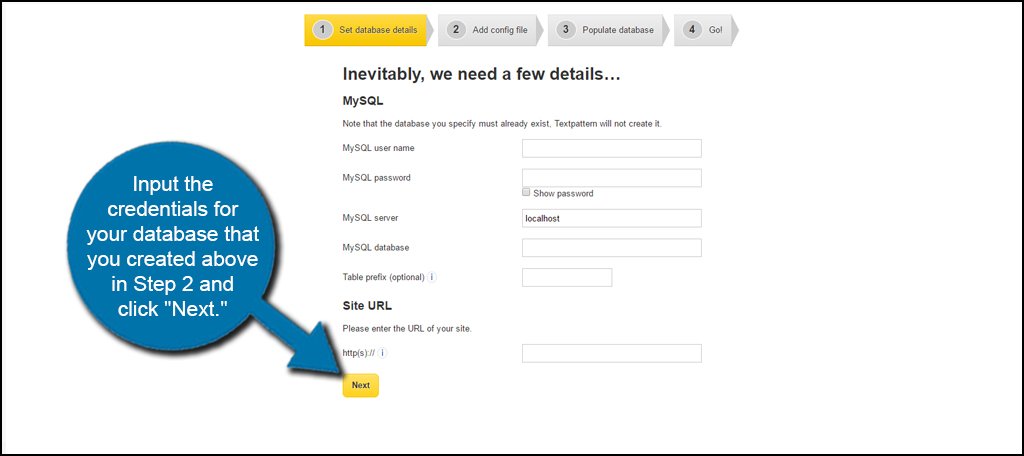
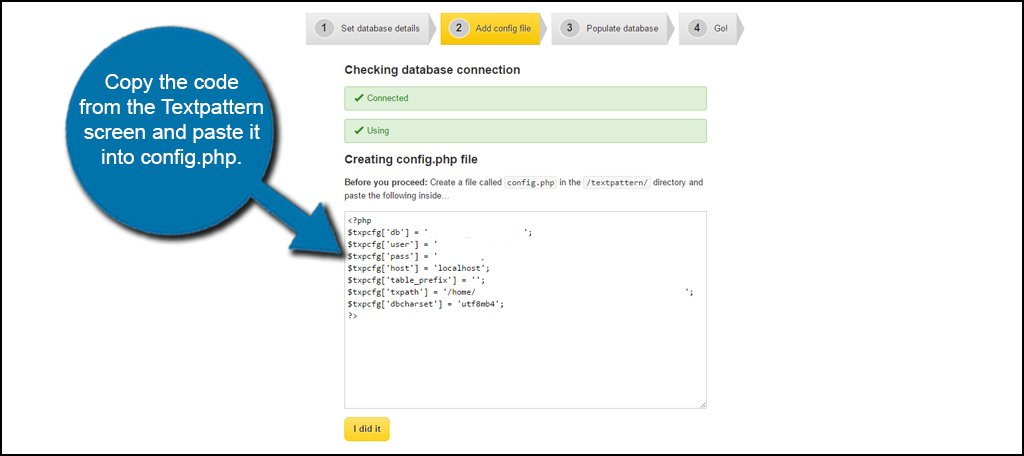
The system will give you a block of code to input into a config.php file. You will have to create this file yourself within your public_html directory.
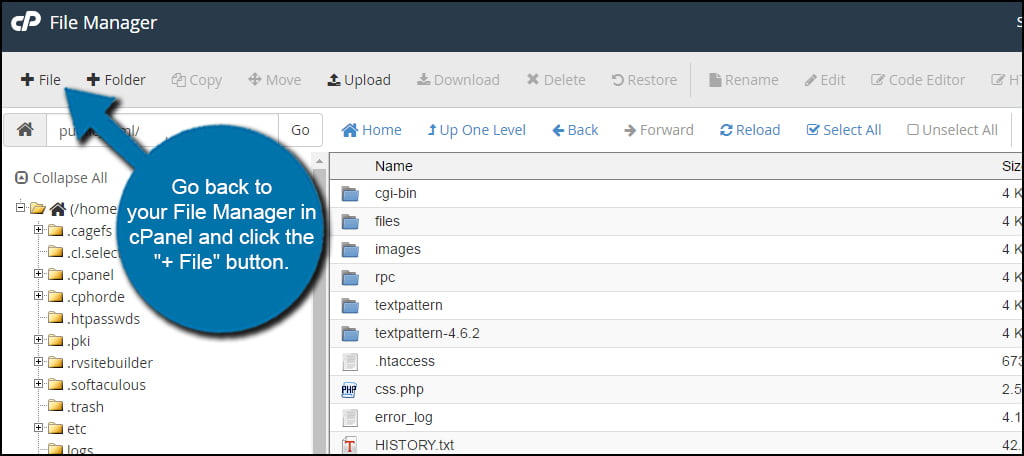
Go back to your File Manager in cPanel and click the “+ File” button. Make sure you’re in the Textpattern directory within your website before creating this file.
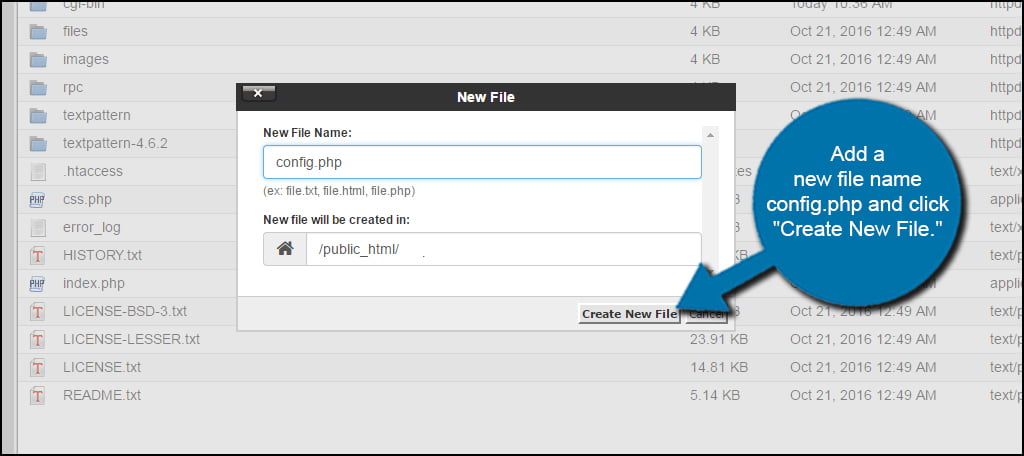
Add a new file name config.php and click “Create New File.”
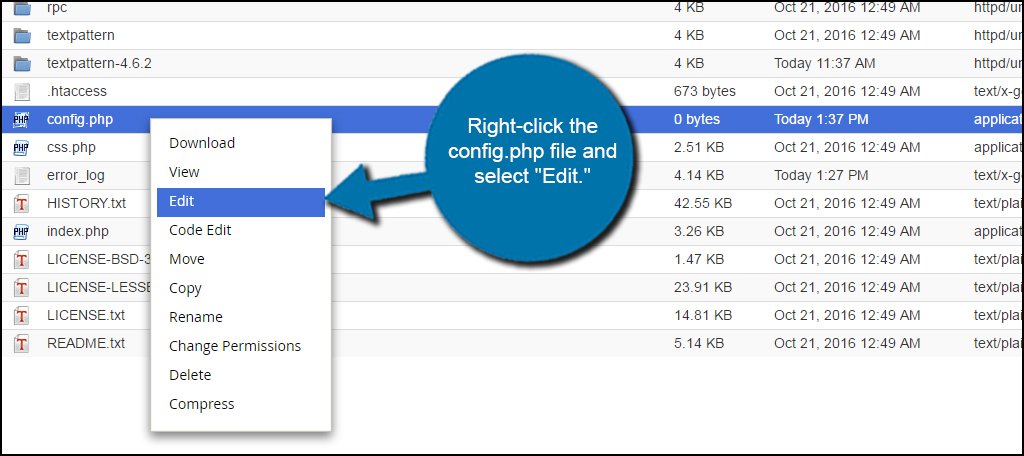
Right-click the config.php file and select “Edit.” Mac users will use CMD+click.
Copy the code from the Textpattern screen and paste it into the config.php file.
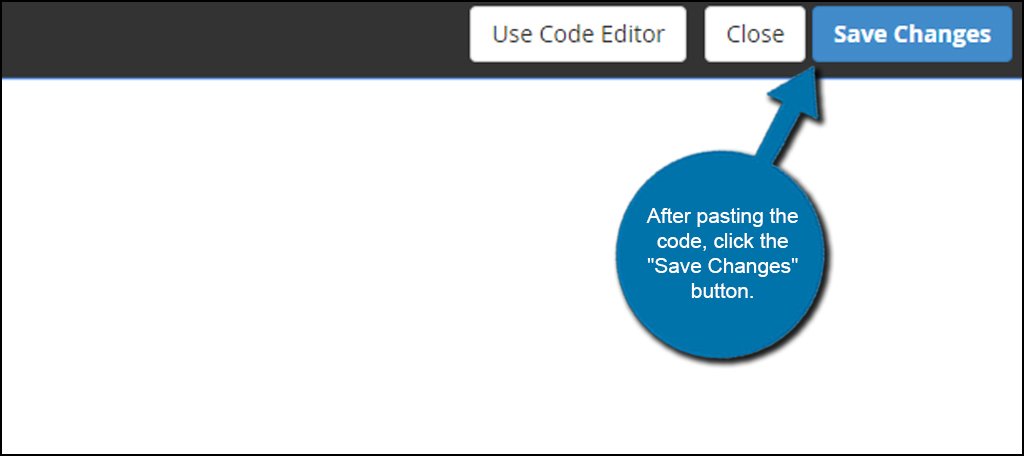
After pasting the code, click the “Save Changes” button. This will be in the top right-hand corner of the editor screen for config.php.
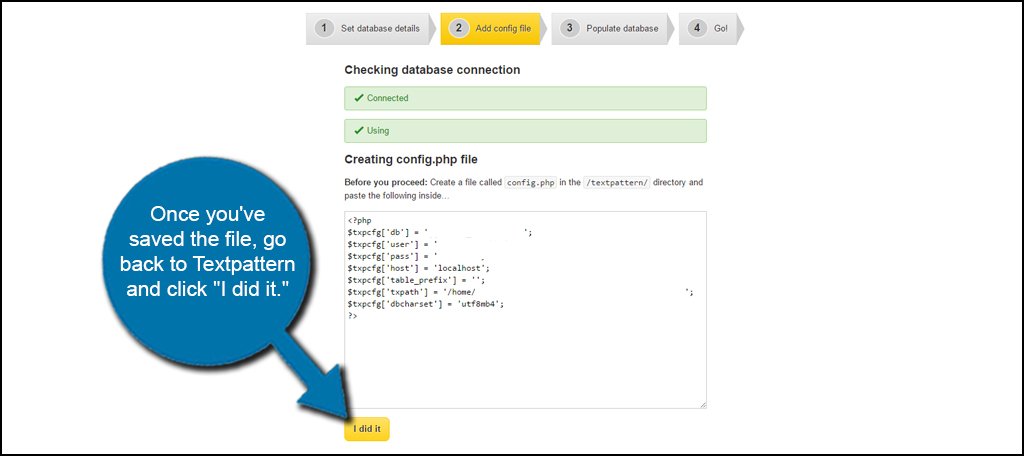
Once you’ve saved the file, go back to Textpattern and click “I did it.”
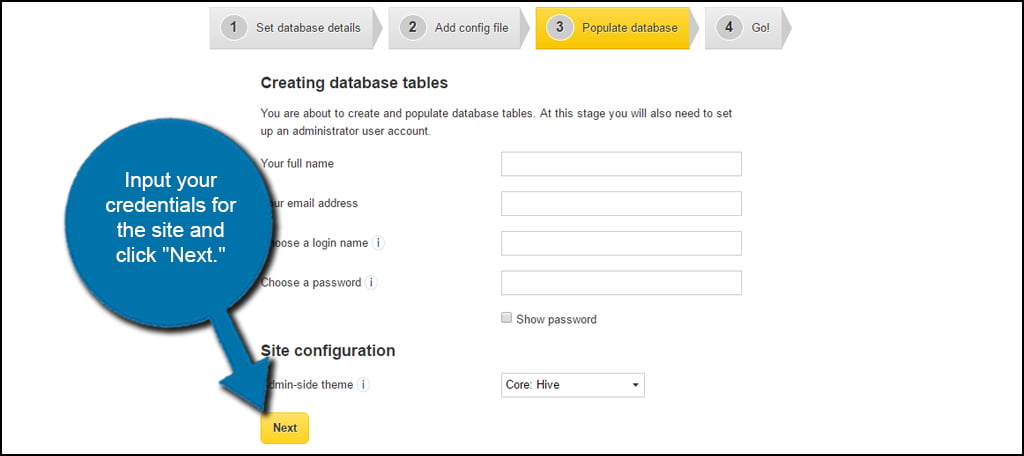
Input your credentials for the site and click “Next.” This will be your personal information including your username and email address. When creating the admin account, it’s advisable not to use “admin” as the username. This is a common name and essentially gives hackers one-half of the ability to access your website.
Choose a username that is more unique to you.
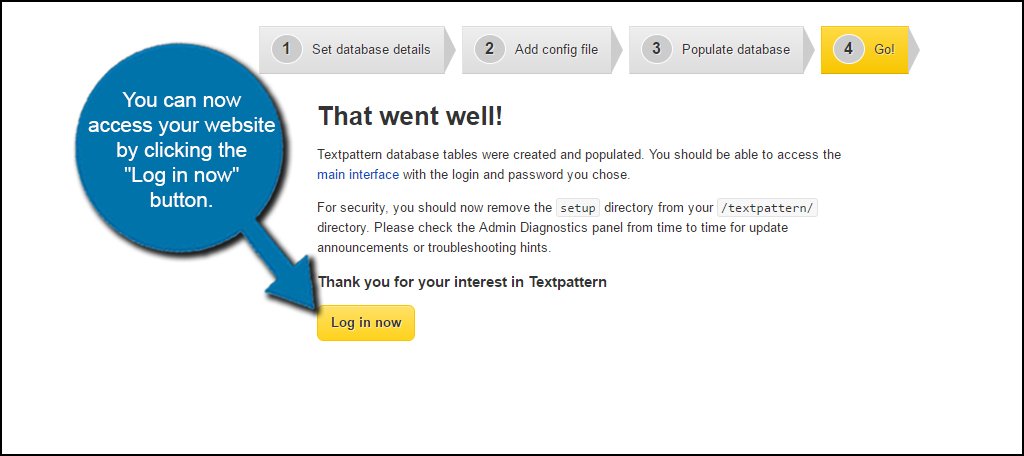
You can now access your website by click the “Log in now” button.
Textpattern is a good way to accentuate your web hosted platform. It makes it easier to create quality content when you don’t have to worry about knowing advanced HTML to create a site. Install Textpattern for yourself and see if it’s a good fit for your needs. It’s a free app and you lose nothing but a few moments of time to see if it’s right for you.

With my hosting, TextPattern is one of the many software packages which can be installed via the Softaculous section in CPanel, so it was much easier than this – just click Install and that was pretty much it.