Are you unhappy with your current username? Unfortunately, many people create less than stellar usernames at first, and it is quite common to change a username in WordPress.
It is important to pick an appropriate username and understand that staff and visitors will see it and the name they see will be one of the first impressions they have of the website.
It’s no secret that usernames need to be an accurate representation of the website’s professionalism. A good way to accomplish this is by using the website’s name, or a shortened version, as part of the username.
Keep in mind that some websites can get away with goofier names, but it is tied to the kind of content produced.
Today, I will demonstrate how to change your WordPress username.
The Importance of the Username
Usernames are quite important, which is why changing usernames in WordPress is made so easy. Take a second to think about the last time you had a chat with someone from a larger website. Was their username a nickname or catchphrase?
Odds are no, they weren’t and there is a good reason for that.
Would you feel comfortable discussing business or a serious topic with a representative with FunkyMonkey21 as the username? If you even had to stop and think about it, the answer is no.
Most customers only take a split second to decide if they want to do business and you probably just lost a customer in that second.
This may be one of the hardest transitions if you are used to writing in comments sections while using a goofy username, but when you are representing a business then you need to add a bit more seriousness to the message you are sending out and it all starts with the username you pick.
Three Methods to Change Your WordPress Username
I will cover three methods to change your WordPress username. They include creating a new user to transfer all of the content from your old username to it, directly editing the username stored in the database, and using a plugin.
I would highly recommend using the first or third options before attempting the second, but sometimes there is no choice.
Method 1: Change by Adding a New Username in WordPress
The first method involves creating a new user. When you create a new user you can give it the admin privileges and name it what you want, but you will need a new email account to do this.
While this may sound strange, it’s quite easy to do, as it avoids coding or adding a plugin.
In reality, changing the admin username in WordPress helps keep it secure, especially if you installed the platform using the default “admin” account.
That’s because “admin” is often the first thing bots and hackers try to use to gain access to a website.
Step 1: Create a New User
On the left-hand admin panel click on Users and select the Add New option.
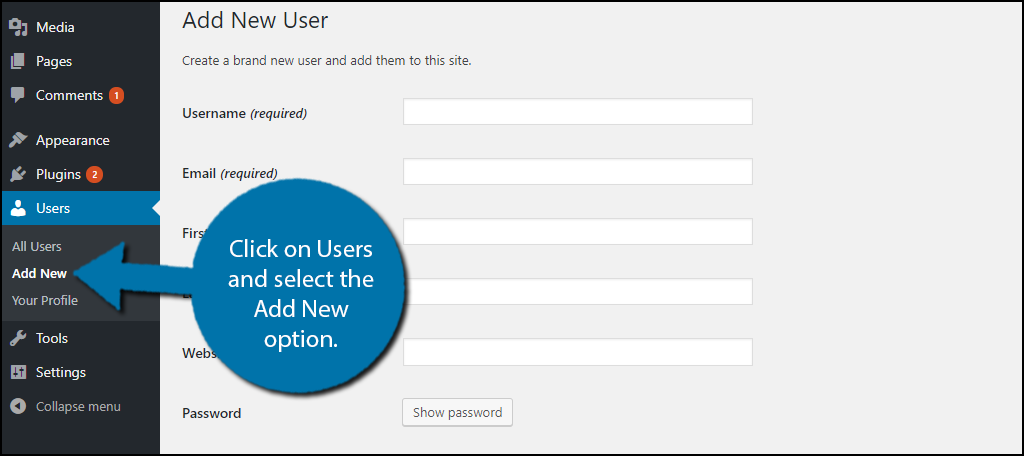
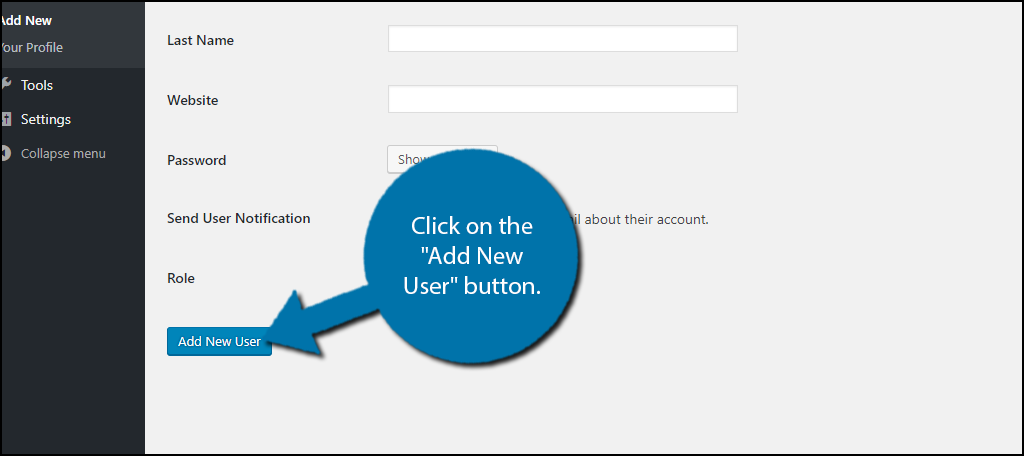
Fill out the information to create a new user. Make sure you give it Administrator privileges. Click on the “Add New User” button at the bottom once you are done.
Step 2: Delete Old User
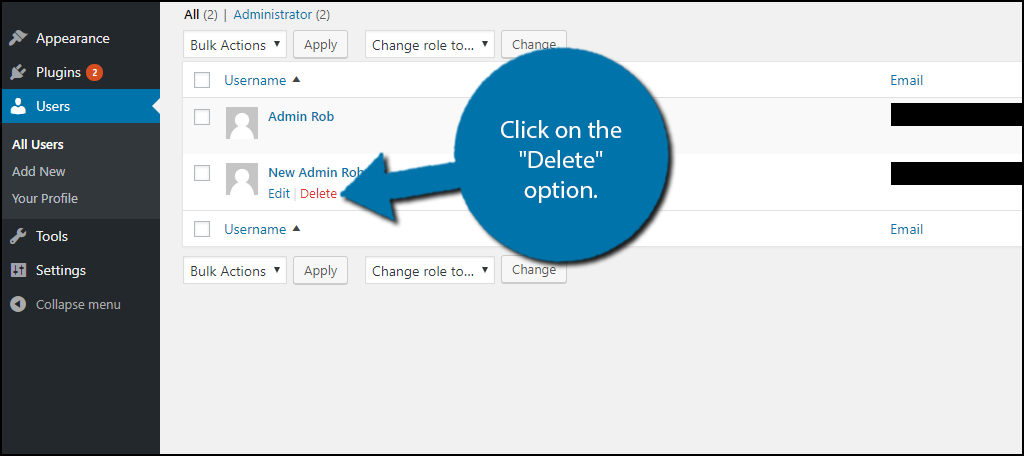
Click on Users and select the All Users option.
You should now see all of the registered users on your website, which includes your current user and the one you just made. You must sign out of your current username and sign in as the one you just created.
Now it is time to delete your old account. When you delete an account, you will be asked what to do with all of the content under that username. One of the options is to transfer it to another user.
Go ahead and click on the Delete option under the old username.
Choose to Attribute all content to the new username you created. Click on the “Confirm Deletion” button.
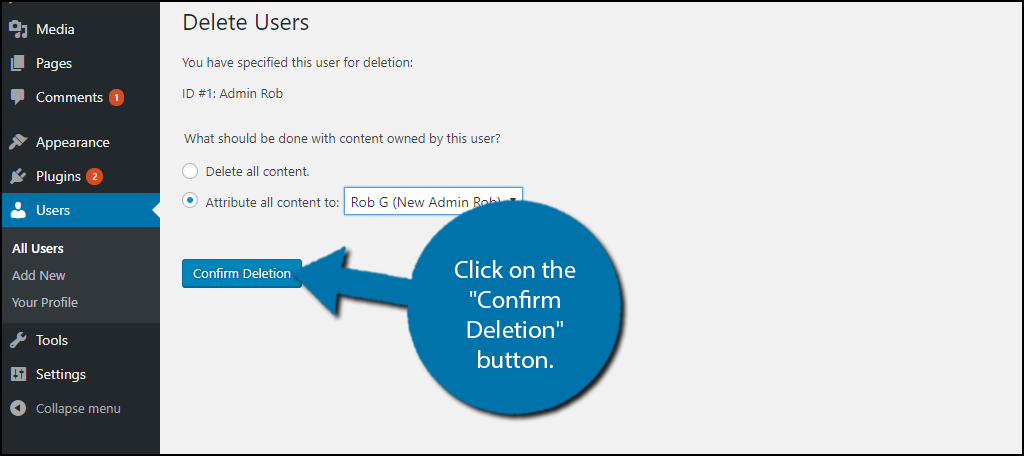
Once this is done, you will have all of the content from your old username, but with a new name. Thus, you essentially changed your username.
Note: Remember that you will change your email to do this method, which might be an issue depending on the types of website notifications you receive. Make sure to check your new email or convert everything from the old one to the new one.
Method 2: Change the WordPress Username in the Database
The second method involves editing your username directly in the database. While this is by no means hard, you should proceed with caution and create a backup of your website.
This will ensure that if something goes wrong, you won’t be locked out of your website.
After all, if you change the WordPress username incorrectly you can actually lock yourself out of the website. But since you’re following this guide, that won’t be happening.
Step 1: Locate Your Database
You will need the login information for your cPanel, which is provided by your web hosting provider.
Log in to your cPanel and click on the “phpMyAdmin” option under the Databases section.
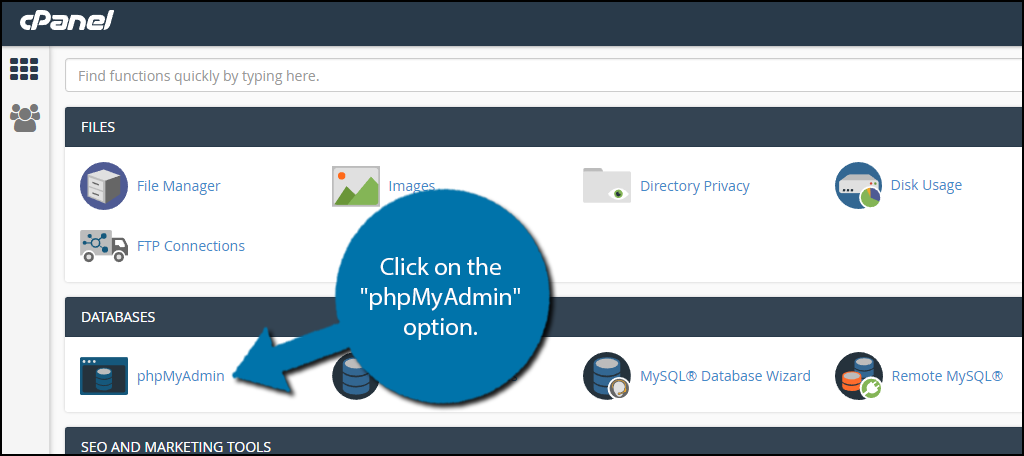
You will see the databases for all of your domains on the left side. finding your database may be tricky depending on your hosting situation.
Step 2: Access the Correct Username Table
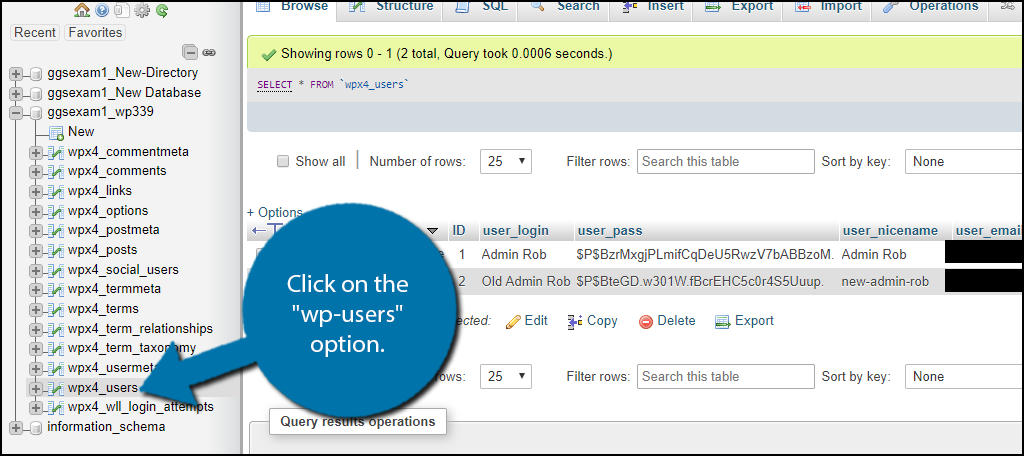
In general, WordPress uses the “wp-” prefix, so it should be easy to identify the correct one. Expand the database by clicking on the “+” symbol next to it.
The naming can vary, but you should see an option that is named wp-users.
In my case, it is “wpx4-users.” Click on the “users” table that you have for your site. You should see your usernames once inside and if you don’t, then you are in the wrong location.
Step 3: Edit the Username
Click on the Edit option next to the username you would like to change. Simply, change the value in the user-login field to the desired username, but remember to write down that username.
It will now be a required piece of information to log in.
Thus, if you forget it, you would have to return to this part to find it or revert your website using a backup.
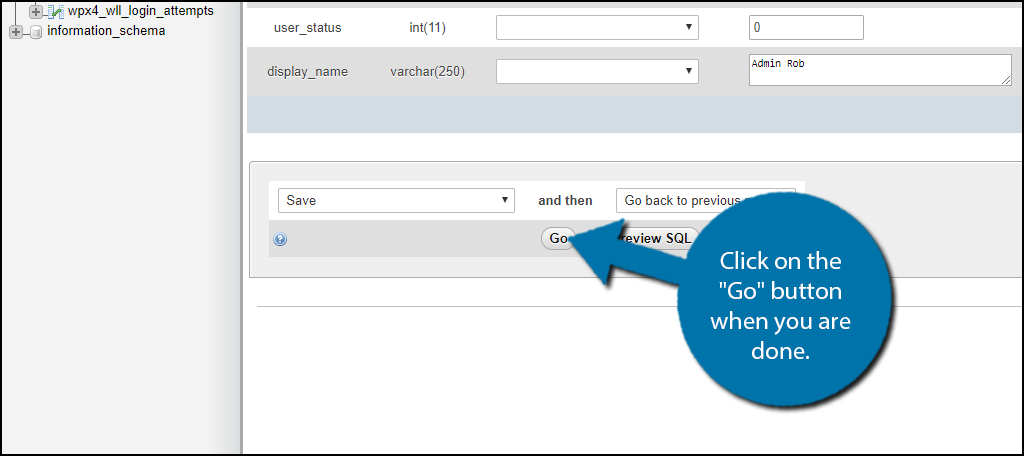
Once you are done, click on the “Go” button to update the changes.
Congratulations, you now know two different ways to change your username in WordPress.
Method 3: Easy Username Updater Plugin
The third method is using the Easy Username Updater plugin to quickly change your username. It’s definitely the easiest method available, but some developers may not like the idea of installing a plugin to do this.
Step 1: Install Easy Username Updater
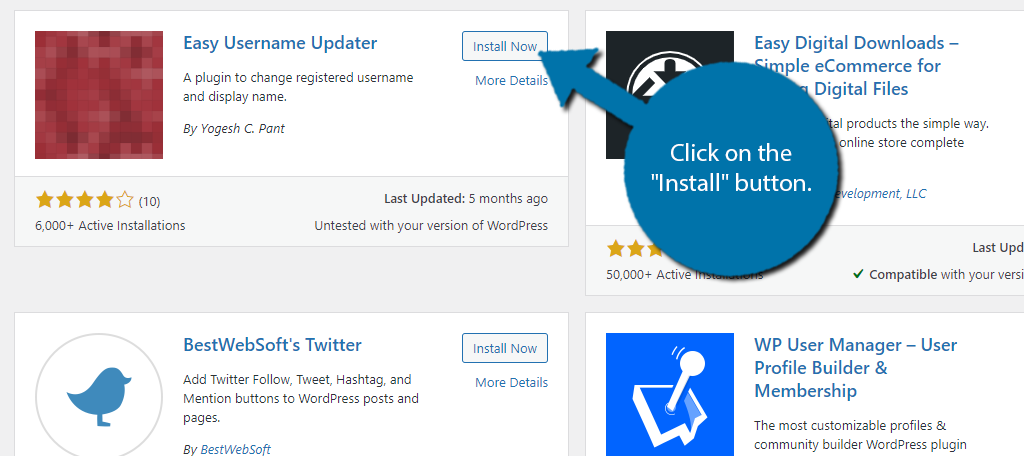
First, install the Easy Username Updater. To do so go to the plugins area of WordPress and add a new plugin. Search for Easy Username Updater and click on the “Install” button.
Finally, activate the plugin for use.
Step 2: Update Username
The plugin is very easy to use and takes less than a minute to change.
Click on Users and select the Username Updater.
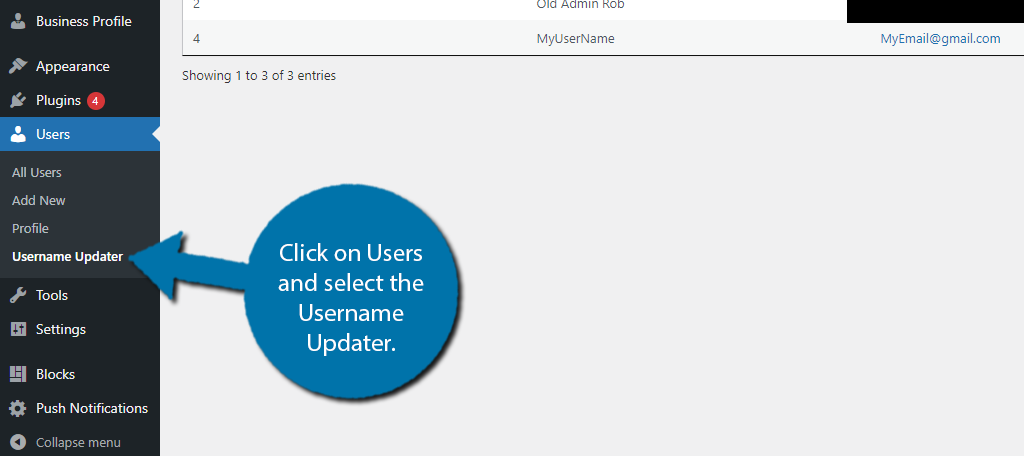
Here, you will see a full list of all users and the emails associated with them. Click on the “Update” option to begin updating that account.

Enter the new username into the text box.
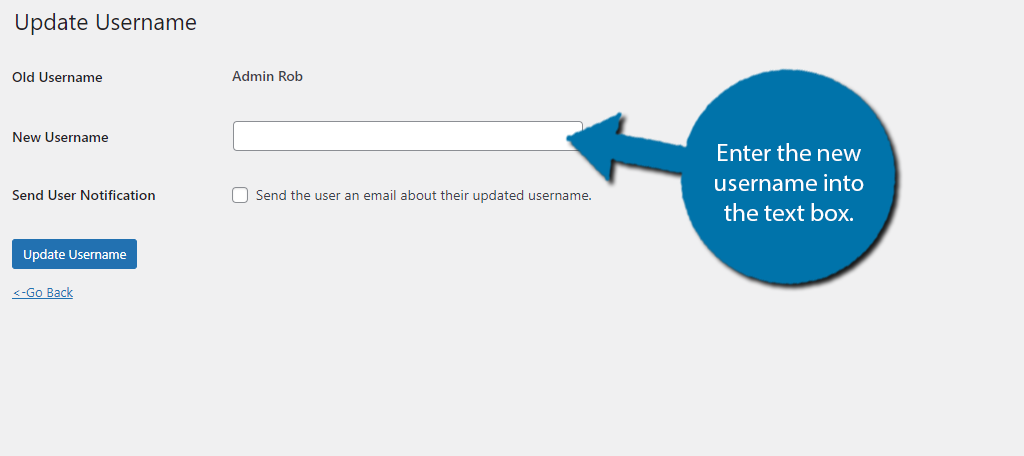
Click on the “Update Username” button to save the new name. Congratulations on changing your WordPress username.
See, this plugin makes it quick and easy to make adjustments on WordPress user accounts.
Keep Your Website Professional
While all businesses are different, the vast majority of them operate in a professional setting. This means the tone in messages, content, and all forms of communication are always professional, and your username is no exception.
However, not every business needs the same level of professionalism.
For instance, if you run a family restaurant, just being kind and courteous is more than enough.
Keep in mind usernames are only one part of creating a professional website. You need everything on your website to have the same professional tone, while not ruining the already-established attitude of the website.
Being professional creates a website that other entities may want to advertise their product on.
Why did you decide to change the username on your admin account? Does your new username sound better for business?

