Pagination is a great way of breaking up larger pieces of content into smaller and more manageable pieces. It can also help improve site navigation. Luckily, there are several ways to add pagination in WordPress.
Of course, how you choose to use it may require specific tools, as pagination allows you to do a variety of things. For example, you could take a larger post and break up the sections into their own pages.
Alternatively, you could take similar posts and make each one its own page. There are a lot of options and ways to go about using the feature, but luckily, it is rather easy to add if you have the right tools.
Today, I will demonstrate how you can add pagination to your WordPress site.
Method 1: Using WordPress Tools
One way to add pagination in WordPress is to use the default options in WordPress. While many people may think of pagination as 1,2,3,4…and so on, that is just one form of it.
WordPress posts, by default, already have a simpler more modern approach to pagination. When you get to the bottom of a post, you will usually see options for you to view the next or previous post, which is another form of pagination.
Think about it, you reach the bottom of a post and have the option to go to another page. It’s worth mentioning that this feature, and pagination in general, is handled differently by various themes.
As such, refer to your theme documentation to see if they have any pagination options. If you have a premium theme, consider contacting support to ask them about it. There is also more traditional pagination, which I will now show.
Step 1: Access the Settings
The first step is to visit the Reading Settings of WordPress. This is easy to do as you just need to click on Settings and select the Reading option.
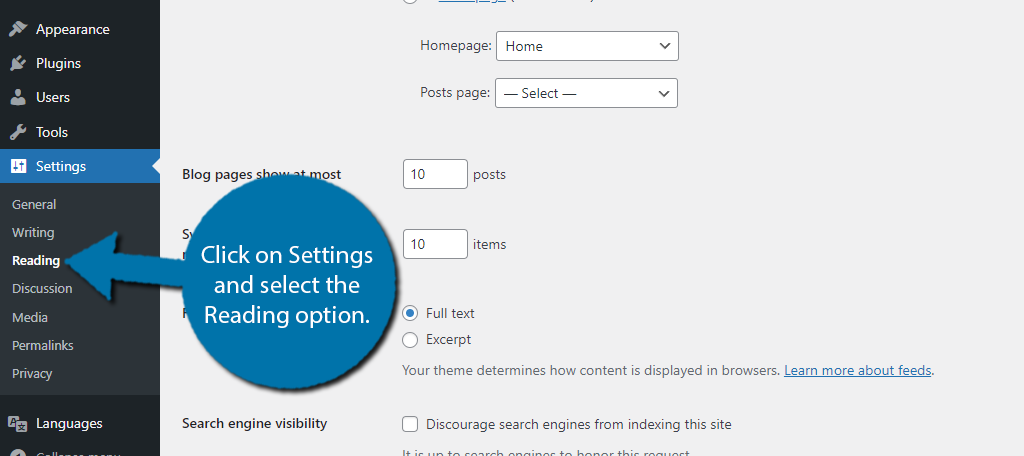
This section of WordPress contains settings related to your Homepage, post content, and search engine visibility.
Step 2: Configure How Many Posts Appear
By default, the homepage will show your most recent posts. And it will display 10 of them. However, once you exceed 10 posts on your blog, it will begin creating pages (1,2,3,4, etc.) that users can click on to see more posts.
Important Note: If you use a static page as a homepage, this method will not work for you. Instead, refer to method 2.
This is how to add pagination in WordPress without a plugin. Now as an example, I am setting the value to 1. This will make every single post its own page, thus, the number of pages will equal the number of posts on your site.
Feel free to enter any value into the “Blog pages shown at most” box, but I would advise making it a number between 1 and 10.
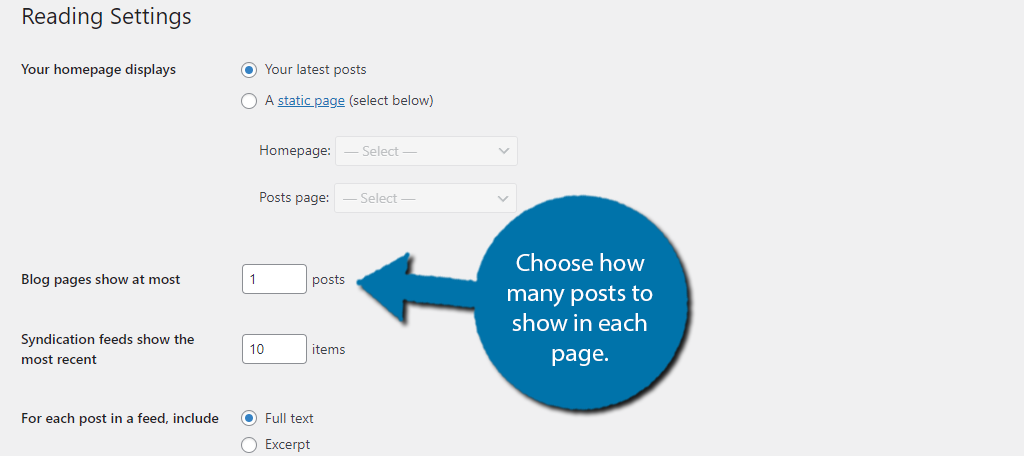
The number you put into this box is the number of posts that will be visible on each page.
Don’t forget to scroll to the bottom and save the changes.
Step 3: Enjoy
All you’ll need to do now is go to your homepage and you will be able to see pagination in action. Again, since I chose 1 as my value, I have as many pages as I do posts.

And that’s it. Again, some themes may have additional options when it comes to pagination that you can find in the theme customizer, or if you are using a block theme, in the site editor.
Refer to your theme documentation for details concerning pagination.
Method 2: Using Pagination by BestWebSoft
One of the best parts of WordPress is the huge library of plugins you can choose from. Naturally, there are a lot that can help you add pagination to your WordPress site. One such tool is the Pagination by BestWebSoft plugin.
This plugin specializes in adding pagination to all of your major WordPress areas like posts, pages, and even the archives. The tool itself is quite easy to use, as it allows you to choose exactly where it is enabled.
Step1: Install Pagination by BestWebSoft
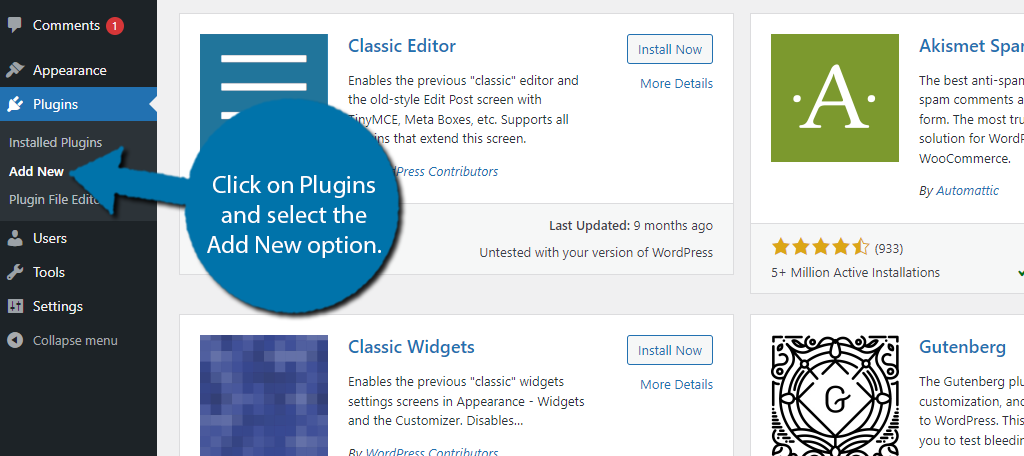
Let’s start by clicking on Plugins and selecting the Add New option on the left-hand admin panel.
Search for Pagination by BestWebSoft in the available search box. This will pull up additional plugins that you may find helpful.
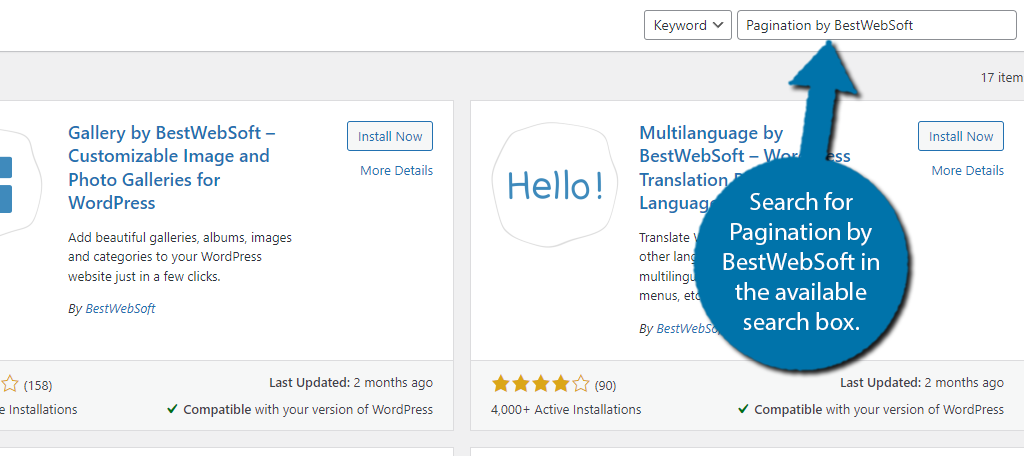
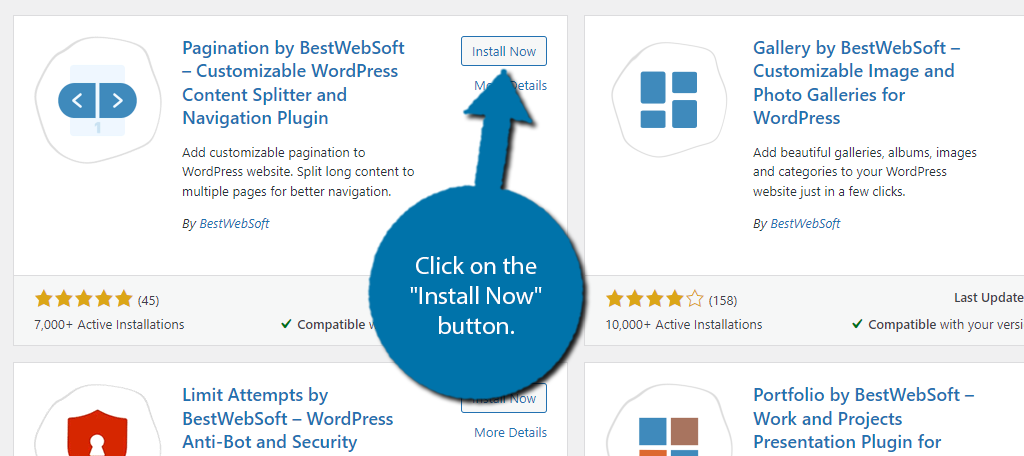
Find the Pagination by BestWebSoft plugin and click on the “Install Now” button and activate the plugin for use.
Step 2: Customize the Settings
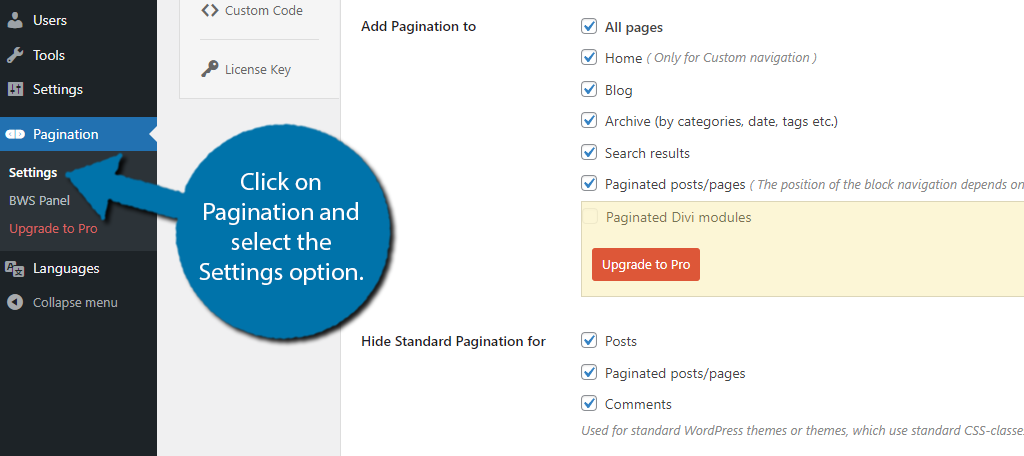
While the plugin is ready to be used upon activation, it is worth going through the settings and customizing them to your needs. To do this, click on Pagination and select the Settings option.
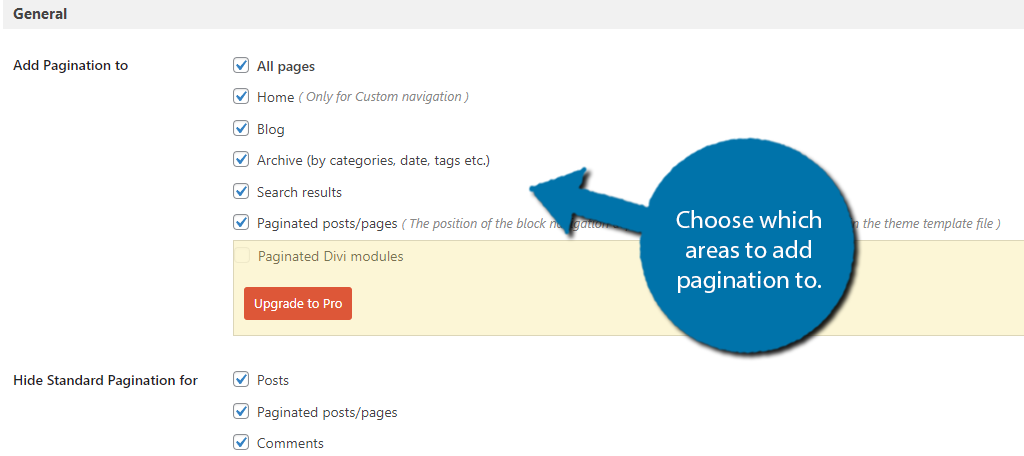
The first settings you find are the most important as they dictate what content pagination will be available. By default, every option is enabled. If you wish to disable it in certain areas, simply uncheck the box for that respective area.
The rest of the settings are easy to configure. I won’t go into detail, but some of the options include hiding pagination, creating nofollow links, pagination position, pagination display options, and more.
Some of the options are locked behind the Pro version of the plugin, Thus, you will need to upgrade to access them.
There are some other tabs you can explore, but there is no point if you do not have the Pro version. You’ll either find options for the Pro version, like adding custom CSS, or find the link to the Pro version.
Be sure to save any changes you make.
And that’s all there is to the plugin. The pagination will automatically be added to your WordPress site. It’s an easy way to add bulk pagination capabilities to WordPress. That said, it is not the only plugin you can use.
Other Plugins to Note:
WordPress has a lot of plugins available that have varying options for pagination. Perhaps the most difficult part is finding the ones that work for you.
Here are a few that I found that may be worth considering.
WP-PageNavi

WP-PageNavi is among the popular WordPress plugins with more than 600,000 active installs. It allows users to alter the text within the navigation while offering control over how many posts to display.
One of the reasons why so many people use this platform is because it has its own CSS file. This allows developers to create a unique navigation display. That is, as long as you know how to code.
It’s worth pointing out that this is a more advanced plugin as it offers several coding options to give you greater control over filter options and whatnot. As such, it may not be the best option for beginners.
WP-Paginate

WP-Paginate is another excellent choice for adding pagination to WordPress. It delivers a flexible system that is customizable. It also supports custom CSS coding for those who know how to make those adjustments.
This plugin comes with a few basic settings including where to display the links and whether to use blue or grey buttons. As such, it is a great choice for beginners due to its simplicity.
Add Pagination to WordPress Today
As you can see, it is rather easy to add pagination to WordPress using the built-in features, but plugins provide another avenue that some developers prefer. They give the user far more customization options than ever.
Adding pagination can help with site navigation and more importantly, with your SEO. That said, there are certain rules you must follow to get the best results when it comes to SEO.
I hope you found this tutorial helpful in learning how to add pagination to WordPress
Why did you want to add pagination in WordPress? Have you noticed a rankings boost since adding pagination to your site?

