Do you want to create Google Web Stories in WordPress? If so, you’ll be glad to know it is completely possible to do so in WordPress. Beginning on May 1st, 2020, the AMP team rebranded from AMP Stories to Web Stories.
This exciting new format was immediately adopted by Google for a variety of reasons. And adopting them now is a great way to give your website a traffic boost.
Today, I will demonstrate how to create Google Web Stories in WordPress.
What Are Google Web Stories?
Google Web Stories are a storytelling format that can appear in Google search results. They include a tap-through experience that is optimized for mobile units but looks great on any device. The main advantage being that they appear to load almost instantaneously.
As a result, Google Web Stories are great for improving SEO and giving your traffic a boost.
Any website can take advantage of them, and since WordPress already powers over one-third of the internet, you can bet it can create a Google Web Story.
Step 1: Installing Web Stories
If you were looking to install the Web Stories plugin in WordPress the traditional way, you might notice it is not in the plugin directory. Currently, the plugin is still in beta form, and like all plugin betas, you can not install it from the directory.
However, don’t worry, it’s almost just as easy to do.
Visit the Google Web Stories plugin beta page and click on the “Download the Beta” button.
Note: This website contains a lot of useful information, and I highly suggest reading through it to get a better understanding of Web Stories. It even includes Web Stories examples!

Doing so should add a web-stories.zip file to your download folder on your computer.
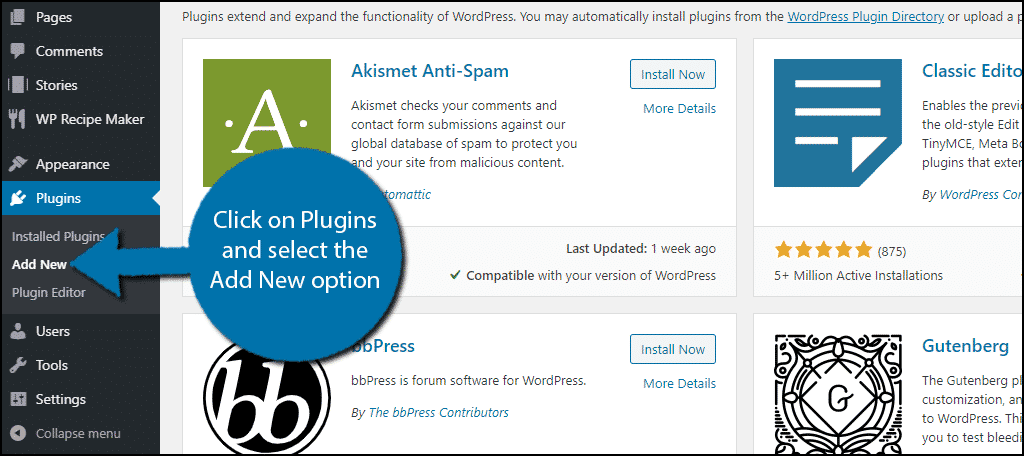
Go to your WordPress website, click on Plugins, and select the Add New option.
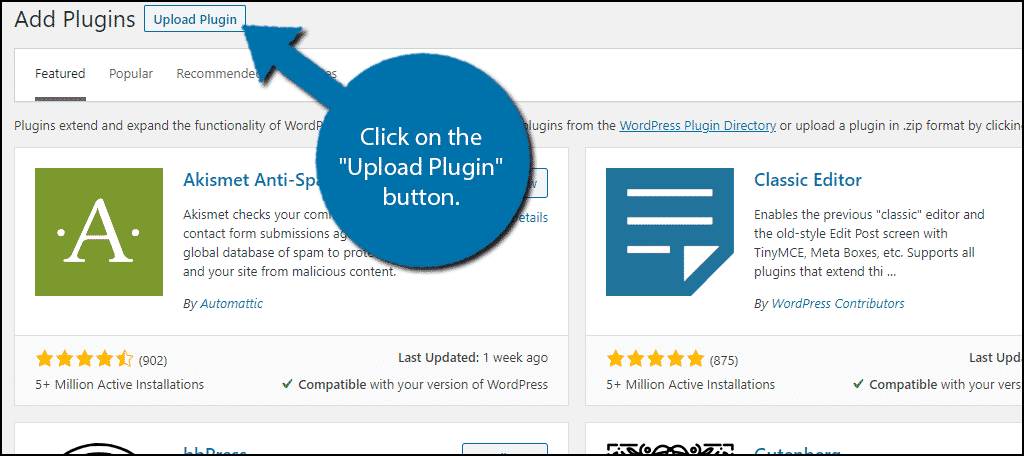
Click on the “Upload Plugin” button at the top of the page.
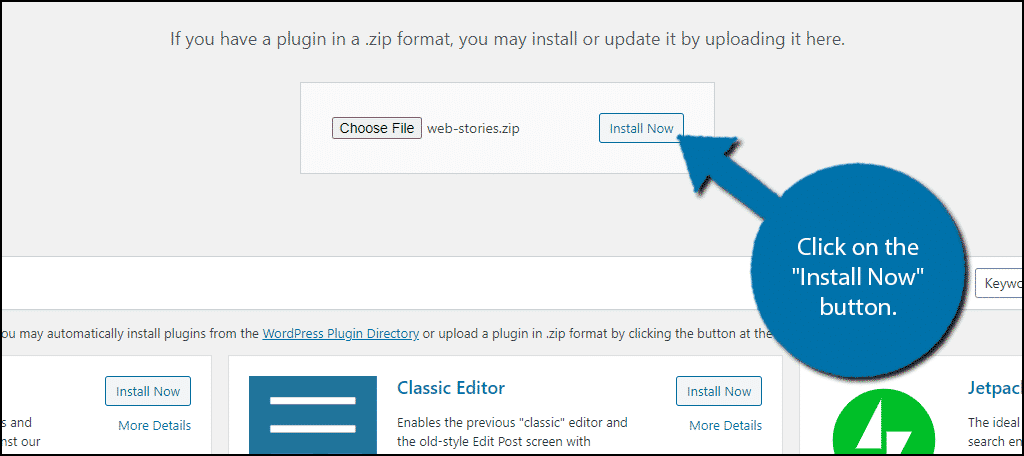
Click on the “Choose File” button and select the web-stories.zip file in your download folder. Once the file is added, click on the “Install Now” button to being installation.
The plugin will now begin installing. When it is done, click on the “Activate” button to enable it in WordPress.
Step 2: Creating Web Stories in WordPress
With the plugin installed, you are ready to start creating stunning Web Stories in WordPress.
Click on Stories and select the Add New option.
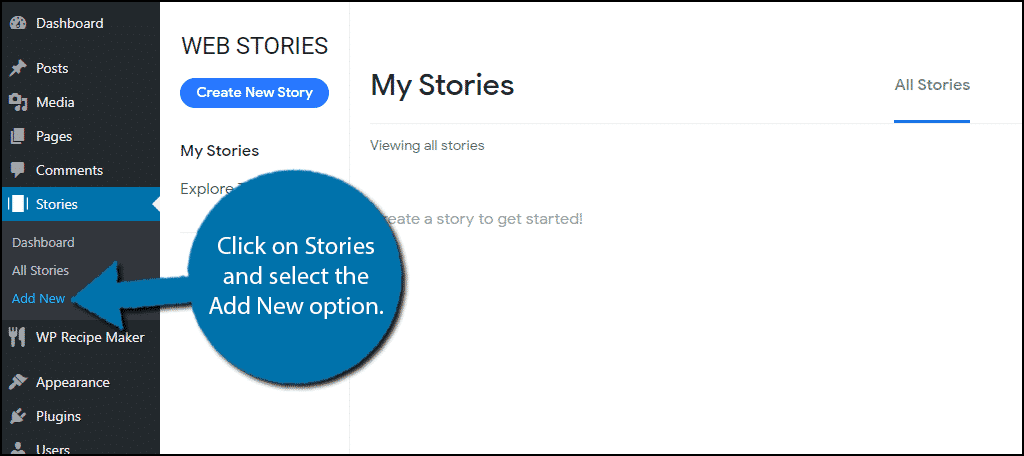
This will open up the story editor. However, before you get started, here are some tips before you get off to a good start.
Web Stories are very similar to a slideshow. You create a slide with an image and text. You can use any images saved in your media library and add simple shapes and text to the image to create a story.
Google recommends making your Web Stories between 10-20 pages for the best result, but you can experiment with that number. There are two things Google has already made clear:
- Do not include crucial/necessary information in an out link (a link that takes a visitor off of your Web Story).
- Do not include an out link on every page in the story or multiple links on a single page.
The stories should be self-contained to meet Google’s standards and get the best results.
High-quality images are crucial to success as well. Since each page generally consists of one main image, you need to make sure it looks good and that the text is readable.
With this in mind Let’s go over how the Web Stories Editor actually works.
Step 3: Using The Web Stories Editor
The Web Stories Page editor is very simple to use.
On the left-hand side, you will find 3 tabs. The first tab allows you to take images from your Media Library and add them to your pages. You can add multiple images to one page. Simply click on the image and it will be added.
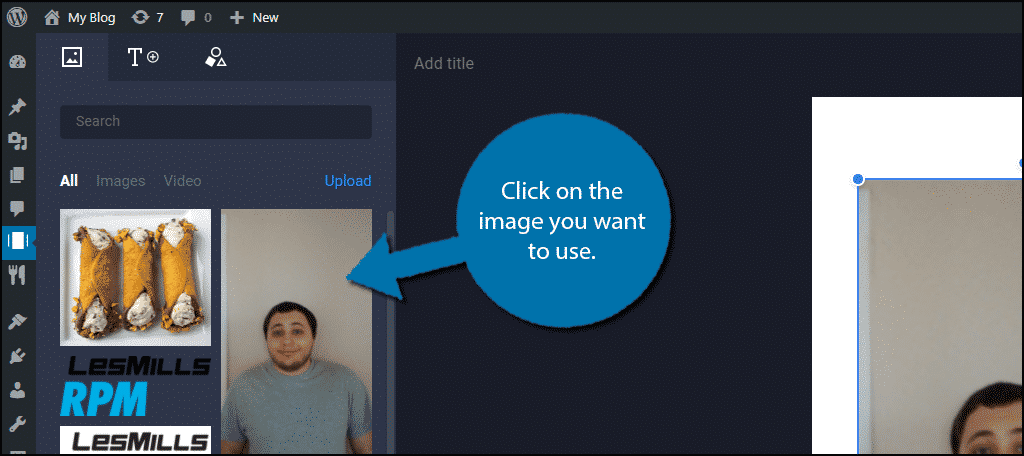
You can drag this image anywhere on the template and resize it as you see fit.
The second tab is all about text options. You can add headings, subheadings, or basic paragraph text. The text is fully customizable including the font type, size, and color.
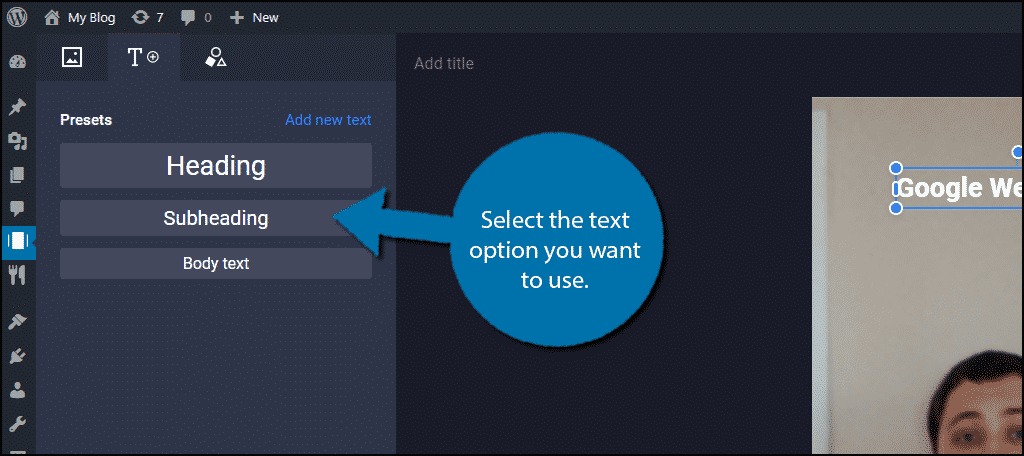
These settings can be found on the right-hand side:

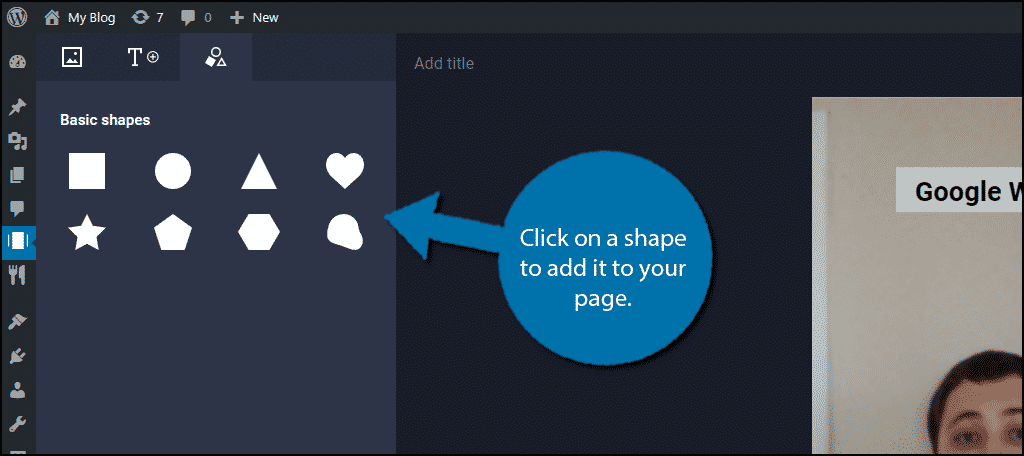
The final tab adds basic shapes. These are great for adding text bubbles on to images or helping text stand out from the image. Similar to images, just click on them and you can drag them anywhere.
All of the items you add to a page are 1 layer. If you have used Photoshop, you should already understand how layers work. But if not I’ll explain it a bit.
Layers can be found on the bottom right-hand side of the editor.
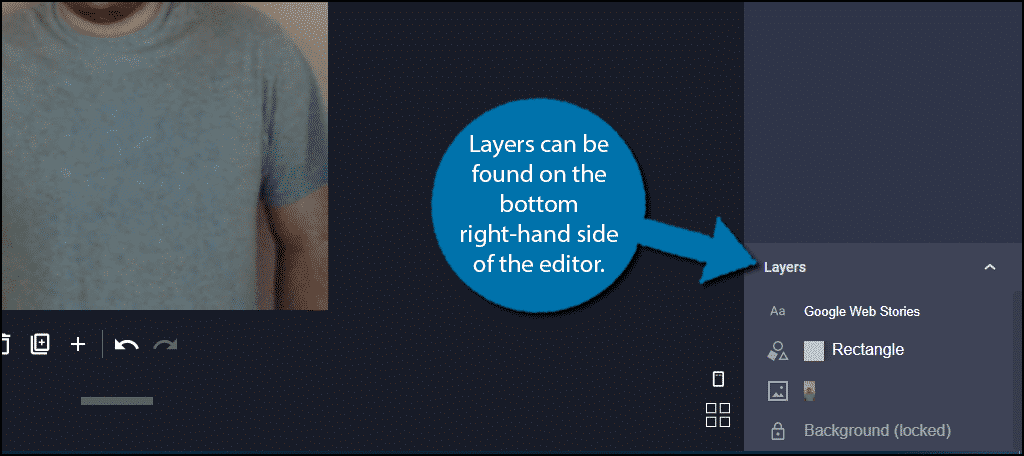
To put it as simple as possible, layers allow you to place images or text on top of other images or text. This allows you to add things like text bubbles, funny mustaches, items to people’s hands, and much more.
Learning how layers work is crucial to making a good Web Story.
Note: This is how memes are made.
Underneath the actual page, you will see a few options you can select. These include delete page, duplicate page, new page, undo, and redo.

Lastly, you will see three buttons at the top right of the editor that include Save Draft, Preview, and Publish. Use these to view and save your work.
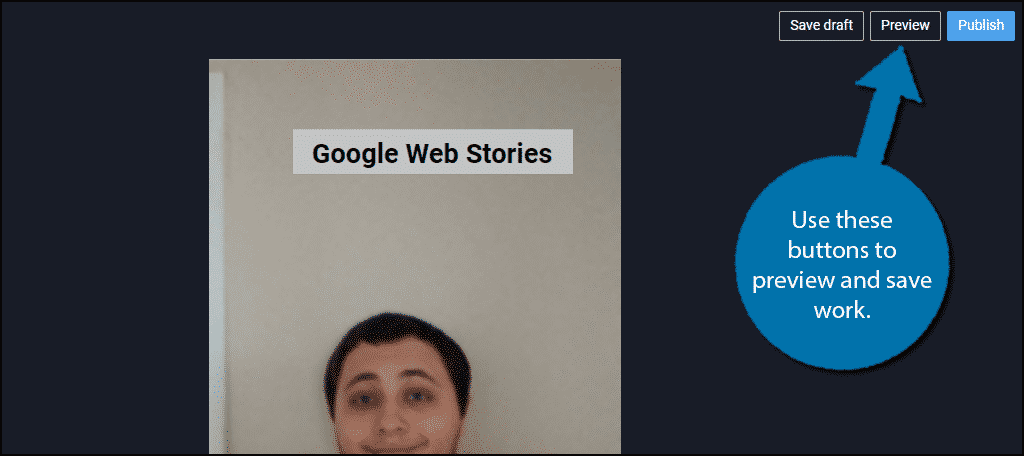
Publish a story to learn how to place it in the next step.
Step 4: Adding A Story to WordPress
Now all that’s left is to actually add your story to WordPress. Luckily, this is pretty standard.
Go to any existing post or page and add the Web Story block to it.
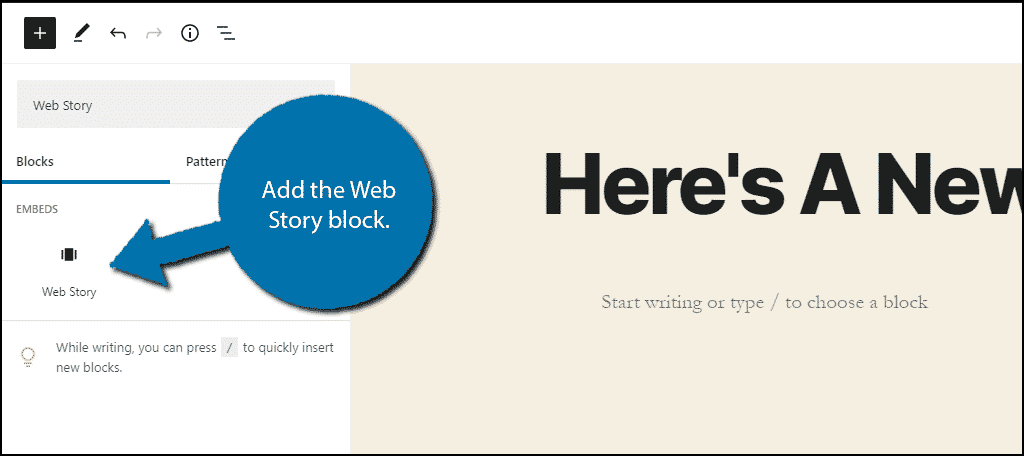
You will now need to add a URL to the Web Story. You can find this by clicking on the “Preview” button in the Web Story editor and copying the URL.
Paste the URL and it will appear in the post or page.

Congratulation on learning how to make Google Web Stories in WordPress. As the plugin gets more updates and comes out of beta, expect more features to be added.
Consider Photo Editing Software
The Stories editor is great for putting things together, but it does not let you create images from scratch or modify them very far.
Instead, if you want to be successful, you are going to want to seriously consider using photo editing software like Photoshop. This will allow you to create far more images and objects that you can use as layers on your stories.
A great example of this may be custom text bubbles. These have a place on most pages, after all, you are telling a story. These can come in different colors shapes, and sizes.
Even more importantly, this will help make sure you are not getting into legal trouble. Image copyright is no joke. Your website will suffer greatly if you steal images. Creating your own is safer and allows you to be more creative.
What feature would you like to see the Google Web Stories plugin add? How do you plan to utilize web stories in WordPress?

Robert – does this article replace the “Integrate Google AMP with WordPress” one?
https://www.greengeeks.com/tutorials/article/how-to-integrate-google-amp-with-wordpress/
Thank you!
Hello Rick,
It is not a replacement for that article. This tool is for those that want to create web stories.