Forums are a great asset on any website. They allow users to ask questions, discuss topics, and just interact with staff and other users. And they are still incredibly popular, just look at Reddit. You can easily add one to your WordPress site with the wpForo Forum plugin.
The plugin is easy to use, responsive, and lightweight. As a result, it ends up being one of the best forum plugins WordPress has to offer.
Today, I will demonstrate how to build a forum section on your website with wpForo.
This plugin is for:
WordPress 5.9
Plugin: wpForo Forum v1.9.9.1
Why Add A Forum in WordPress?
I think a better question might be why not add a forum in WordPress because there are a ton of benefits.
For starters, it gives your visitors a way to communicate and interact with each other and staff members on your website. This gives you a great area to not only build a relationship with users but also make announcements.
Many companies in 2022 rely heavily on social media to interact with users, and there’s nothing wrong with that. But keeping track of multiple social media accounts can be very…involved. Forums give you a better environment to do so.
Of course, interacting with your visitors is only one side of the coin. Let’s not forget that they can interact with each other.
For example, someone might have a question about a product or service. Instead of waiting for your staff to assist them, having a knowledgeable and helpful community providing aid is extremely beneficial.
As a result, creating a help forum in WordPress is a great way to improve customer relations in just about every way.
How to Add Forums in WordPress with wpForo
Step 1: Install wpForo Forum
If you are looking for a quick way to set up forums in WordPress, look no further than wpForo. It might just be the best forum plugin in WordPress.
In just a few minutes, you’ll be able to set up a fully-functioning forum that your userbase can use for just about anything.
And you won’t even break a sweat in the process.
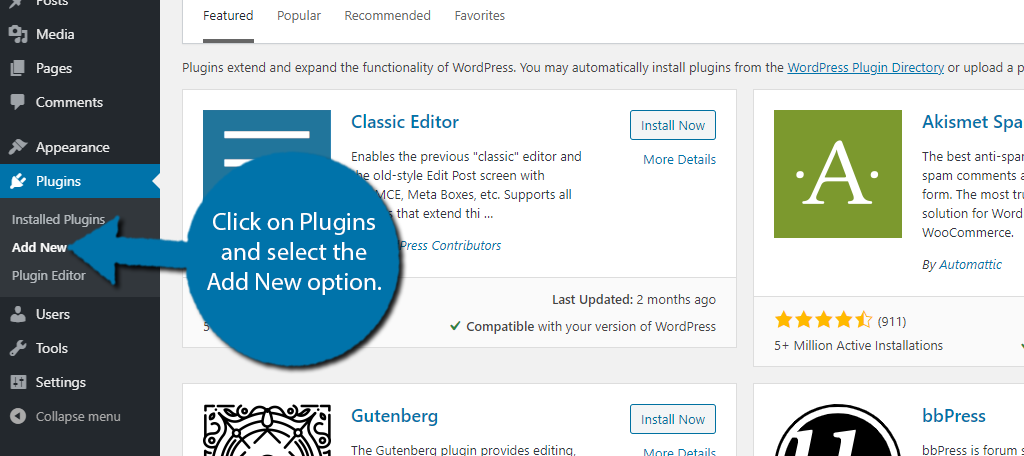
Let’s start by clicking on Plugins and selecting the Add New option on the left-hand admin panel.
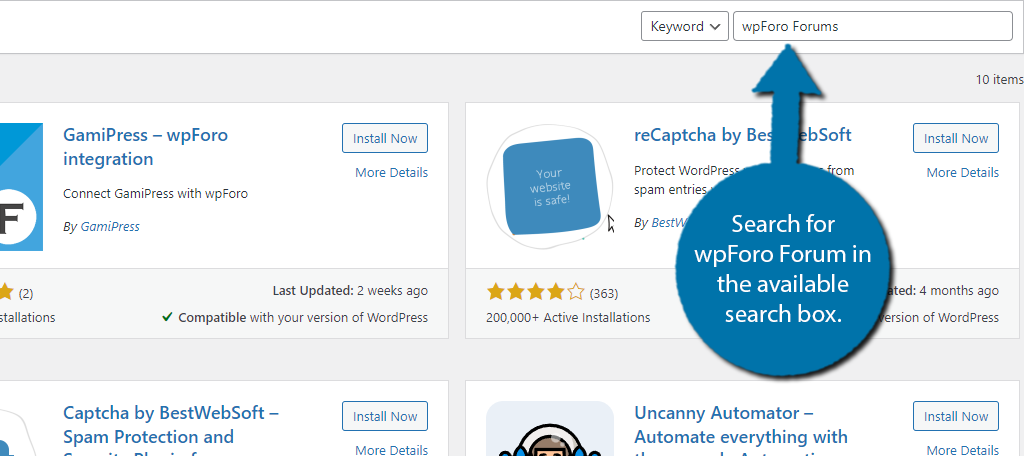
Search for wpForo Forum in the available search box. This will pull up additional plugins that you may find helpful.
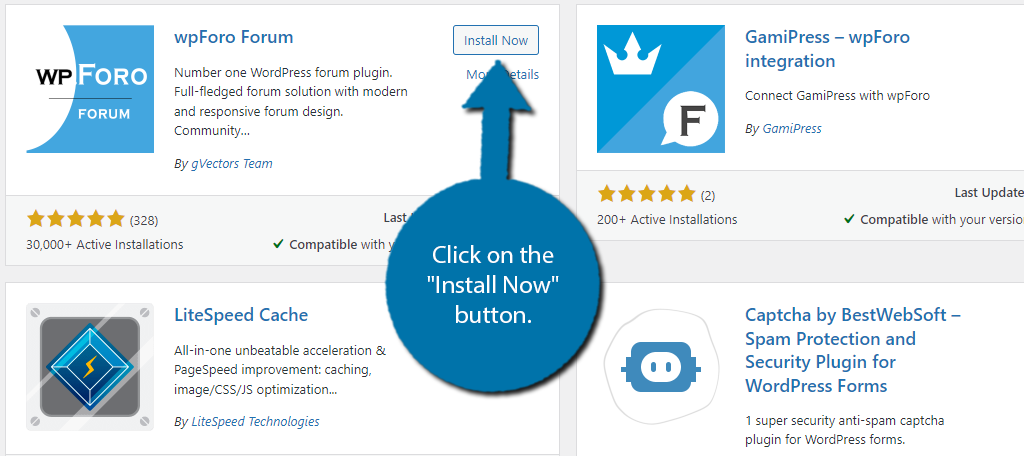
Scroll down until you find the wpForo Forum plugin, click on the “Install Now” button, and activate the plugin for use.
Step 2: Configure the Settings
The plugin offers a robust selection of settings that you can configure to really get the forum working exactly as you want. Now the good news is that the default options will work for most sites.
Simply click on Forums and select the Settings option.

There are a total of 9 tabs and each is full of settings you can configure. And frankly, it can be a bit overwhelming. Again, the default options are pretty solid, but I still recommend reading through all of the settings and making any changes as you see fit.
Due to the sheer size of these settings, I will not be going through them in detail, but the plugin does a good job at providing a description of what each setting does, so it shouldn’t be very difficult to read through them.
Step 3: Create Forums
By default, the plugin will generate a main category and main forum section. These are generic placeholders that you should fill out.
You also have the option to add more forums.
For example, if you want a forum topic of “book” and then have “classical” as a subforum, this is where you would do it. Just be sure to avoid adding too many subforums as it can hurt navigation.
That said, it is perfectly acceptable to only have a few subforums, as some websites don’t need many.
Click on Forums and select the Forums option.
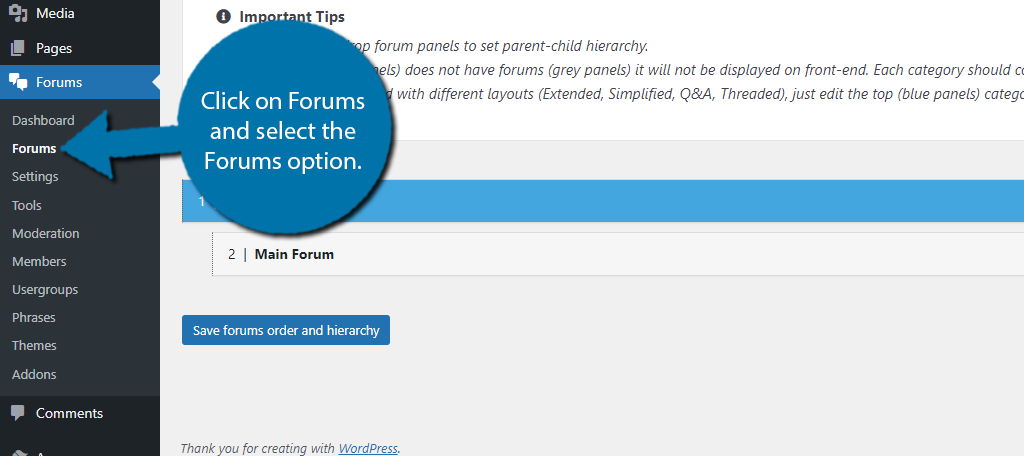
This is where you will find those default forums I mentioned earlier. This may be a little confusing at first, but I assure you it is easy.
Essentially, every category needs a main forum. In this case, the default has a main category and the main forum.
Simply click on the edit option to begin adjusting it for your site.
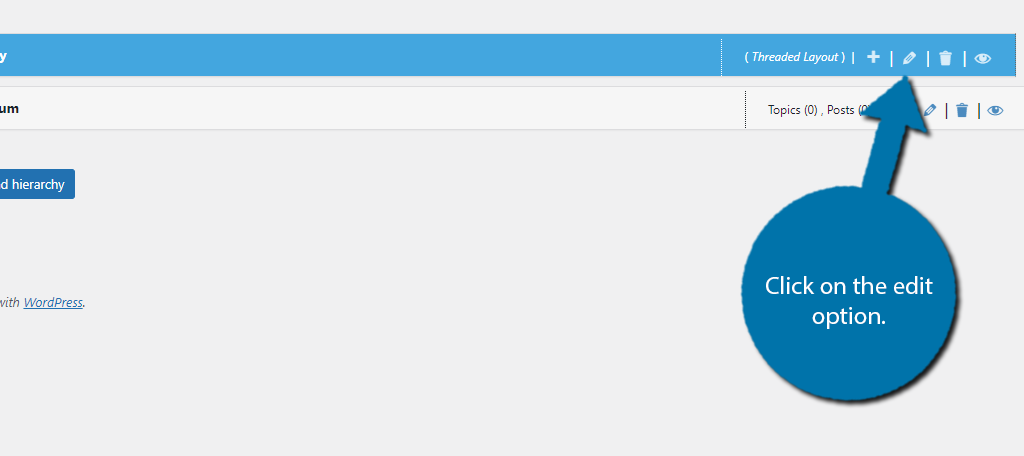
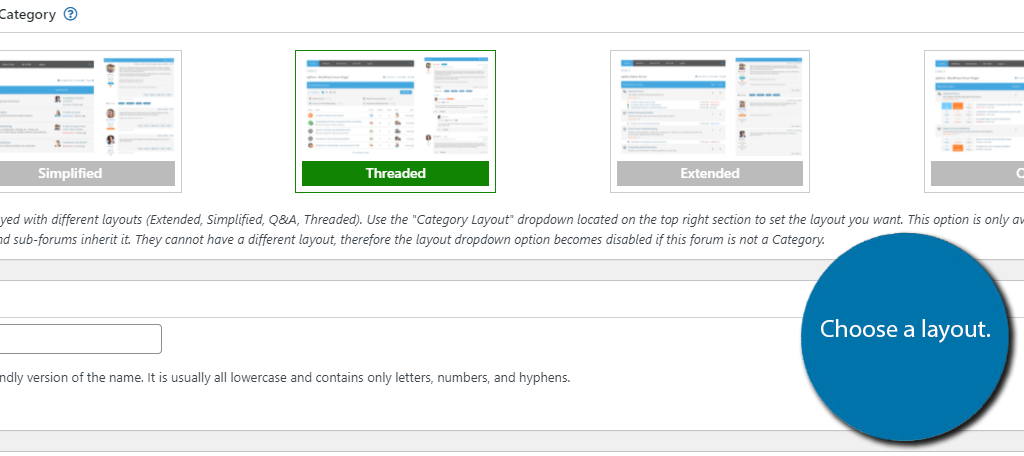
There’s not much to editing these. At the top, enter the category or forum name and add a description. Below this, you can edit the layout. By default, you are using a “Threaded” layout, but there are four others you could use.
For example, if you are creating a help forum, you probably want to pick the “QA” layout.
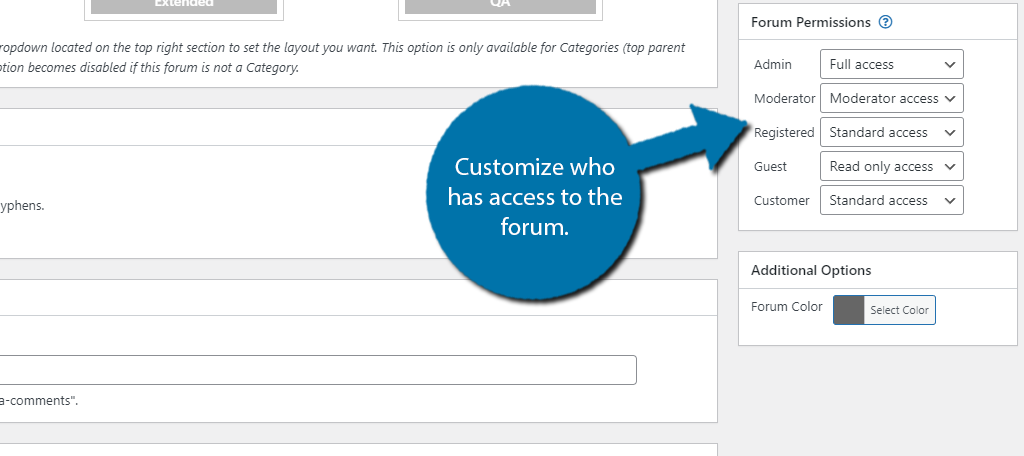
On the right-hand side, there is a Forum Permissions section. Here, you can set up who can use these forums. In some cases, you may want this to be for employee use only.
Simply pick the settings that fit your needs.
After that, double-check everything and click on the “Update” or “Publish” button.
Use the “Add New” button and repeat these steps to create forums and categories.
Step 4: Organize the Forums
Now you need to classify them as such, which is very simple. You can actually click and drag a category and forum into the appropriate space.
A category will always be blue, while a forum under that category will be grey. One thing that makes this slightly unique is that on top of traditionally dragging the items vertically, you can also do so horizontally to make them dependent.
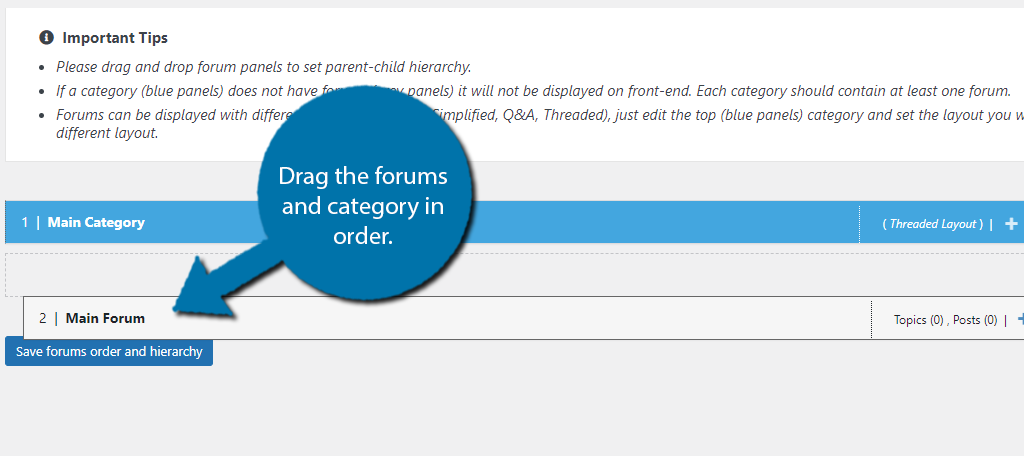
Save the changes to finish putting your forums together. You can edit these at any time.
Step 5: Customize the Usergroups
You should also take moment to customize the “Usergroups” section. This is how your visitors will be displayed in the forums. While the default will work, you should customize it to make it feel unique and to ensure the color choices match your website.
Click on the Usergroups option.
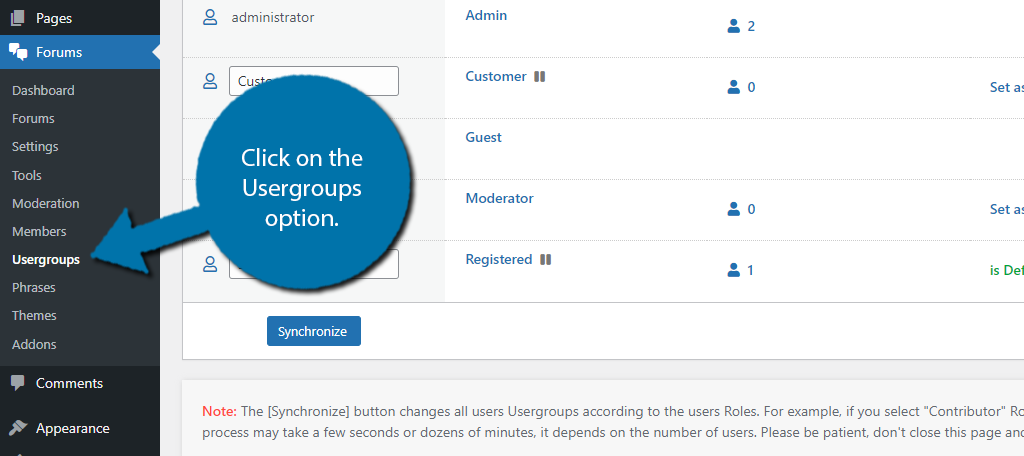
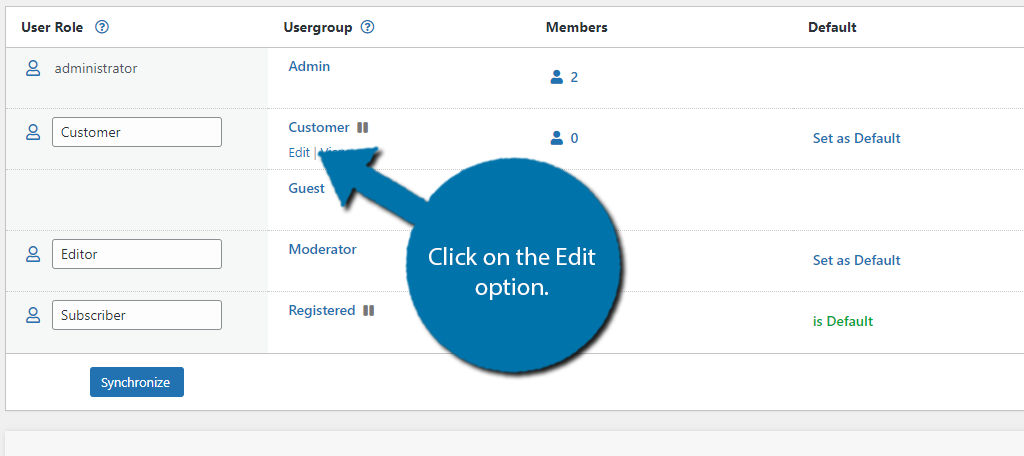
There’s not much to editing the userbases, so rest easy. Hover over the role you want to edit and click on the Edit option.
While this screen might look crazy, it’s pretty straightforward. At the top, enter the usergroup name and user role. Below this is where it will scare people; there are 35 checkboxes.
These determine what that usergroup has access to, so you just need to check the box when appropriate. For instance, a “Customer” usergroup may not have access to manage the forums, so, don’t check it.
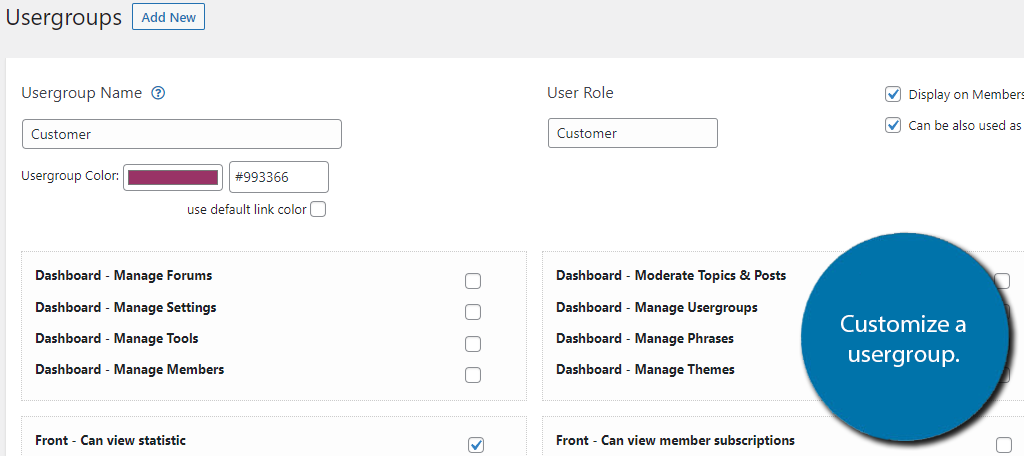
And as always, save your work after making your adjustments.
With that, your forums should be fully customized and ready for use. You can find them by entering yourwebsiteurl.com/community.
Note: You can actually change the URL in the general settings tab, so be sure to use that if you made a change.
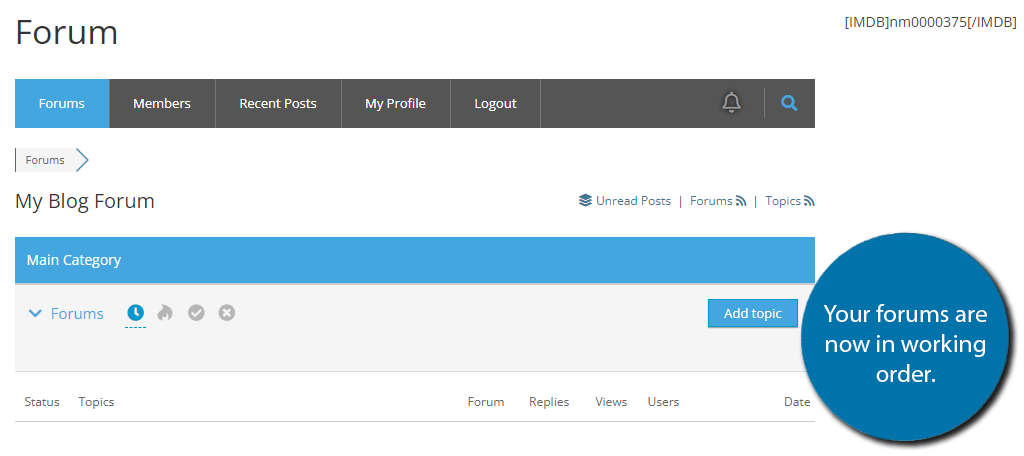
Congratulations on learning how to use wpForo to add forums in WordPress.
Give Your Customers A Way to Communicate With You
Forums are a great way to start and engage in conversations with your user base. And with wpForo, you can easily add them to WordPress. The plugin offers an amazing amount of customization that is often only found in premium tools.
Yet, this plugin is free to use! Start building a forum today to enhance your user engagement and build better relationships.
How easy did you find wpForo to use? Why did you start a forum in WordPress?

