When moving WordPress from one host to another, sometimes information gets lost. Although this doesn’t happen often, you might experience the wrong comment or category count in WordPress.
It can be misleading and confusing to visitors and affect any data you’re collecting regarding those aspects. For instance, a visitor may see you have 0 articles in a category when it may host more than 400.
In this tutorial, I’ll show you how to fix the category count as well as comment data in WordPress after an import.
Before we get started though, understand that this means you’ll need to do a bit of coding work. However, it’s not overly difficult.
Also, note that this fix does not work with PHP 7.
Backing Up Your Site
It’s always a good idea to create a backup of WordPress when making any modifications. In the event something goes wrong, you can easily restore the site.
If you’re not sure how to do this, I suggest using the UpdraftPlus plugin. It’s a great tool that lets you save to your own cloud accounts such as Dropbox or Google Drive.
While I don’t foresee any real problem cropping up from this tutorial, it’s better to be safe than sorry.
Creating Category-fix.php
Today, we’ll create a new file called, “category-fix.php.” There are several ways you can do this:
- Create a Notepad file on your computer.
- Use the File Manager tool in cPanel.
- Use a plugin in WordPress like WP File Manager.
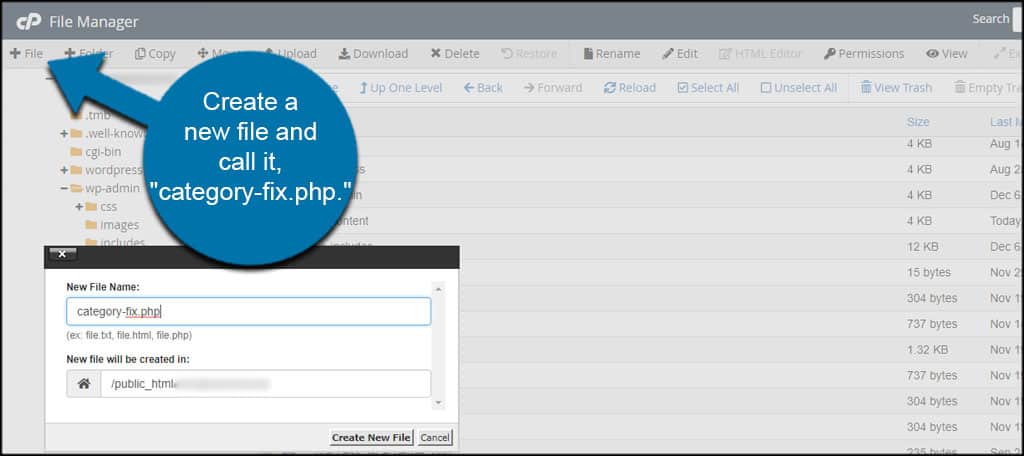
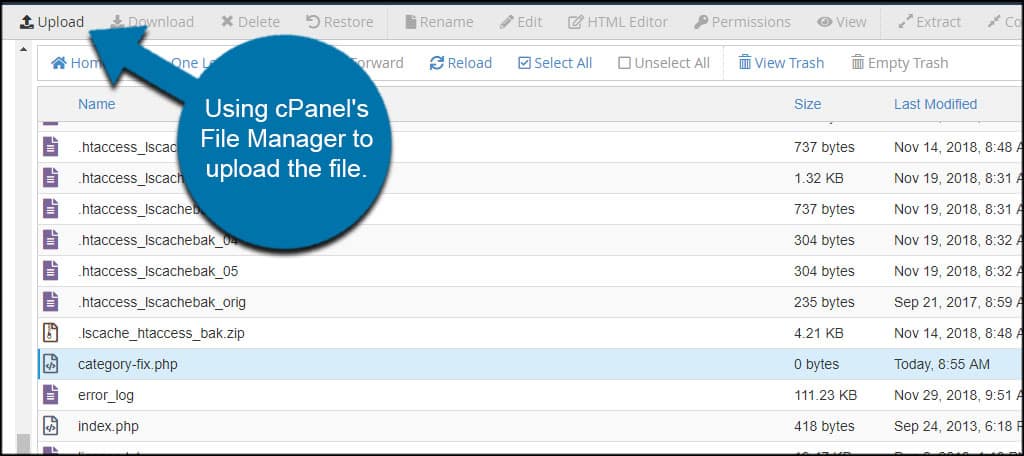
For this tutorial, I’m going to keep it simple and just use the File Manager in cPanel.
In any case, create a new file and call it, “category-fix.php.”
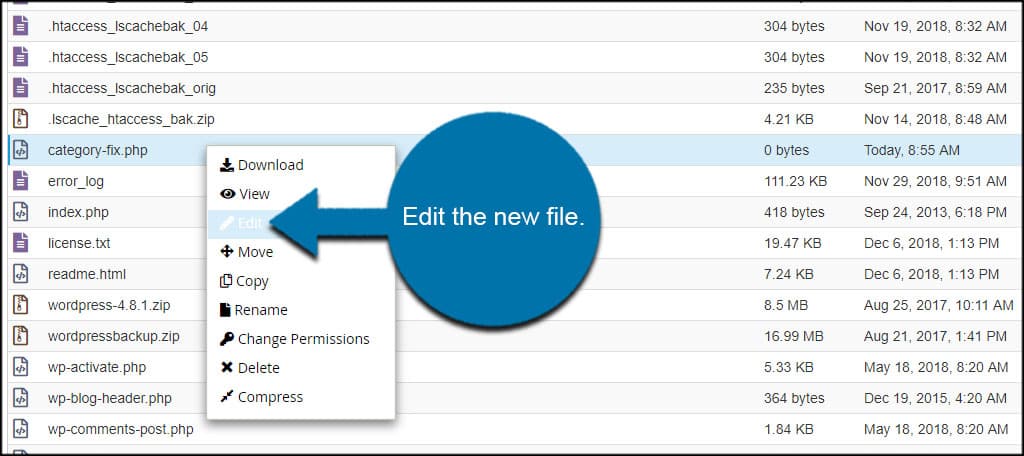
Edit the new file.
Paste this code into the file:[ht_message mstyle=”info” title=”” show_icon=”” id=”” class=”” style=”” ]<?php
include(“wp-config.php”);
if (!mysql_connect(DB_HOST, DB_USER, DB_PASSWORD)) { die(‘Could not connect: ‘ . mysql_error()); }
if (!mysql_select_db(DB_NAME)) { die(‘Could not connect: ‘ . mysql_error()); }
$result = mysql_query(“SELECT term_taxonomy_id FROM “.$table_prefix.”term_taxonomy”);
while ($row = mysql_fetch_array($result)) {
$term_taxonomy_id = $row[‘term_taxonomy_id’];
echo “term_taxonomy_id: “.$term_taxonomy_id.” count = “;
$countresult = mysql_query(“SELECT count(*) FROM “.$table_prefix.”term_relationships WHERE term_taxonomy_id = ‘$term_taxonomy_id'”);
$countarray = mysql_fetch_array($countresult);
$count = $countarray[0];
echo $count.”<br />”;
mysql_query(“UPDATE “.$table_prefix.”term_taxonomy SET count = ‘$count’ WHERE term_taxonomy_id = ‘$term_taxonomy_id'”);
}
$result = mysql_query(“SELECT ID FROM “.$table_prefix.”posts”);
while ($row = mysql_fetch_array($result)) {
$post_id = $row[‘ID’];
echo “post_id: “.$post_id.” count = “;
$countresult = mysql_query(“SELECT count(*) FROM “.$table_prefix.”comments WHERE comment_post_ID = ‘$post_id’ AND comment_approved = 1″);
$countarray = mysql_fetch_array($countresult);
$count = $countarray[0];
echo $count.”<br />”;
mysql_query(“UPDATE “.$table_prefix.”posts SET comment_count = ‘$count’ WHERE ID = ‘$post_id'”);
}
?>[/ht_message]
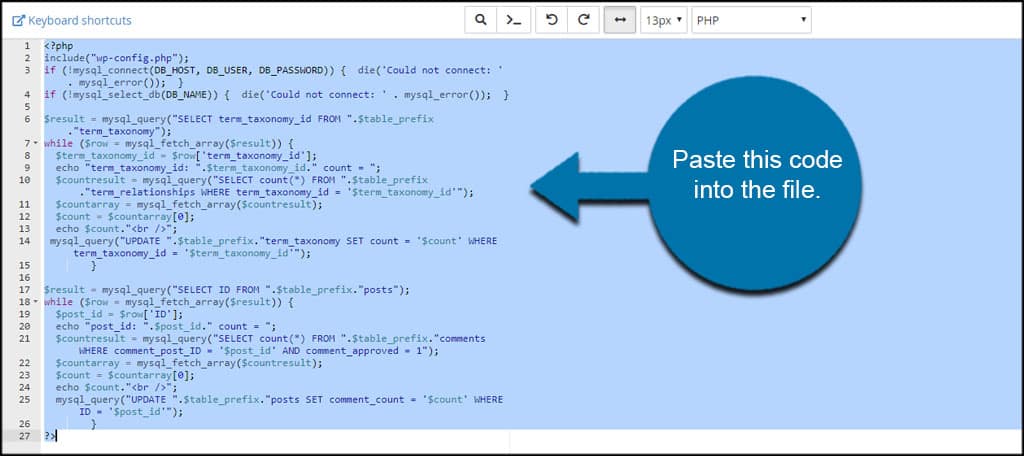
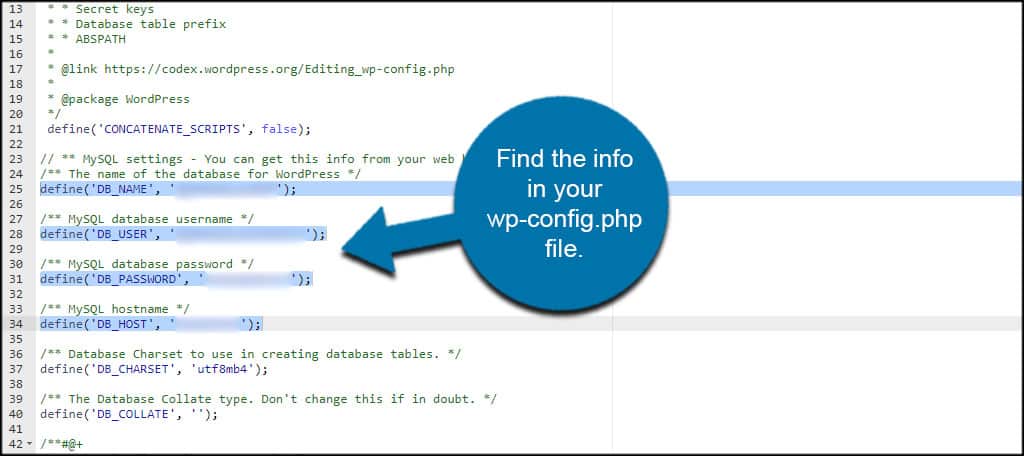
Replace the “DB_HOST, DB_USER, DB_PASSWORD and DB_NAME” with your own credentials. This will be the information for accessing the WordPress database.
Be sure to include the single-quote character before and after the host, user, password and database name.
For instance, the DB_HOST may look something like this:[ht_message mstyle=”info” title=”” show_icon=”” id=”” class=”” style=”” ]’localhost'[/ht_message]
If you’re not sure what this information is, you can find it in your wp-config.php file.
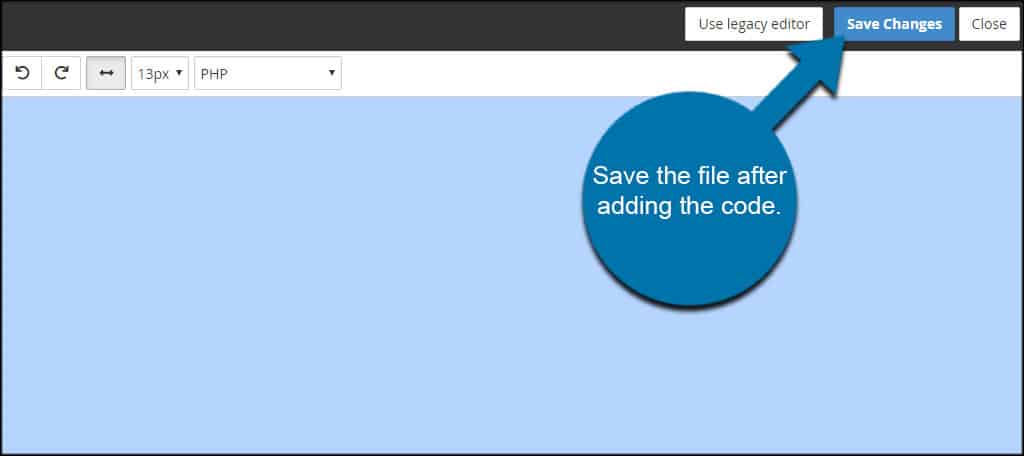
Save the file after adding the code.
If You’re Using Notepad or Other Text Editor…
After adding the code to something like Notepad, you’ll obviously save the file as “category-fix.php.” Then, you’ll want to use an FTP program like FileZilla or cPanel’s File Manager to upload the file.
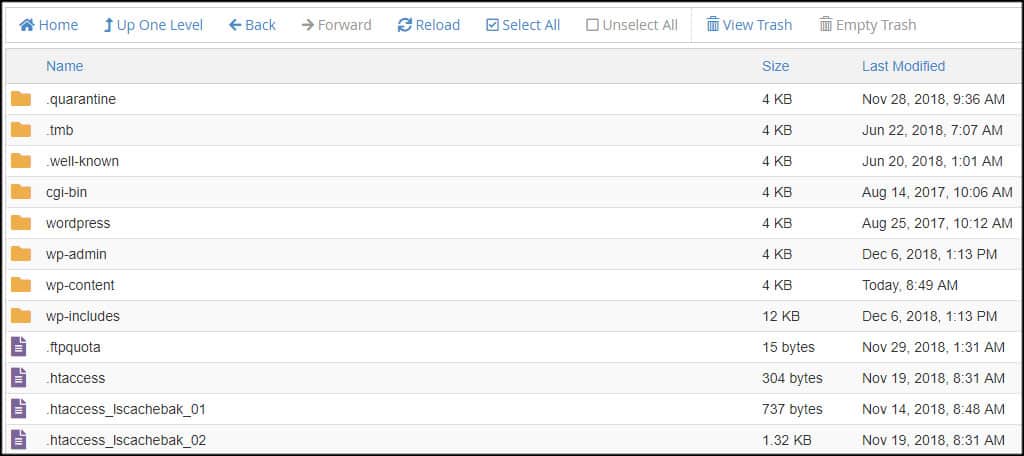
When uploading the file, make sure you’re saving it in the root directory. This is the primary folder of your actual website. You should see similar folders as shown in this image:
Running the File
Open a web browser and access the file. The address will look something like this:[ht_message mstyle=”info” title=”” show_icon=”” id=”” class=”” style=”” ]https://yourwebsitename.com/category-fix.php[/ht_message]
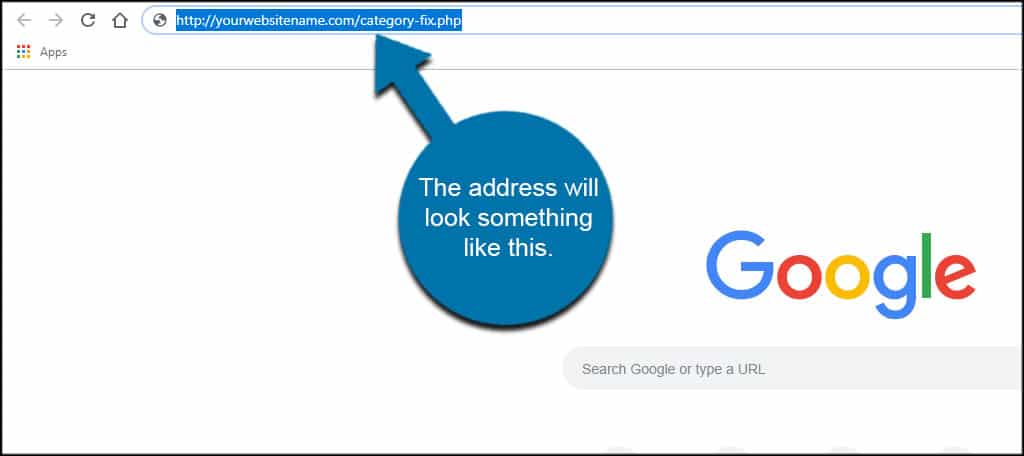
Of course, you’ll want to change “yourwebsitename.com” to your own domain.
The file will then scan through the database and correct the numbers accordingly.
Deleting the File
After running the file and verifying the comment and category count in WordPress is correct, you’ll need to delete the category-fix.php file.
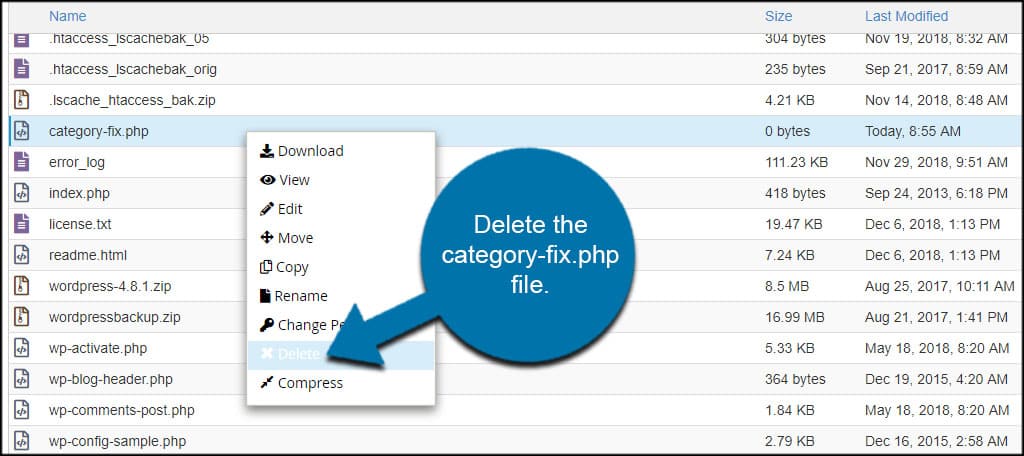
It’s simply safer to remove this file from the system. It prevents a variety of issues, most of which are security threats.
What if you get an HTTP ERROR 500?
In most instances, the “HTTP ERROR 500” screen is caused because you’re using PHP 7 while trying this fix. The newest versions of PHP removed the ability to access the database in such a manner.
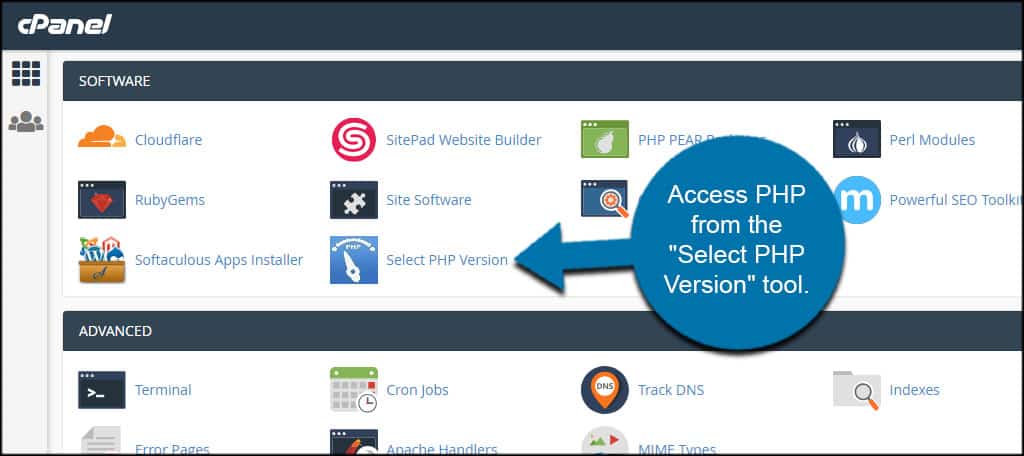
You’ll need to find out what version of PHP you’re using to eliminate this as an issue. You can access this from the “Select PHP Version” tool in cPanel.
The update also made a lot of other adjustments that prevent certain older fixes from working.
You also may want to check the file and folder permissions of your website. Not having the right permissions may also cause this error to crop up.
If these are not the case, you might have to do some in-depth troubleshooting. The Error 500 is a general problem and is caused by a vast array of things.
It’s More than a Cosmetic Issue
When the WordPress category count is wrong or the site shows incorrect comment counts, it can throw off users. For example, a seemingly empty category may prompt users not to explore the content.
Keep your site in optimal condition; this includes things you might think are “just cosmetic” issues.
How often do you make modifications in WordPress with code snippets? What other problems have you experienced after upgrading to PHP 7?
