Remote work is becoming more and more popular. This is especially true right now and looking forward. Companies big and small are trying to get their remote workers on the same page as easily as possible. This is where having an easy-to-access eRoom comes into play.
What is an eRoom?
An eRoom is an easily accessible room that you can use for meetings and webinars. It allows a space for remote workers to come together to learn, interact, team-build, and connect. eRoom is also the name of a WordPress plugin.
There are several ways to make an eRoom room correctly. One of the more popular ways to accomplish this is to use Zoom. You can either use it as a stand-alone product or use it integrated into something like your WordPress website.
What is Zoom?
Zoom is an enterprise-level video communication company. They offer a state of the art cloud-based video communications app. This app allows you to set up virtual video and audio conferencing, webinars, live chats, screen-sharing, and other collaborative capabilities.
This is extremely important for the way we do business and keep in touch today.
In this tutorial, I am going to show you how you can easily set up an eRoom and use Zoom for webinars and meetings on your WordPress website. This is a great way to keep the operation all in one place and be in full control of your team.
To do this, we are going to use a plugin. Let’s take a look at it and see all that it has to offer.
eRoom – Zoom Meetings and Webinar
eRoom – Zoom Meetings and Webinar is a powerful tool used for remote work that will help you make sure all the business processes are handled at a top-level. The plugin also allows you to easily connect and interact with team members and remote workers.
The plugin is free to use and provides you with a ton of functionality for managing Zoom meetings, scheduling options, and adding users directly from your WordPress dashboard.
It is lightweight, yet very powerful. It combines WordPress and Zoom together and gives you an outlet that allows for almost anything you need via remote style workrooms and conferencing.
Webinars
The eRoom plugin will also allow you to create webinars using Zoom and put them on your website. This is a fantastic option for something like a lecture, or some other project where you have to include a large audience. Furthermore, the webinars you create can be added to any page of your site, and you can sell them as WooCommerce Products.
The plugin is easy to use, yet very comprehensive. It is a perfect solution for long-distance work and learning how to adapt to it on several levels. Once activated, the plugin will allow you to conduct online training sessions, seminars and lectures, business meetings, online consultations, and more.
This particular Zoom WordPress plugin comes with a lot of great built-in features as well. Some of the highlights include:
- Fully compatible with WordPress
- Provides Zoom integration to WordPress
- Compatible with Zoom API
- Zoom video conferencing features enabled
- Shortcodes to conduct meetings on any page of your site
- Intuitive admin area to manage all meetings and users
- Includes performance and engagement reports from Zoom
All-in-all, if you are trying to use Zoom and integrate it into WordPress, then the eRoom Zoom video webinar plugin gives you all the tools you need and more.
Note: You will have to have a Zoom account. What you do and don’t pay for through them is based on usage. However, the plugin itself is free to use. There is also a pro version of the plugin that allows for more features. Feel free to view this option if you feel you need it. The tutorial below is based on the free version of the plugin.
Let’s get it set up and running.
Setup eRoom and Add a Meeting
In order to start adding meetings and webinars to your site, you first need to get the plugin all setup. Here is the main rundown of steps that include everything you need to get up and running properly.
Step 1: Install and Activate the Plugin
The first thing you need to do is install and activate the eRoom plugin. You can do this by hopping over to the Plugins page inside the WordPress admin dashboard.
Simply search the plugin by name using the available search field, and install it directly from there.
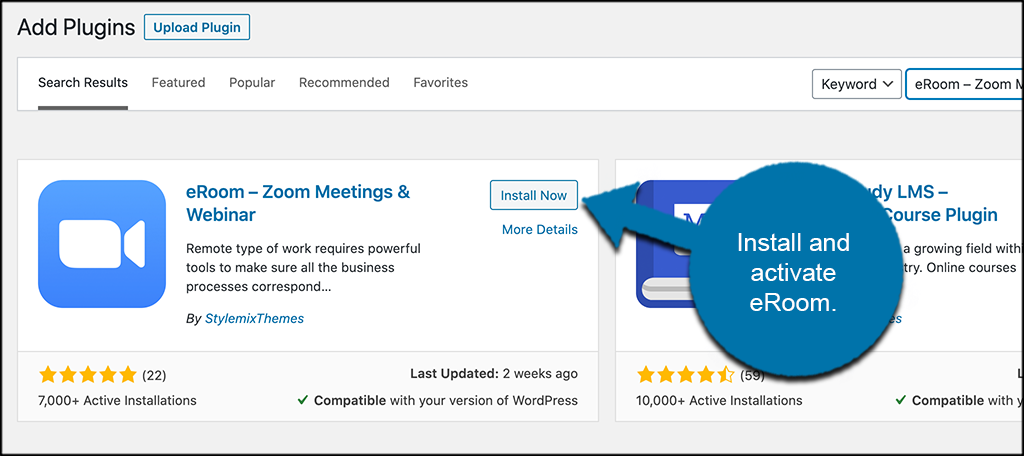
Once activated, you need to access the settings real quick to get your Zoom API keys. To do this, click on eRoom > Zoom Settings in the left menu area of the dashboard.
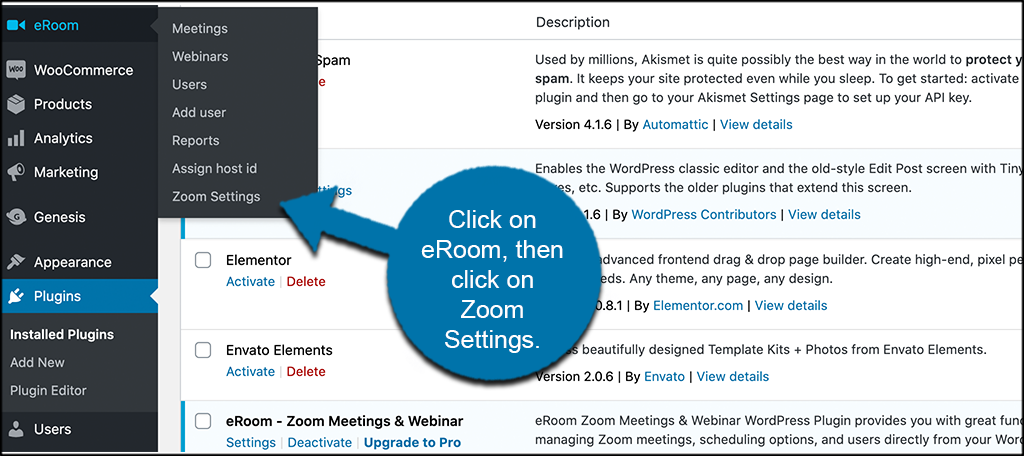
You see that this is now an available option after you activate the plugin.
Step 2: Get Zoom API Keys
It is actually not difficult to get the proper Zoom API keys needed to run the eRoom plugin. Go ahead and head over to the Zoom Marketplace. Once there click on the “Develop” button located on the top right of the page.
From the dropdown menu select the option “Build App.”
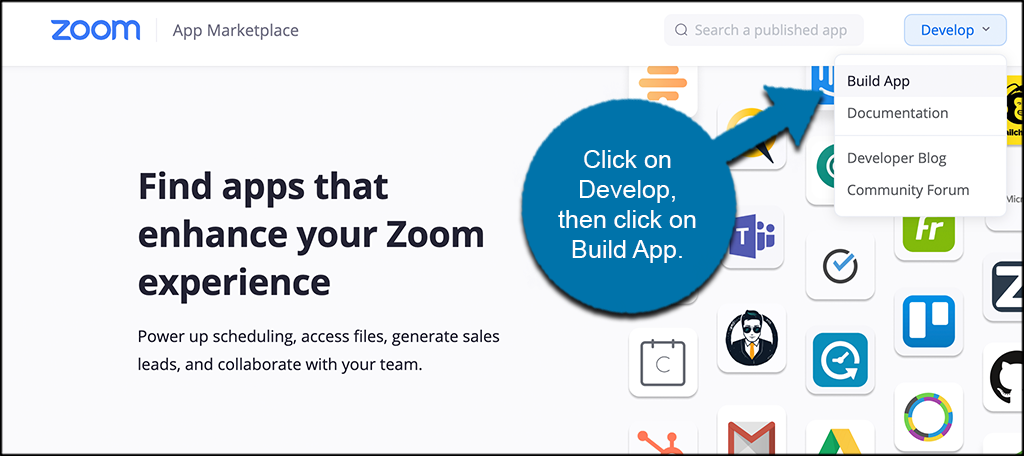
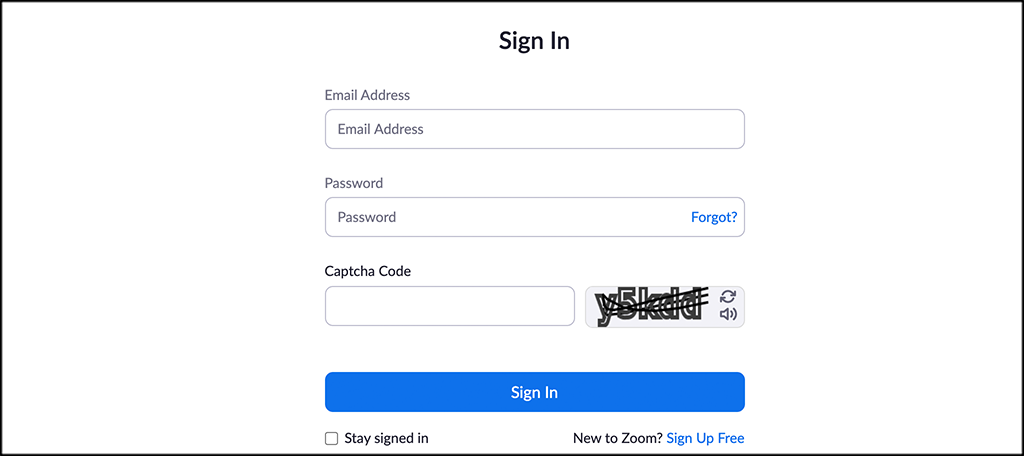
Enter your login credentials here. If you don’t have a Zoom account, then sign-up for one. It is free to hold an account.
Once signed in, you will see a number of app type selections that you can build from. You want to choose the JWT type from the options available. Click on the “Create” button.
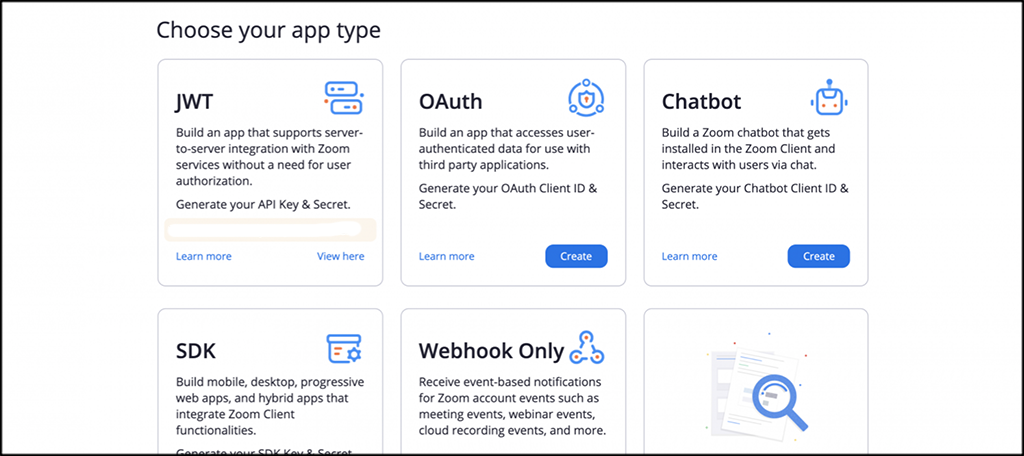
Enter any information that is requested within the App Credentials section. Two API keys are then generated. Take both of those keys and copy and paste them back into the main settings page for the plugin in WordPress.
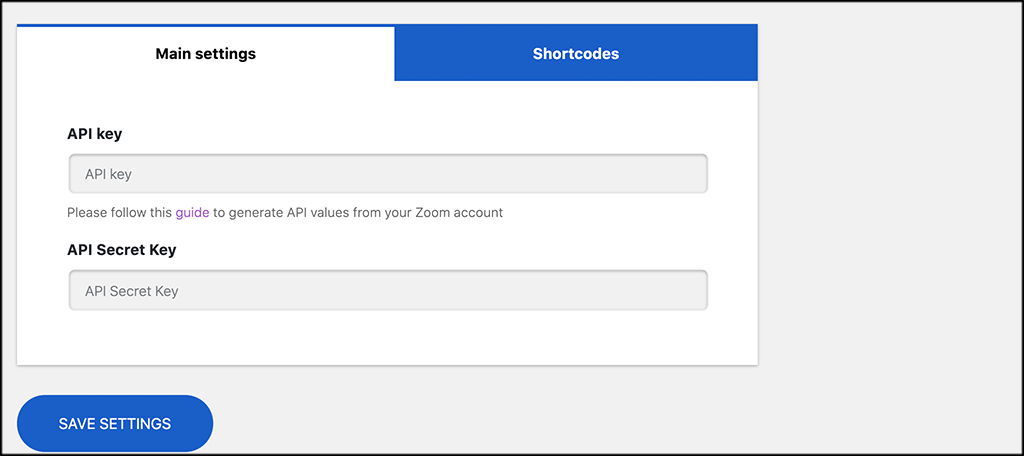
Click on the “Save Settings” button and you have activated the app. You are now ready to add meetings and/or webinars.
Step 3: Add a Meeting
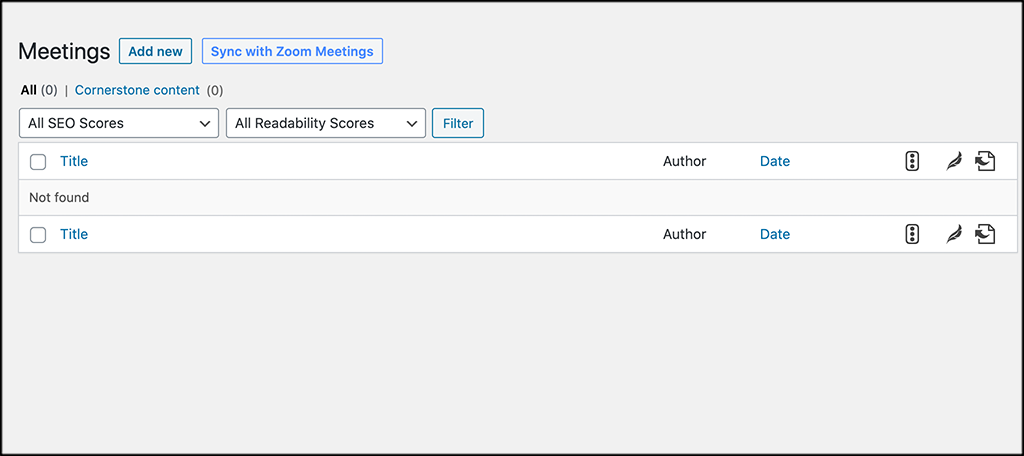
At this point, you are ready to add a meeting in eRoom. Click on the “Meetings” tab link located in the left menu area.
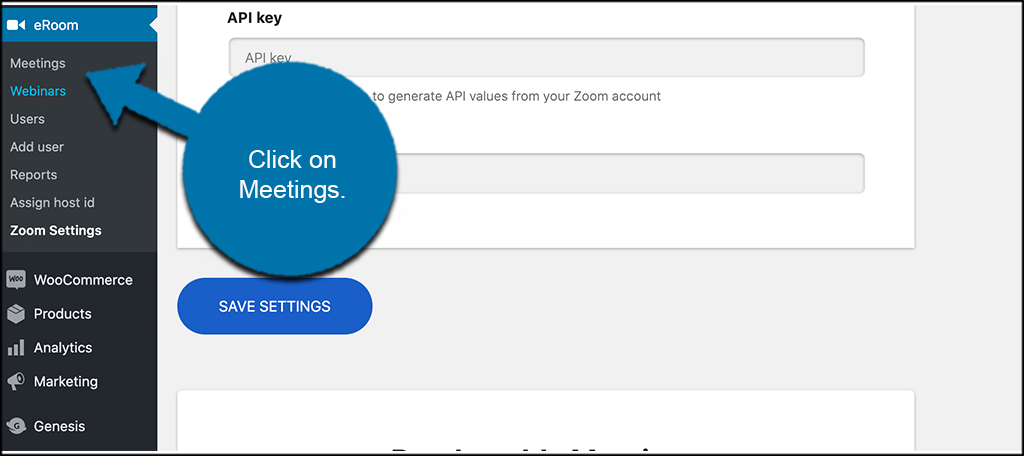
From here, you can either add a new meeting or sync with Zoom meetings. In this case, we are going to add a meeting.
Click on the “Add New” button at the top of the page.
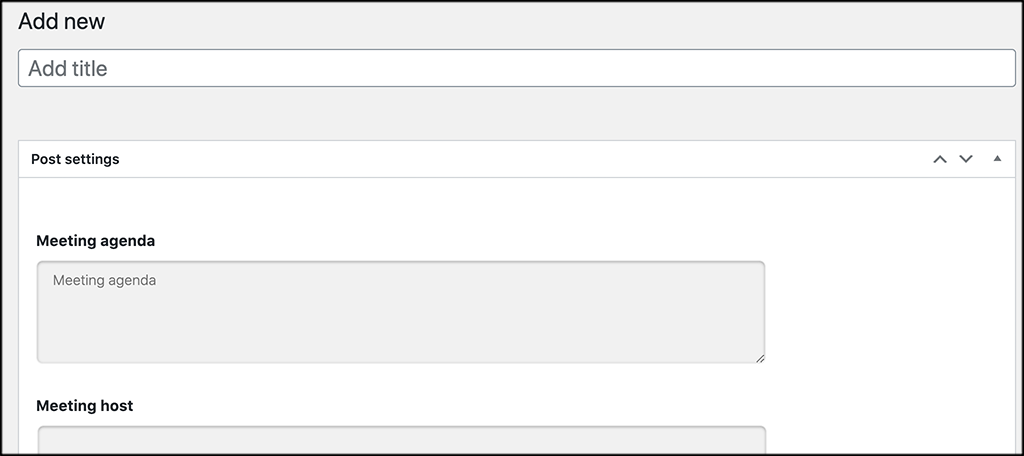
An editor pops up and you can start building your first meeting. Add a meeting title and some information for the meeting agenda section.
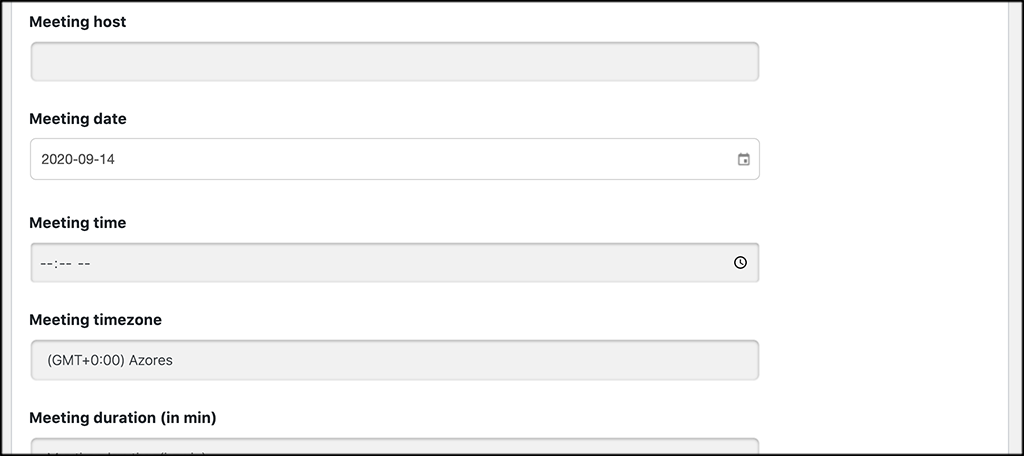
Scroll down a little and add a Meeting host, date, time, and timezone.
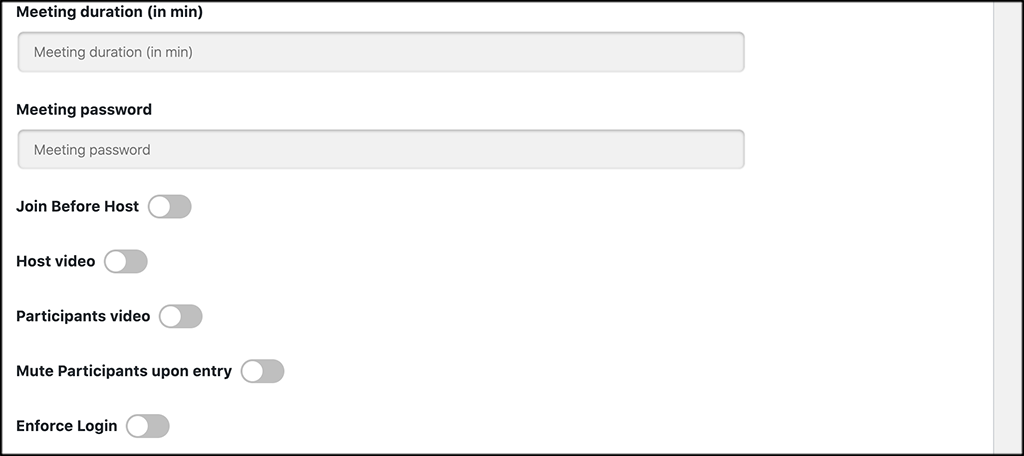
Finally, scroll down more and add the last few items to your meeting. This will include the meeting password (which you will need to make available for all meeting participants), as well as some other options to complete the meeting setup.
At this point, you can click on the “Publish” button and publish the meeting.
Simply go to that page to access the meeting and you can start.
Note: Your Zoom account must be attached using the API keys you got above for this to work properly.
Step 4: View Other Options
The eRoom plugin allows you to also add webinars, users, and assign other host IDs. You can do this by selecting any of those options from the left menu area under the main eRoom tab.
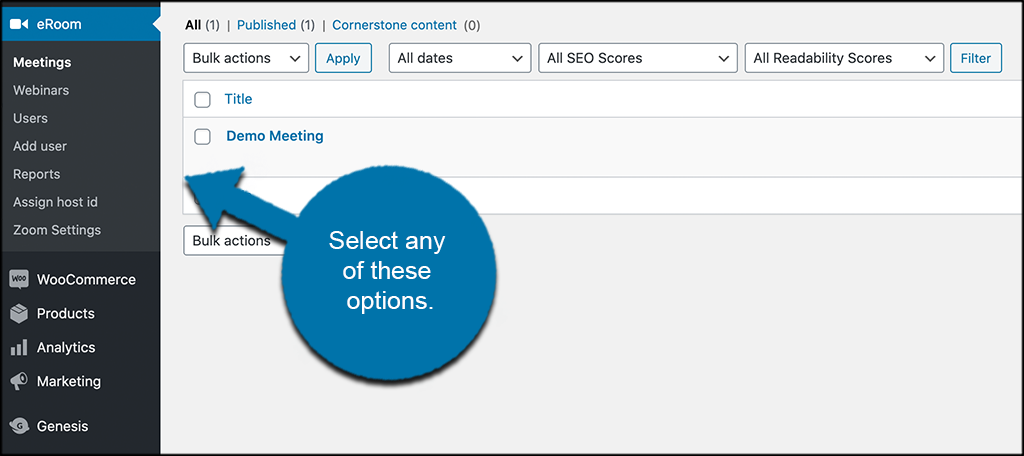
The concept of adding webinars and users is the same as adding a meeting. You simply add in the requested info and you are good to go.
That’s it! You are off and running with the eRoom plugin and now have the ability to integrate meetings and webinars into your WordPress website.
Do I Need Zoom to Make This Work?
While everything is integrated and run in your WordPress dashboard, you do need to connect your Zoom account to make it operational.
Is This Compatible With My Theme?
Yes, the eRoom plugin is compatible with all WordPress themes. Simply install it and go to work!
Can I Save Webinars?
You can indeed save webinars for viewing later. Just use the URL link of the video. That being said, you will need the eRoom purchasable meetings plugin to do this, as well as sell your webinars on WooCommerce.
Final Thoughts
Remote work is becoming the norm. It is important to have solid options in place that will allow for both a smooth transition for remote workers, as well as an access point for meetings, connections, webinars, and more.
The eRoom plugin can help you accomplish all of this and more. Not only does it easily connect to your Zoom account, but it allows you to manage everything from the WordPress admin dashboard.
I hope this tutorial showed you how easy it is to actually add an eRoom using the plugin and start adding meetings and webinars.
Have you ever used Zoom before? Do you use their app as a stand-alone product, instead of integrating it into your website?
