In this tutorial, I am going to quickly show you how to enable cookies when you are using the Firefox browser. A cookie, also known as a web cookie, browser cookie, or HTTP cookie, is a piece of text stored by a user’s web browser.
A cookie can be used for things like authentication, storing site preferences, shopping cart contents, an identifier for a server-based session, or anything else that can be accomplished through storing text data.
Firefox makes it easy to accomplish certain tasks that may not be as easy to handle in other browsers. Things like blocking websites in Firefox, or using Firefox to add, edit, and modify bookmarks can easily be done with just a few clicks of your mouse.
However, let’s focus on how you can easily enable cookies in Firefox.
Enable Cookies in Firefox
First you want to launch the Firefox web browser. Click or double-click the Firefox app icon, which resembles an orange fox around a blue globe. You can find it in your Applications folder on a Mac, or on your Start menu on Windows.
Once you have Firefox open click on the top right corner of the browser window to open the dropdown menu.
![]()
When the dropdown window slides out select the “Options/Preferences” tab.
Note: The tab will be called “Options” on a PC and ”Preferences” on a Mac.

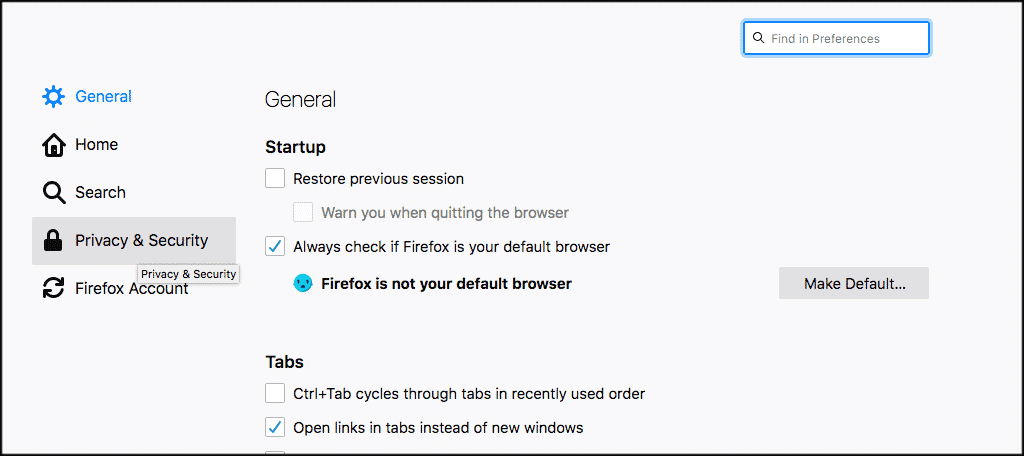
This will take you to the main setting’s page where you will then click on the “Privacy and Security” tab located on the left side of the browser window.

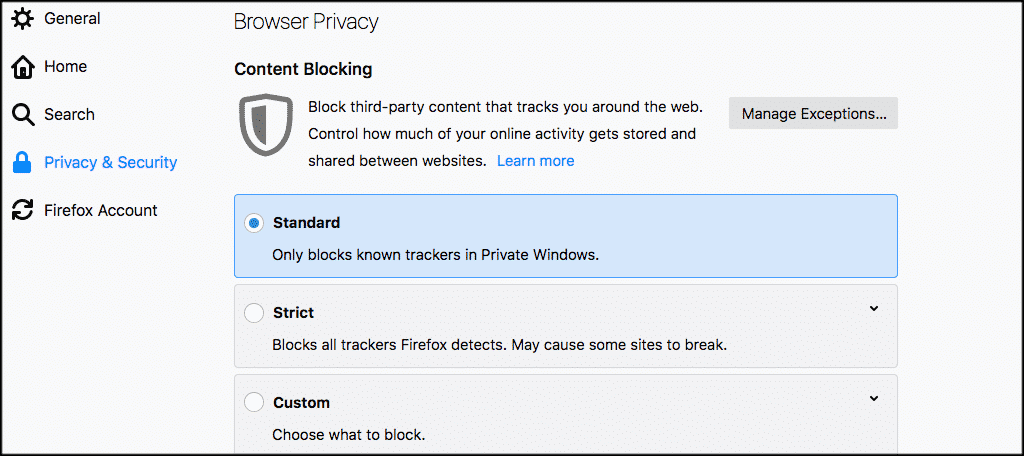
The “Browser Privacy” scrolling options will pop up. Set “Content Blocking” to Standard.

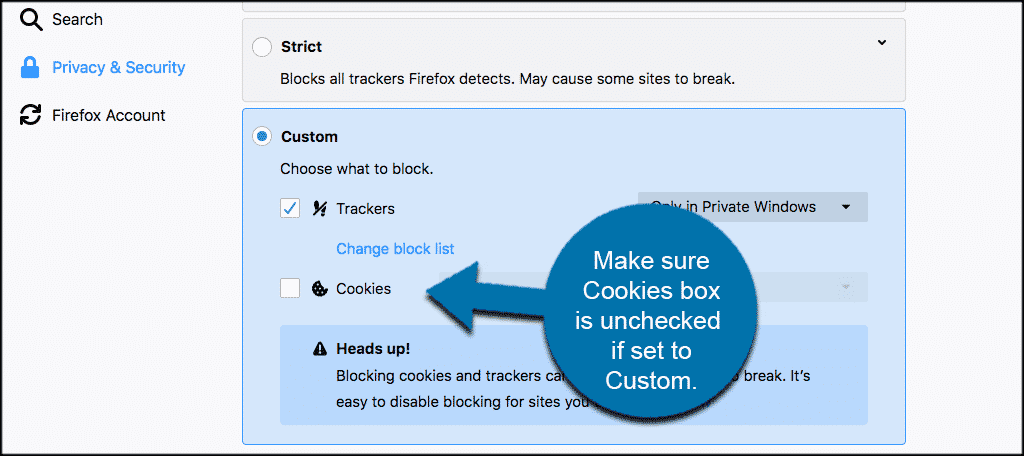
Note: If you have the “Custom” box selected make sure that the Cookies box is unchecked.

That’s it. You are all set to go. The Firefox browser makes it easy to enable cookies.
