The Google Chrome browser only has one plugin; Adobe Flash. Chrome already comes packed with great tools, so this may not be on the top of your list.
However, you may want to enable Adobe Flash. In this tutorial, I will show you how to quickly and easily enable Adobe Flash in Chrome.
Enable Adobe Flash in Chrome
Launch the Google Chrome browser from your desktop. The Chrome icon looks like a colored ball with a blue dot at the center. You can find it in your Applications folder on a Mac, or on your Start menu on Windows.
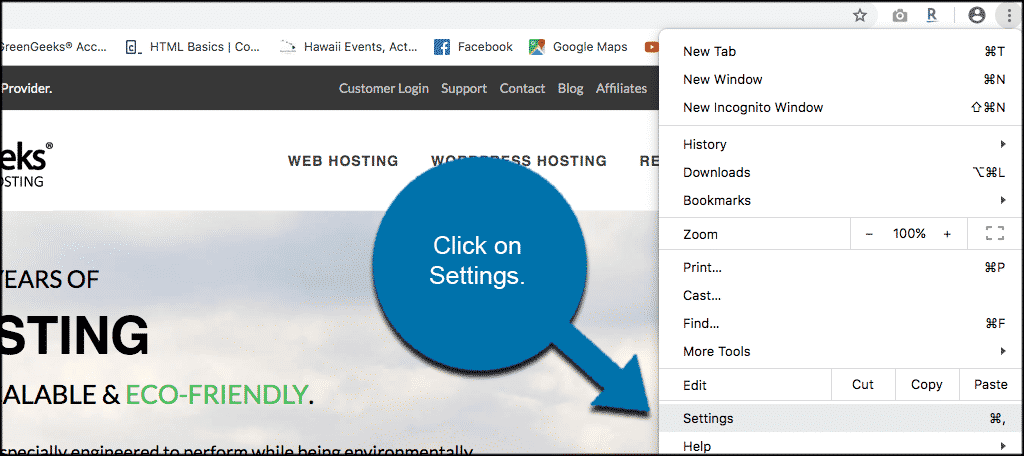
Once the Chrome browser is open click the three-dot icon. This icon is located next to the address bar in the upper-right corner of your browser window. It will open a dropdown menu.

When you click on the three-dot menu a dropdown menu will appear. Go down to the “Settings” option and click on it.

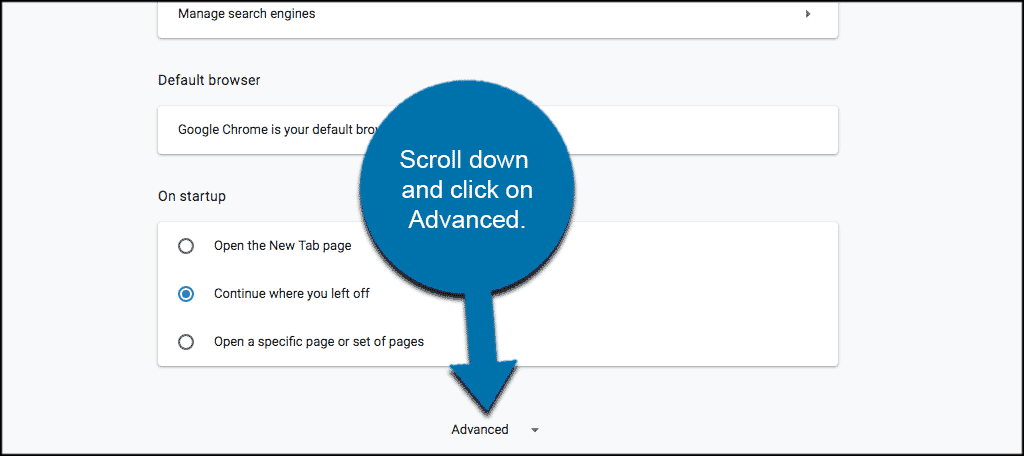
Now, from the Setting’s page scroll all the way down to the bottom until you see “Advanced.” Click on that when you see it and more advanced setting’s options will drop down and be displayed.

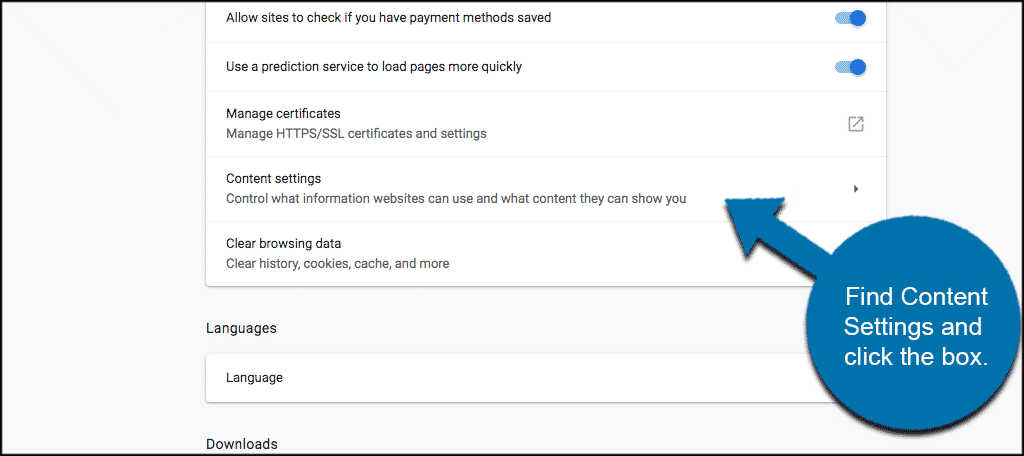
Now that more setting’s options are displayed, scroll down until you see “Content Settings.” You will find it near the bottom of the “Privacy & Security” group of options.

Click on that box and a list of other content setting options will be displayed. You are looking for the “Flash” option. It is a puzzle piece icon toward the middle of the page. Click on it.
![]()
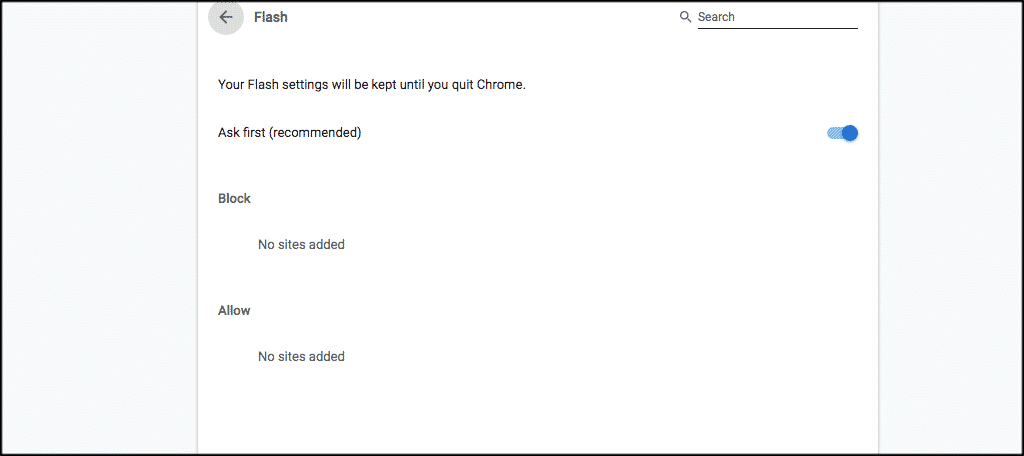
From here you can enable Adobe Flash. You will see a short list of options. Fill those in how you see fit.

That’s it, you have successfully enabled Adobe Flash using Google Chrome. To disable it simply follow the above steps back to the Flash setting’s page and update it how you want.
