As the title of this tutorial suggests, I am going to show you how to embed pages into WordPress content. But you aren’t limited to pages. You can embed any WordPress content type in a post or page. This includes custom post types that you create yourself, or that are created by a plugin.
Today, I’ll talk about why embedding is a powerful tool, and we’ll go through the steps required to embed pages into WordPress content.
Why Embed a Page in a Page?
If you have content that appears in multiple places on your site, you know that when that content changes, it can be tedious to update every post or page on which it appears. It’s easy to miss a page when you update manually. Then, you run the risk of having conflicting information from one page to another.
But what if you could update the repeating content in one place and automatically update every page where the content appears? That’s the power of embedding.
Just update the page that contains the content and it changes everywhere the text or media appears on your site.
Embedding as a Formatting Tool
Repetitive content isn’t the only good use of embedding. Often, we have elements of a post or page that may require a layout that’s different from the standard WordPress post format. This may be visual presentations such as image galleries or carousels. And sometimes tables might not fit into the standard page markup.
Embedding a custom page type can make your workflow much more efficient.
Embedding is a powerful tool, but it doesn’t have to be complicated. If you’ve ever coded a site manually and used includes for repetitive content, that’s essentially what we’re going to do here. Embedding using WordPress shortcodes or “including” a file in a page will give us the same result.
If you’ve never worked with includes or embedding, don’t worry. By the end of the article, you’ll understand how it works. And if you follow along, you’ll be ready to start embedding right away.
Installing the Insert Pages WordPress Plugin
We’re going to use the “Insert Pages” plugin to do our embedding, so let’s install it.
Log in to your WordPress admin panel.
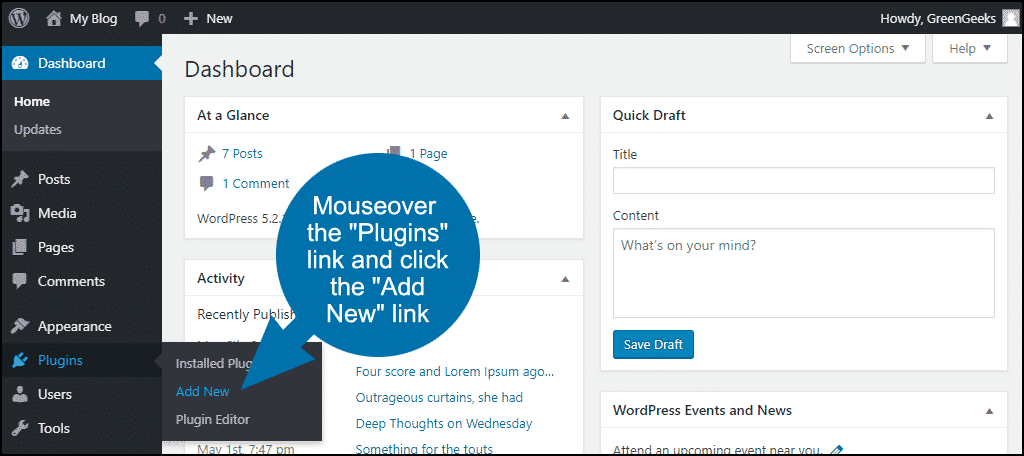
In the left column navigation mouse over the “Plugins” link and click the “Add New” link.
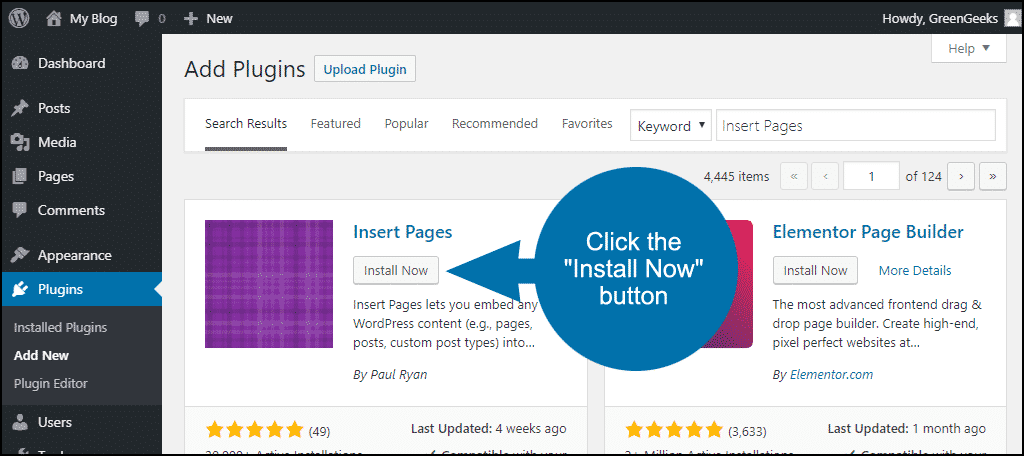
In the “Search plugins…” box, enter “Insert Pages.”
Once you have located the plugin, click the “Install Now” button.
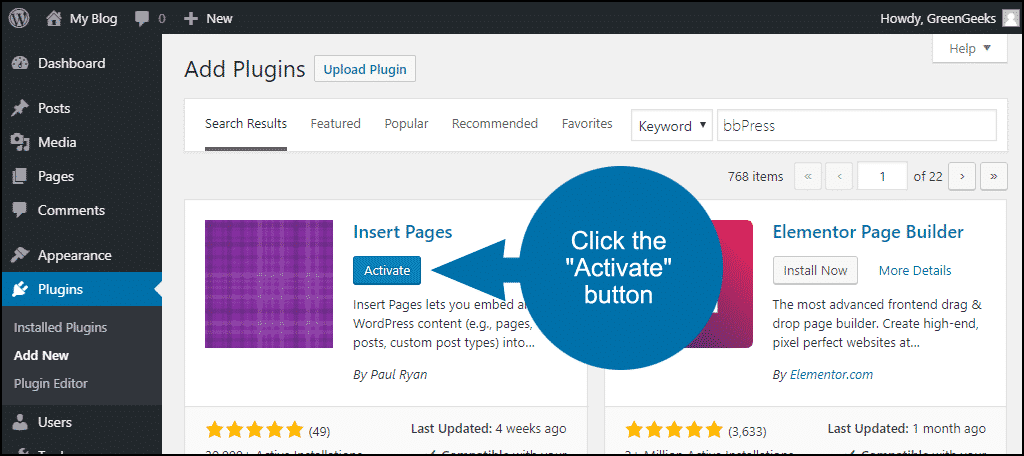
When the plugin has been installed, click the “Activate” button.
Using the Insert Pages Plugin
The examples here use the WordPress Classic Editor. If you are using Gutenberg, the Insert Pages functions have to be added to posts manually using the Shortcode block. I’ll show you how that works in a minute.
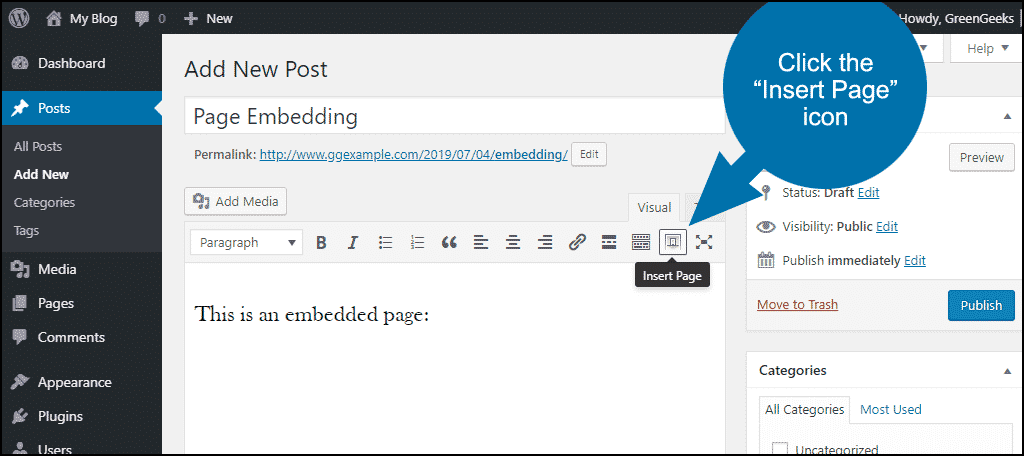
When writing or editing a post, you’ll see an “Insert Page” icon. Click it to insert a page into your post.
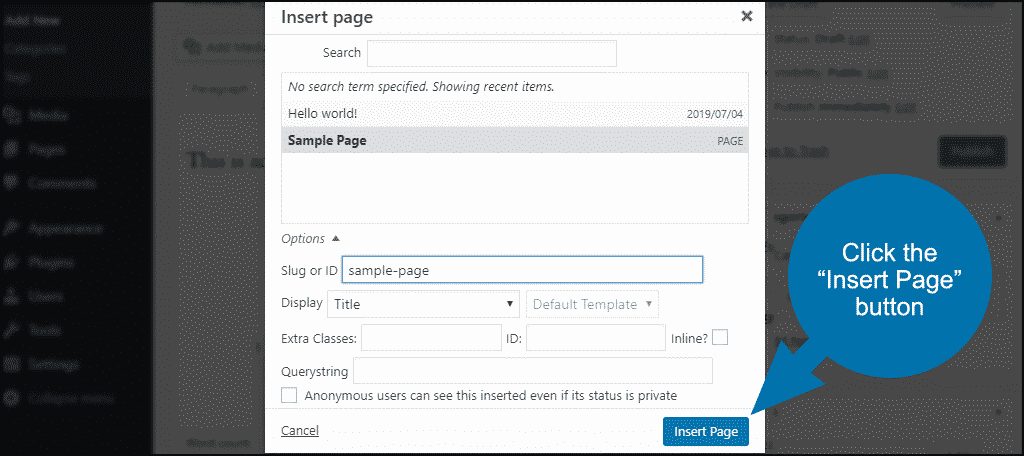
In the “Insert Page” pop-up window that opens, select a page from the list of pages. Selecting a page will automatically populate the “Slug or ID” field.
Alternately, you can manually enter the slug name or page ID in the “Slug or ID” field.
Click the “Insert Page” button.
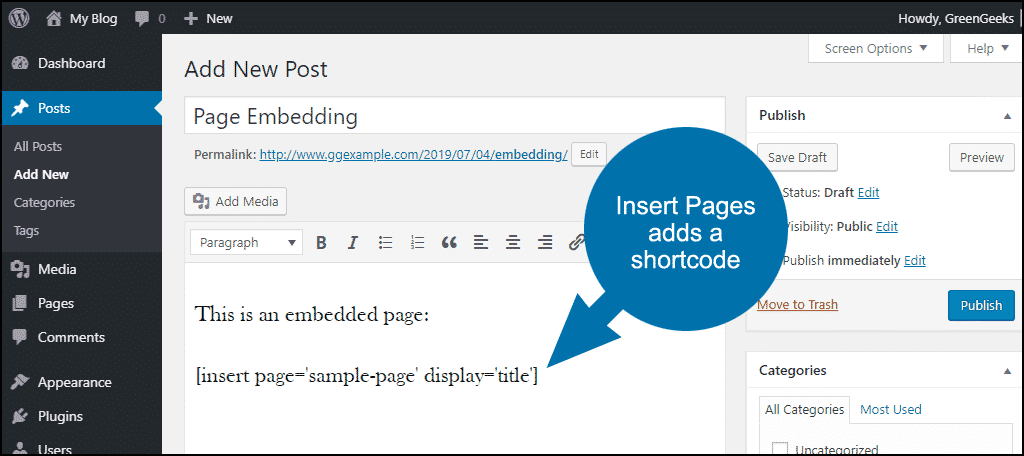
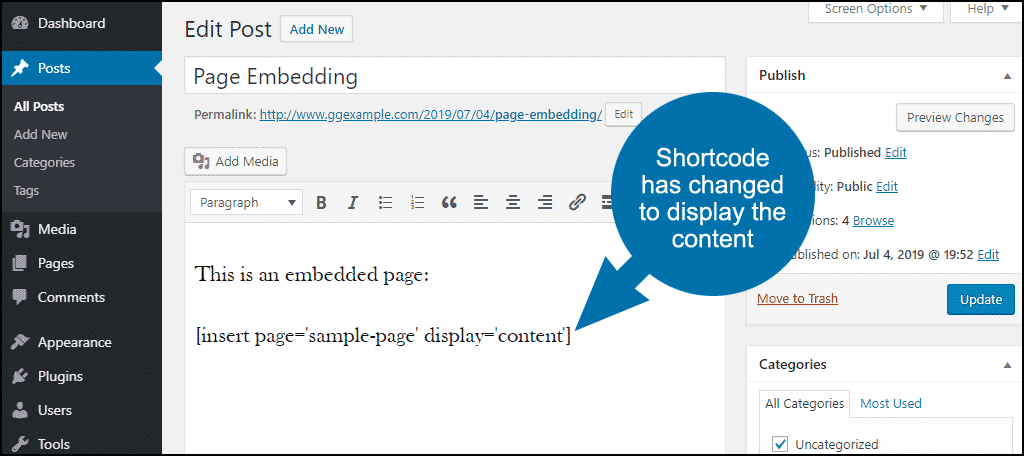
You can see that Insert Pages adds a shortcode to the post.
That code indicates where the inserted page will show up in the post.
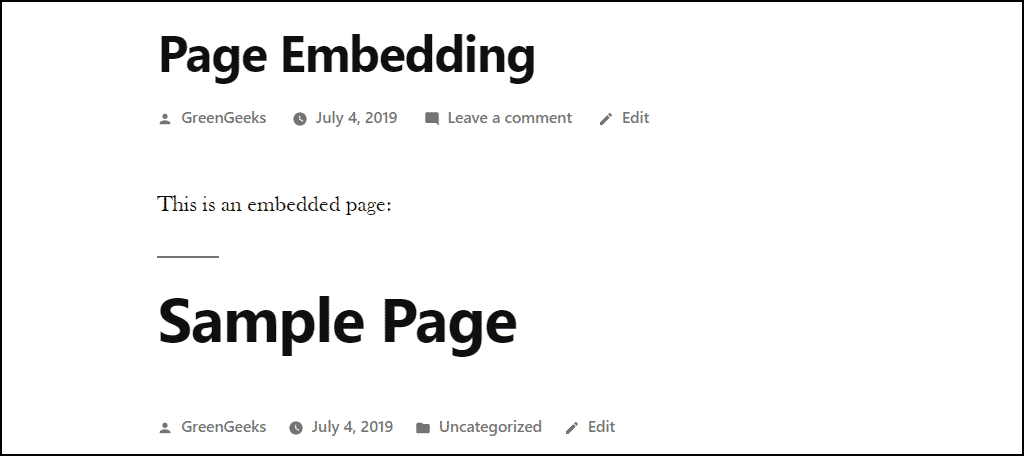
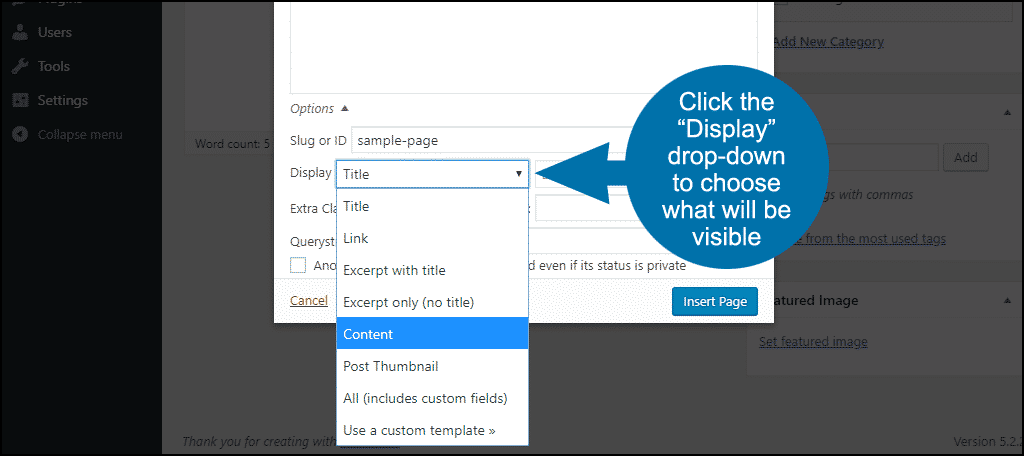
By default, only the title of the embedded page is displayed.
Let’s change that so the content of the embedded page is shown.
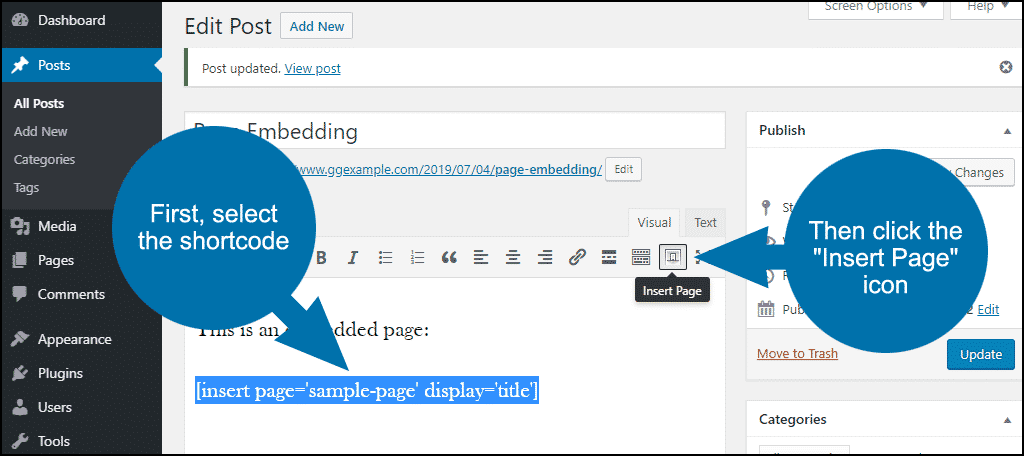
Open the post that contains the embedded content in the editor. Select the shortcode that we added. Click the “Insert Page” icon.
Now you can choose which part of the embedded page is shown.
We’ll choose “Content,” and then click the “Update” button.
You can see that the shortcode has changed to display=’content’.
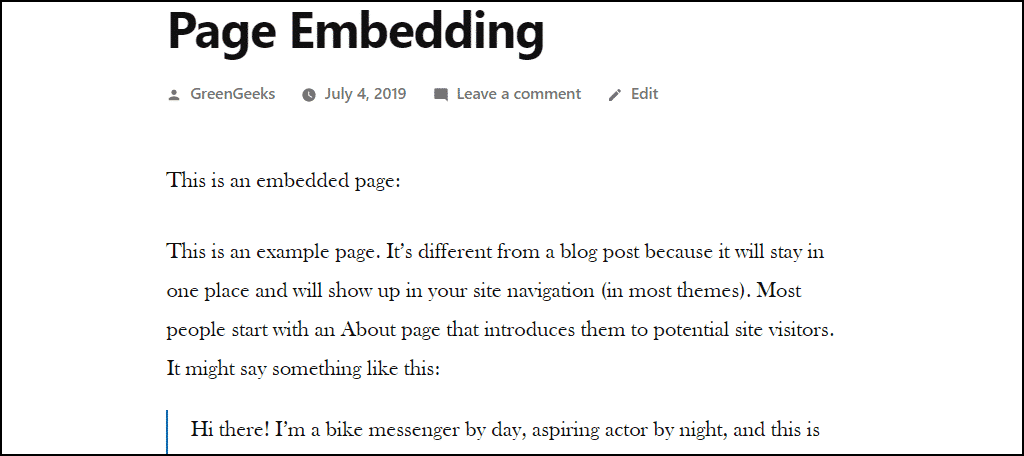
After we save the post, you can see that it now displays the page content.
Using the Insert Pages Plugin With the Gutenberg Block Editor
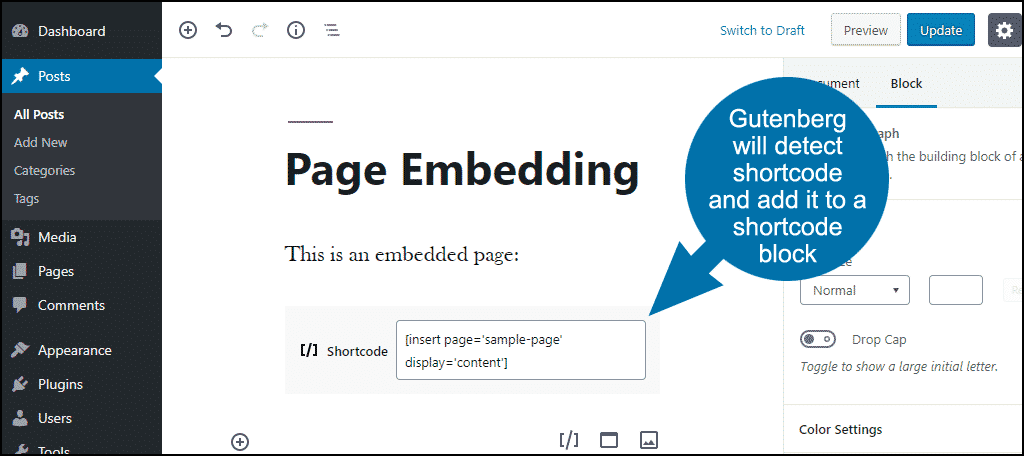
As you may have gathered from the shortcodes in the previous examples, embedding a page in the Gutenberg block editor works the same way it does in the Classic Editor. The only difference is there’s no “Insert Page” icon to bring up the pop-up window.
The shortcode has to be added manually when working with Gutenberg.
To add the contents of our sample page to a post in Gutenberg, we just add the shortcode:
[ht_message mstyle=”info” title=”” show_icon=”” id=”” class=”” style=”” ][ht_message mstyle=”info” title=”” show_icon=”” id=”” class=”” style=”” ][insert page=”sample-page” display=”content”][/ht_message][/ht_message]
Note that Gutenberg will detect shortcode and add it to a shortcode block.
These are the Insert Pages options. You can see that only the “display” value changes.
[ht_message mstyle=”info” title=”” show_icon=”” id=”” class=”” style=”” ][insert page=’sample-page’ display=’title’]
[insert page=’sample-page’ display=’link’]
[insert page=’sample-page’ display=’excerpt’]
[insert page=’sample-page’ display=’excerpt-only’]
[insert page=”sample-page” display=”content”]
[insert page=’sample-page’ display=’post-thumbnail’]
[insert page=’sample-page’ display=’all’][/ht_message]
Embedding Custom Post Types
We talked about the use of custom post types for adding content that requires specific formatting. Custom post types can also be embedded using the “Insert Pages” plugin.
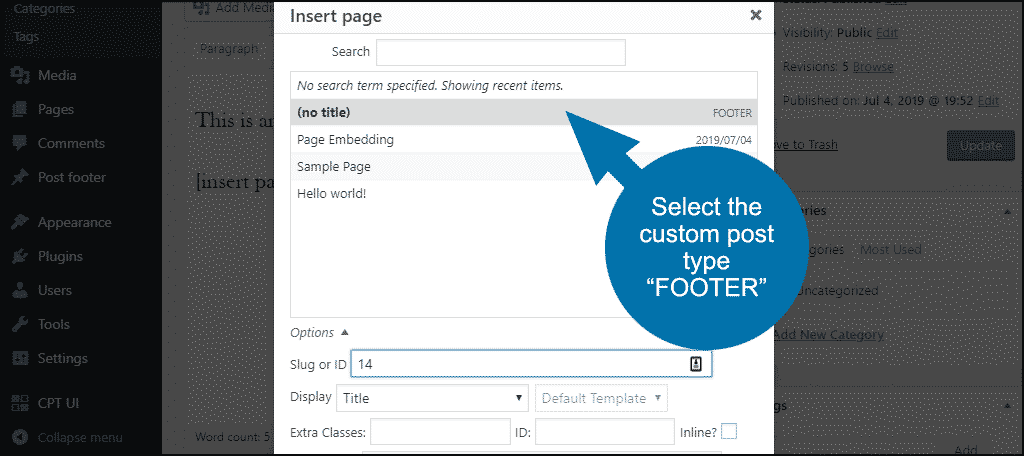
We’ll select the custom post type “FOOTER.”
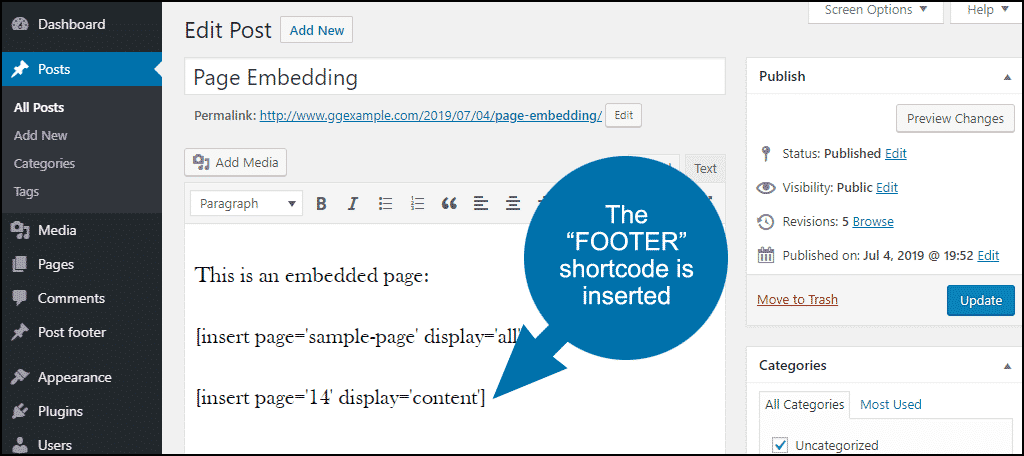
The “FOOTER” shortcode is inserted.
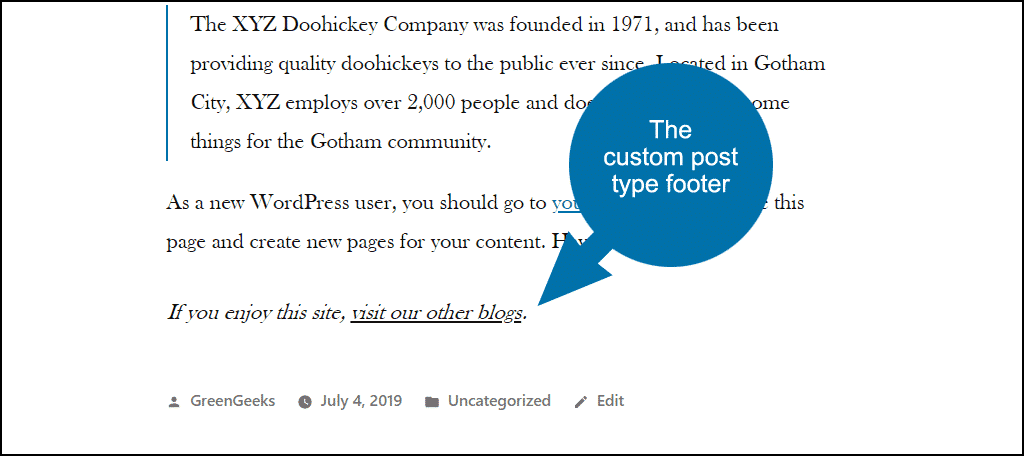
And the custom post type footer is displayed in the post.
If You Embed It, They Will Come
There are a lot of uses for embedding, and we’ve only scratched the surface here. Using custom post types, you can get into some elaborate and complicated embedding scenarios. But the simple uses are great too. Getting accustomed to the idea of embedding content into a post can open the door to a lot of new ideas.
Have you ever used other manual methods to embed content in a page? Can you think of a custom post type that could be a useful embedding tool?

