Fake emails are one of the most common ways websites are getting compromised nowadays. These emails look like they came from a co-worker, or from your boss, but are actually fake. You can help reduce this happening by enabling email authentication.
This will validate any emails sent from your own domain name, which will make it less likely that employees would be fooled by fake emails. That said, many workers still fall victim to fake emails, which can compromise the entire business.
For this reason, you need to have more security safeguards in place to protect against these kinds of attacks.
Today, I will demonstrate how to enable email authentication for your domain.
What Are DKIM and SPF Email Authentication?
The two most-used tools for email authentication are SPF (Sender Policy Framework) and DKIM (DomainKeys Identified Mail) records.
- An SPF record contains information about which IP addresses are authorized to send mail from your domain. So when you send a message, the receiving server compares the IP address information in the message with the IP address information in your publicly available SPF record. If they are a match, the email is delivered.
- When a DKIM record is added to the DNS zone for a domain, a code is added to the DNS zone and the headers of outgoing messages. The receiving servers compare the code in the headers with the information in DNS zone. If they are a match, the email is delivered.
The methods are similar, with the receiving server checking DNS records to authenticate messages, but SPF uses path-based authentication (your server’s IP address) while DKIM uses identity-based authentication (the unique code in your message headers).
If it sounds complicated, the good news is the records can be created and published automatically for your cPanel-managed email accounts. The cPanel “Email Deliverability” section is where DKIM and SPF records are created or managed, and where the status of PTR (Reverse DNS) records is displayed.
How to Authenticate All of Your Email in a Few Easy Steps
The process I will cover today is not hard, but you will need to have access to your website’s cPanel. For the most part, all you need to do is click on a few buttons and the cPanel will take care of everything for you.
If you want to be safe, you may want to take a moment and create a backup of your website, just in case, you happen to make a mistake.
Note: This tutorial will cover DKIM, SPF, and DMARC email authentication.
Step 1: Access the Email Deliverability Settings
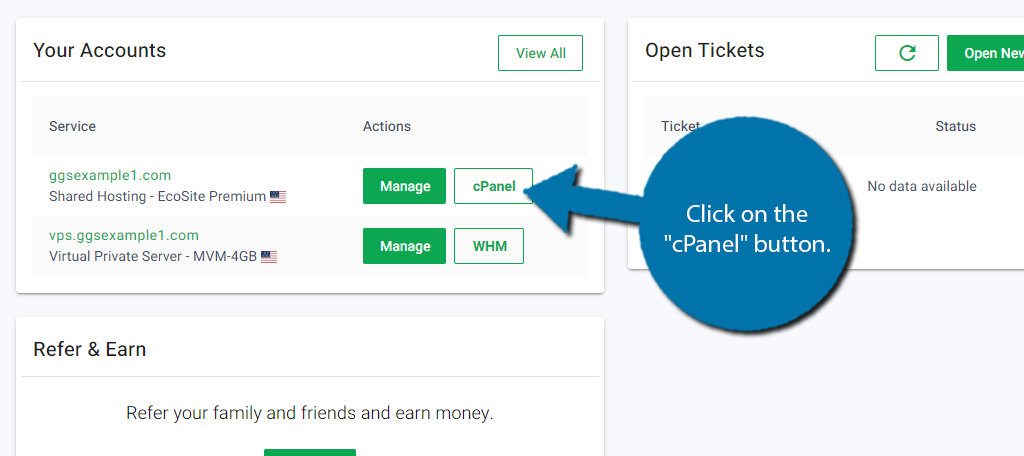
Start by logging into your GreenGeeks account. Click on the “cPanel” button.
Locate the Email section (it should be the first one). Click on the Email Deliverability option.

Step 2: Repair the Domain
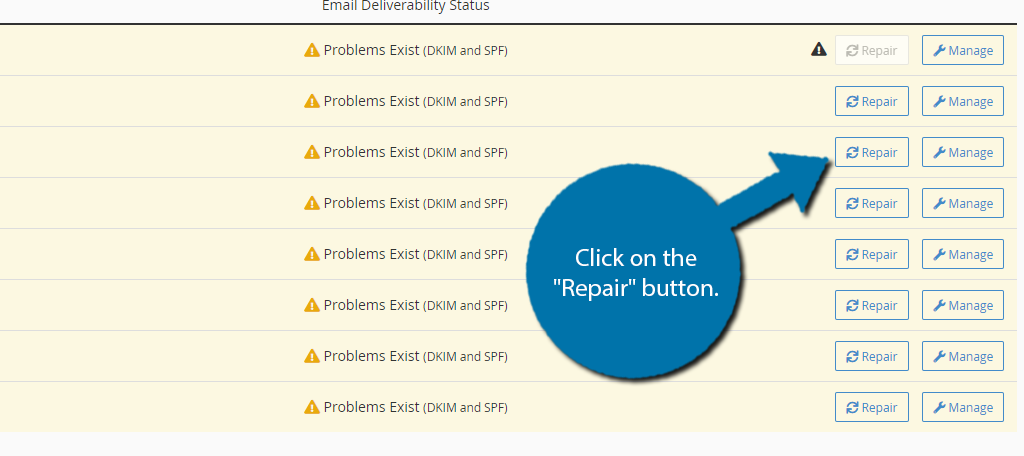
You should see a list of every domain name and subdomain attached to your web hosting account. If you only have one, then that is all you will see. You will see a column named Email Deliverability Status.
Locate the one for your domain name and it should say “Problems Exist (DKIM and SPF)”. We need to repair this, so click on the “Repair” button. Alternatively, you can click on the “Manage” button to do it manually, but that is not recommended for beginners.
Note: The “Repair” button may not be available if your DNS does not point to the cPanel server.
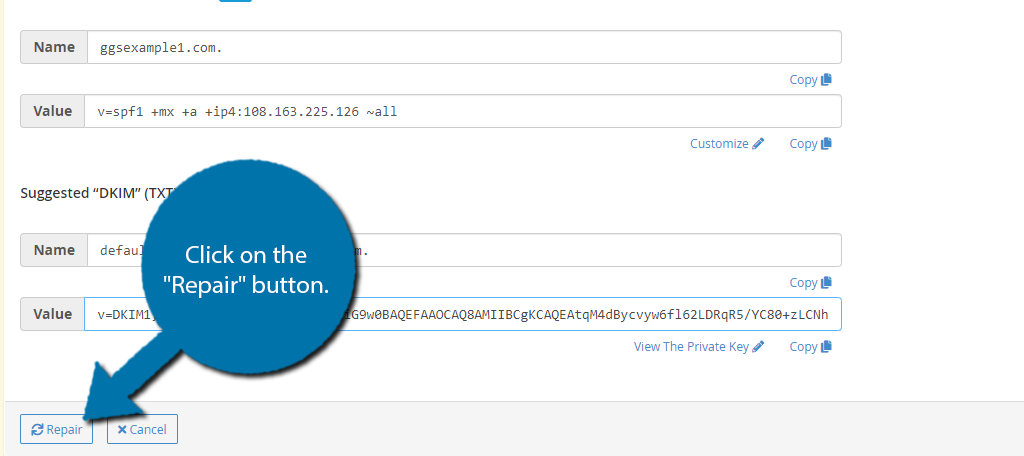
You will see several text boxes that are automatically filled. You cannot edit any of these. It contains all of the information necessary for both SPF and DKIM, Click on the “Repair” button.
After several moments, you should see the Email Delivery Status column say “Valid”. This signifies you are good to go and your Email Authentication is enabled.
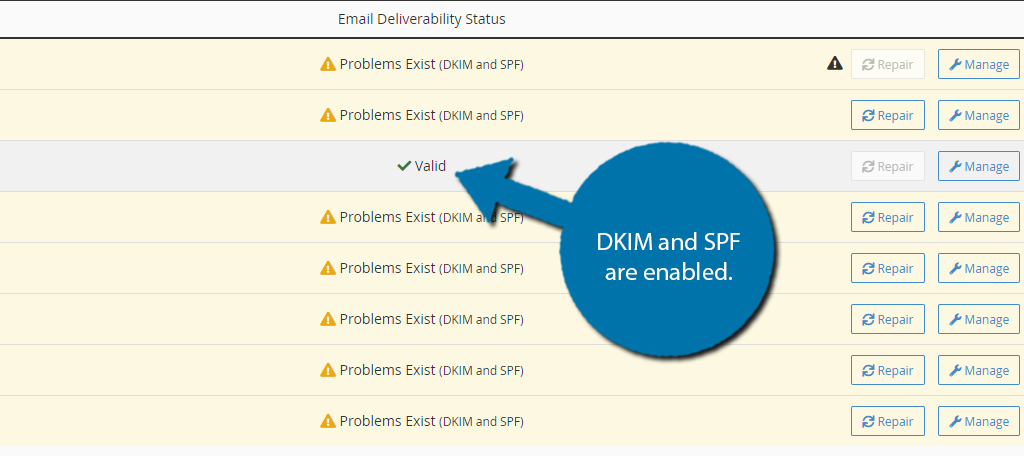
You can repeat this for every domain on your web hosting account.
Step 3: Configuring DMARC Authentication
While SPF and DKIM are great security protocols, they have problems. You can fix those problems by enabling DMARC Authentication. DMARC is not configured in the Email Deliverability part of the cPanel.
Instead, you need to locate the Domains section of the cPanel and click on the Zone Editor option.
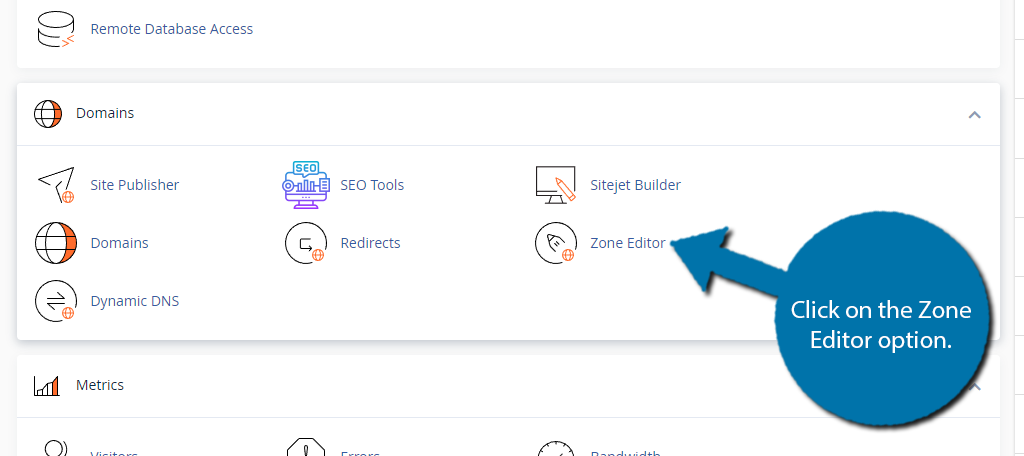
You should see your domain name in the list. Click on the Manage option next to it.

Click the little down arrow on the right side of the “Add Record” button and select “Add “TXT” Record.”
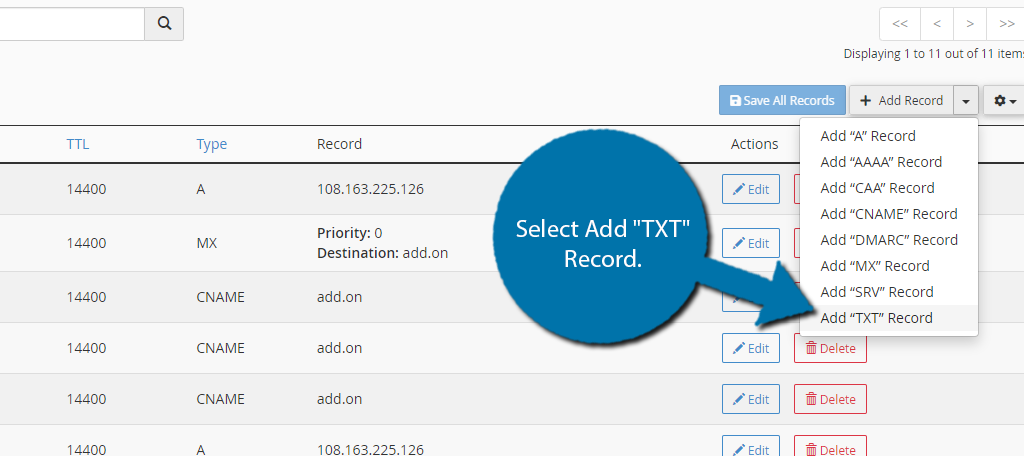
You will now need to enter some information into each field, as this is not automatically filled in like the previous step.
- In the “Name” field, enter _dmarc (when your cursor leaves the text box cPanel will automatically add the domain name).
- TTL should be set to 14400 (it will likely default to that value).
- Type should be TXT (it should default to that value since that’s what we selected from the dropdown).
- In the “Record” field, enter the DMARC configuration line (see below).
- Click the “Save Record” button.
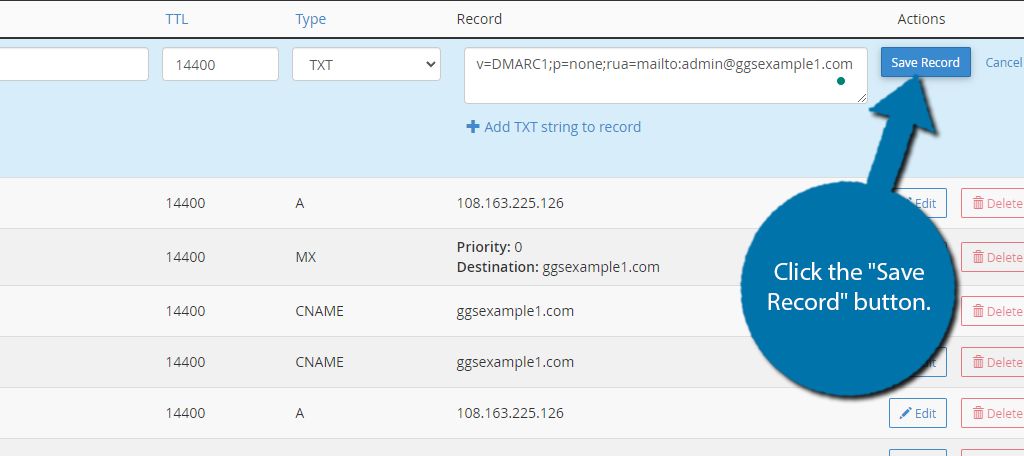
DMARC settings can be complicated. It is not really a one-size-fits-all kind of configuration, so we can’t tell you exactly what to use in the “Record” section of the TXT entry as a DMARC configuration line.
You can go to the overview page at dmarc.org and scroll down to the “Anatomy of a DMARC resource record in the DNS” section for an example and the breakdown of the record elements. Also, check out their resources section for links to tutorials and validators.
FAQ Email Authentication
No. Due to the delicate process needed that is unique to your web hosting environment, and the permissions needed to make these changes, no plugin can help you enable email authentication.
While it can significantly improve the security of your website, it is not foolproof. Users may not take the time to verify if an email is real or not. That said, it makes it much harder for bad actors to pass off fake emails as real.
Yes. It will still be beneficial to do so, but DMARC takes the security benefits to the next level because it can tell the network what to do with an email that is not legitimate.
This might sound cliche but training your staff to identify fraudulent emails and informing your customer base about them is the best way to prevent any catastrophes from happening.
Absolutely! Even if you do not plan on sending out emails from your site, you may still want to do this as bad actors can impersonate your site, which can hurt your reputation.
Improve Account Security with Two-Factor Authentication
Another step you should take is to protect your web hosting account with two-factor authentication. This means that even if your account details are compromised, a hacker could not gain access to your website without the passcode from the authenticator.
There are several ways to implement this like having the code sent out via email, or by SMS message. In other cases, you could download an authenticator app that you’ll need to open and add the code every time you log in.
Some users do not like adding this because it makes logging into an account annoying. It is absolutely worth adding to a web hosting account, nonetheless. If the account is compromised, not only is your site impacted, but the data of your customers could be stolen.
As such, you should take a moment and set up two-factor authentication today.
Add Email Authentication Today
As you can see, it is rather simple to add email authentication for your site. The cPanel tools make it extremely simple to add DKIM and SPF email authentication. However, DMARC is a bit more complicated.
That said, there are plenty of resources out there to help you configure it for your site. Don’t hesitate to contact your web host for additional help if you run into any problems following this tutorial.
I hope you found this tutorial helpful in learning how to add email authentication in WordPress.
How easy did you find it to set up? Did you have any trouble configuring DMARC?


mail-tester.com shows my emails are not DKIM authenticated, where do I found the keys to add the DKIM TXT Record to my domains?
Thanks Michael.
There is a DMARC configurator at
https://dmarc.globalcyberalliance.org/
Produces the DMARC txt for entry into cPanel.
Cheers and rock on!
Thank you very much for this, it has been very useful
You’re welcome. 🙂
This is so helpful! I searched a ton of google forms and found nothing. I was able to use this to fix my issue on stablehost’s cpanel.