If you’ve ever wished you could add a custom sidebar to WordPress, now you can. Not only can you create as many sidebars as you’d like, but you can also place them on any page or post.
Do you have a page that needs a sidebar that’s different from the other pages on your site? No problem. I’m going to show you how to add custom sidebars anywhere.
The trend in website design is toward mobile-friendly single column layouts and away from sidebars. You may have noticed that WordPress hasn’t offered a default theme with a sidebar in several years.
Not to worry. In a theme without a sidebar, the widget areas are in the page footers. The plugin we’re going to use works on those as well as multi-column themes.
To more easily illustrate this tutorial, I’ll be using a theme (Friendly Lite) with a right sidebar.
And to work our sidebar magic, we’ll use the SMK Sidebar Generator plugin. The plugin generates sidebars that replace your theme’s default sidebar. So if you have sidebar widgets in place already, you’ll have to add them to the newly created sidebar(s).
Why Would You Want to Replace the Default Sidebar?
If you use the same sidebar everywhere on your site, there’s no need to replace your theme’s default sidebar. The plugin we’re going to talk about gives you the option of creating many different sidebars and using them wherever you’d like.
Use it if you want the sidebar on your pages to be different than the sidebar on your posts. Or if you want a unique sidebar on a single page or post. Or a sidebar that only appears on a selected group of pages or posts.
The plugin lets you create unlimited sidebars, giving you endless flexibility that you wouldn’t have without it.
Installing the SMK Sidebar Generator Plugin
Log in to your WordPress admin panel.
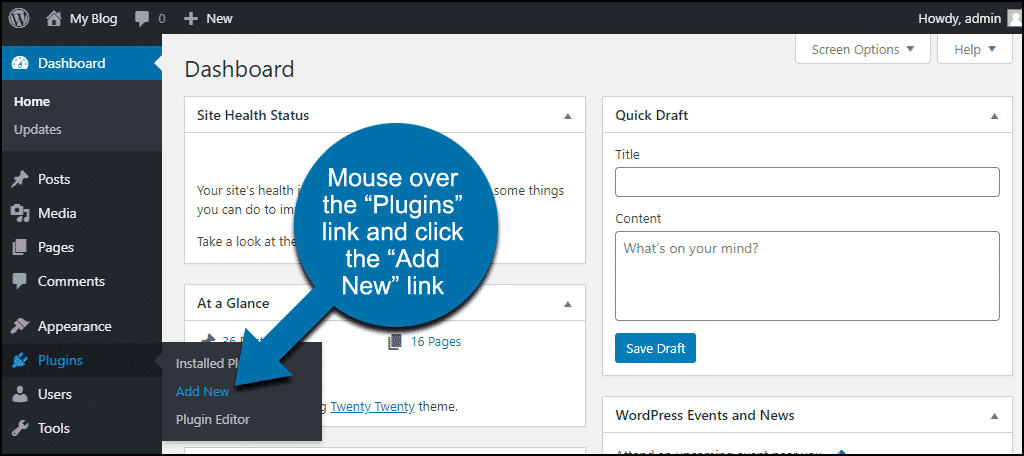
In the left column navigation, mouse over the “Plugins” link and click the “Add New” link.
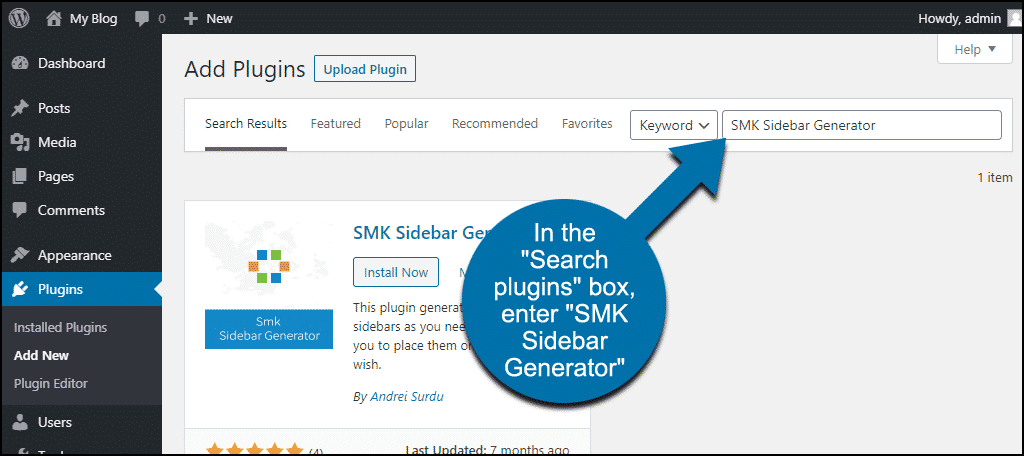
In the “Search plugins…” box, enter, “SMK Sidebar Generator.”
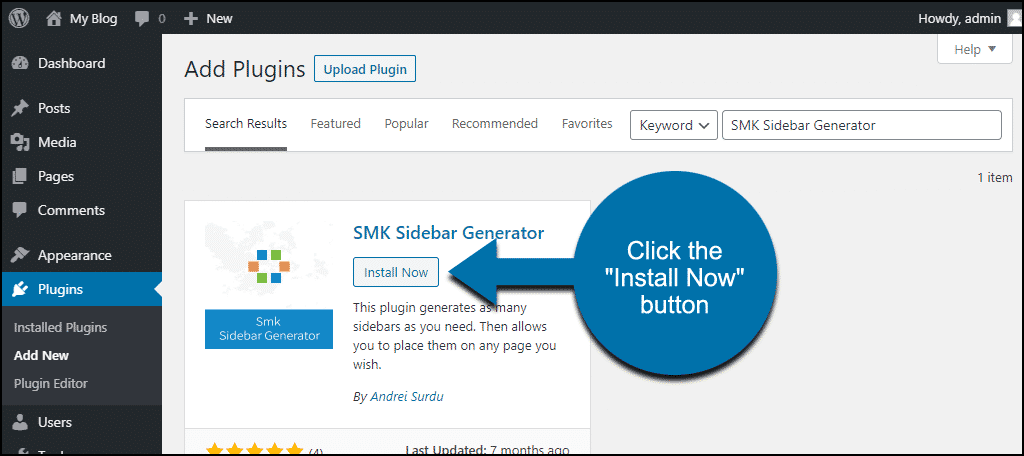
Once you have located the plugin, click the “Install Now” button.
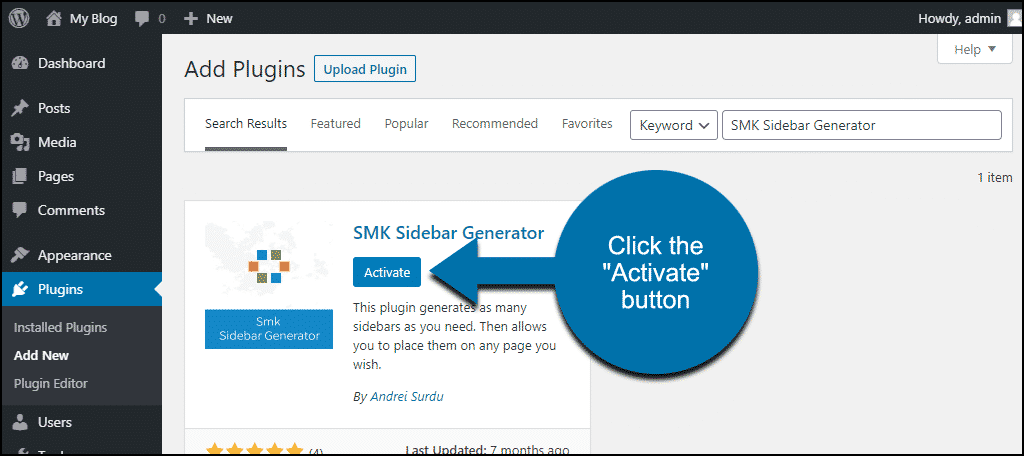
Finally, click the “Activate” button.
How to Create a Sidebar in WordPress With the SMK Sidebar Generator
The first thing we want to do is create a global sidebar. One that will appear on every page and post where we don’t show a custom sidebar. We have to do that because the plugin replaces the theme’s default sidebar.
For our default sidebar, we’ll show a post calendar. As I mentioned earlier, if you already have sidebar widgets in place on your site, you’ll add them to this new default sidebar. We’ll get to that step after we create the new sidebar.
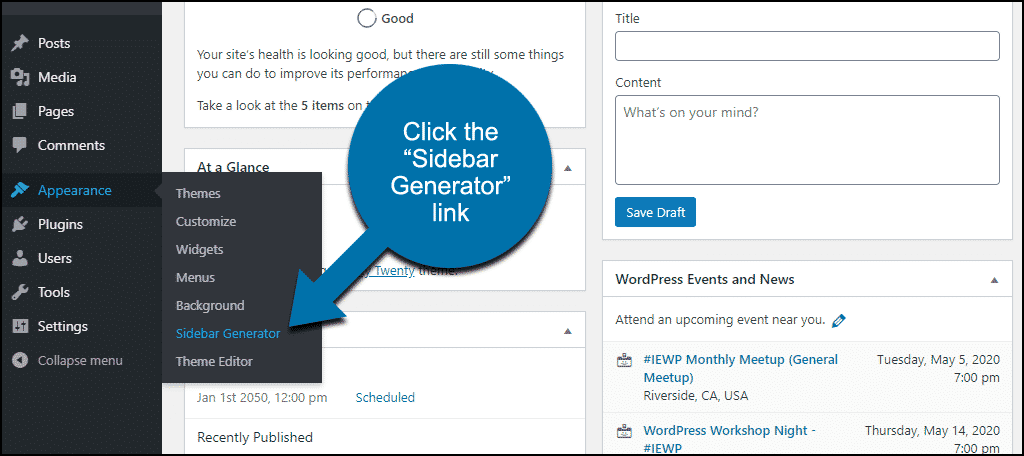
In the left column navigation, mouse over the “Appearance” link and click the “Sidebar Generator” link.
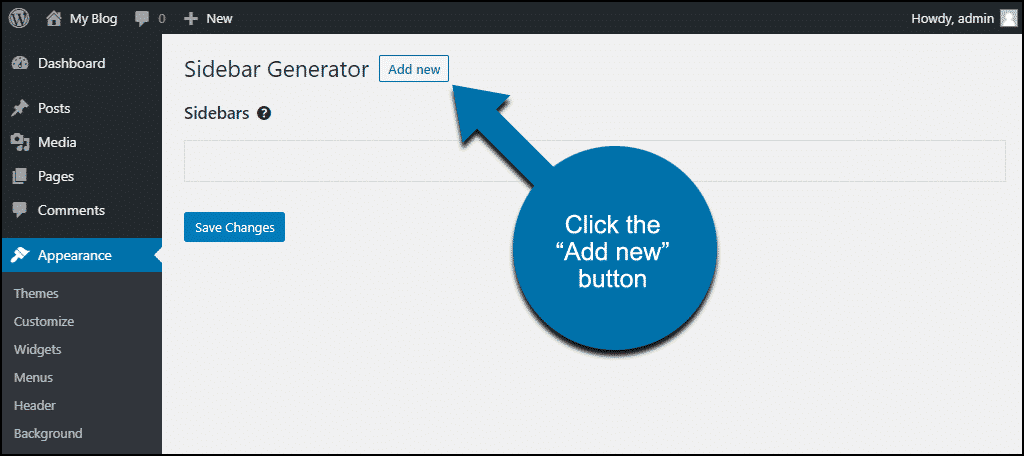
Click the “Add New” button.
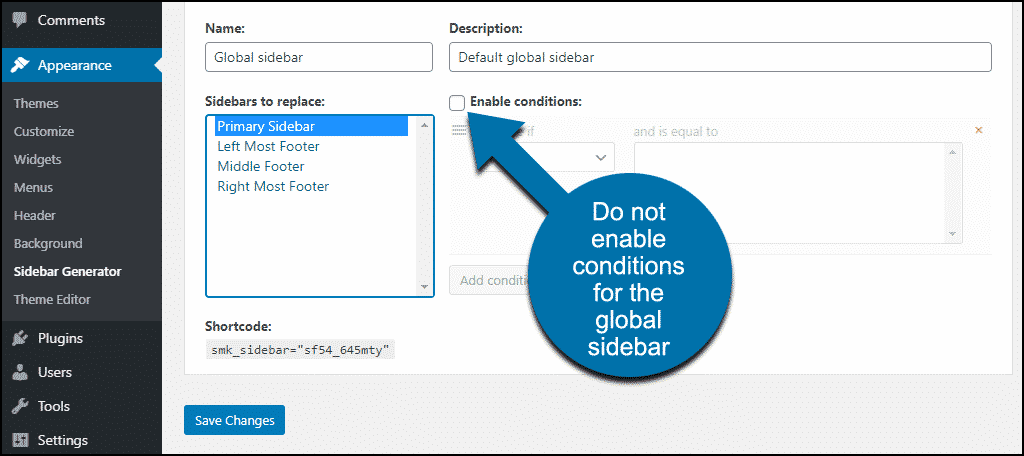
In the “Name” field, I’m going to add, “Global sidebar.”
Then in the “Description” field, I’ll enter, “Default global sidebar,” so we can identify it in the sidebars list.
In the “Sidebars to replace” list, we’re going to choose, “Primary Sidebar.”
The final option is the “Enable conditions” box. We’ll get to the conditions in a minute. But since we want this global sidebar to show up everywhere, we won’t check the conditions box.
Click the “Save Changes” button.
As you can see, there are options to replace any widget area. In this theme, there happen to be three footer widget areas and the right sidebar. Your theme will likely have different widget areas.
Adding Widgets to the New Sidebar
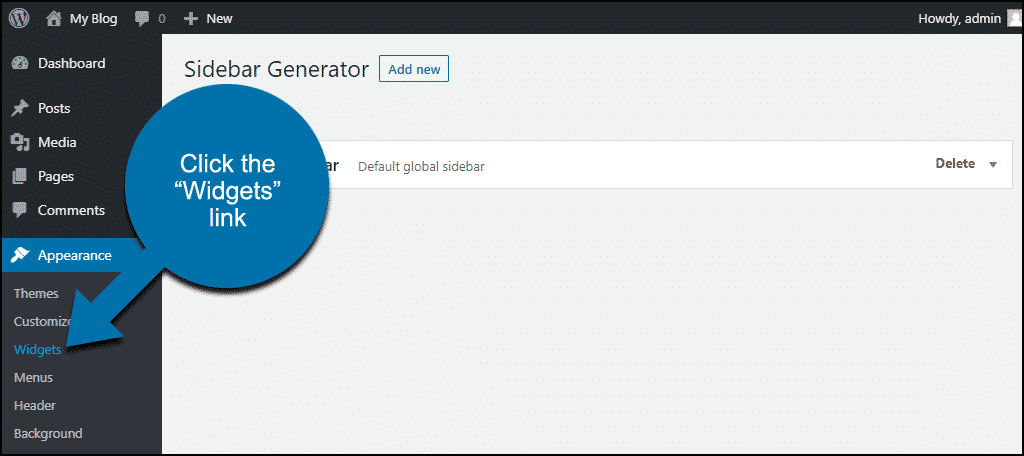
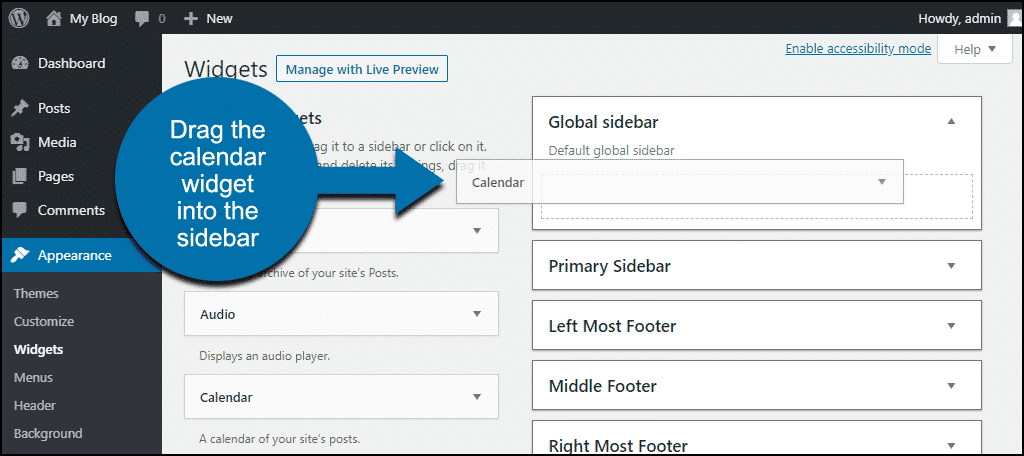
Now, if we click the “Widgets” link in the left column navigation, we can add our calendar to our new sidebar. Again, if you have to add widgets that were in your default sidebar, here’s where you’ll do it.
I’ll drag the Calendar widget into the new global sidebar widget area.
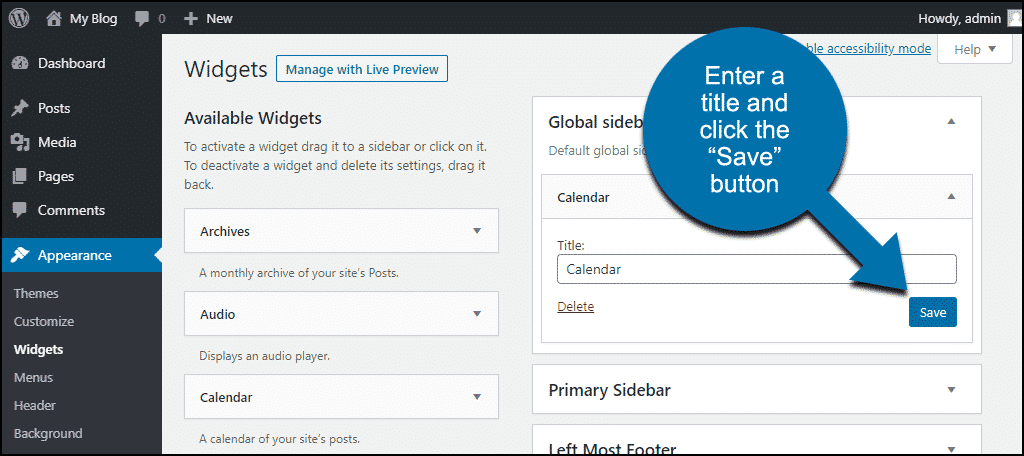
Then I’ll give it a tile and click the “Save” button.
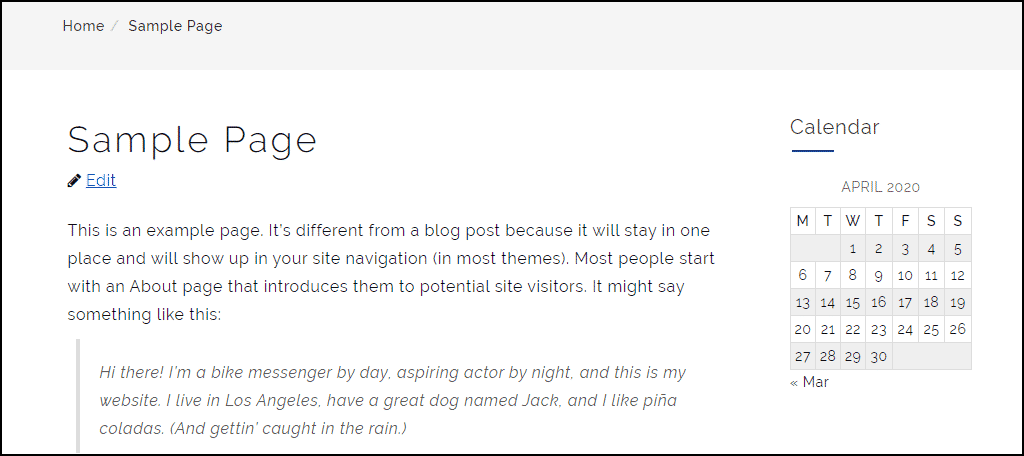
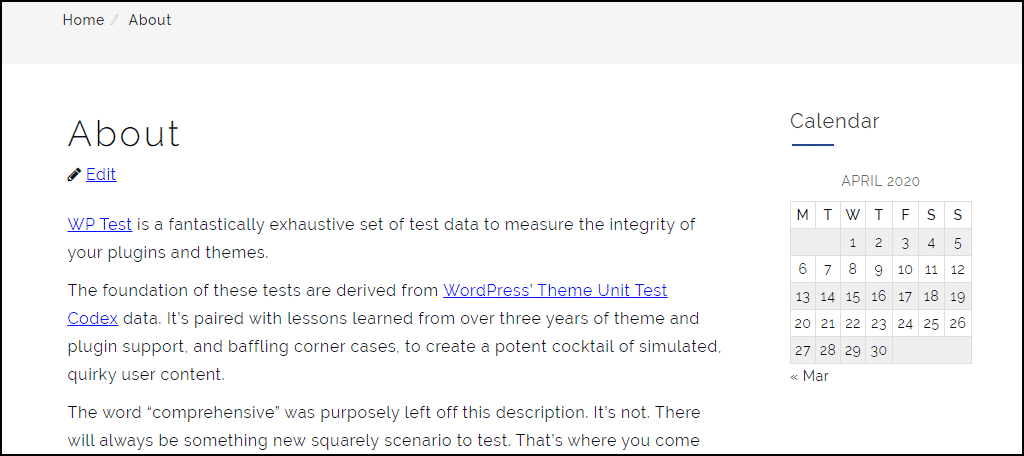
Now, if we go to the site, we can see our new calendar sidebar replaces the default sidebar.
Working With the Conditions in the Custom Sidebar in WordPress
Now let’s look at how we can add a different sidebar and display it wherever we want to.
First, create a new sidebar. We’ll do that the same way we created our global sidebar. Here are the steps again:
- Click the “Sidebar Generator” link.
- Click the “Add New” button.
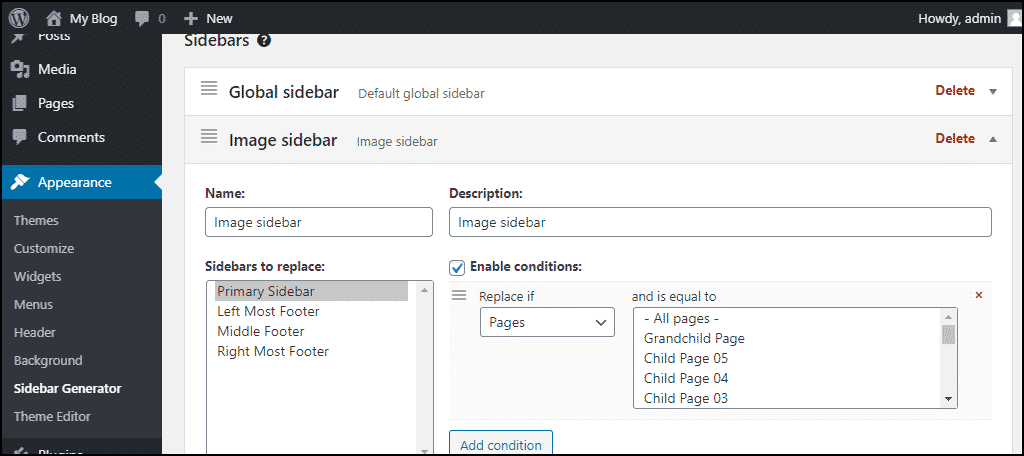
- Enter a name in the “Name” field. (I’m naming this one “Image sidebar,” since we’re going to use it to display an image.)
- Enter a description in the “Description” field so we can identify it in the sidebars list.
- In the “Sidebars to replace” list, choose “Primary Sidebar.”
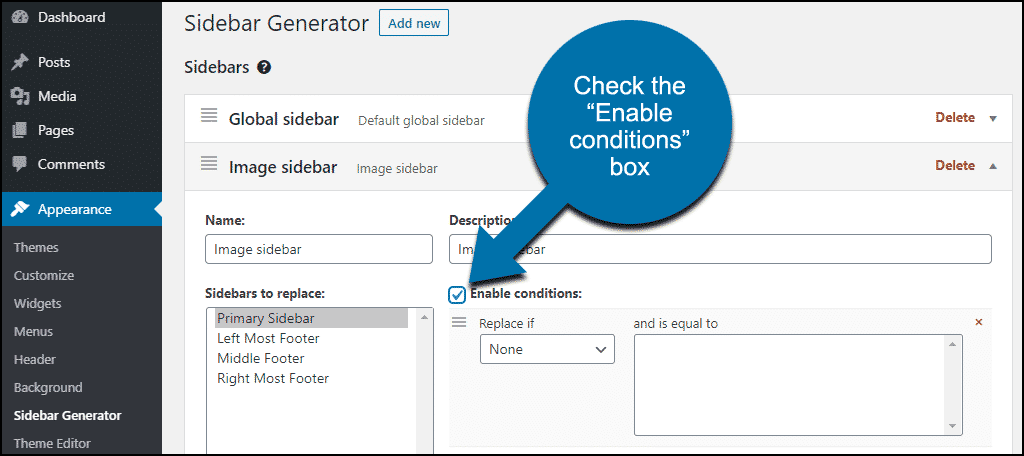
Now check the “Enable conditions” box. This is where we choose where the new sidebar will be visible.
Click the “Replace if” drop-down.
You can see we have the choice between “Posts” and “Pages.” I want to display an image in the sidebar of some pages of the site. So, I’ll select “Pages” in the drop-down.
Now the “and is equal to” field is populated with the names of all of our pages.
- If we select “All pages,” the image sidebar will be displayed on every page of the site. Posts will still show the global sidebar.
- If we choose a single page, the sidebar will be displayed on that page only.
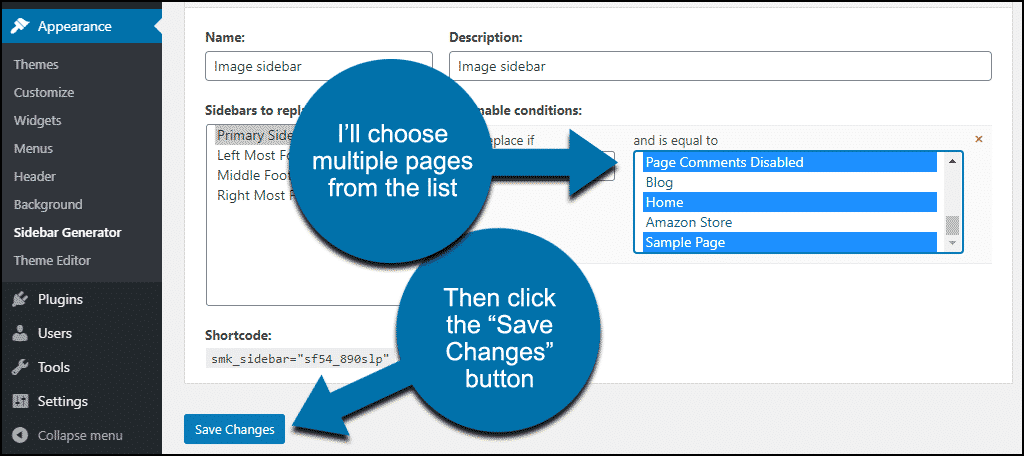
- We can also choose multiple pages by clicking a page name, then holding down the Ctrl key and clicking other pages.
I’ve selected a few pages to show our image sidebar.
Finally, we click the “Save Changes” button.
If we selected “Posts” from the “Replace if” drop-down, we would have the same options, but for posts, not pages.
Adding the Image Widget to the New Image Sidebar
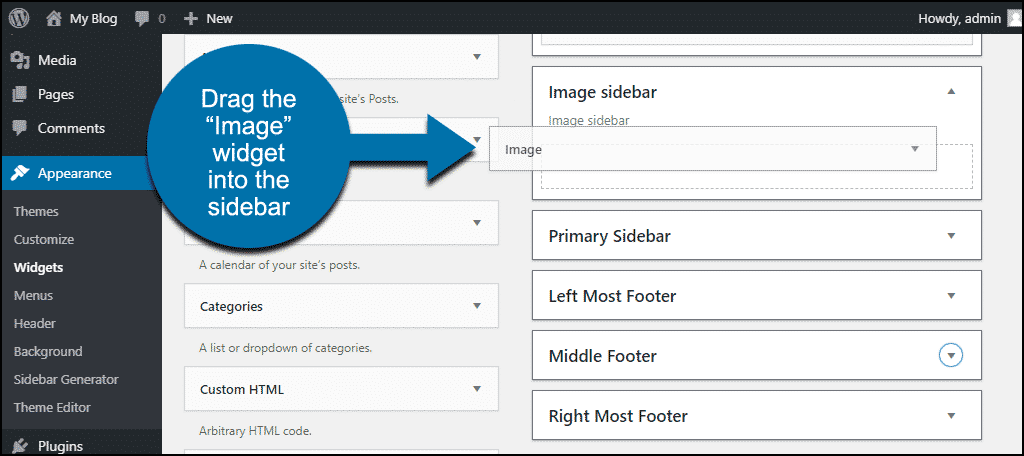
Now we’ll click the “Widgets” link in the left column again and drag the image widget into our new sidebar.
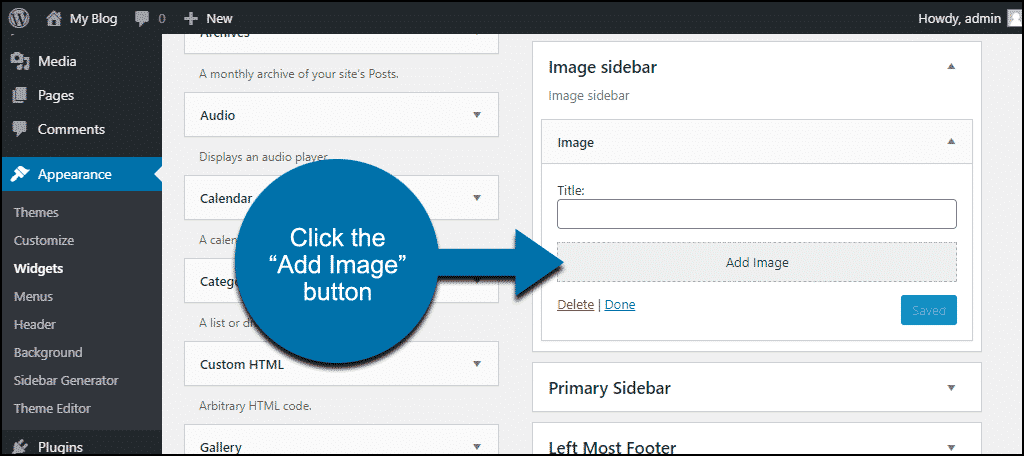
I’ll click the “Add Image” button to upload an image or add one from the Media Library.
Then click the “Save” button.
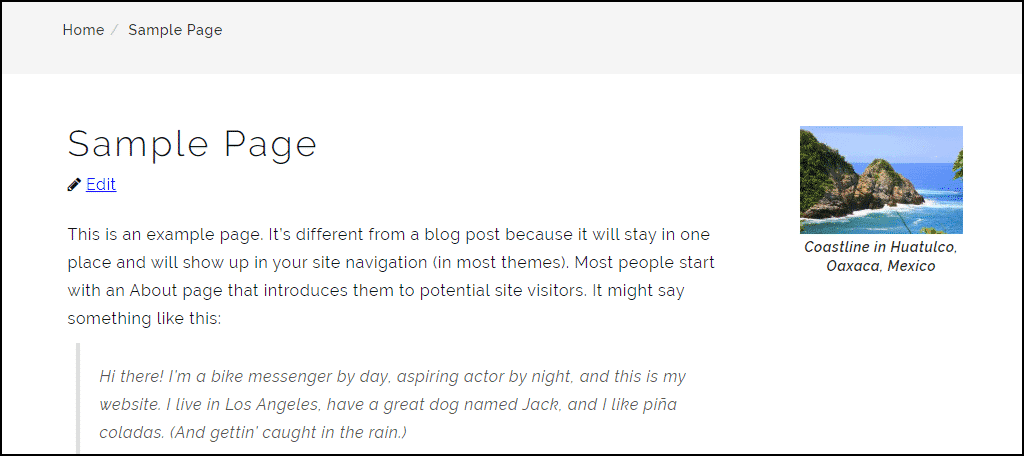
Now, if we go to one of the pages we selected in conditions, the image has replaced the calendar.
But if we go to a page that we didn’t select in conditions, the calendar is displayed.
Additional Conditions
We chose between pages and posts when we set up our conditions. But it doesn’t have to be either/or. For example, we can show our image sidebar on some posts by adding a condition.
I’ll click the “Sidebar Generator” link in the navigation, then open the image sidebar by clicking on it.
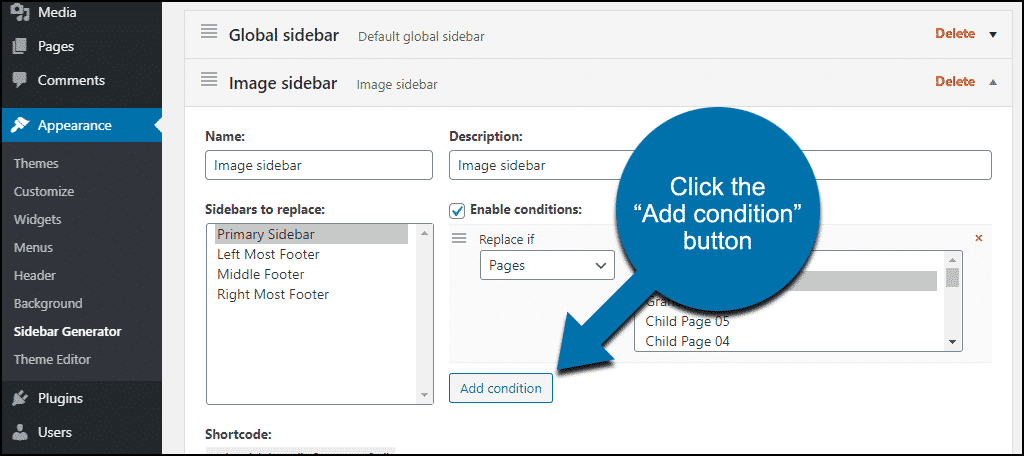
You can see under “Enable conditions,” there’s an “Add Condition” button.
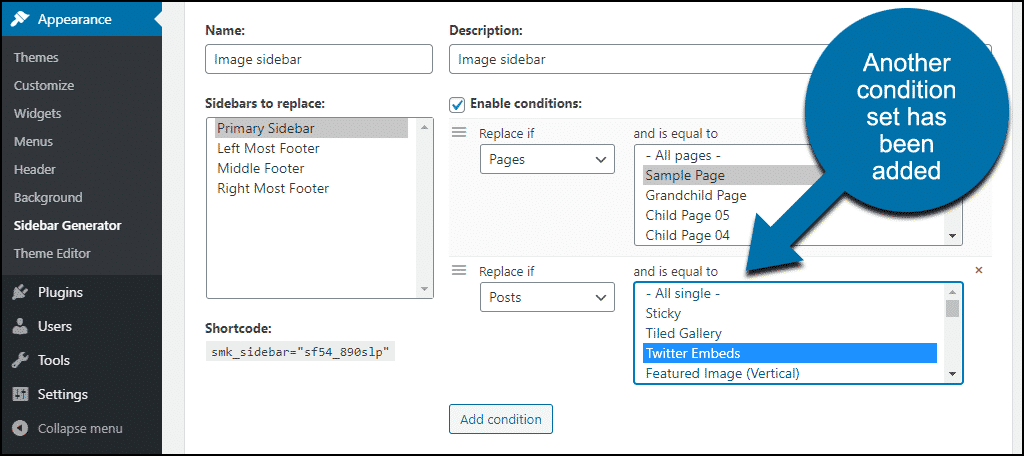
If we click it, another condition selection appears. From there, we can choose which posts (or all posts) we add the image sidebar.
That covers the setup and configuration. I’m sure you can see that the configuration possibilities are extensive. You can add as many conditions as you need to as many sidebars as you need. Pretty cool.
What Happens if You Uninstall the SMK Sidebar Generator Plugin
If you uninstall the plugin, all of your custom sidebars and configuration will be deleted. Pages and posts will revert to the original theme sidebar.
It’s Never Been Easier to Add a Sidebar to WordPress
We’ve gone over how the plugin works and shown you how to customize when and where custom sidebars appear. The SMK Sidebar Generator clearly provides a level of customization that isn’t available in a stock WordPress installation.
Sidebars may not be in style anymore, but maybe that makes them more attractive. In a world with no sidebars, the sidebar is king! But as I mentioned, this plugin can customize any widget area, so it works in footers as well.
Do you still use a theme with a left or right sidebar? Might you consider going back to a sidebar now that you know you can customize its appearance? Let me know in the comments.


WordPress Twenty Twenty Theme does not have a sidebar. Can I add a sidebar using this plugin?
Thank you