Custom post types are often created by users to create content outside of normal posts in WordPress. These can involve anything from movies to image galleries. Unfortunately, not all of these custom post types are connected to categories. This makes it difficult to find as well as keep organized on the site.
Creating a custom post type archive page is useful, but it’s not always the best option. Not to mention that many of these archives lack an assigned category or tags to connect with the rest of the website.
In this tutorial, I’ll show you how to create custom post types with categories in WordPress. Whether you’re creating new types or adding a category to an existing one, this method will work well to keep your content connected.
Using Custom Post Type UI
Creating a category is one of the easiest ways to keep WordPress content organized. However, this built-in method often doesn’t affect various custom post types.
Today, I’ll demonstrate the Custom Post Type UI plugin. This exceptionally easy tool is highly rated and very common among many WordPress developers.
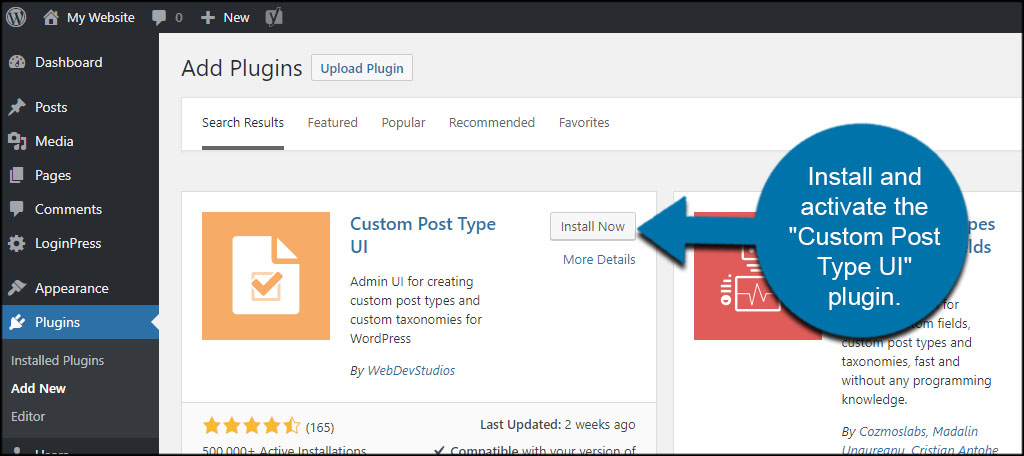
Install and activate the “Custom Post Type UI” plugin.
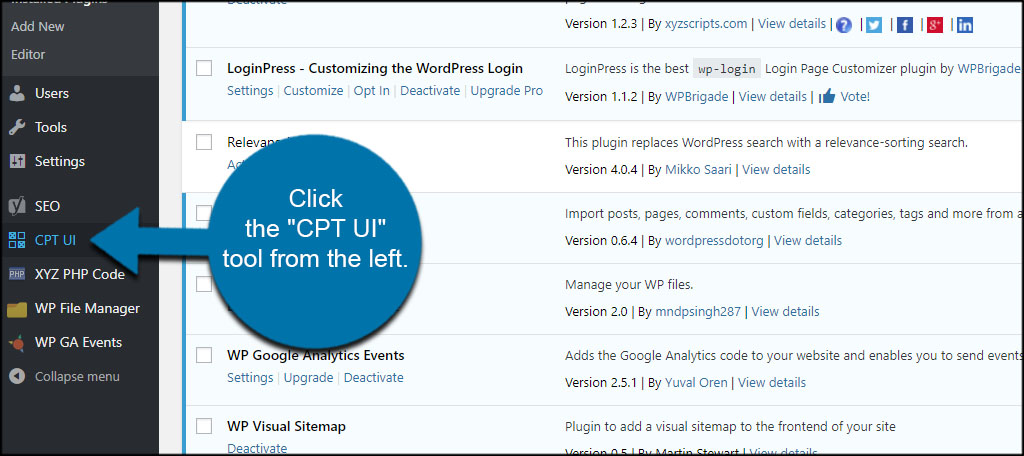
Click the “CPT UI” tool from the left.
Creating a New Custom Post Type
In this screen, you can edit and create post types. You can also modify settings like making the post type private, showing the UI, excluding from search results and much more. Most of these settings will rely on what you’re trying to develop.
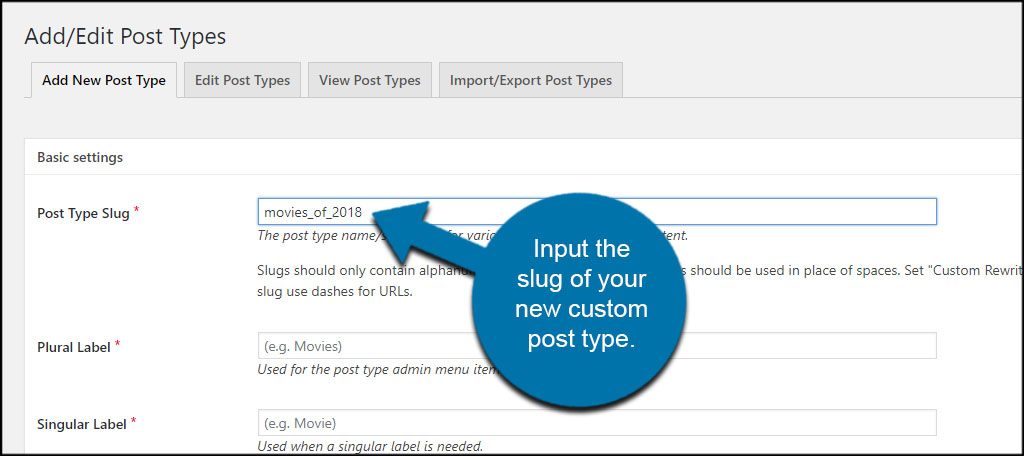
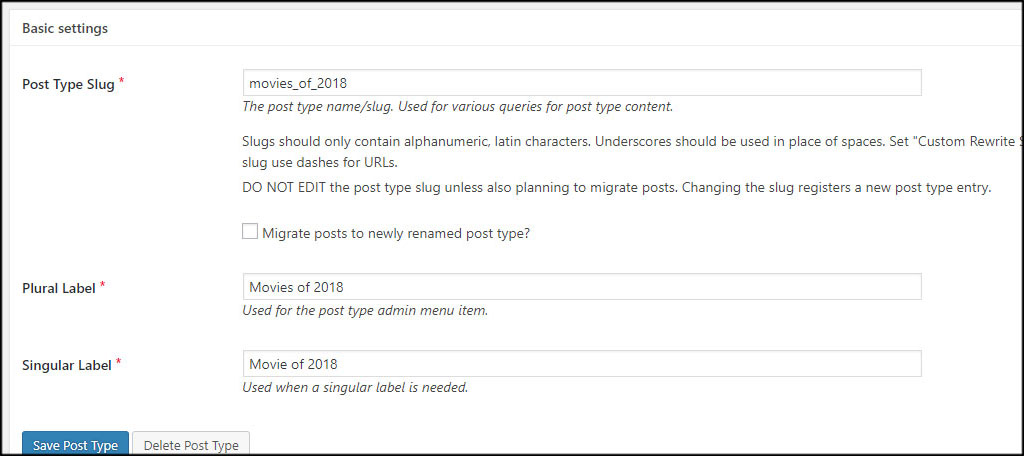
Input the slug of your new custom post type. For this tutorial, I’m going to simply make a quick one called “Movies of 2018.”
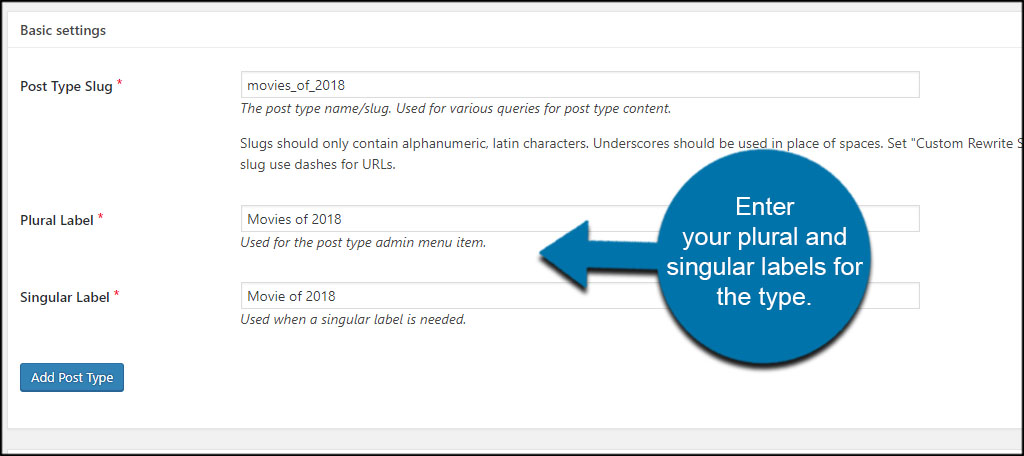
Enter your plural and singular labels for the type.
Go through the rest of the available settings in this screen and make changes as necessary. There are a lot of options to sift through, so carefully go over what is available.
At the bottom of the list, click the “Categories” box for built-in taxonomies.
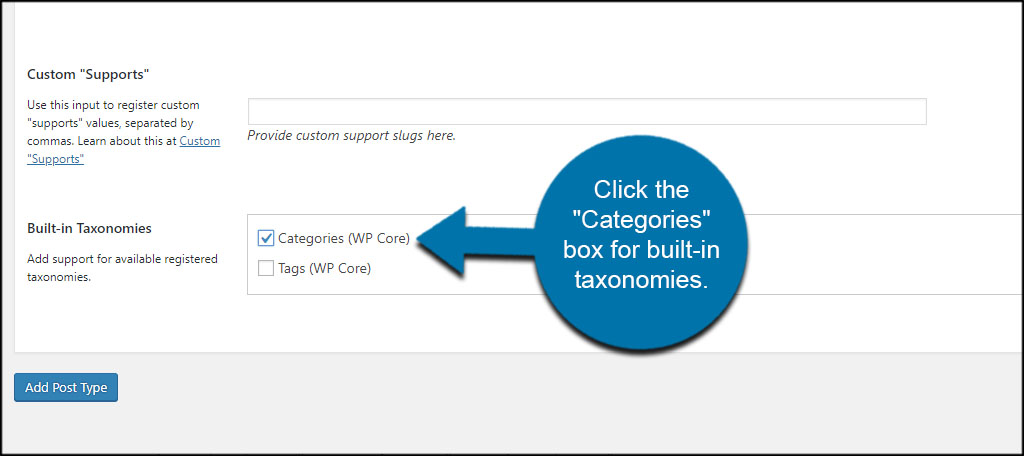
As you can see, you can also choose to add tags to the custom post type as well. This checkbox is directly under the “Categories” option.
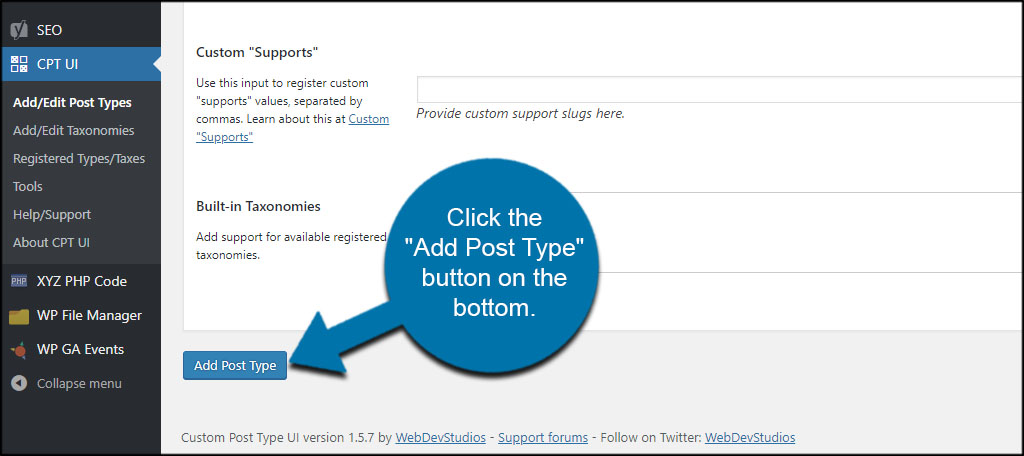
Once you’re done making your adjustments, click the “Add Post Type” button on the bottom.
Editing Custom Post Types
Editing custom post types created with CPT UI has a similar layout. At any point, you can go back and make modifications across any of the settings that are available when you add a post type.
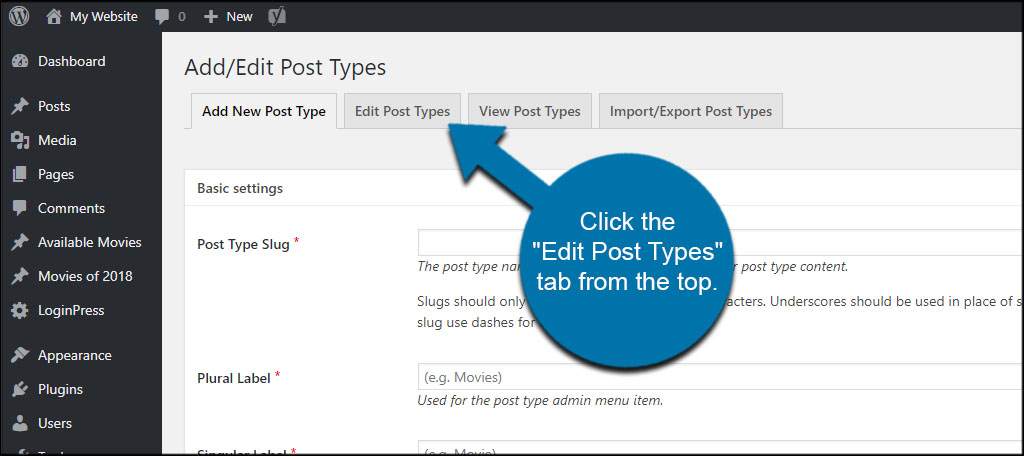
Click the “Edit Post Types” tab from the top.
Use the “Select” drop down window to choose the type to edit.
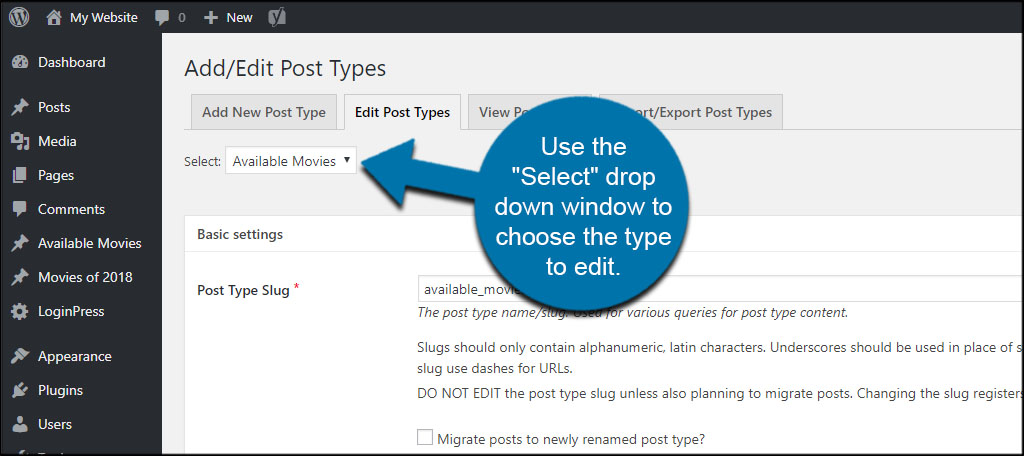
Once you choose the post type, it will immediately change the information available so you can edit or delete.
Adding and Editing Taxonomies
What if you want to add or edit taxonomies and connect them to custom post types? This is useful if you want to expand how the content is organized in terms of tags or categories.
Click the “Add/Edit Taxonomies” link on the left.
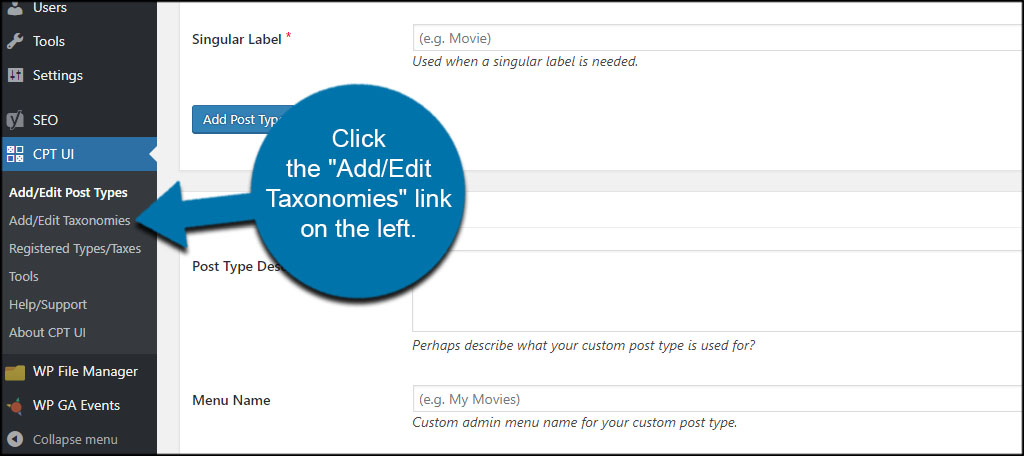
The taxonomies work in a similar way to post types. You enter a slug and labels as you did before. However, you now have access to the post types that are currently available in WordPress. Click the checkbox of the types you want the taxonomy to govern. As you can see, my new custom post types are also visible.
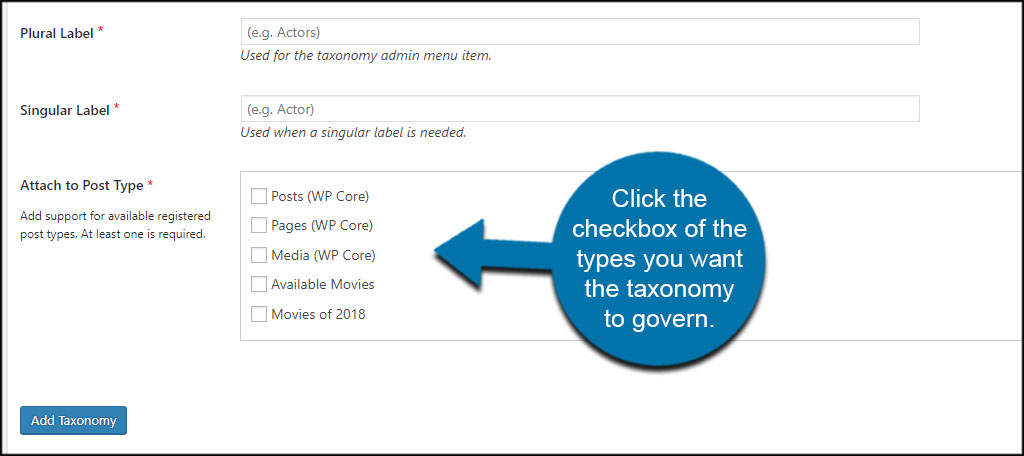
The long list of settings you can adjust is available in this section. Go through these options and assign the properties you want for the taxonomy.
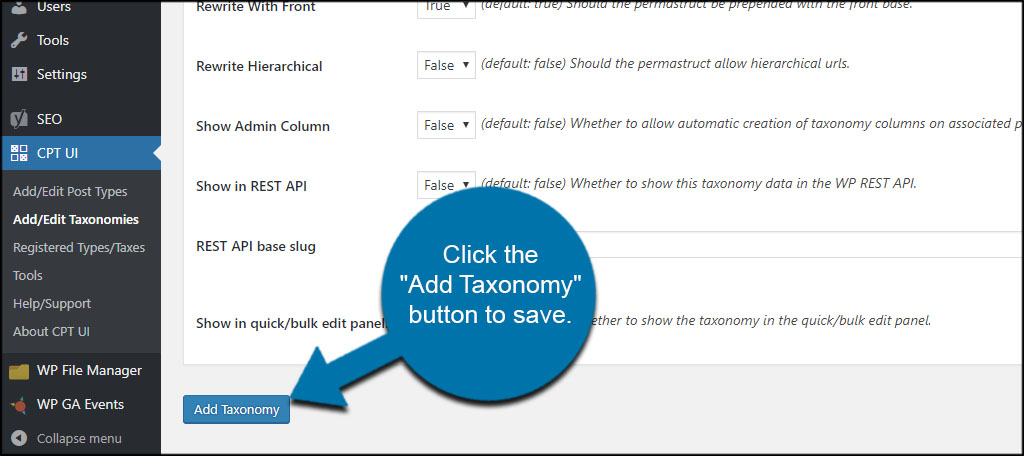
When you’re done with adjustments, click the “Add Taxonomy” button to save.
Customize WordPress to Fit Your Needs
This is just one of many ways to display custom post types by category or even tags. After all, these organization methods are also good for website SEO. It’s much easier than trying to master coding, and this particular plugin has served nearly half a million site developers. Keep your content organized and easy to find. It may impact the way you engage and retain visitors.
What methods do you have in place to make it easier to find certain content on the website? How often do you use custom post types?
