Are you looking for an easy way to create a client feedback form in WordPress? A feedback form allows customers to leave their thoughts on the products or services you provide.
It is an invaluable tool for gathering data that can help you improve your offerings.
However, WordPress does not have a way to create quality forms on its own. But like most things in WordPress, there is a plugin to do it. Today, I will demonstrate how to create a client feedback form in WordPress using the WPForms plugin.
Why Add A Client Feedback Form
Feedback is crucial to making improvements. Regardless if you offer products or services, the experience of the customer is what’s important.
Understanding what they liked and disliked about their purchase allows you to improve the business as a whole.
For example, if you get consistently bad reviews on a service you offer and they list exactly what’s wrong with it, you can make the necessary changes to improve your services.
On the flip side, if you are getting great reviews, you know that customers are responding well to what you are offering.
In either case, client feedback is the best way to obtain data on how you are performing as a business. However, you do need to be on the lookout for fake reviews.
Sadly, some people will go through the trouble of leaving a fake review, therefore, you need to make sure multiple reviews suggest the same problems or strengths.
Installing WPForms
WPForms is one of the most popular form building plugins with over 2 million active installs. It makes everything easy to do with its drag and drop interface.
Unfortunately, many of its features are locked behind the premium version. However, the free version will be more than enough to build a client feedback form in WordPress.
If you do not want to use WPForms, feel free to use these other great contact form plugins.
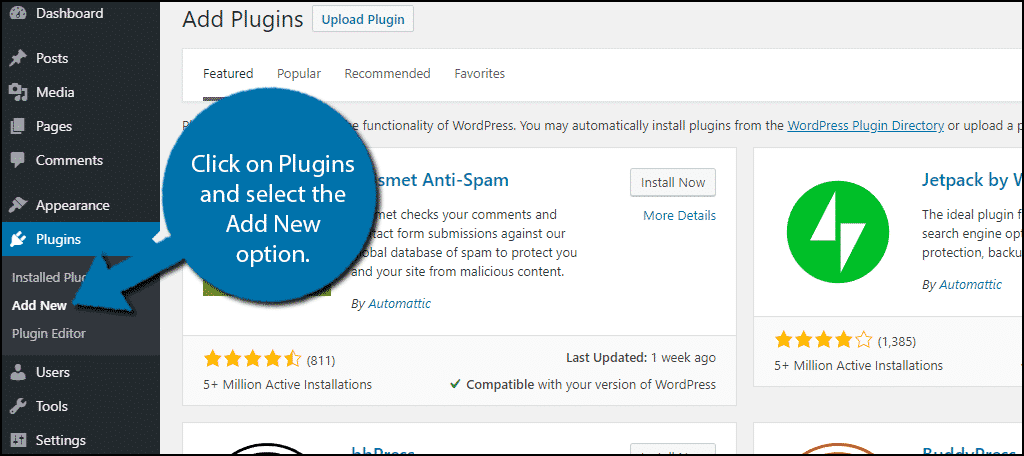
Let’s start by clicking on Plugins and selecting the Add New option on the left-hand admin panel.
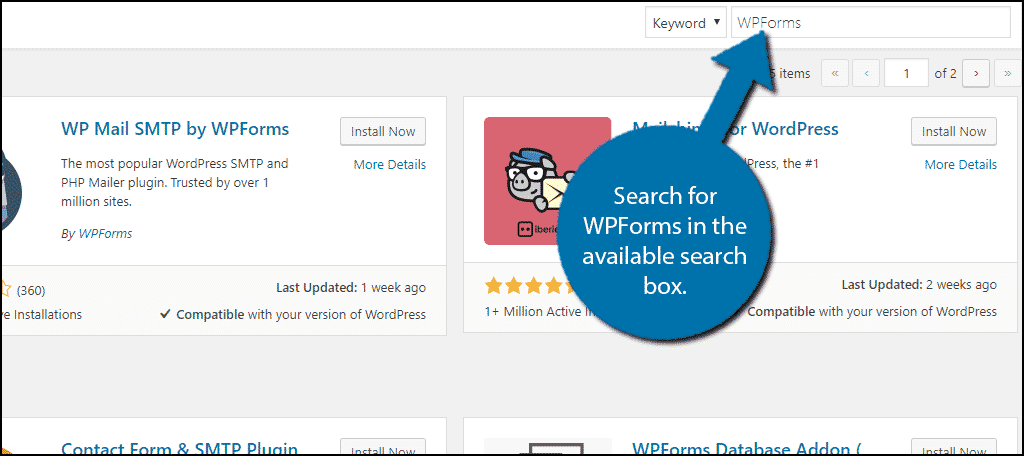
Search for WPForms in the available search box. This will pull up additional plugins that you may find helpful.
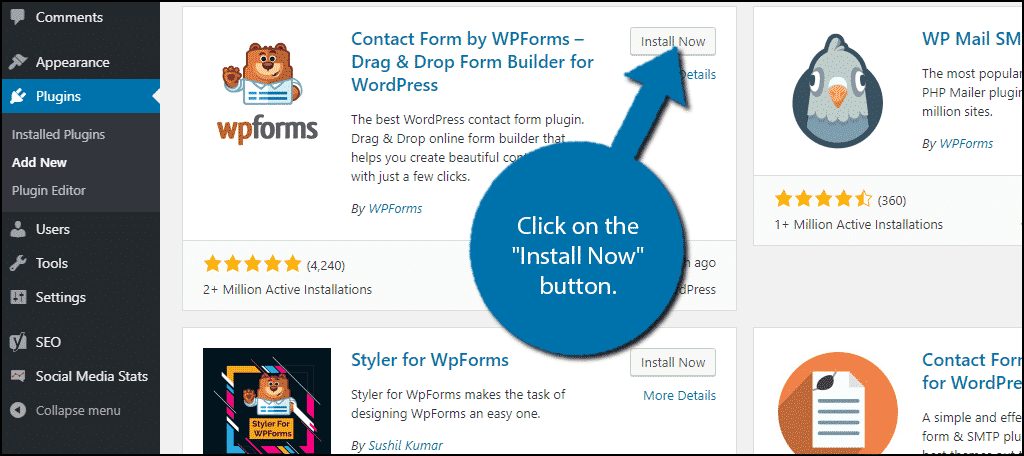
Scroll down until you find the WPForms plugin and click on the “Install Now” button and activate the plugin for use.
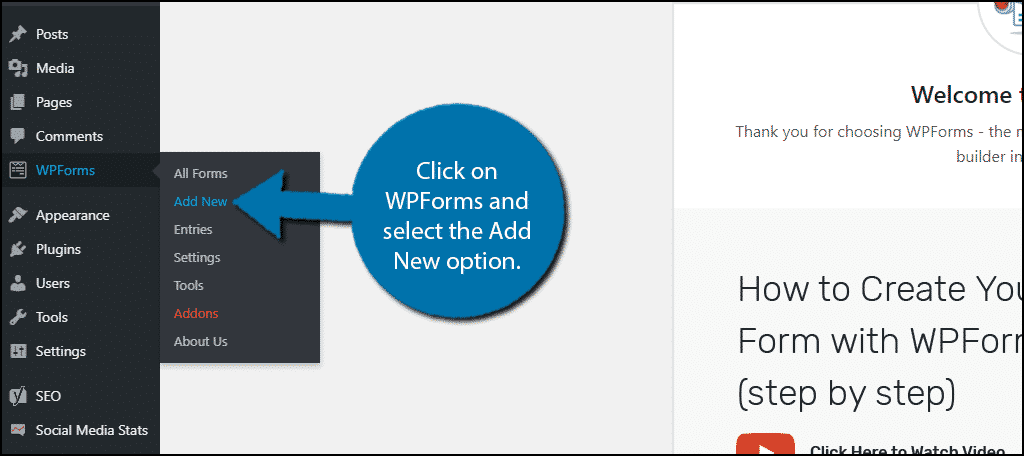
On the left-hand admin panel click on WPForms and select the Add New option.
Creating a Client Feedback Form
WPForms provides four templates to work with. Since we are doing a client feedback form, click on the “Suggestion Form.” Feel free to try a different template, but the Suggestion Form is the most appropriate for our needs.
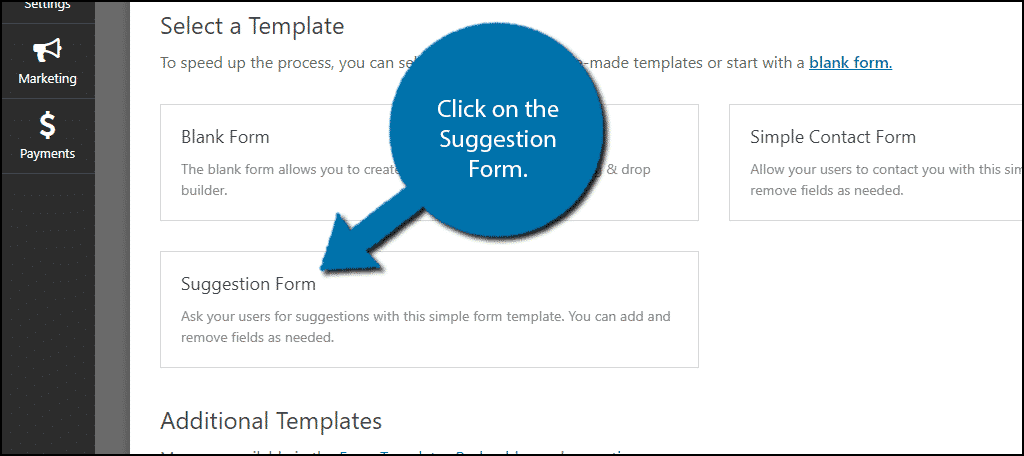
By default, the Suggestion Form provides a Name, Email, multiple choice question, Subject and Message fields. It is very basic and it might be exactly what you are looking for.
But there is room for a lot of customization.
To begin, look over the default form and decide if you want to add a new, remove or edit a field. It is always recommended to use the least number of fields possible. The longer a form is, the less likely a customer is to fill it out.
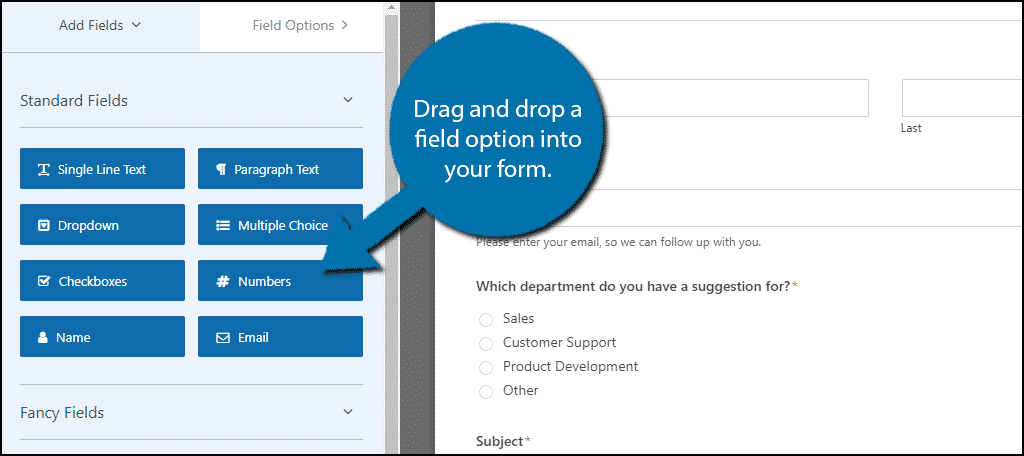
If you wish to add a field, look on the left-hand side. You will see 8 option you can use if you are using the free plugin and many more if you have the pro version. Simply drag the option you want into your new form.
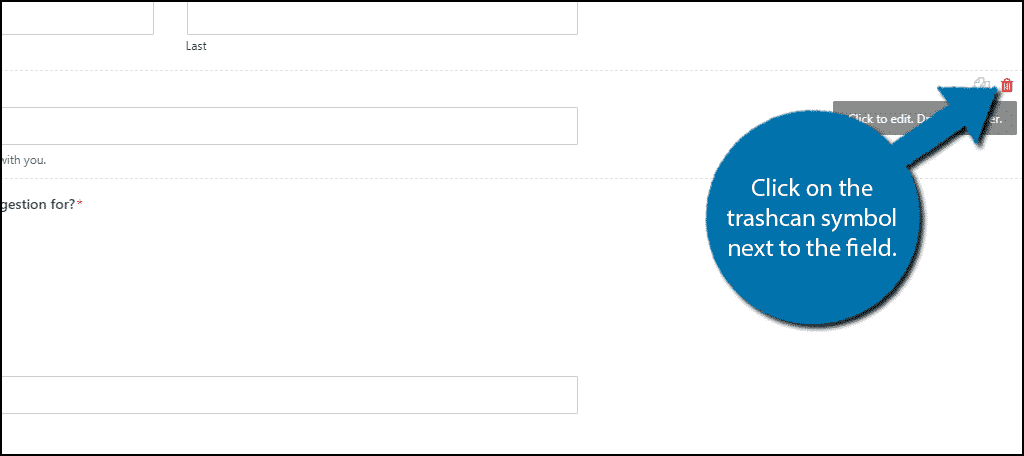
If you want to delete a specific field, click on the trashcan symbol next to the field.
To make edits, simply click on the field. On the left-hand side, you will see a place to edit them.
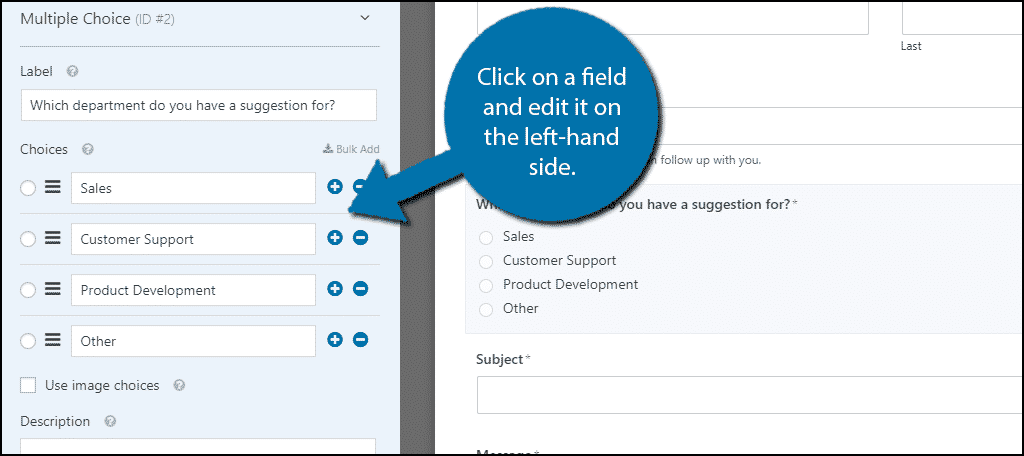
Use the tools at your disposal to create a client feedback form.
Setting Up Notifications
Once your feedback form is ready, you need to set up notifications. This will determine how you get notified about customers who take the time to fill out the form.
Obviously, if you do not read the feedback, there is no point to create a form in the first place.
Click on Settings and select the Notifications option.
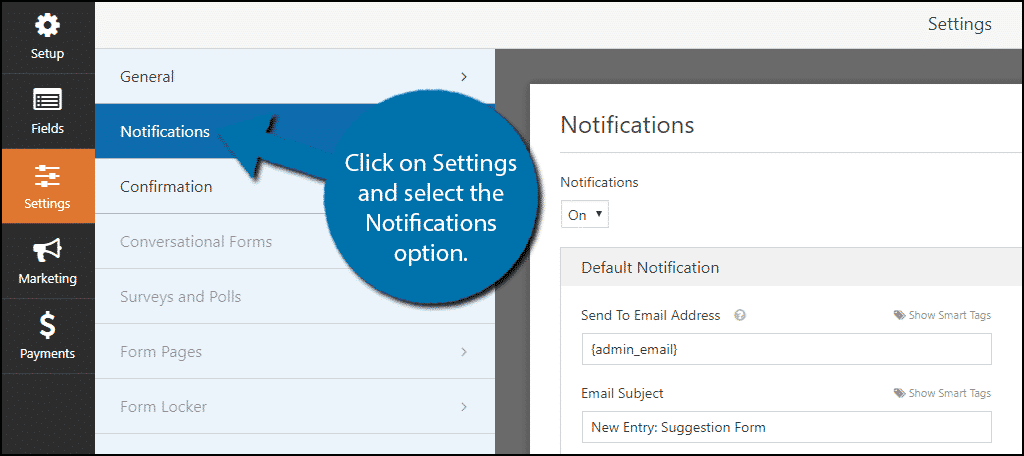
By default, the notification settings will send it to the Admin email address in WordPress. However, you can easily change who receives the message.
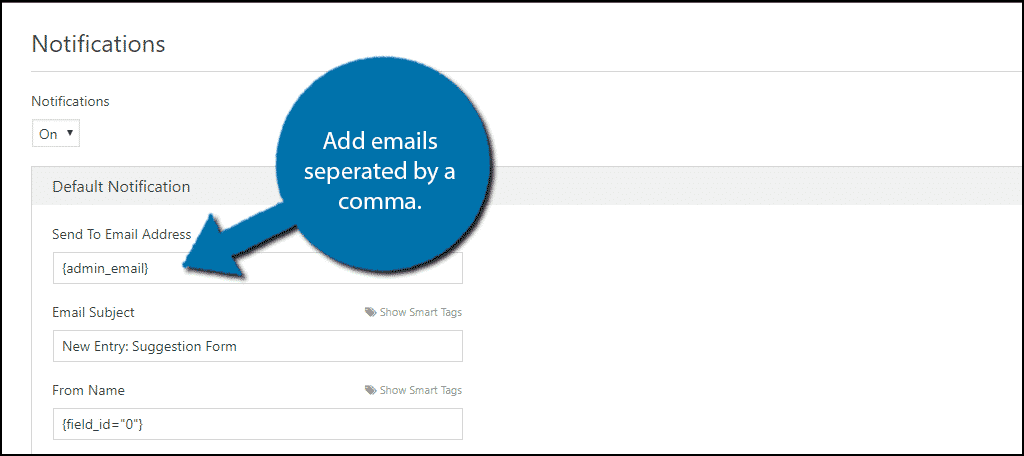
For example, you might want to send it to a support manager as well. If so, simply add the email to the email field. If you need to add multiple emails, separate them with a comma.
Click on Confirmation.
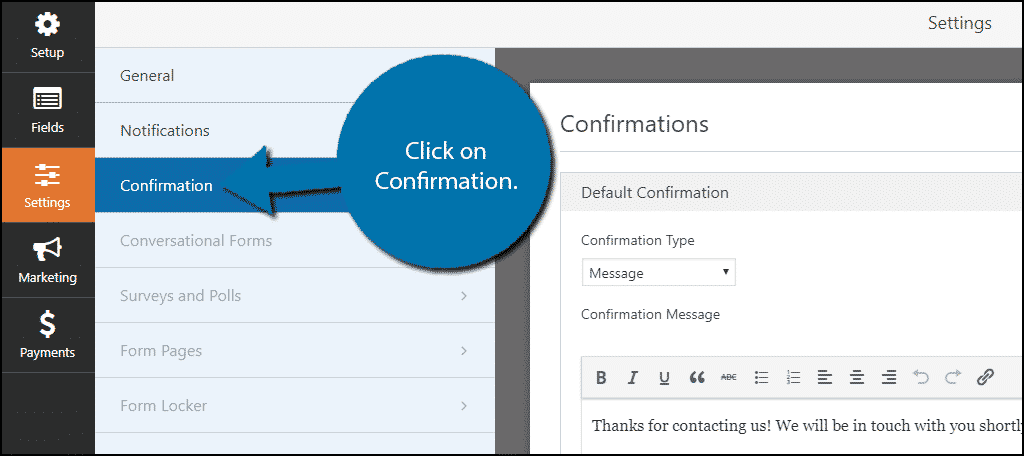
This is where you can set up the confirmation message visitors receive. This should be a short message that thanks them for spending the time and effort to fill out a form to help you improve the business.
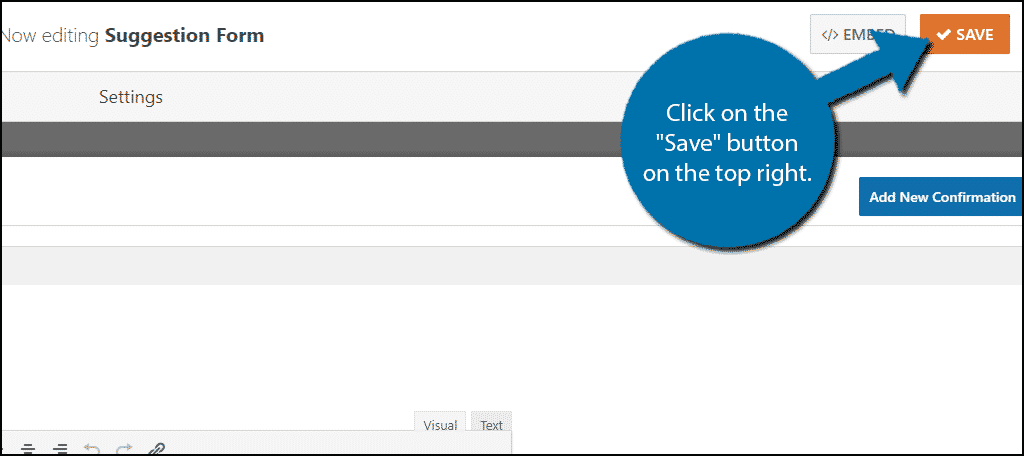
Once you are finished creating your form, setting up notifications and writing a confirmation message, you need to save your work. Click on the “Save” button on the top right.
All that is left is to actually add the form to your website.
Adding The Client Feedback Form
Go to any existing post/page on your website or create a new one. A great location for this form is on a Contact Us page.
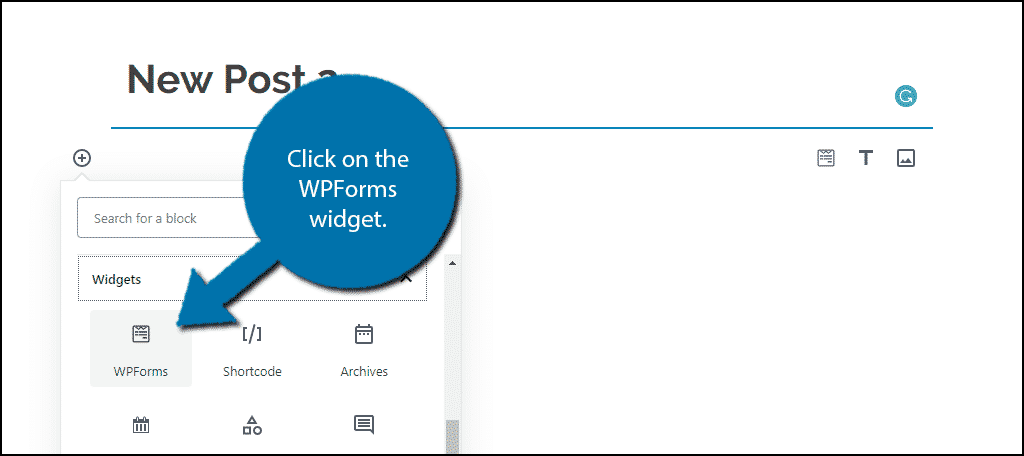
Click on the block you want to add the form. Next, Click on the “+” symbol on the right and select Widgets and finally, click on the WPForms widget.
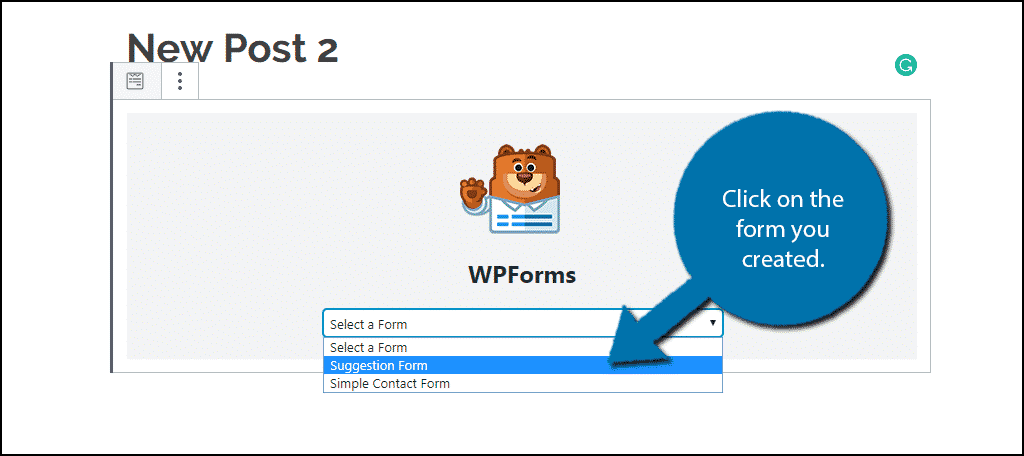
A WPForms menu will now appear in the block. Select the Suggestion Form you created in the drop-down menu. You will now be able to see your form on the post or page. Remember to save the changes.
Alternatively, if you have Gutenberg disabled, there will be an “Add Form” button in your toolbar. This will allow you to add the form to a post/page in the classic visual editor.
Congratulations, you have successfully created and added a client feedback form in WordPress.
Make It Easy For Customers To Reach You
If given the chance, many customers will leave you valuable feedback based on their experience. However, you need to make sure you have a system in place that collects the information and notifies you about it.
That’s where contact forms come into play.
Contact forms allow you to ask the questions you need to, and make it easy to do so. They can be used for a wide variety of content and the only limitation is your creativity.
How easy did you find WPForms to use? Are there any other contact forms you think every website should have?
