One of the major appeals of the WordPress platform is how easy it is to change the appearance of your website. This is all done by selecting a theme for its appearance. One way to take this a step further is to create a child theme for WordPress.
In simple terms, a child theme is a copy of your theme that you can freely edit, yet you can still update the main theme without losing any changes made to the child. This can save you a lot of headaches, as updates can often break your theme in unexpected ways.
As such, a child theme is a powerful tool for any website to take advantage of, and today, I am going to demonstrate how to create one and why you should do it.
What is a Child Theme in WordPress?
A child theme is one that inherits the styling and functionality of its parent theme. It is essentially a copy of the parent theme that can be modified and used on your website. This gives it the unique property of being able to update your theme without impacting the child.
Normally, when a theme is updated, it is very likely to impact your design, especially if you have added custom code to the theme. That’s because files are replaced when they are updated, which means your custom code will be deleted.
This isn’t the case with a child theme. It is an independent copy of that parent theme and not impacted. Thus, you can reap the benefits of updating your theme, without being negatively impacted by changes to the theme’s files.
And just like how the child theme is independent of the parent theme, the same is true the other way. Any changes to your child theme will not break your parent theme. Thus, using a child theme is one of the best additions you can make to your site.
What is a Parent Theme in WordPress?
A parent theme is just a theme in WordPress that has been declared the parent of a child theme. Essentially, a parent theme is the foundation of any child theme created from it and provides all of the styling options and functionality a child theme has.
In truth, every WordPress theme you install can become a parent theme if a child is created by the user.
With that said, not all themes are created equal. Since a child theme is limited by the parent theme, it is often recommended to always choose a feature-rich theme that has a lot of styling options and compatibility with major plugins.
This ensures that any child theme created from one will also have the same. Not to mention that a clean-coded theme makes it easier to edit the child theme from a code level. While any theme can be a parent theme, it doesn’t mean you should make it one.
8 Pros and Cons of a Child Theme
Advantages of Using a Child Theme
Like most things in life, everything has an advantage and a disadvantage associated with it, and child themes are no different. There are several advantages that make them a great choice for any website, so let’s take a moment and go over them.
1. Keep Changes After Updates
I’ve mentioned it already, but the biggest advantage of using a child theme is to avoid any problems that can occur when a theme is updated. Unfortunately, if you customize a theme with code, that code is overwritten when a theme is updated.
Or at the very least, the code is broken by the rest of the code in the theme updating.
Essentially, if you customize your theme with code and it is updated, it will no longer work because the code is essentially deleted. As such, it is common for sites to break completely when updating a theme.
While you can use a backup to revert the changes and bring your site back online, eventually you’ll need to update that theme. Not doing so opens the doors for security vulnerabilities, and that’s where child themes come in.
A child theme is independent of the parent as far as updates go. Thus, you can safely update your theme without impacting your site negatively because all of your code changes are located in the child theme files and not the parent.
2. Keeping Original Safe
While we just mentioned how a routine update could break a theme, the truth is that bad coding on a developer’s part is more likely to break a site than updating a theme. Once again, a child theme fixes this.
Again, since a child theme is independent of the parent, you can safely code the child theme without risk of breaking the parent.
This makes it a great option for trying new things on your site without risking any serious damage. Normally, you would either need to use a backup to revert the changes you made or reinstall the theme to revert the changes.
A child theme makes this not only safer but easier to correct if things do go wrong.
3. No FTP Required
File Transfer Protocol, or FTP, is a common method by which website developers make adjustments. Using tools like FileZilla gives you control over the site’s files without having to go through the cPanel.
However, if you are using a child theme, this isn’t necessary to do outside of an initial file creation.
Instead, you can simply access that file from your WordPress site and make all of the changes there. This makes it not only simpler to make changes but can also save you a lot of time setting up an FTP or accessing your cPanel.
4. Faster Development
This ties into the last point, but not only do you save time accessing files, it is just quicker in general. Remember, the parent theme is the foundation of your child. From a development standpoint, all you really need to do is change what you see fit.
Normally, coding or recoding an entire theme can take a lot of development time, but that’s not what a child theme is.
You are only modifying the parts of the parent that you want to change or expand on. This reduces the amount of code you actually create. Not only does this save you time, but it also allows you to focus on what’s important to the site.
5. Easily Create Similar Sites
Many sites create one successful site and then create another for multiple reasons. In many cases, the developers want to create a similar site to the original, and it often starts with making a copy of the original site and modifying it to meet the needs of the new site.
Naturally, this makes a child theme a great option as you can easily transfer everything to the new domain.
Once you copy the child theme over to the new site, you can simply modify it as needed. Again, this is quicker for development time and easier to manage than cloning your site from one domain to another.
Disadvantages of Using a Child Theme
As you can see, there are a lot of reasons why you may want to add a child theme in WordPress, but that doesn’t mean there are no drawbacks. Let’s take a look at some of the things you need to keep in mind when considering if a child theme is right for you.
1. Requiring Knowledge of Theme Files
Clearly, you are going to need to know your way around a theme file to make meaningful changes to it.
While in many cases you will just be modifying the stylesheets of the theme to add CSS to customize the appearance of your site, if you plan to change or add functionality, you’re going to need some deeper knowledge.
Not to mention a lot of what goes on in a child theme relies on understanding how hooks work to call upon certain files within the main theme. Thus, if you are not proficient at coding, this may not be a good option for you.
2. Possible Slower Site Speed
If your website utilizes a child theme, you may notice that it may have become slightly slower, or even significantly slower.
It really depends on the number of changes you made to the child theme. This happens because WordPress will try to load the parent theme, and then be told that it must load the child theme. Thus, it adds an extra step to the entire process.
That said, the level of speed your site loses depends on the changes you make. Smaller changes will almost have no impact on your site performance, but major ones, like customizing or adding a new feature, could severely impact load time.
3. Abandoned Parent
While updates are likely to break a theme if you make changes to it, sometimes the opposite happens. Theme developers abandon a theme, and it receives no updates for a prolonged period of time.
This becomes a massive security vulnerability as the theme may not be keeping up with WordPress core updates.
While this is a problem for any theme, it’s still worth pointing out as it could put your site at risk. This is especially true if you’re not paying attention to how long since the parent was updated.
Thus, if support ends for the parent theme, you will need to get a new theme and make a new child.
Method 1: Make a Child Theme Manually
Creating a child theme is not a terribly complicated process and can be done manually in a few minutes if you know what you’re doing. Even if it is your first time, it is not a very hard process to follow.
With that said, since you will be editing files on your website, it is highly recommended to take a moment and create a backup of your site. This will ensure if a mistake is made, you can easily revert the changes.
Step 1: Open the Theme Directory from cPanel
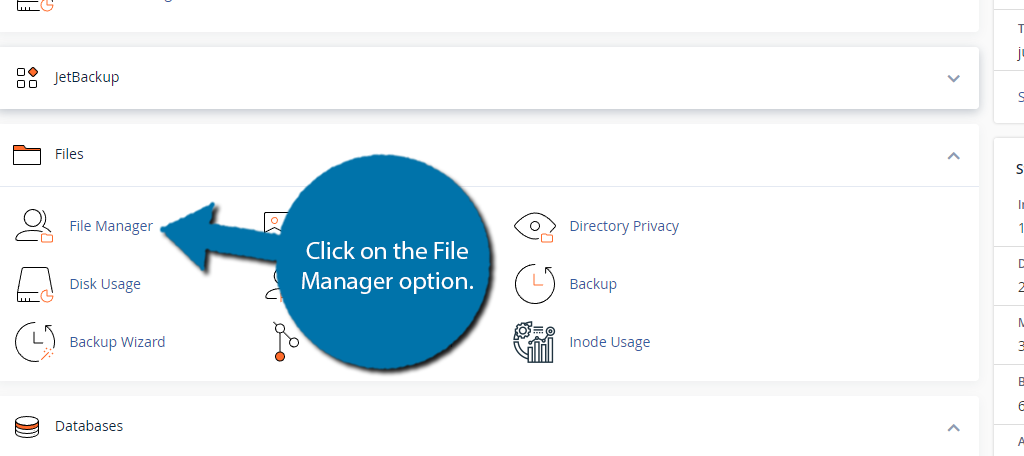
The first thing you need to do is access your web hosting account and enter the cPanel. If you need help obtaining your login credentials, contact your web hosting company. Once there, locate the Files section and click on the File Manager option.
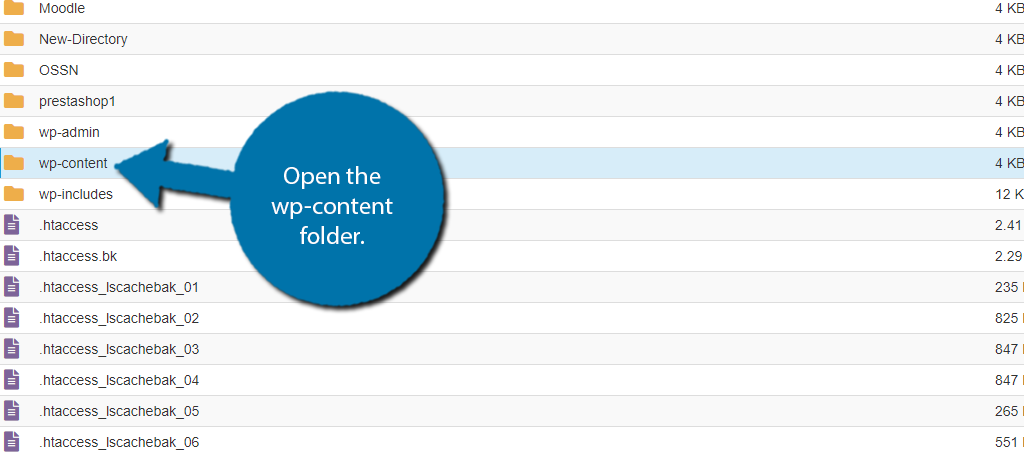
This contains all of the files stored on your web server. We need to locate the theme directory to create a child theme. To do so, first, enter the public_html directory and open the wp-content folder.
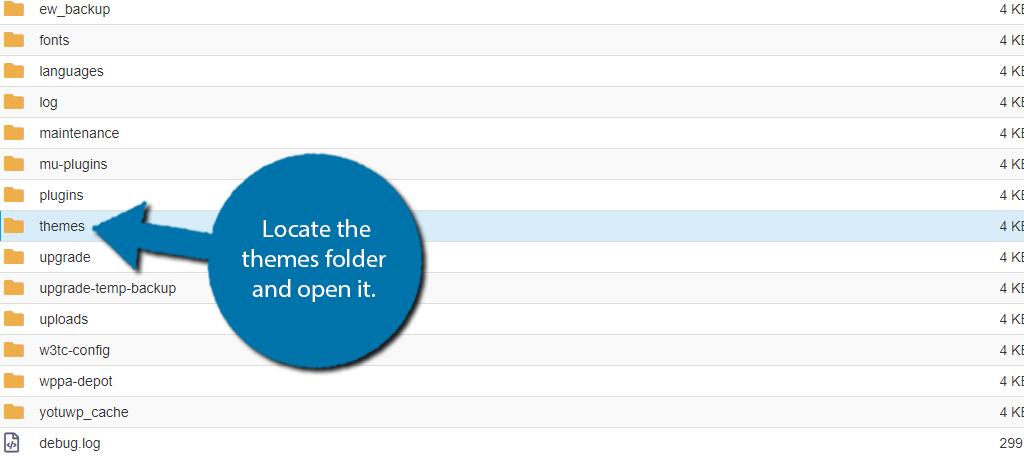
Finally, locate the themes folder and open it.
Step 2: Create a New Folder for the Child Theme
The theme folder contains all of the themes and their associated files. This is where we are going to create the child theme. To start this process, we are going to need a dedicated folder for it.
To add one, click the “+ Folder” option from the top toolbar.
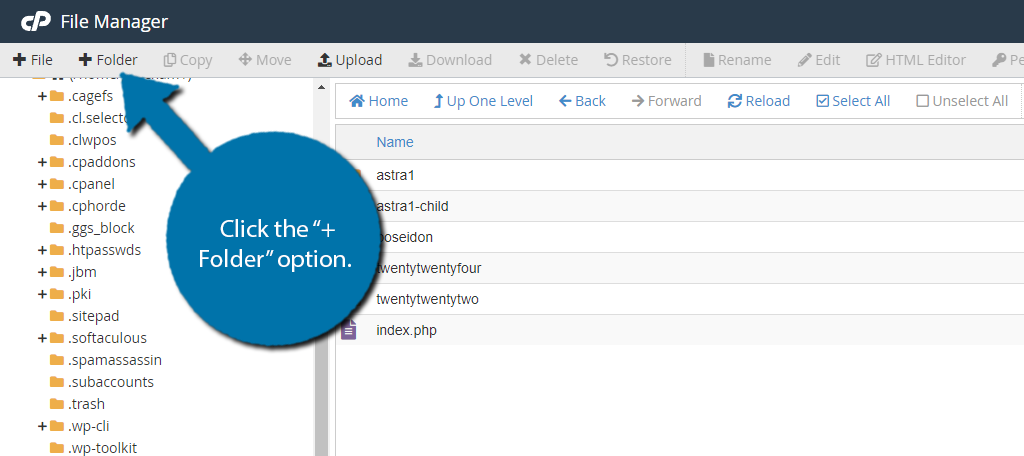
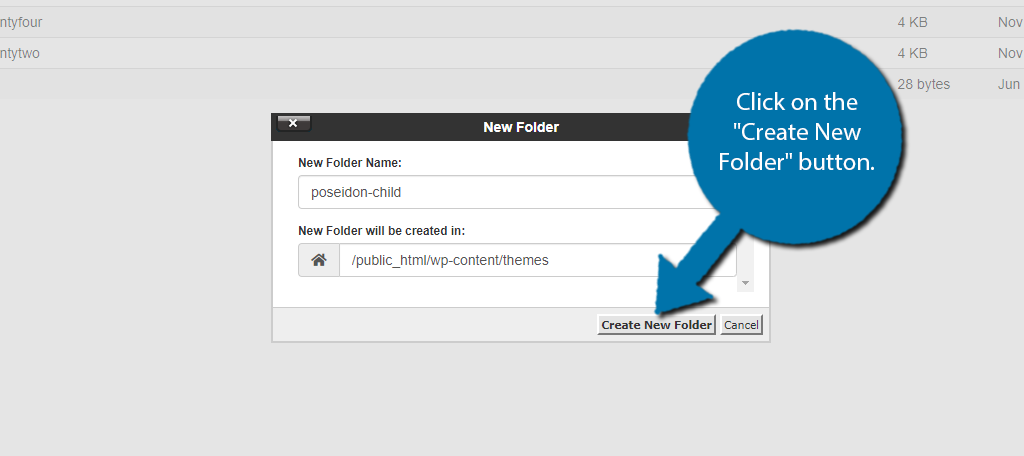
This will open up a small popup where you can enter the folder name of the child theme. I would recommend something along the lines of [YourThemeName]-child, but the choice is up to you. Enter the name and click on the “Create New Folder” button.
Step 3: Set Up the style.css File
Now that we have a file for our child theme, go ahead and enter it. Normally you would see all of the files for your WordPress theme like the functions.php file, but since we just created the child theme, it is blank, but we are about to change that.
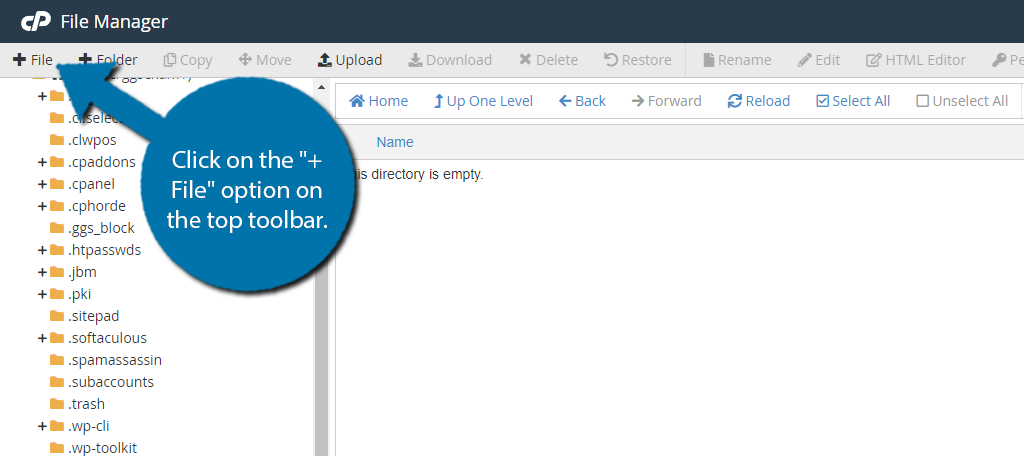
The only thing we need to add is a style.css file. To do so, click on the “+ File” option on the top toolbar.
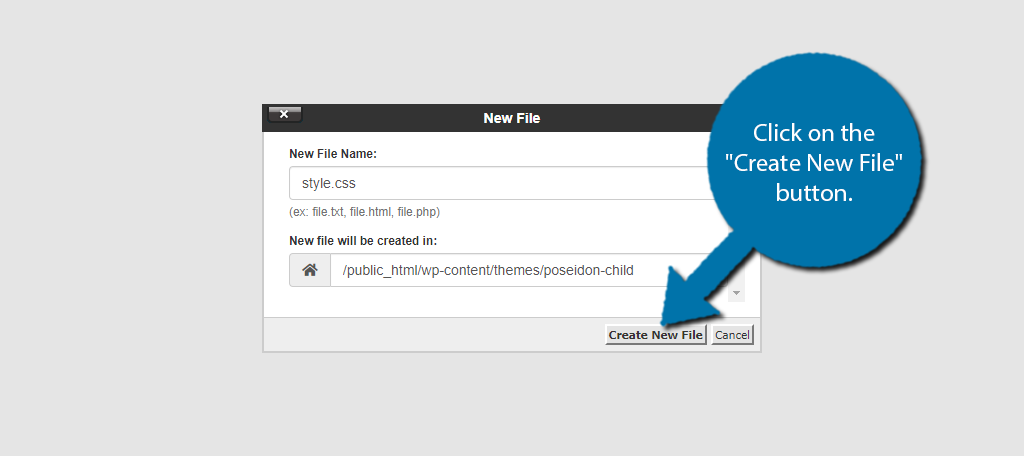
A familiar popup should appear asking you to enter the name of the file. You must name it “style.css” and double-check the spelling. This name must be the same or your website will not recognize it. Click on the “Create New File” button.
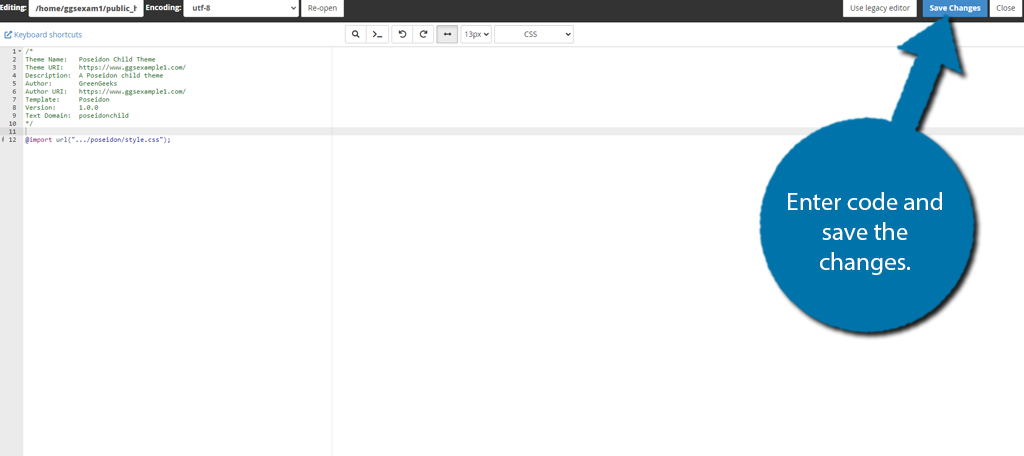
Alright, now we need to fill the file with the necessary code, plus this is your chance to add your own custom code to change how the theme looks. Go ahead and enter the file we just created.
Enter the following code into the file. In this case, you will need to enter your own URL and theme information. In this case, I am making a child theme for the Poseidon theme. Simply name yours accordingly.
/*
Theme Name:   Poseidon Child Theme
Theme URI:       Enter Your URL
Description:      A Poseidon child theme
Author:             GreenGeeks
Author URI:      Enter Your URL
Template:         poseidon
Version:            1.0.0
Text Domain:    poseidonchild
*/

@import url(".../poseidon/style.css");
Take special note to the last line of code. This is going to import the stylesheet of the parent theme. Ensure that the path entered is correct for your web hosting environment, as not every website will be the same.
Save the changes after the code has been entered.
Note: You can also add any custom CSS you wish to add during this step. Just add it at the bottom of the files. Or you can wait until after you activate the theme to view the changes you make.
Step 4: Activate the Child Theme
With that saved, your child theme has been created in WordPress. Now you just need to take a moment and activate it as your theme in WordPress, which is identical to activating any theme in WordPress.
Click on Appearance and select the Themes option. Here will be a full list of every theme you currently have installed in WordPress. Activate the child theme you just created.
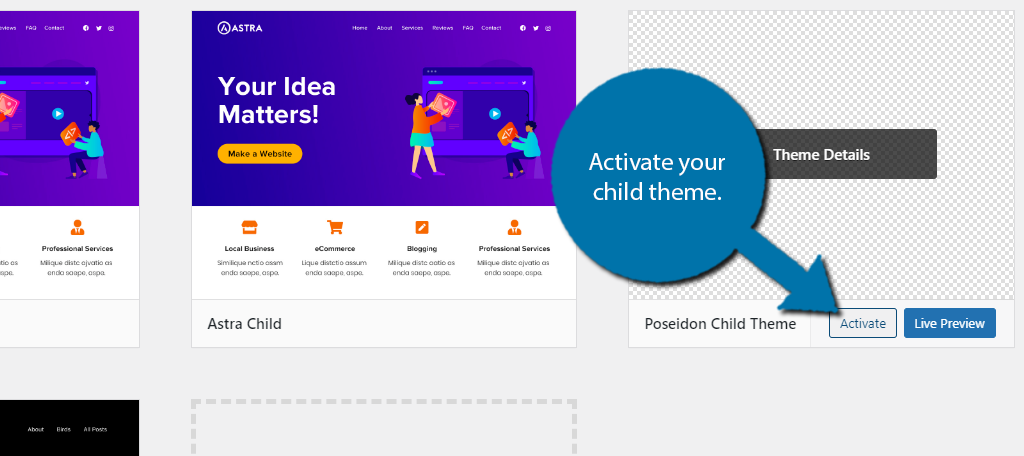
If you set everything up right, the theme will look identical to the parent theme as it is calling its stylesheets. If not, review the code in your files and refer to that theme’s documentation for help with setting up a child theme. Alternatively, check out the next method.
Step 5: Edit the Child Theme Files
So, you could access the child theme files via the cPanel, and add your own code to them from there, but there is a much easier way to do this in WordPress. Click on the Theme File Editor option under Appearance.
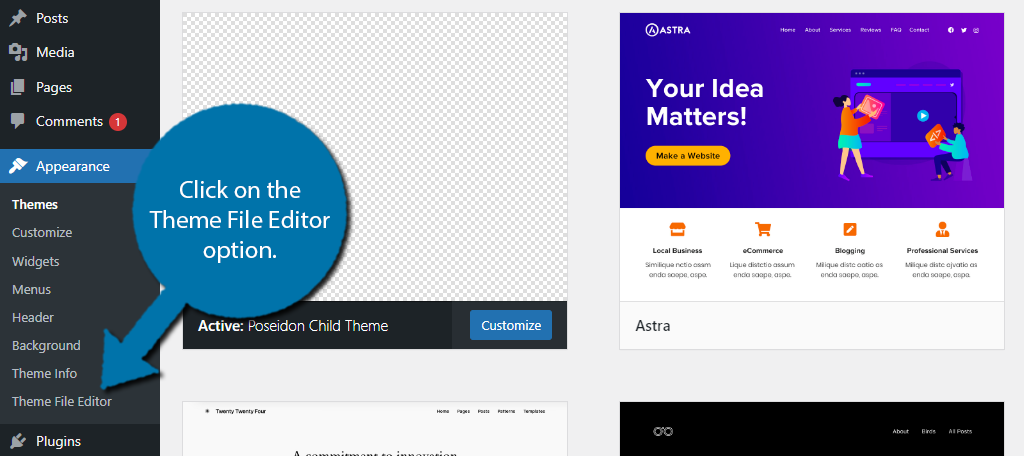
By default, WordPress will show the only file we created earlier in your child theme.
Simply insert your code at the bottom of the file to make changes. The changes you make will override the parent theme’s stylesheets. Thus, you can freely customize your child theme from WordPress itself.
Be sure to update the file after any changes are made.
And with that, you have successfully learned how to create a child theme in WordPress manually. If it doesn’t work right the first time, double-check your code, as it is pretty easy to make a mistake.
If you are looking for an easier way, the next method using the Child Theme Configurator plugin is probably the better way of doing this.
Method 2: Make a Child Theme with a Plugin
While you can do everything manually, you can save a lot of time by using a plugin. This is quite helpful if you plan on creating multiple child themes. Naturally, WordPress has a lot of options when it comes to this.
One of the best options is the Child Theme Configurator plugin.
It is a popular plugin with over 300,000 active installs that simplifies the process. It will determine the best way to create a child theme for your current theme, while also streamlining the editing process for you.
Step 1: Install Child Theme Configurator
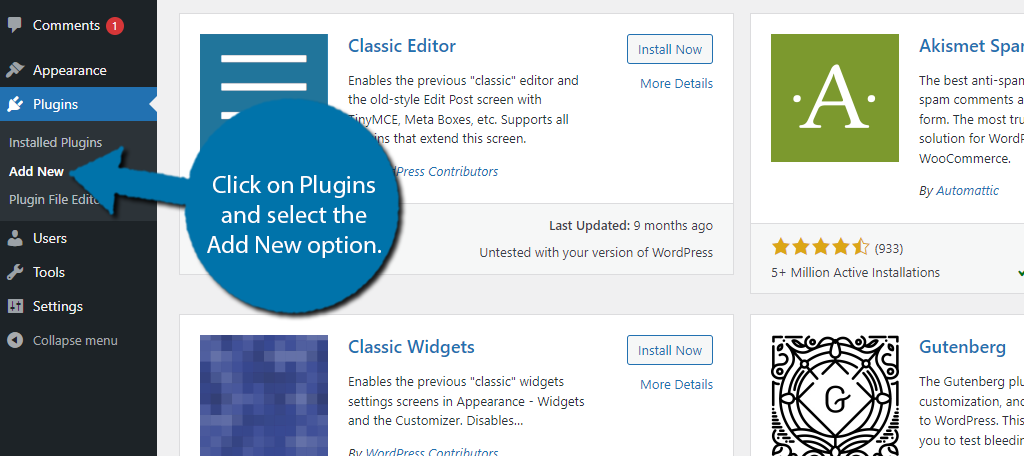
Let’s start by clicking on Plugins and selecting the Add New option on the left-hand admin panel.
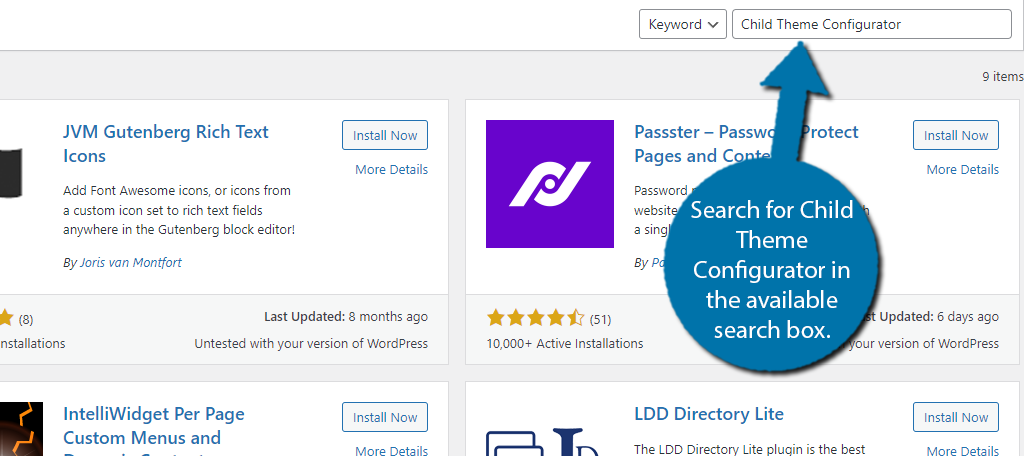
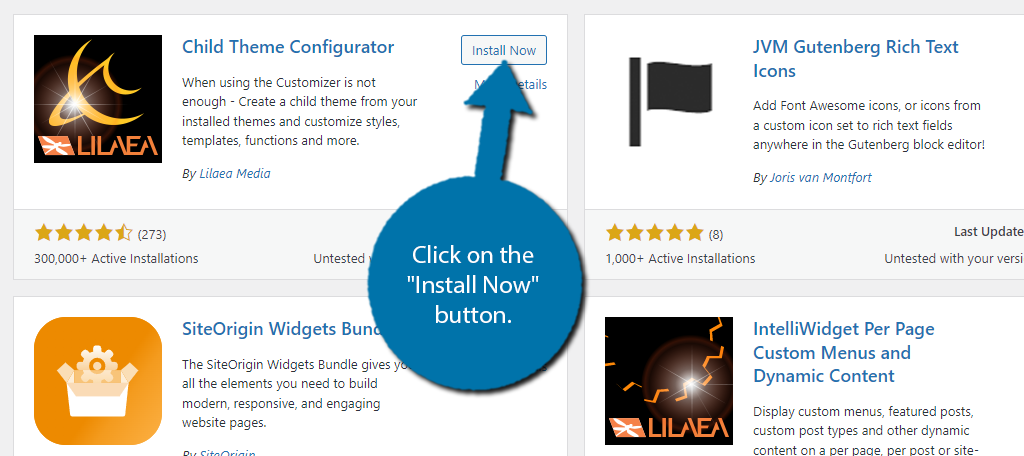
Search for Child Theme Configurator in the available search box. This will pull up additional plugins that you may find helpful.
Find the Child Theme Configurator plugin and click on the “Install Now” button and activate the plugin for use.
Step 2: Create A Child Theme
Using the plugin is pretty straightforward. It analyzes your theme, and it determines the best way to make a child.
To begin this process, click on Tools and select the Child Themes option.
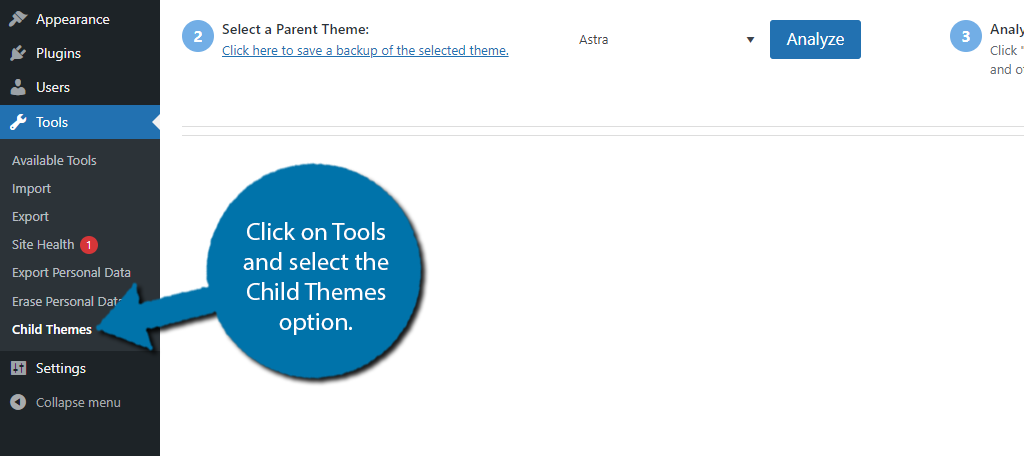
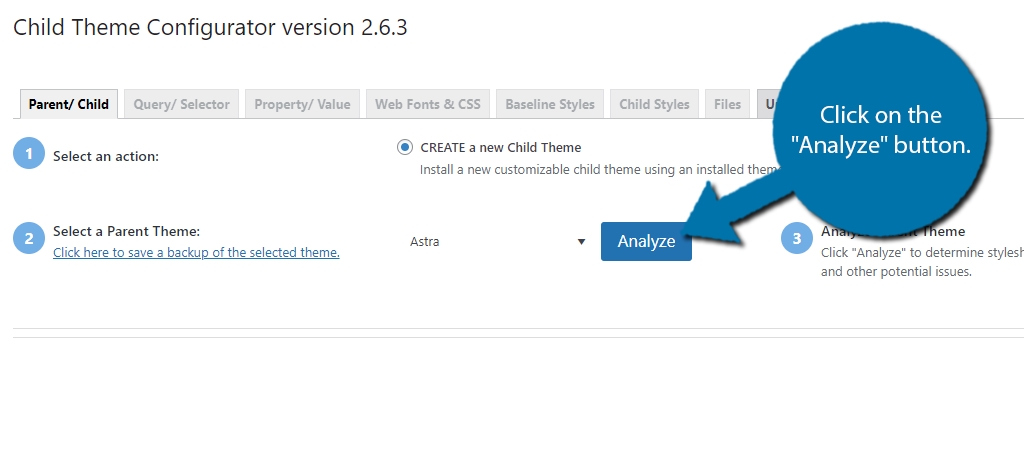
The plugin will automatically identify your current theme and select it as the parent for what you are about to create. It is possible to select a different theme if you have it installed by using the dropdown menu.
Click on the “Analyze” button to begin the process.
After a moment, a series of options will appear informing you what the plugin found and how to create a child theme in WordPress. The options that appear for you may be slightly different than what appears for me. It all depends on the theme.
As such, I’ll just focus on some of the options that probably appear for most themes. Let’s start with naming the directory.
By default, the plugin will call it “[YourThemeName]-child]” and you can leave this or change it. This is where all of the files for your child theme will be stored, so be sure you can identify it for easy access.

You will need to choose how stylesheets are handled, and this really depends on your theme. The plugin should auto-select what it thinks is best, so feel free to just use it. There will be an option that allows you to configure the child theme attributes.
Here, you can edit the child theme name, description, and other information as you see fit.
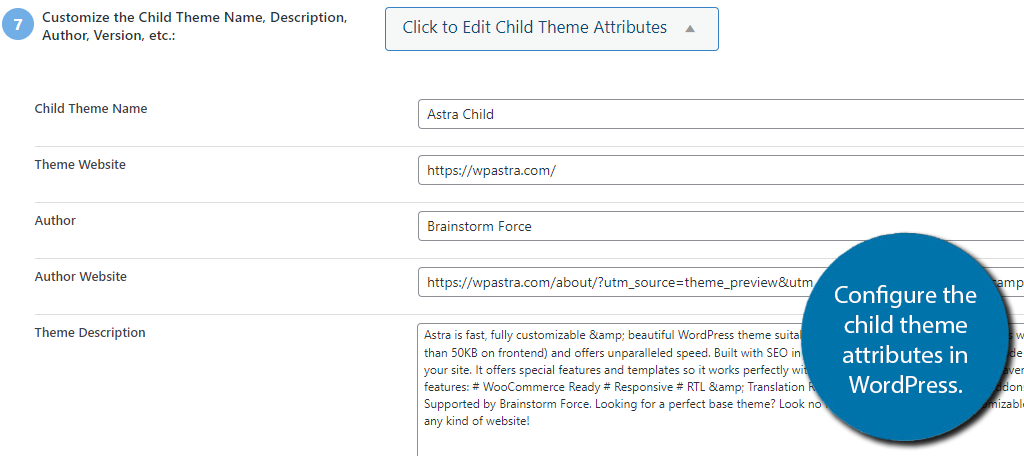
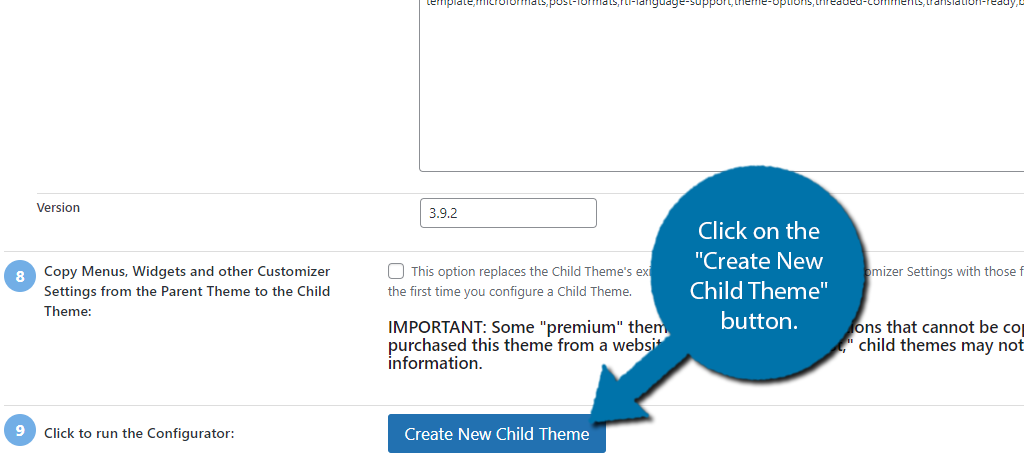
There are other settings, so be sure to go through every option. When you are done, click on the “Create New Child Theme” button.
Step 3: Configure And Activate Your Child Theme
Once the plugin generates the child theme, that’s pretty much it. All that is left is for you to actually configure the child theme. Remember, all of the files are located in the directory you created earlier.
Once you have actually taken the time to configure the files, all you need to do is set it as your theme in WordPress.
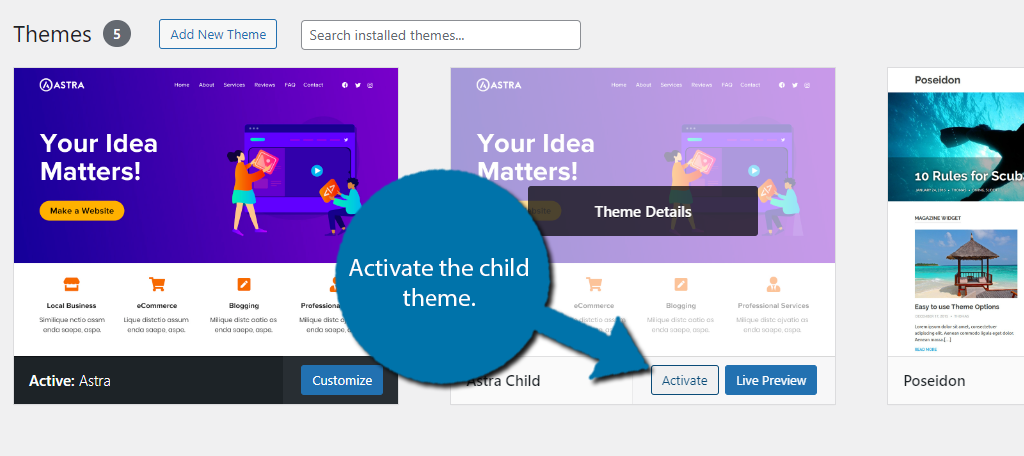
This is no different than selecting a regular theme. Click on Appearance and select the Themes option.

You should now see your child theme as a selectable option. Simply click on the “Activate” button to use it.
And that’s it. You can safely delete the plugin if you wish as the theme is already created and the plugin is no longer required. Congratulations on learning how to create a child theme in WordPress with a plugin.
When Should You Use a Child Theme?
A child theme should always be considered whenever you find yourself thinking about modifying your theme.
As we have covered extensively already, creating and modifying a child theme is a better choice than directly editing your theme because when that theme is updated, the changes you make will be overwritten.
That said, it really does depend on what you are trying to accomplish when tinkering with a theme.
For example, perhaps you just want to make a small change to alter the design of your site, which requires a few simple lines of CSS. This isn’t a big deal to add to your theme, but you might need to re-add this every time the theme is updated.
As such, creating a child theme in this instance is probably the better option because it is a one-and-done thing, assuming you know how. The truth is that WordPress is home to a lot of beginners due to the simplicity of starting out.
Alternatively, most themes have a section for adding custom CSS. If you edit the parent theme using this section, your changes will be saved when the parent is updated. But this works best for smaller alterations. For major changes, you’d probably want to use a child theme instead.
If you know how to write those lines of CSS, that doesn’t mean you know how to create a child theme. Thus, you may still want to just constantly edit the theme after every update. Realistically, if you ever want to edit your theme, create a child theme.
Child Theme FAQs
There is no difference between these options as it comes down to personal preference. If you use a plugin, you can safely delete it afterward to not impact your site, thus, there is no difference between doing so manually. It is up to you.
Many premium themes already have child theme functionality built-in and can generate one for you to edit at the click of a button. This is often the best option as it is from the theme developers themselves.
Yes. Many developers may take the time to design a new site interface for a holiday or big event. Instead of editing a single child theme and then reverting the changes, they just make a separate child theme and use that.
No. In WordPress, you can only have one theme active at a time. Thus, you cannot make another theme a parent other than the one you have active. In fact, you should remove unused themes to save space on your site.
In most cases, you should delete it. After you create the child theme, the plugin serves no purpose. The only exception is if you plan to create multiple child themes. For instance, perhaps you want a unique design for Halloween, Christmas, and so on. Creating an extra child theme for each occasion can help streamline the process. After all, you can just reuse them next year.
Create A Child Theme in WordPress Today
As you can see there are a lot of reasons to consider using a child theme in WordPress. And luckily, it is actually not that difficult to do so, but you do need to understand how to edit theme files.
If you ever find yourself in a situation where you need to edit your theme, it is time to create a child theme. Otherwise, every time that theme is updated, the changes you make are going to get lost.
I hope you found this tutorial on how to create a child theme in WordPress helpful.
Do you think all WordPress themes should include a child theme generator? Did you use a plugin to create one?


