Do you want to automatically change your SALT keys in WordPress? Security authentication, or WordPress SALT keys, are encrypted codes that WordPress uses to store your website’s login information. Just like changing your password helps you protect your accounts, changing your website’s SALT keys will help you increase your WordPress security.
It is important to note that changing these SALT or security keys will not affect your login information. Changing them will only help you improve your website’s security and you can start improving that security right after installing WordPress.
Today, I will demonstrate how to change WordPress SALTS automatically using the Salt Shaker plugin.
What is a SALT key?
A SALT key is a cryptographic element that hashes both passwords and cookies to keep them secure in WordPress. In other words, this prevents hackers from seeing your passwords in plaintext if they gain access to your database.
As a result, they provide a safeguard that can slow down or prevent hackers from doing more damage or accessing certain information entirely. However, just like your actual password, they are susceptible to brute force attacks.
Thus, you need to update them automatically every few months.
How Does Changing Your SALT Keys Help
Many users underestimate how important changing a password is. And that’s because one of the most common ways accounts are compromised is brute force attacks. While most websites have safeguards in place that limit the number of attempts these hackers get, it isn’t foolproof.
Changing that password regularly helps prevent this from happening.
Just like passwords, SALT keys can be used to compromise all of your website’s login information. SALT keys are extremely important and if they are compromised, they could compromise every account on your website.
Automatically changing them every 3-6 months will drastically improve your website’s security.
Note: There is absolutely no reason to ever share your SALT keys with any other person or third-party website. Thus, you should be the only person to see this information.
How to Change Salt Keys Automatically
Step 1: Installing Salt Shaker
The Salt Shaker plugin is the easiest way to automatically change your SALT WordPress keys. Simply install it, decide how often they should be updated, and save the changes, and it will update your WordPress SALT keys. It really is that easy.
It is worth mentioning that you can easily change your SALT keys manually.
All you would need to do is find the wp-config file that contains your salt keys, generate new SALT keys by using the WordPress API, and replace them. However, the main problem with doing them manually is that you are likely to forget to change them regularly.
Automatic updates will only require a one-time setup and will always be on time.
It is important to note that every time the SALT keys are changed, all users are logged out and will have to log in. For this reason, it is recommended to set up the changes to happen during your website’s off-hours.
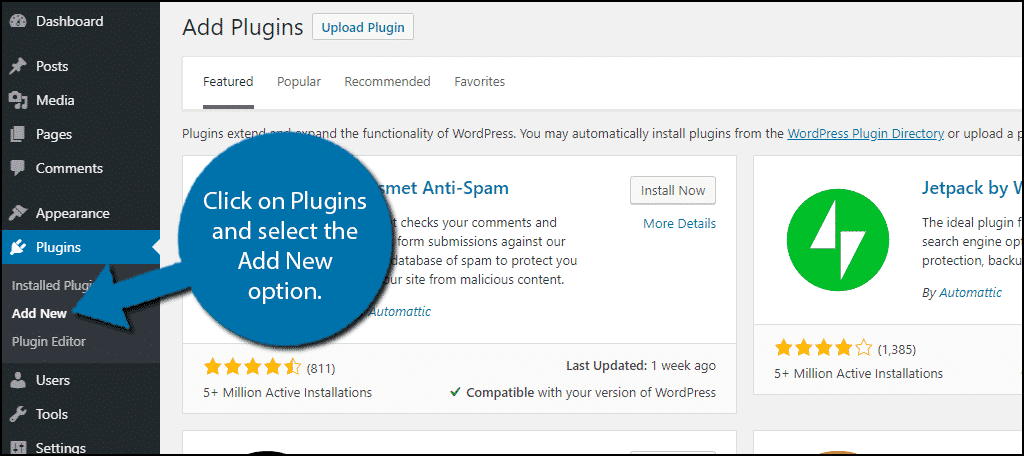
Let’s begin by clicking on Plugins and selecting the Add New option on the left-hand admin panel.
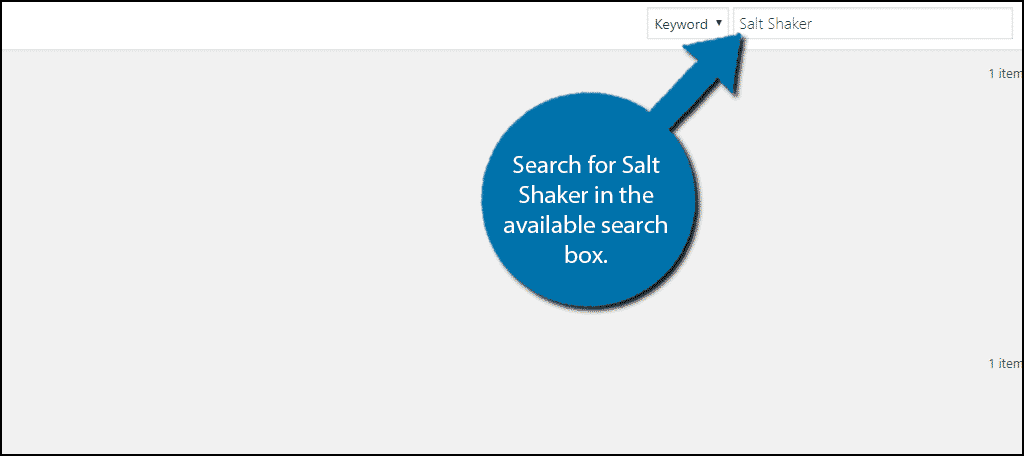
Search for Salt Shaker in the available search box. this is the WordPress SALT generator plugin we are using today. This will pull up additional plugins that you may find helpful.
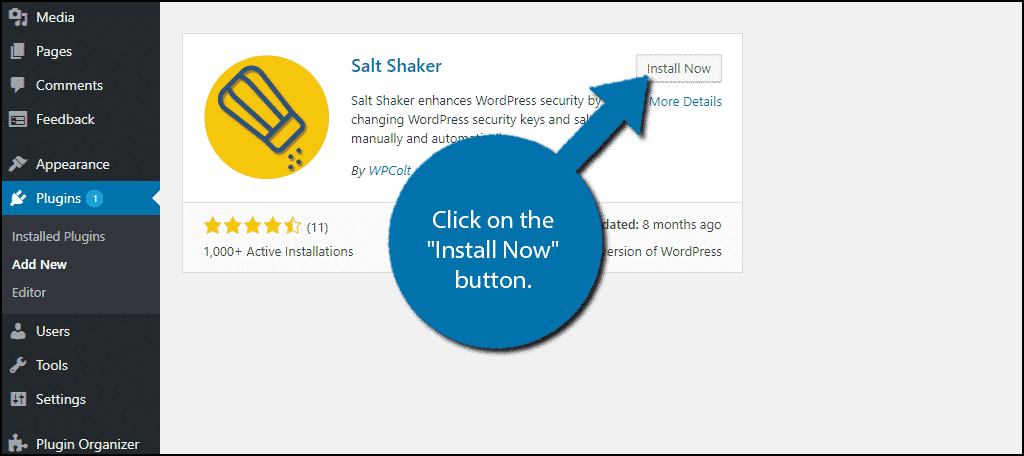
Scroll down until you find the Salt Shaker plugin and click on the “Install Now” button and activate the plugin for use.
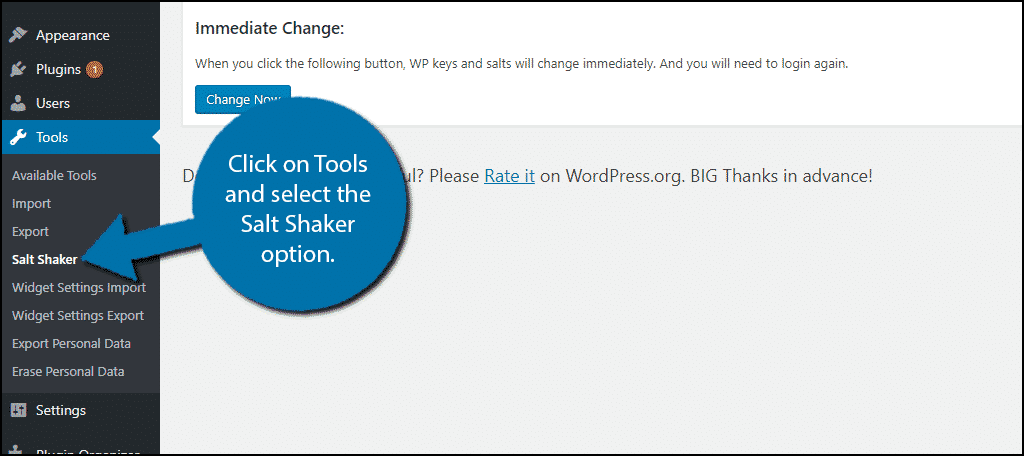
On the left-hand admin panel click on Tools and select the Salt Shaker option. This will pull up the main settings page.
It is entirely possible to skip the next step, but odds are your default settings prevent the plugin from writing in your wp-config file. Luckily, this can be fixed very easily.
Step 2: Ensure Your WP-Config Is Writable
This step may not be required depending on your settings, but if you encounter an error message, it is required. The plugin will need to make an alteration to the WP-Config file, but if it is not writable, the plugin cannot do its job.
As a result, you need to ensure that the WP-Config file is writable.
These changes cannot be made from your website. Instead, you will have to make the changes from your website’s C-panel. The login information is provided to you by your web host.
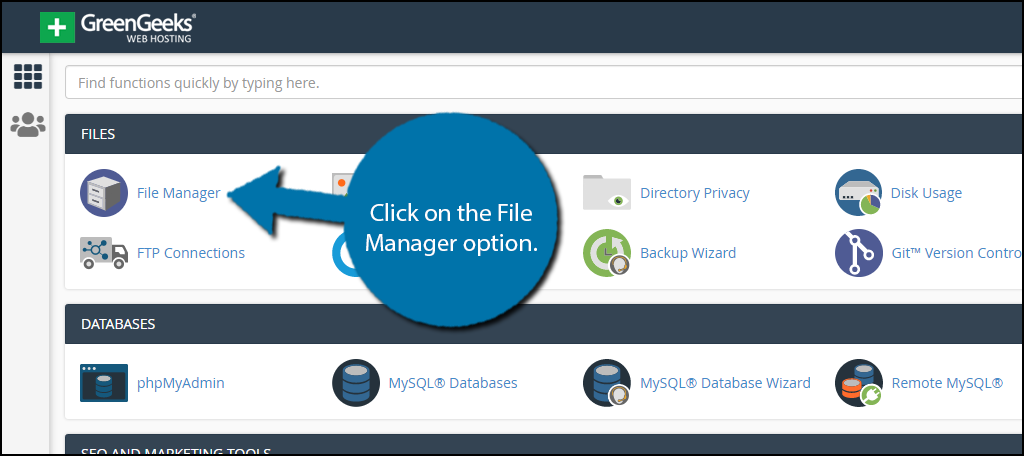
Once you have logged in, click on the File Manager option.
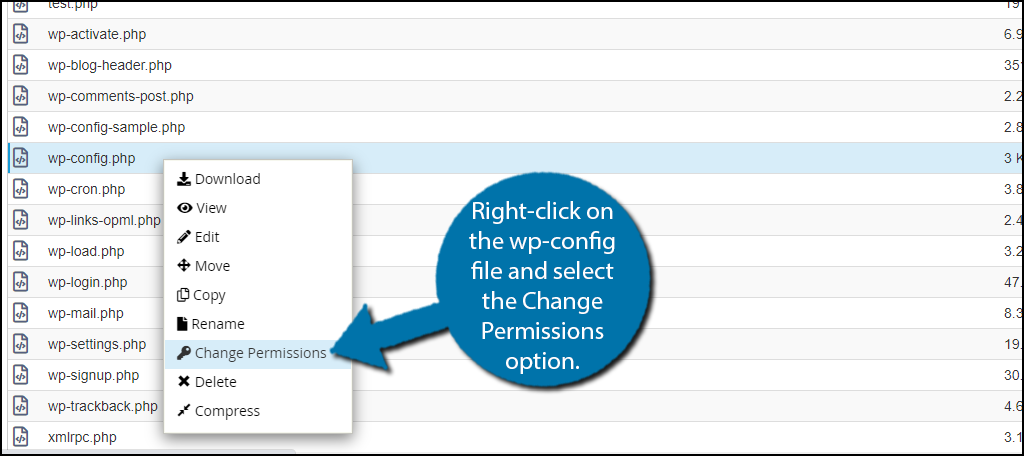
Locate and click on the public_html directory and right-click on the wp-config file and select the Change Permissions option.
Note: The directory name may vary.
Check the write box for the user only and click on the “Change Permissions” button.
Note: If you are brand new to file permissions in WordPress, the User refers to the administrators of the website. Group means a specific set of users, while World means that anyone can alter the file. You should never select the World option for wp-config or any other important files.
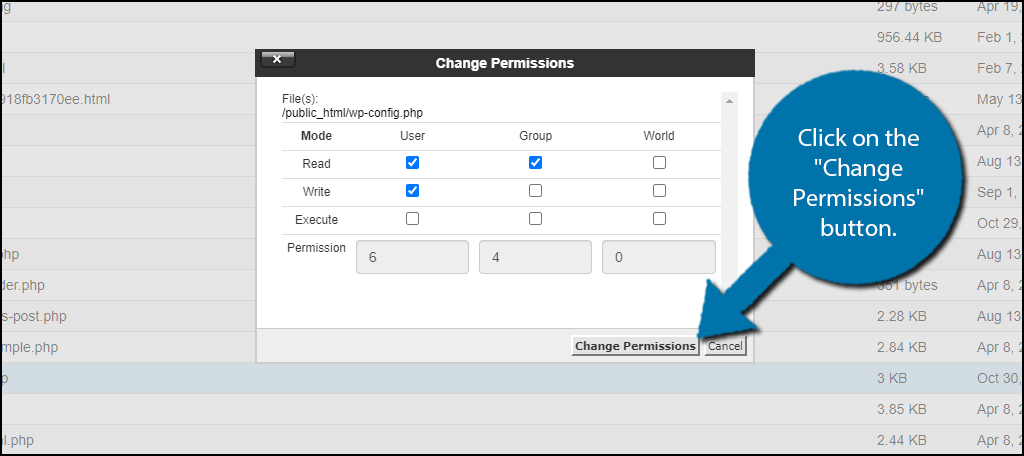
This will ensure that your plugins can write in the file whenever they need to. There are many plugins that require this step.
Note: You may have to take additional steps to ensure the plugin is not being blocked by a security plugin. These types of plugins usually contain a whitelist option for other plugins. Thus, you simply need to add the Salt Shaker plugin to that list.
Step 3: Setting Up Automatic SALT Key Changes
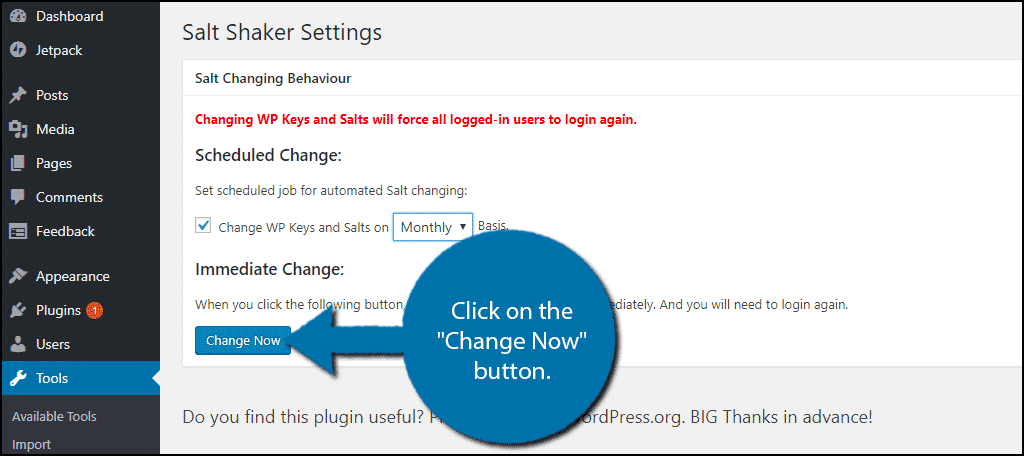
This plugin is extremely easy to use and makes the process extremely quick. This plugin has three options when it comes to the frequency of SALT keys being changed, Daily, Weekly, Monthly, Quarterly, and Biannually. I strongly recommend monthly, because daily and weekly is far too often.
After all, every time you change them, everyone is logged out of your website.
I strongly recommend waiting for the off hours of your website before continuing this process. It will log out all users and everyone will have to log back in.
Check the box to automatically change the SALT keys. Use the drop-down box to select Daily, Weekly, Monthly, Quarterly, and Biannually as the frequency.
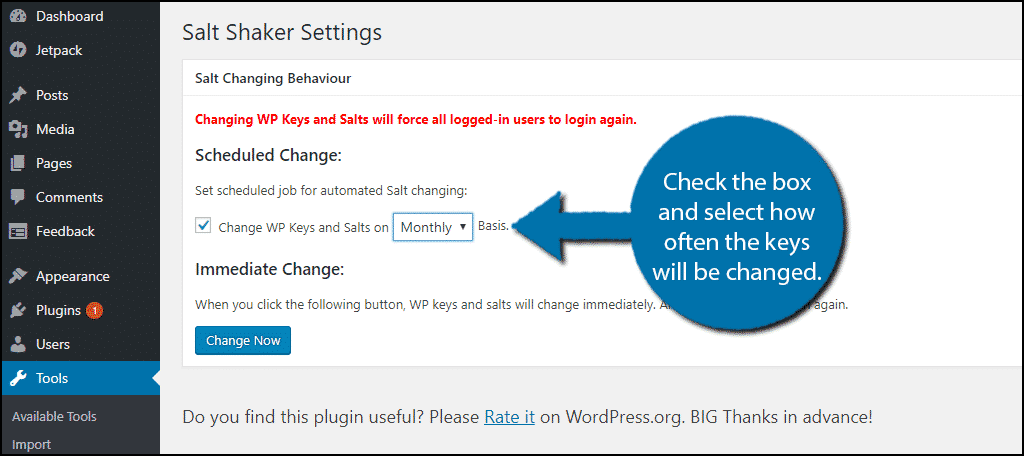
Click on the “Change Now” button to confirm your settings. Once the button is pressed, your SALT keys will be changed. You and all users will be logged off of the website and will have to log back in.
Congratulations, you have successfully set up automatic SALT key replacements. Since this will log out all users every time it occurs, it is recommended not to have it happen too frequently. Otherwise, this can become an inconvenience that will drive loyal visitors away.
Take Website Security Seriously
Without a doubt, cyber-attacks, are one of the biggest problems websites face every day.
Even if you do everything right and create an awesome website with great content, it can all be ruined by one cyber attack. WordPress security is something every web developer should take seriously and there are plenty of plugins to help secure your website.
Identity theft is one of the biggest problems on the internet and you need to make sure your website is not aiding the wrong people. Guarding your visitors’ information is just as important as making great content or creating good designs. Once you lose your visitors’ trust, you will not rebuild it easily.
How often did you choose to update SALT authentication? Have you taken other actions to improve your website’s security?
