Sometimes, it may be necessary to change the WordPress author on a post. Luckily, that’s pretty easy to do in most cases. In fact, WordPress provides two built-in methods to do this; one for individual posts and another for bulk.
In reality, both methods take less than a minute to do, so you can breathe easily. There are also many author-related plugins that could add additional methods and features.
Today, I will demonstrate how to change the WordPress Author using those two methods.
Why Change the author in WordPress?
If your blog expands past a single author, there may come a time when he or she leaves your team. In some cases, you might not want their name on your website anymore. Thus, changing the name becomes a must.
In other cases, you might have another staff member do a comprehensive rewrite to modernize the piece. At that point, listing it as the original author’s work isn’t accurate.
Your website could also utilize contributors. While credit should go where credit is due, the user may delete their account or request their name be removed from your website. Changing the author is a simple but effective solution to the problem.
I guarantee that if you have multiple authors, there will be a moment in which you need to change the author’s name.
Method 1: Changing the Author of a Single WordPress Post
This is by far the simplest and most direct. It allows you to change the author of an individual post within seconds.
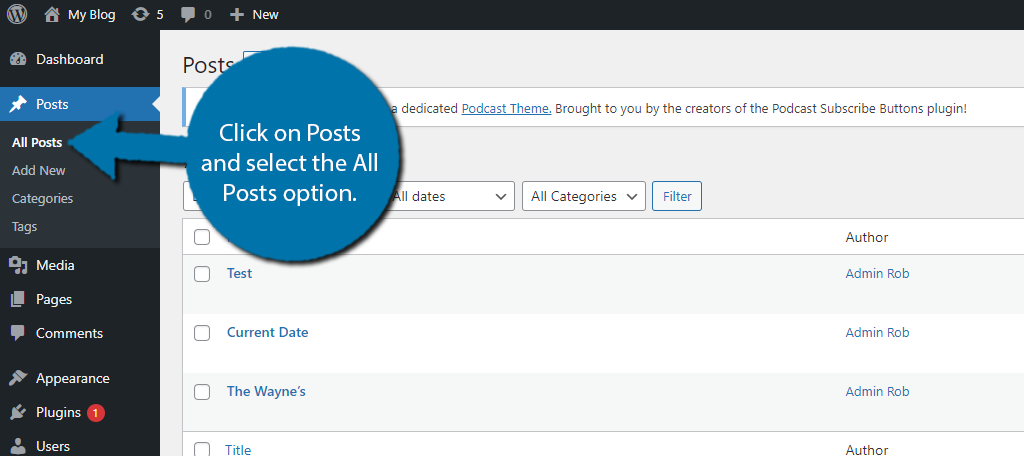
To start, click on Posts and select the All Posts option.
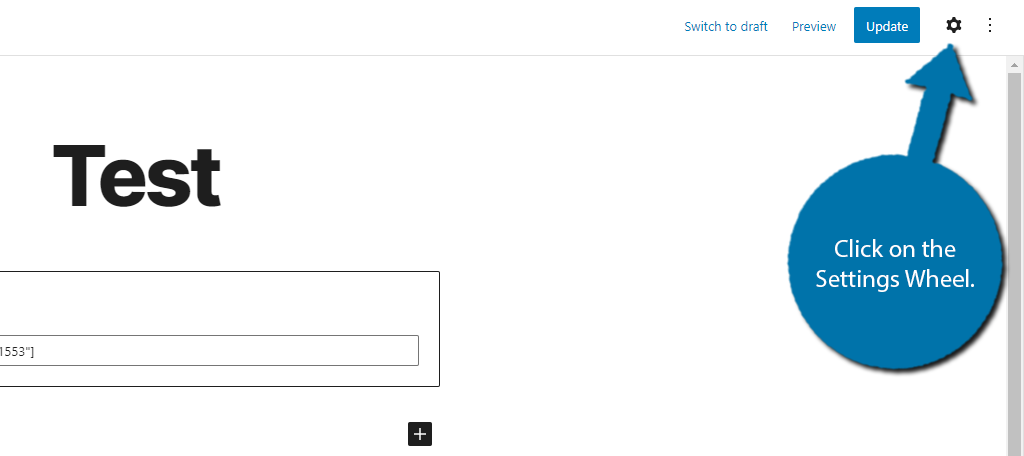
Click on the existing post of which you want to change the author. Once inside the post, if it is not open already, click on the Settings Wheel.
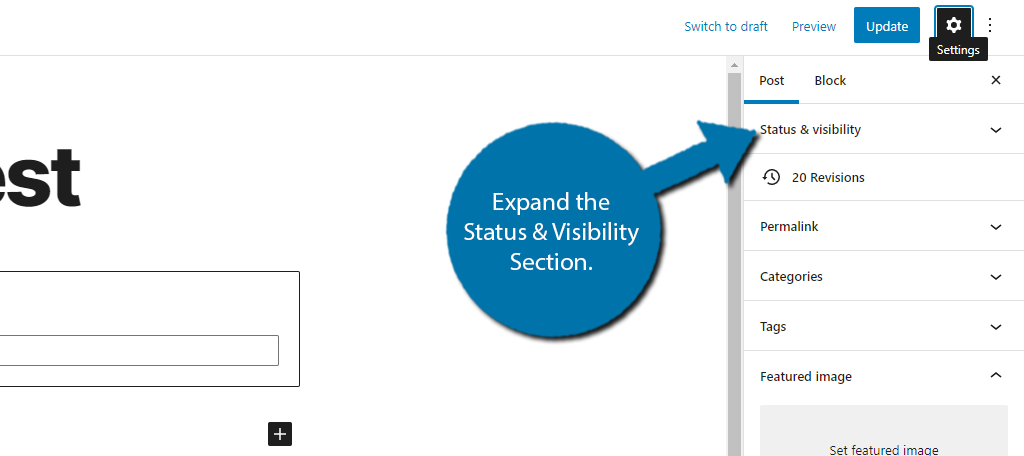
Expand the Status & Visibility Section by clicking on it.
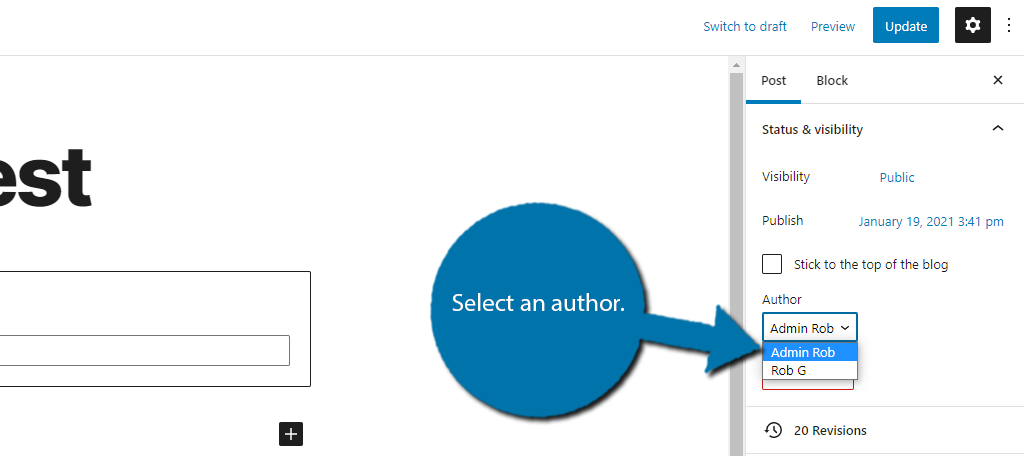
Use the author drop-down box to select which author to use.
Click on the “Update” button to finalize the changes.

Congratulations, you have successfully used WordPress to change the author of the post. You can repeat this step on other posts, but I would recommend using a bulk action if there is more than one.
Method 2: Changing the Autor of Multiple WordPress Posts
WordPress allows you to carry out multiple types of bulk actions on posts, and luckily for us, one of those actions allows you to change the author. This is very handy when you need to erase an author from your website.
Click on Posts and select the All Posts option.
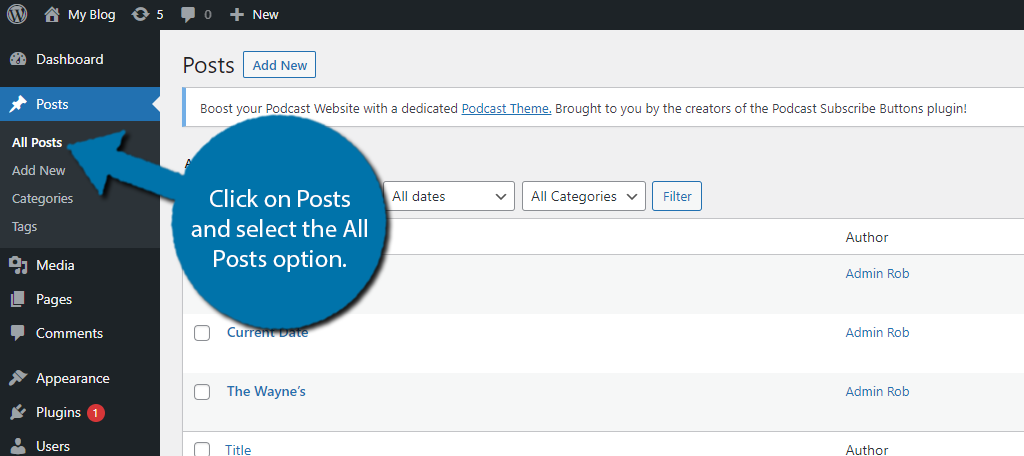
Depending on how many posts your website has, you may want to expand the number of visible posts in this section. To do that, click on Screen Options.
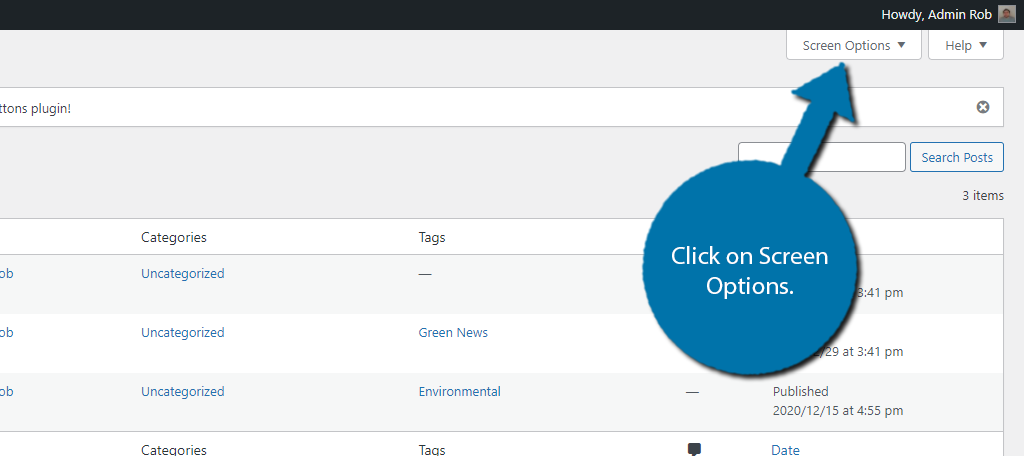
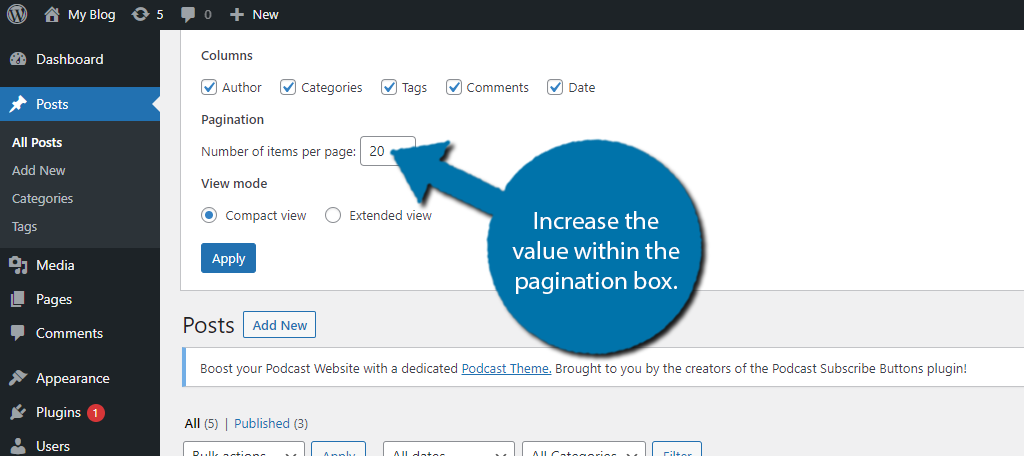
Increase the value within the pagination box.
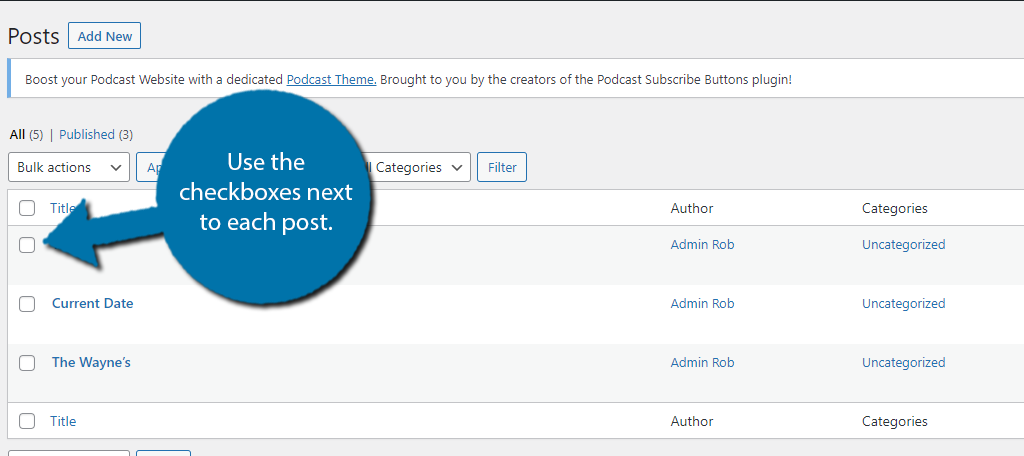
Use the checkboxes next to each post to select which should be affected by the bulk action.
Note: You can also use the top checkbox to select all posts. This might be quicker if there are more posts that need to be changed than ones that don’t.
Use the Bulk actions dropdown box to select the Edit option.

Click on the “Apply” button.
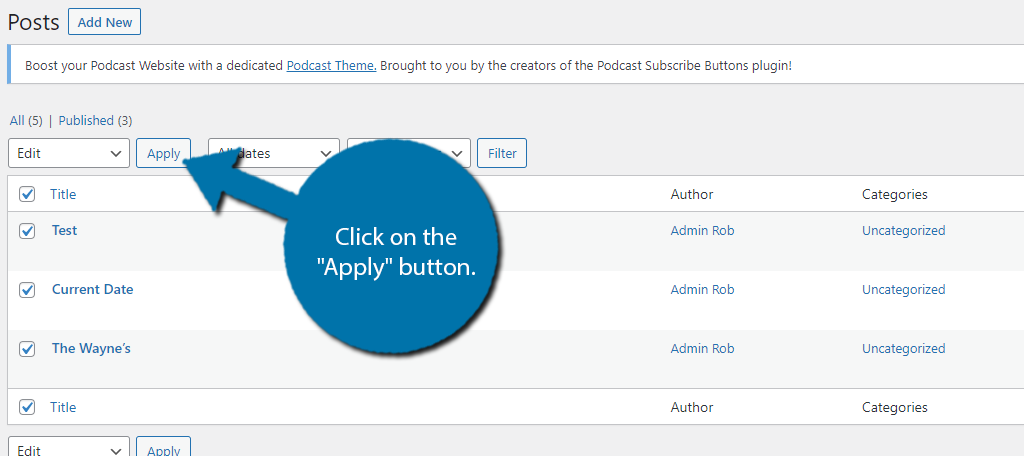
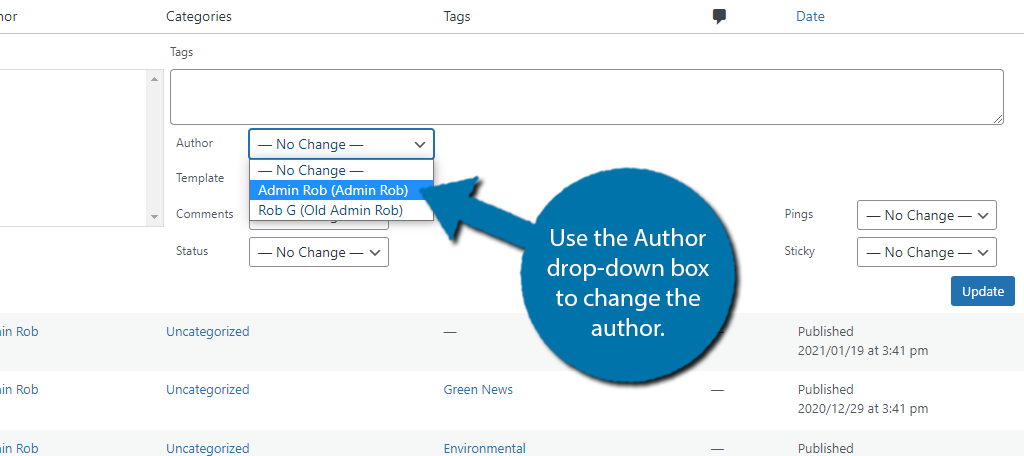
The Edit option allows you to make several changes to selected posts, this includes things like setting the status, comments, pingbacks, and more. In our case, we are changing the author.
Use the Author drop-down box to change the author of all selected posts.
Click on the “Update” button to apply the changes.
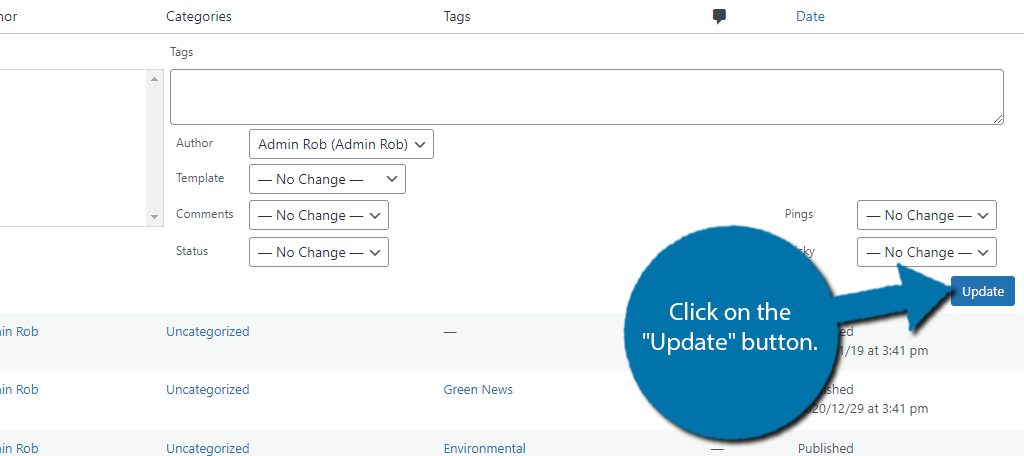
Congratulations, you have successfully changed the WordPress author on all of the selected posts. You can do this again at any time.
Adding Attractive WordPress Author Bios
WordPress is fully customizable, and one of the first things any blog should do is customize the author bio box. This allows you to display a short message and sometimes include contact information.
The first way to do this is by using Custom CSS, however, a much easier way is to use an author bio plugin.
Here are a few awesome ones to try.
Simple Author Box

Simple Author Box adds an author box at the end of every post. Within it, you can add the author’s gravatar, biography, and most importantly, you can add social media icons. This helps the author increase their presence on social media and potentially find new customers.
In terms of design, the plugin is basic, so this plugin might not be for you if you’re looking for something flashier.
Starbox – the Author Box for Humans

Starbox is a very flexible author box plugin. It allows you to choose from a variety of styles to pick the perfect author box for your website. You can place the author box either at the bottom or top of the post. It also supports icons for most major social networks.
This might sound complicated, but it’s actually really easy. It will only take a few minutes to set up.
WP Post Author
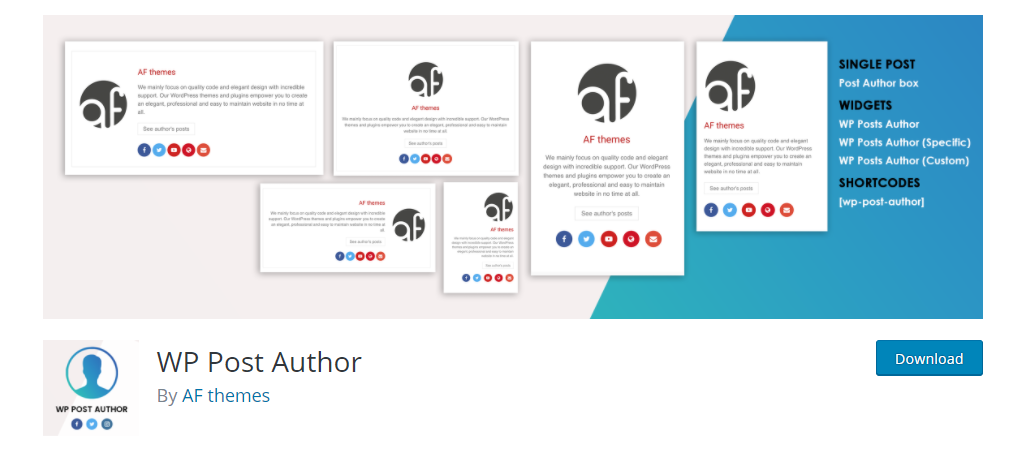
WP Post Author is another excellent choice that can help you customize the author box. It allows it to appear in a variety of shapes and sizes and they can be placed via shortcode. The plugin also adds a custom widget that you can use to display author information in the widget area.
And it’s worth mentioning that social media buttons, with icons, are supported in all box types.
SEO Tips For Author Boxes
Learning how to change the author in WordPress and customize the author box is important, but you also need to make sure it is SEO-friendly.
That’s right, you even have to worry about the author box.
For instance, the length of the author’s description or biography matters. The general rule of thumb that most websites follow is to keep author bios to a 100-word maximum. This is generally 3 to 4 sentences in length and should give a brief overview of your history as a writer or role.
A big problem that most websites neglect is the author’s archives page. This is the page where WordPress displays a list of authors and some of their latest work. If your website only has one author, the page will duplicate your homepage.
Thus, in this case, you want to ensure it is not found by search engines by using a No-Follow link.
In the case of multiple authors, it is fine to have it crawled.
Show Off Your Authors
Having multiple authors allows you to create content faster and add new perspectives to your website. Thus, they dramatically increase the potential of any website. Having custom author boxes can help you make them stand out to visitors.
This is especially important if your website is participating in a collaboration. It’s common to have someone from each website write for the other’s website. Making sure their bio and contact information is front and center is imperative.
Even if you only have one author, it’s important to highlight that. Let your community know who you are by adding your own personal flair to the box. This can also help visitors realize they are talking to an author in the comments section.
Don’t be afraid to strut your stuff, or in this case, your author’s stuff.
Why did you need to change the WordPress author? What plugin do you use to style your author box?

